Tom Kaneko Design & Architecture: Sketch, Design / Build in Practice
Tom Kaneko is an architectural designer and SketchUp ninja specializing in bespoke residential retrofits and extensions in the United Kingdom. In this conversation, we delve into his workflow and how he uses SketchUp to deliver value to his clients within the constraints of a tight budget. For Tom, ‘SketchUp makes the means of design & communication, with client and contractor, one and the same’.
Tell us about your background as an architect and how this influences your approach to design.
I’m drawn to the technical aspects of the profession and the site. Luckily I had a very hands-on experience at the University of Edinburgh that has served me well in practice. As a designer, you have to know your craft… knowledge gaps become apparent when you transition from design to construction, particularly when engaging in conversations with builders and subcontractors.
What was the “Aha!” moment for you with SketchUp?
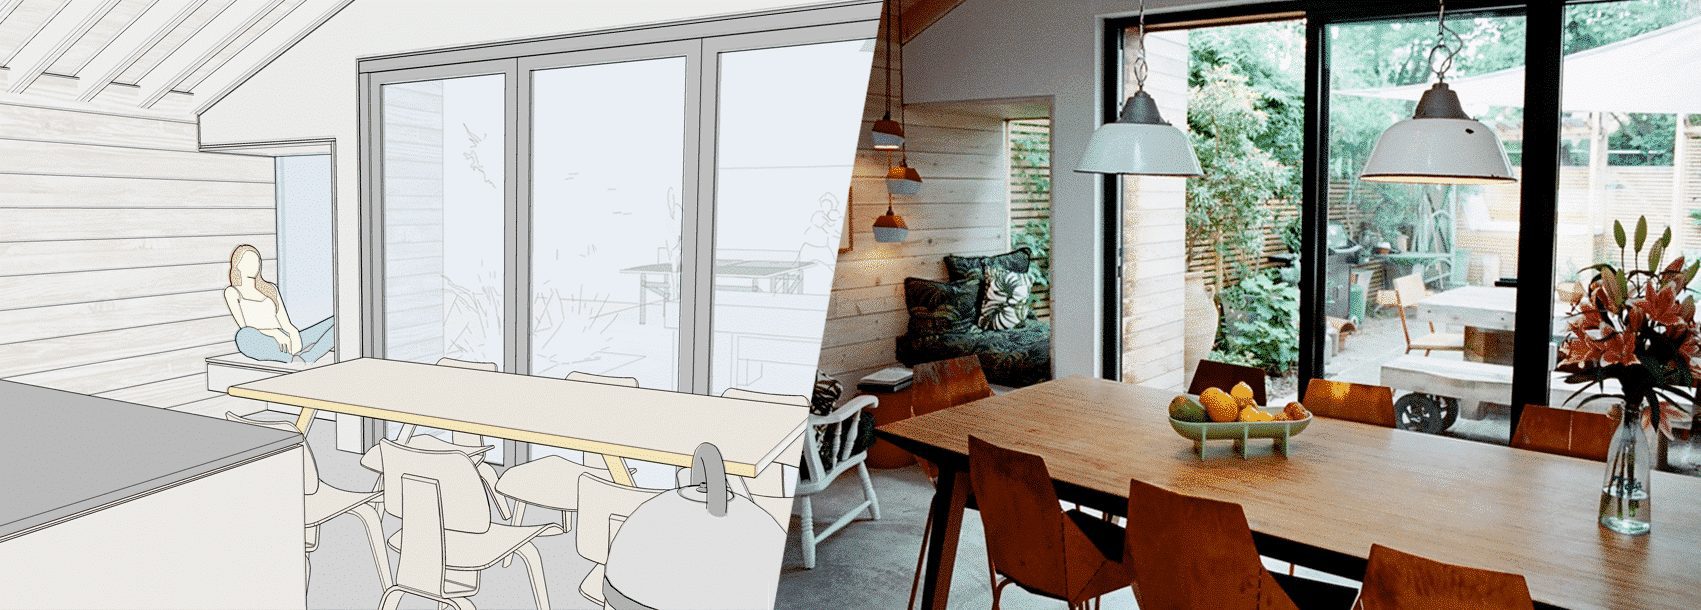
It came in 2011 when I was working on Jemima’s House, an extension to a terraced Victorian house with big ambitions and a tight budget.
SketchUp model and photo of completed project showing view from dining area into garden at Jemima’s House, London.
For all the ways you draw…
Drawing heuristics are what we do. LayOut’s tool-set makes drawing details easier. Here are three of our favorites:
Use the 2 Point Arc tool to find tangent inferences. You can also use it to create chamfers and fillets with a specified radius.
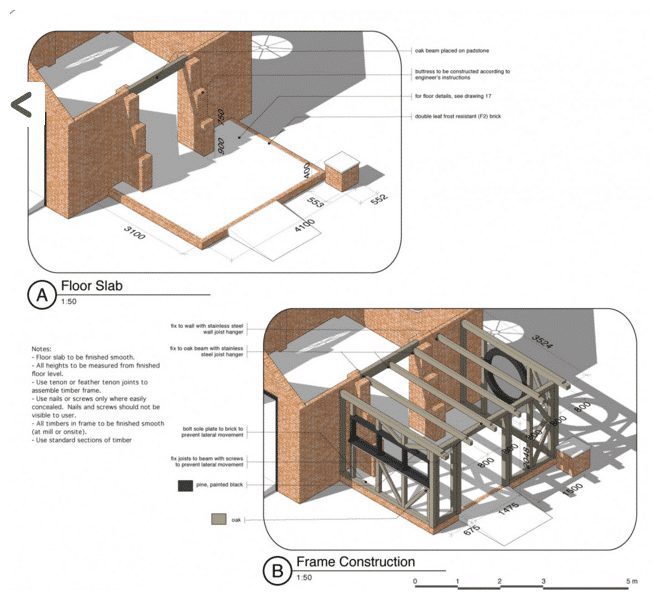
3D details of extension frame construction.
The smooth transition from concept to the site is crucial for a successful building – How do you ensure this and how does SketchUp support your workflow?
I start every concept with hand drawn sketches. I focus on getting the flow of the plan right, whilst incorporating the client’s requirements and desires within the limitations of a typical London terrace.
Hand drawn early concept plan.
At the schematic design stage, I get a survey of the existing building done, and turn that into a SketchUp model. In terms of my model structure, each floor is its own component, walls and floors are separate, and furniture and people are on individual layers. Having a well organised model makes it easy for me to make changes or remove elements. I also set up all my key scenes and sheets early on in SketchUp Pro and LayOut… floor plans, sections, main elevations and perspective views of the main spaces.
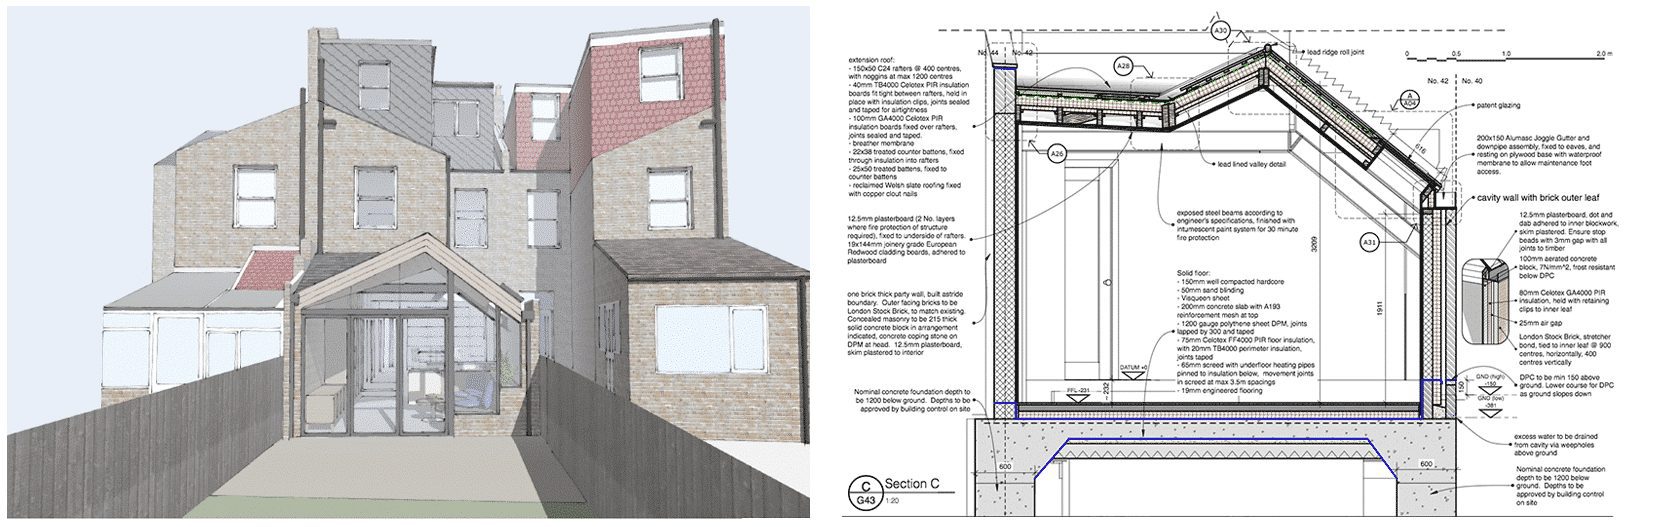
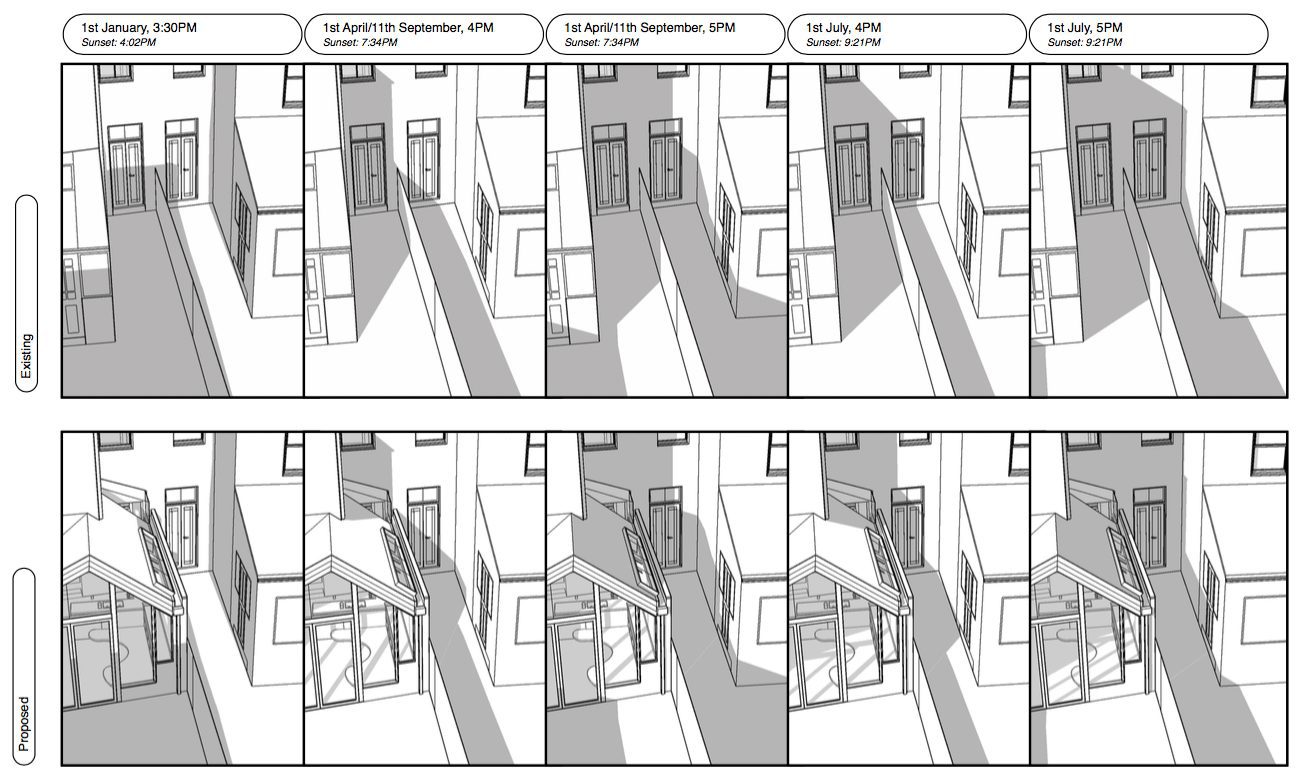
One typical design challenge I have is to achieve a great sense of space in the interior with a higher roof line, whilst considering the shadows cast on neighbours. At this point, testing out ideas in section and 3D helps me arrive at a unique, contextually appropriate response.
Early concept model showing 3D image & sectional test of context responsive roof pitch.
The output from the model can be used for sunlight studies which might be submitted as part of the planning application documents.
Early concept model showing 3D image & sectional test of context responsive roof pitch.
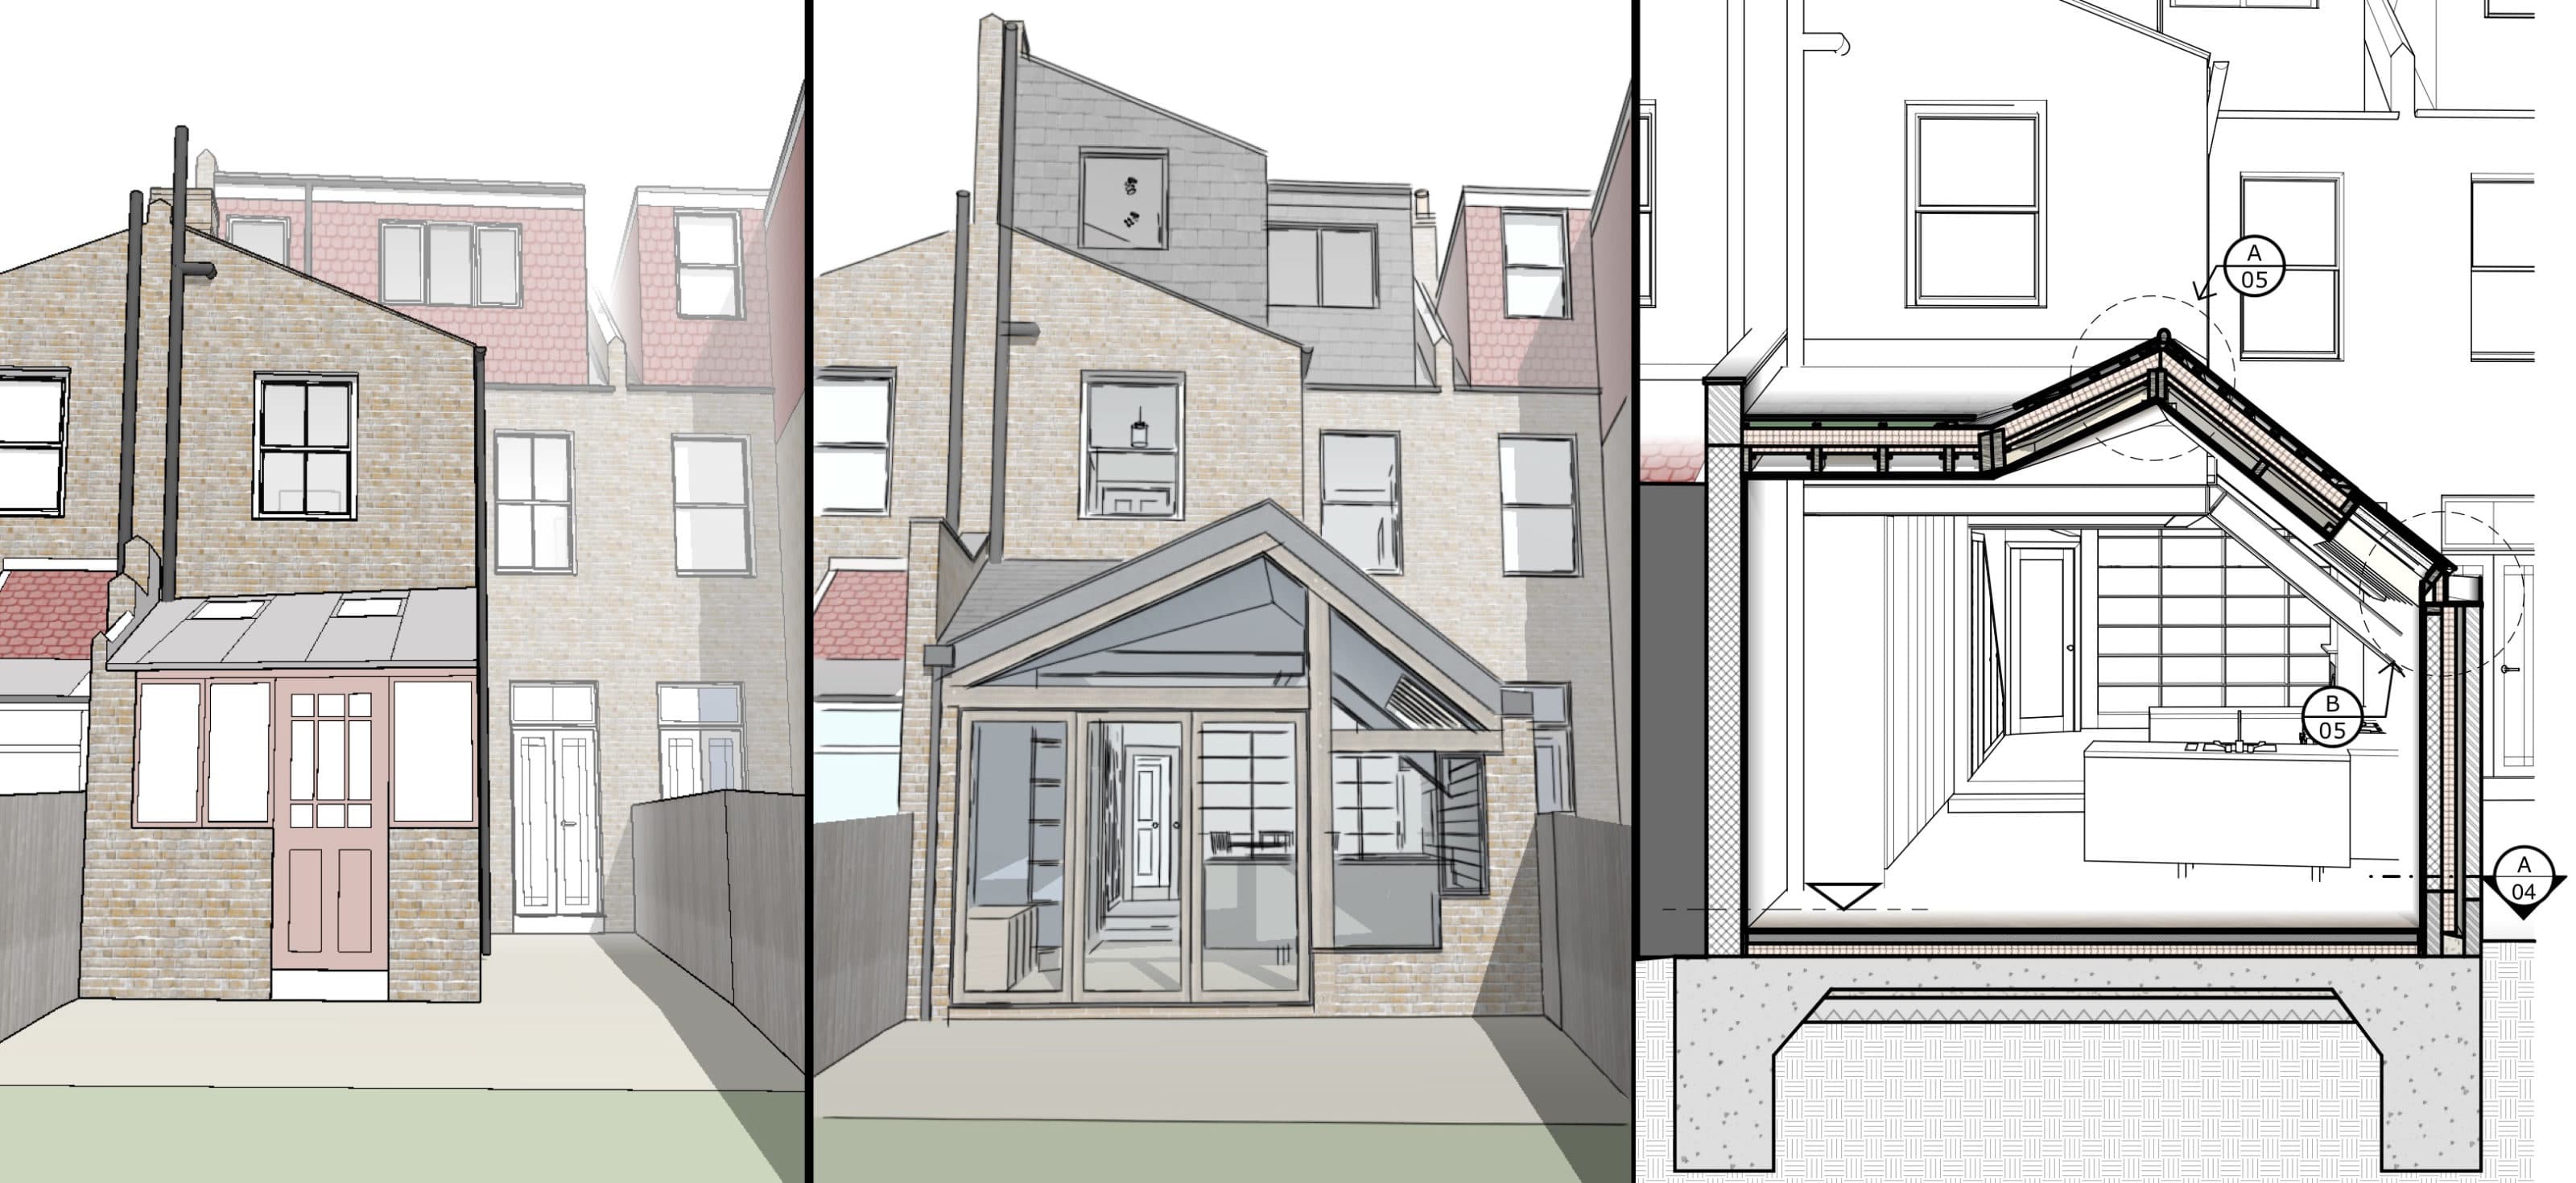
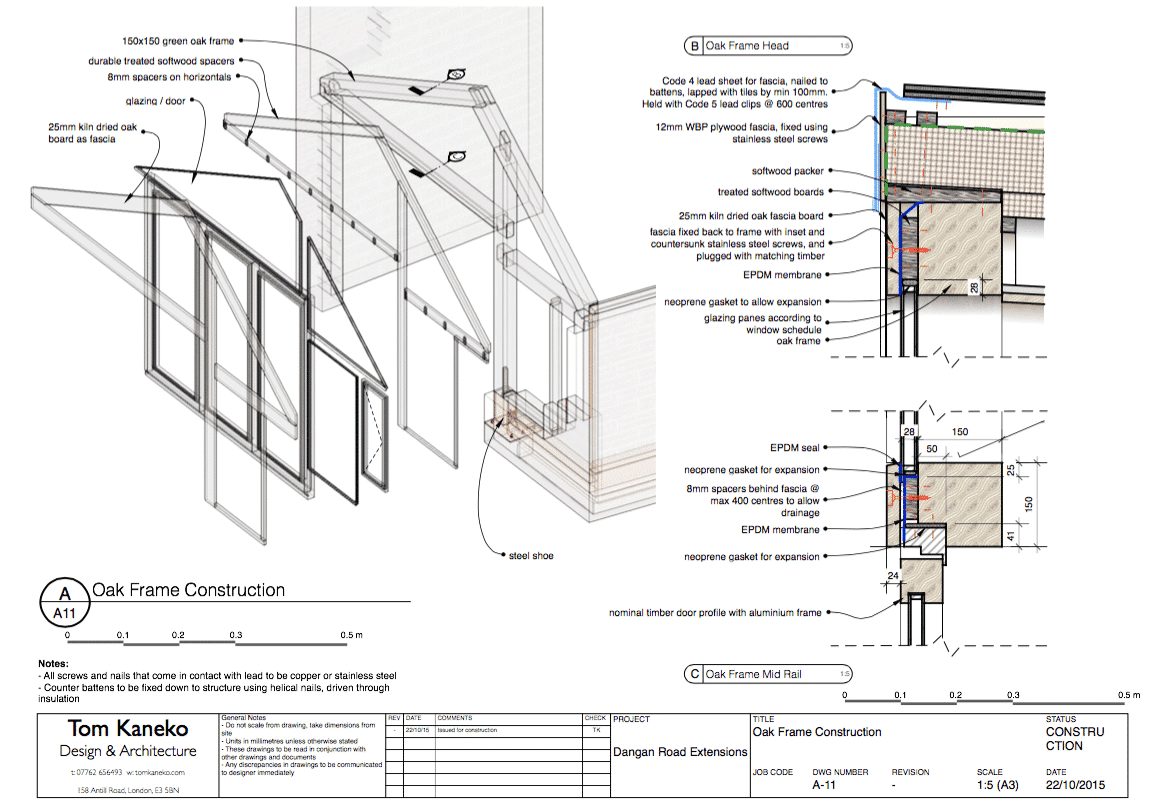
Once the plans and sections are agreed, I create a separate construction model to really drill down into the details. Some of the angles in the roofline mean we have very bespoke junctions and I have to be able to clearly communicate the construction and design intent to the builders.
Early sunlight studies showing the positive impact of a context responsive roof pitch. Shadows cast by the proposal do not negatively impact the neighbouring building
Once the plans and sections are agreed, I create a separate construction model to really drill down into the details. Some of the angles in the roofline mean we have very bespoke junctions and I have to be able to clearly communicate the construction and design intent to the builders.
Construction drawing sheet created in SketchUp’s LayOut showing an exploded perspective of a bespoke oak frame end wall and details of key junctions.
As the design progresses, I usually create a separate model for each key stage. A simple schematic model will have several iterations… changes can take five minutes or forty minutes depending on how big a leap we’re making. A big win is that I can quickly update the section views using Skalp for SketchUp, and LayOut automatically picks up the changes. The final proposal from LayOut is what I use for the planning application.
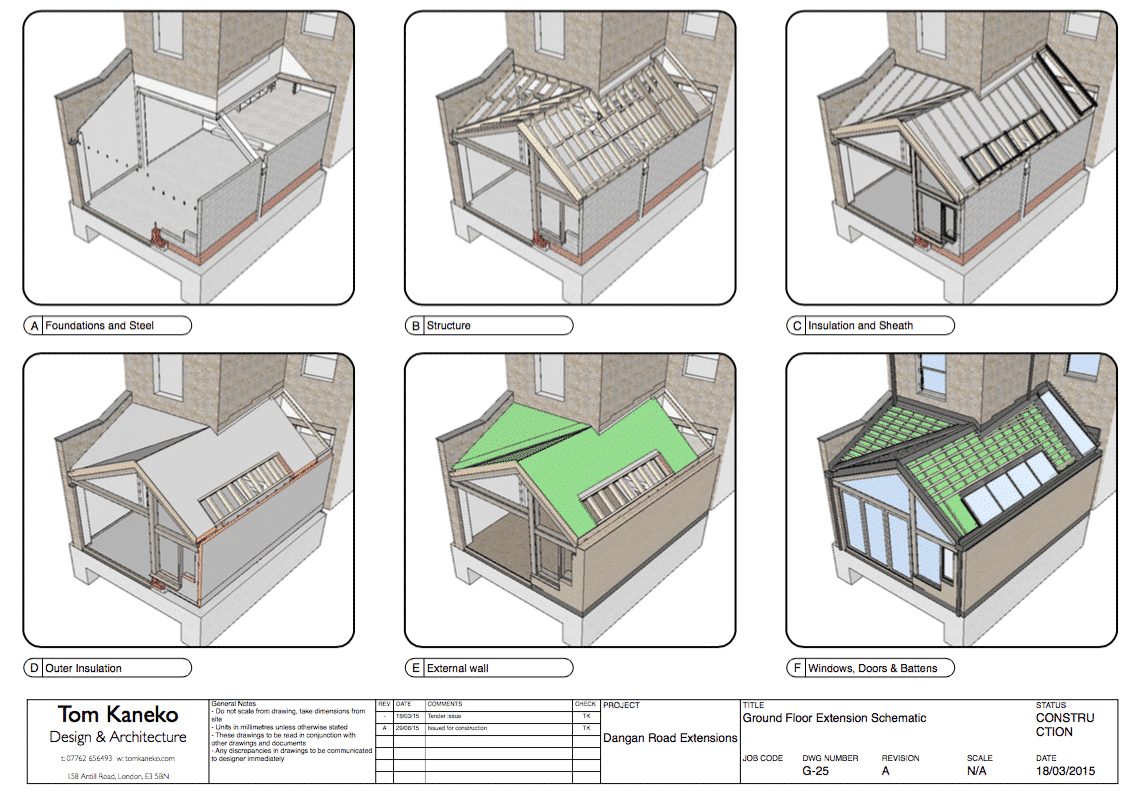
Next, I create a detailed construction model that takes us on-site. Instead of hollow walls, the technical construction model articulates wall and roof details.
I’ve found that showing builders assemblies and perspectives in 3D helps them really get behind the design intent. They have a clear understanding of what you’re trying to achieve and why. In my experience, clear information leads to great relationships on the building site. Some really experienced builders on previous projects have told me my construction drawings from LayOut are some of the best details they’ve ever seen!
Image showing construction sequence. Dangan Road Project by Tom Kaneko Design.
What drawing standards and style templates do you use most in SketchUp and why?
My LayOut template is very pared back and simple. I usually place drawings on an A3 sheet, as it’s a good size to view things on the computer and in print. I use the font Helvetica for annotations and keep all sheets simple, legible and scalable. Over time I’ve developed my own set of revision clouds and title blocks but my principle is to keep graphics minimal so that the design can take centrestage.
What custom keyboard shortcut could you not live without?
Hide rest of model without a doubt! I have set “Ctrl + H” to allow me to hide all geometry outside of the selected group or component to easily edit tiny details within vast spaces.