How to import free high quality assets into SketchUp with Quixel Bridge & Transmutr
Quixel provides an expansive library of high quality realistic 3D assets and materials. In this tutorial, you’ll learn how to import 3D models and textures from Quixel into SketchUp, and how to save them into a component library for simple drag and drop use in your scenes.
Step 1: Installing and configuring Quixel Bridge
Download and install: – SketchUp Pro (If you don’t own/haven’t trialed SketchUp before you can access a fully featured 30-day trial when you sign in) – Quixel Bridge (Free Program)
For rendering:
– Enscape OR
– V-Ray for SketchUp (Both have fully functional trials you can access after downloading and installing for the first time)
You will need an Epic Games account to access Quixel Megascans assets, CLICK HERE to register an account with Epic Games:
Choose “Sign up with email” and enter your details to register. After creating your account, launch Quixel Bridge and sign in using your Epic Games account.
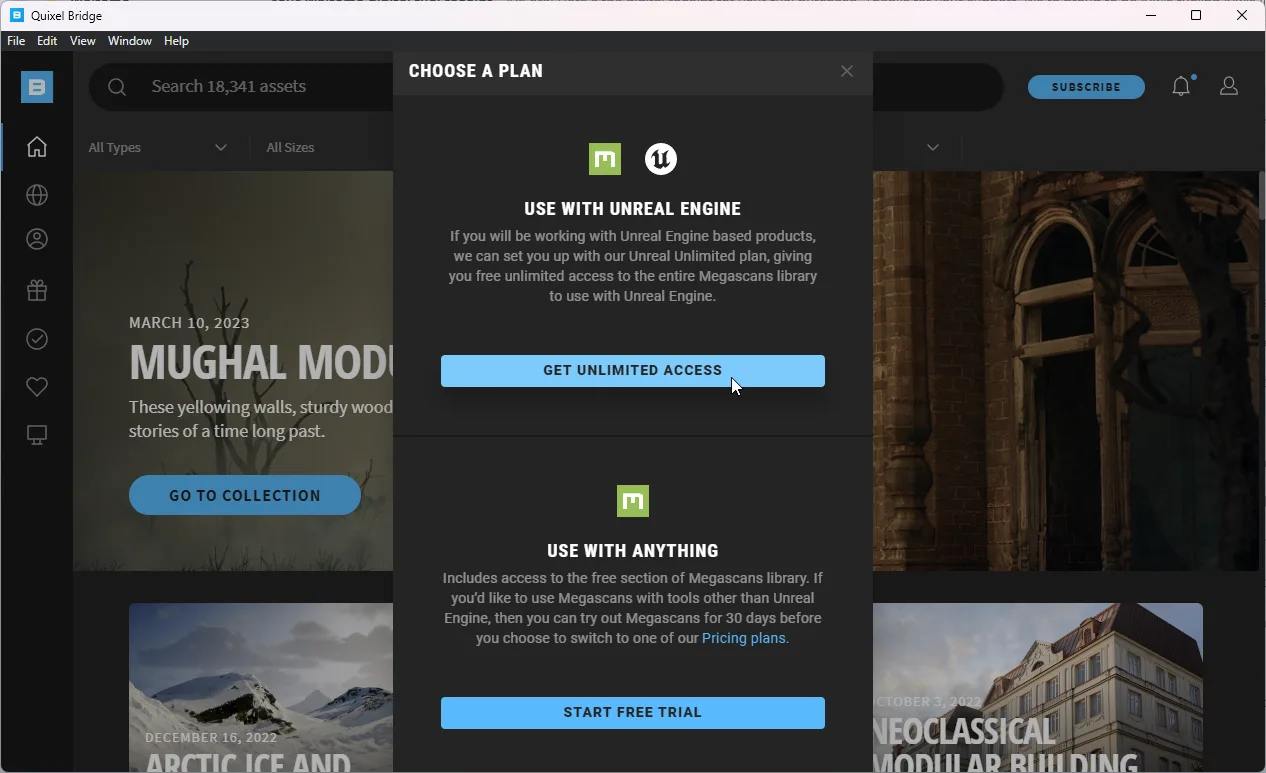
IMPORTANT: After launching Quixel Bridge and signing in for the first time make sure to select “Get Unlimited Access” under “Use with Unreal Engine” or you will not get free access to the entire Quixel Megascans library.
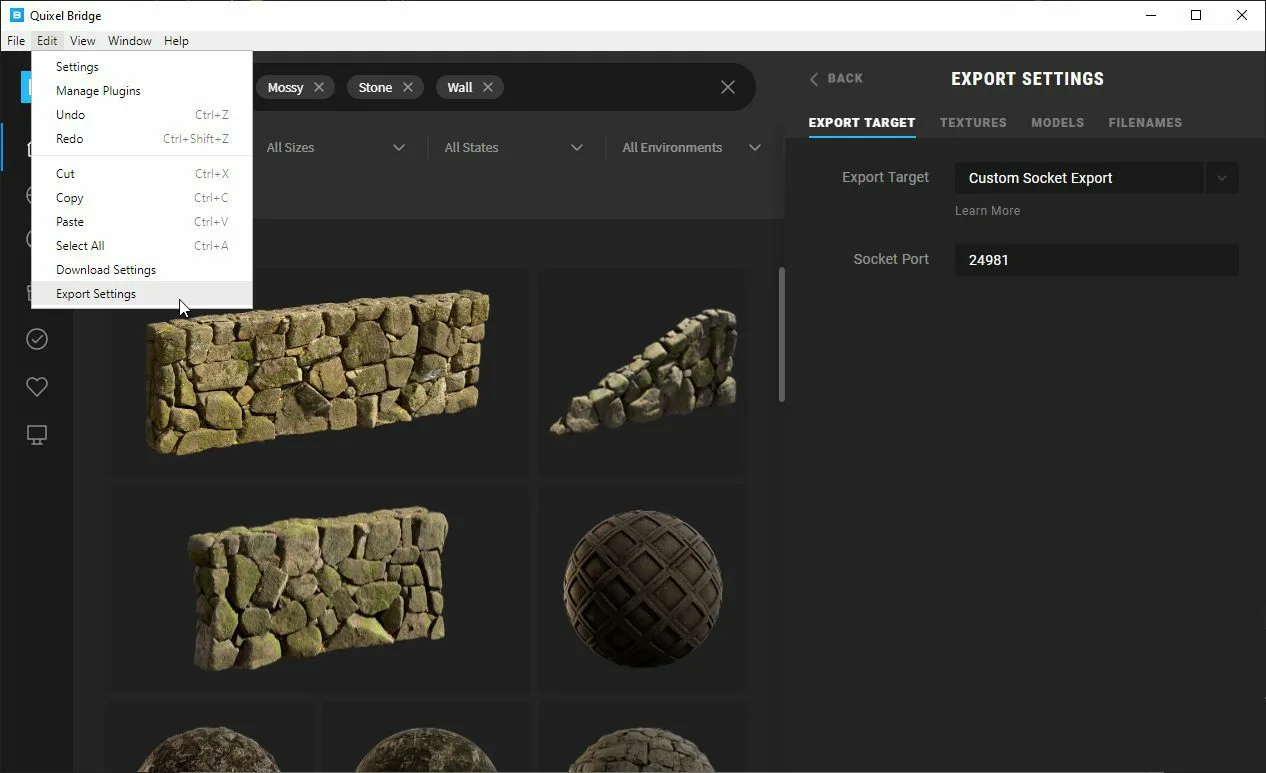
Next we need to setup the export settings in Quixel Bridge. Go to Edit > Export Settings:
Select Custom Socket Export as the Export Target from the dropdown
Make sure the Socket Port value is set to 24981
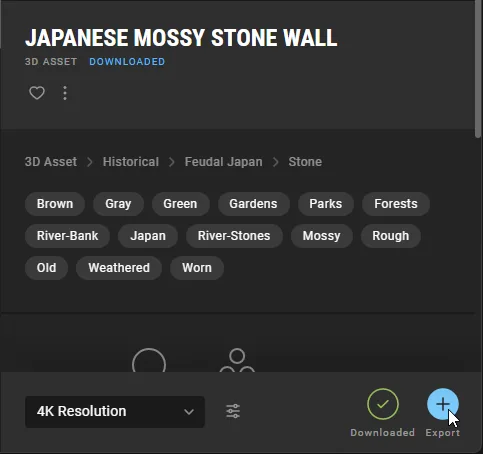
Next we are going to use the search bar at the top left of Quixel Bridge to browse for a model. You can pick any 3D asset you want to import, for this example I used “Japanese Mossy Stone Wall”. If you do not have a powerful graphics card you may want to select 2K resolution instead of the default 4K. After selecting your resolution click on the green download button:
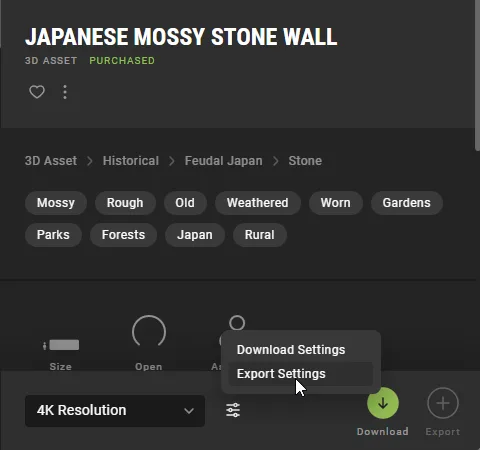
After selecting the asset you want to download, click on settings next to the download button and then go to Export Settings:
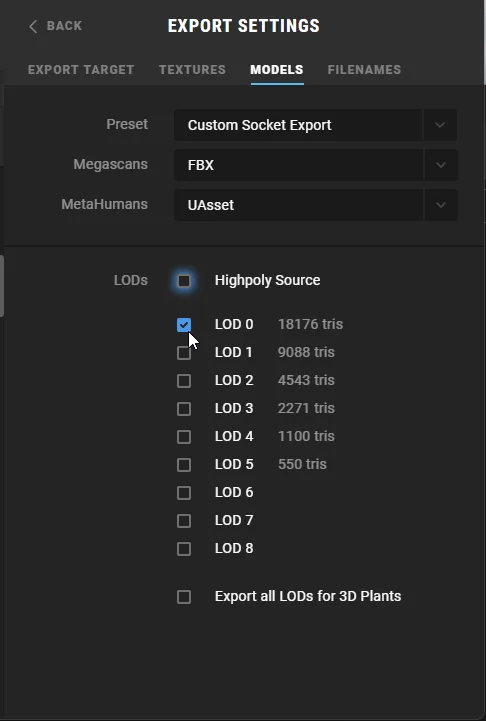
Navigate to the Models tab and tick the Level of Detail you want to download. Highpoly source is not recommended unless you have a very high end graphics card, so untick this. LOD 0 is the next highest level of detail and what we will use for this example. Higher number LODs are less detailed. The level of detail you can select will depend on the speed and VRAM capacity of your graphics card. If SketchUp crashes attempting to import the asset or runs slowly, try lowering the LOD then redownloading:
Click on the Back button in the top left and then download the asset:
(You can change where these files are downloaded to in Edit > Settings, you could set this to a temporary folder and clear it regularly if you only want to keep the .skp files that we export in the next step and not the Unreal Assets that Quixel Bridge will download in the above step.)
Step 2: Import into Transmutr from Bridge and Export to .SKP
Download and install Transmutr. Sign up for the 7-day trial or Purchase a License. Once Transmutr is running go back to Quixel Bridge and click on the Export button:
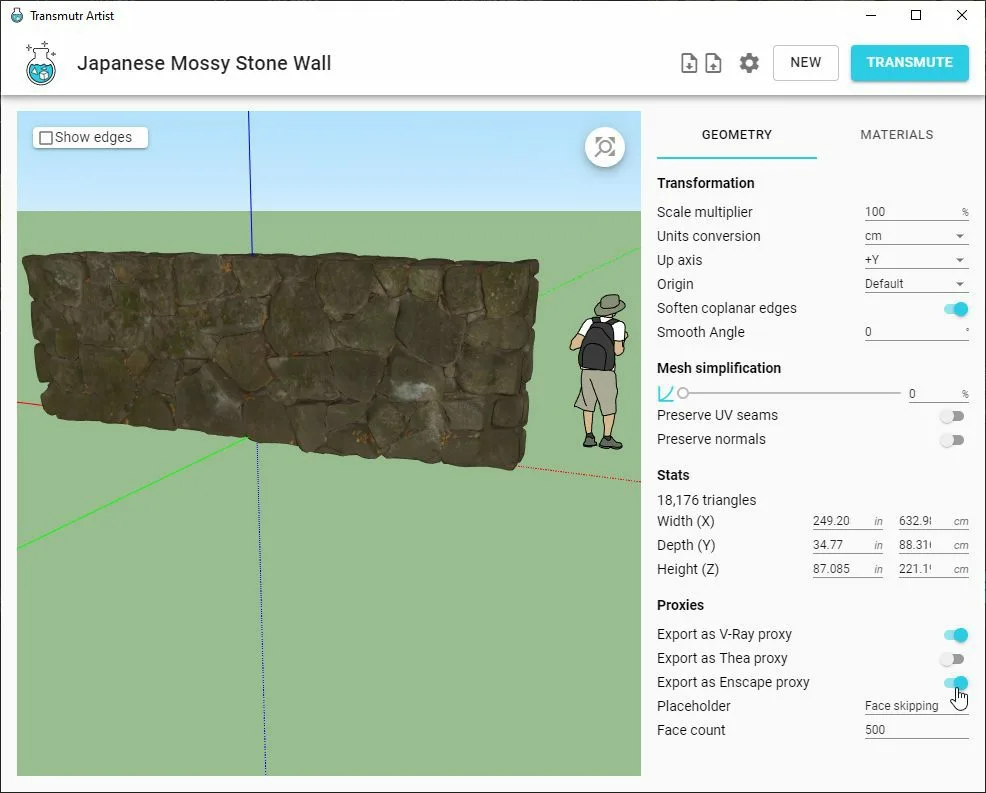
The asset should now show in Transmutr. Toggle on the option to export an Enscape or V-Ray proxy depending on what render software you are using, then click on Transmute. You will then be prompted to save the exported files.
Step 3: Import Proxy Assets into SketchUp
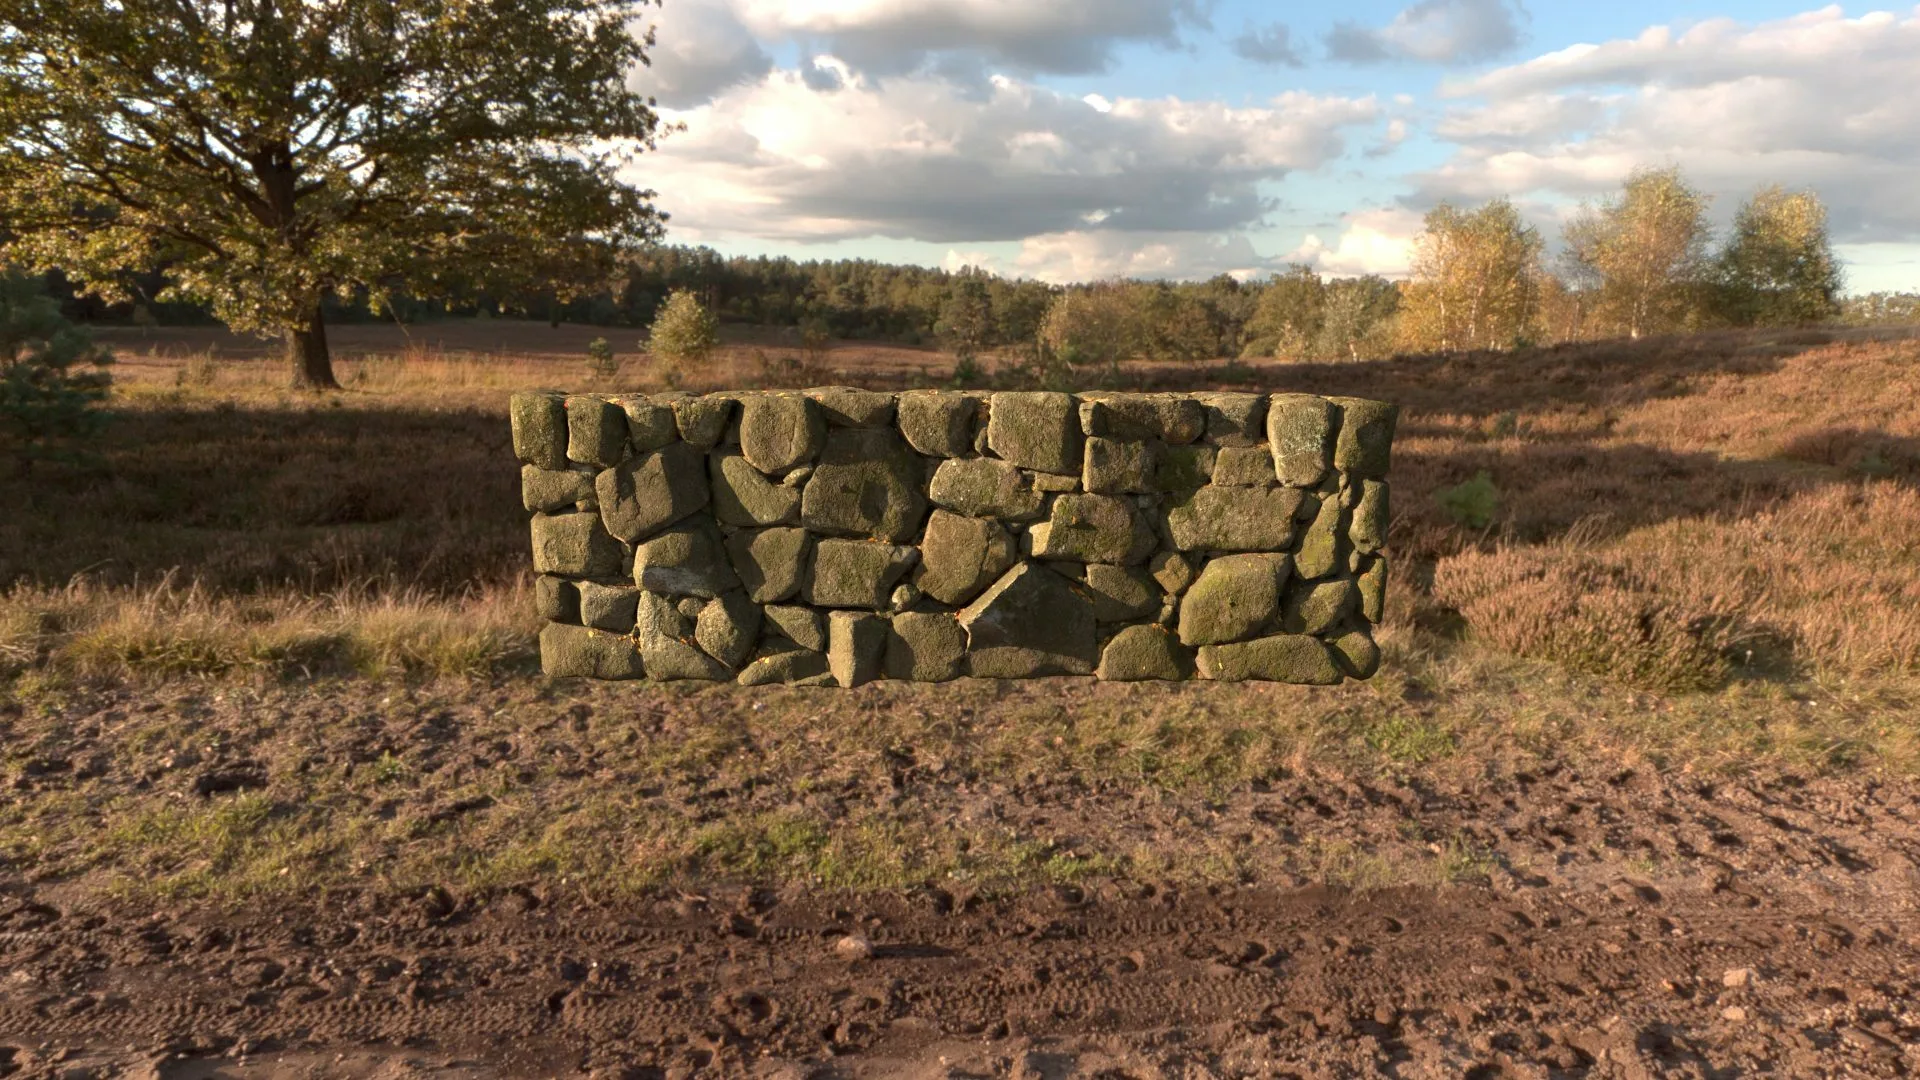
Proxy placeholder appearance in SketchUp.
Next step is to drag the exported proxy file from your component library into your SketchUp scene. The proxy file is in .SKP format and does not have the words “fullGeometry” at the end of the filename. It should look something like the above image when you drag it into SketchUp. This is what is known as a proxy placeholder. You will still see the fully quality when rendered (see below images). Using proxies means we can bring in much more complex geometry and have unlimited copies of that proxy component in our scene, as SketchUp’s polygon limit is bypassed.
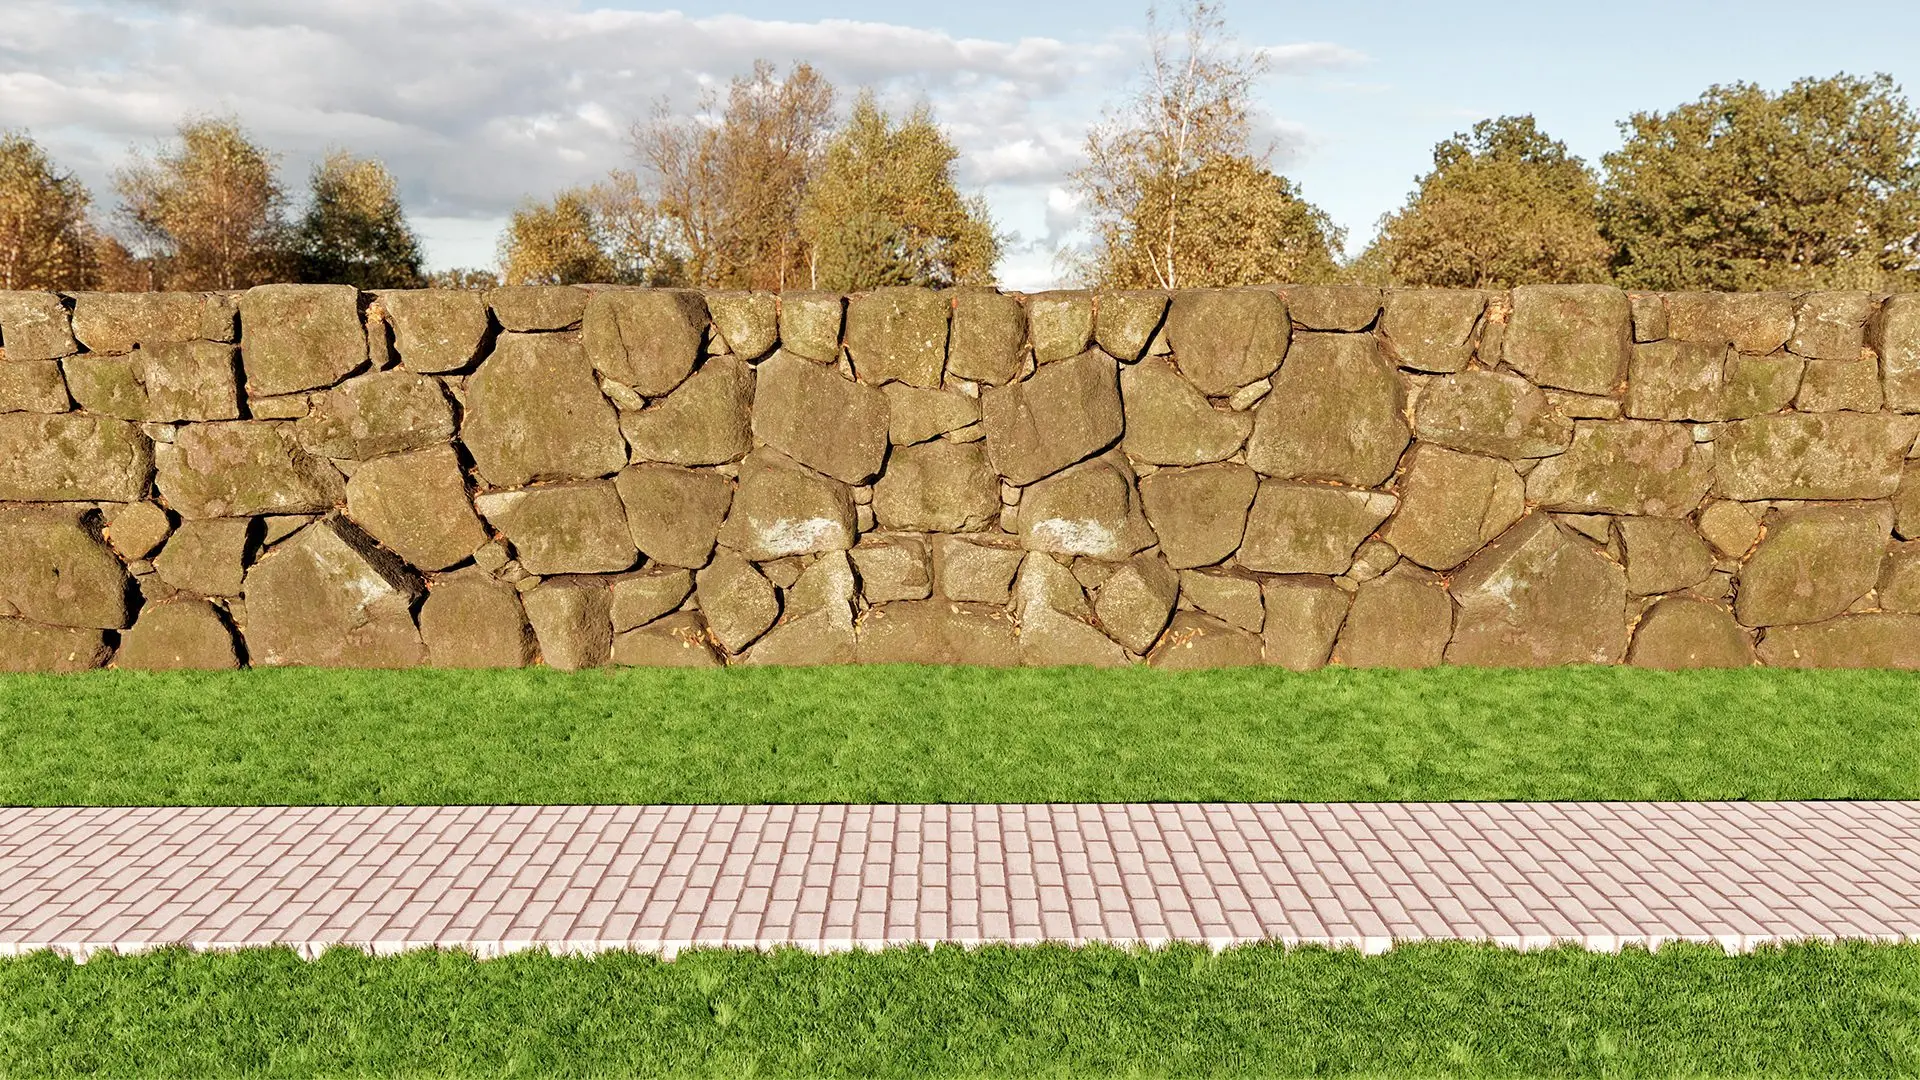
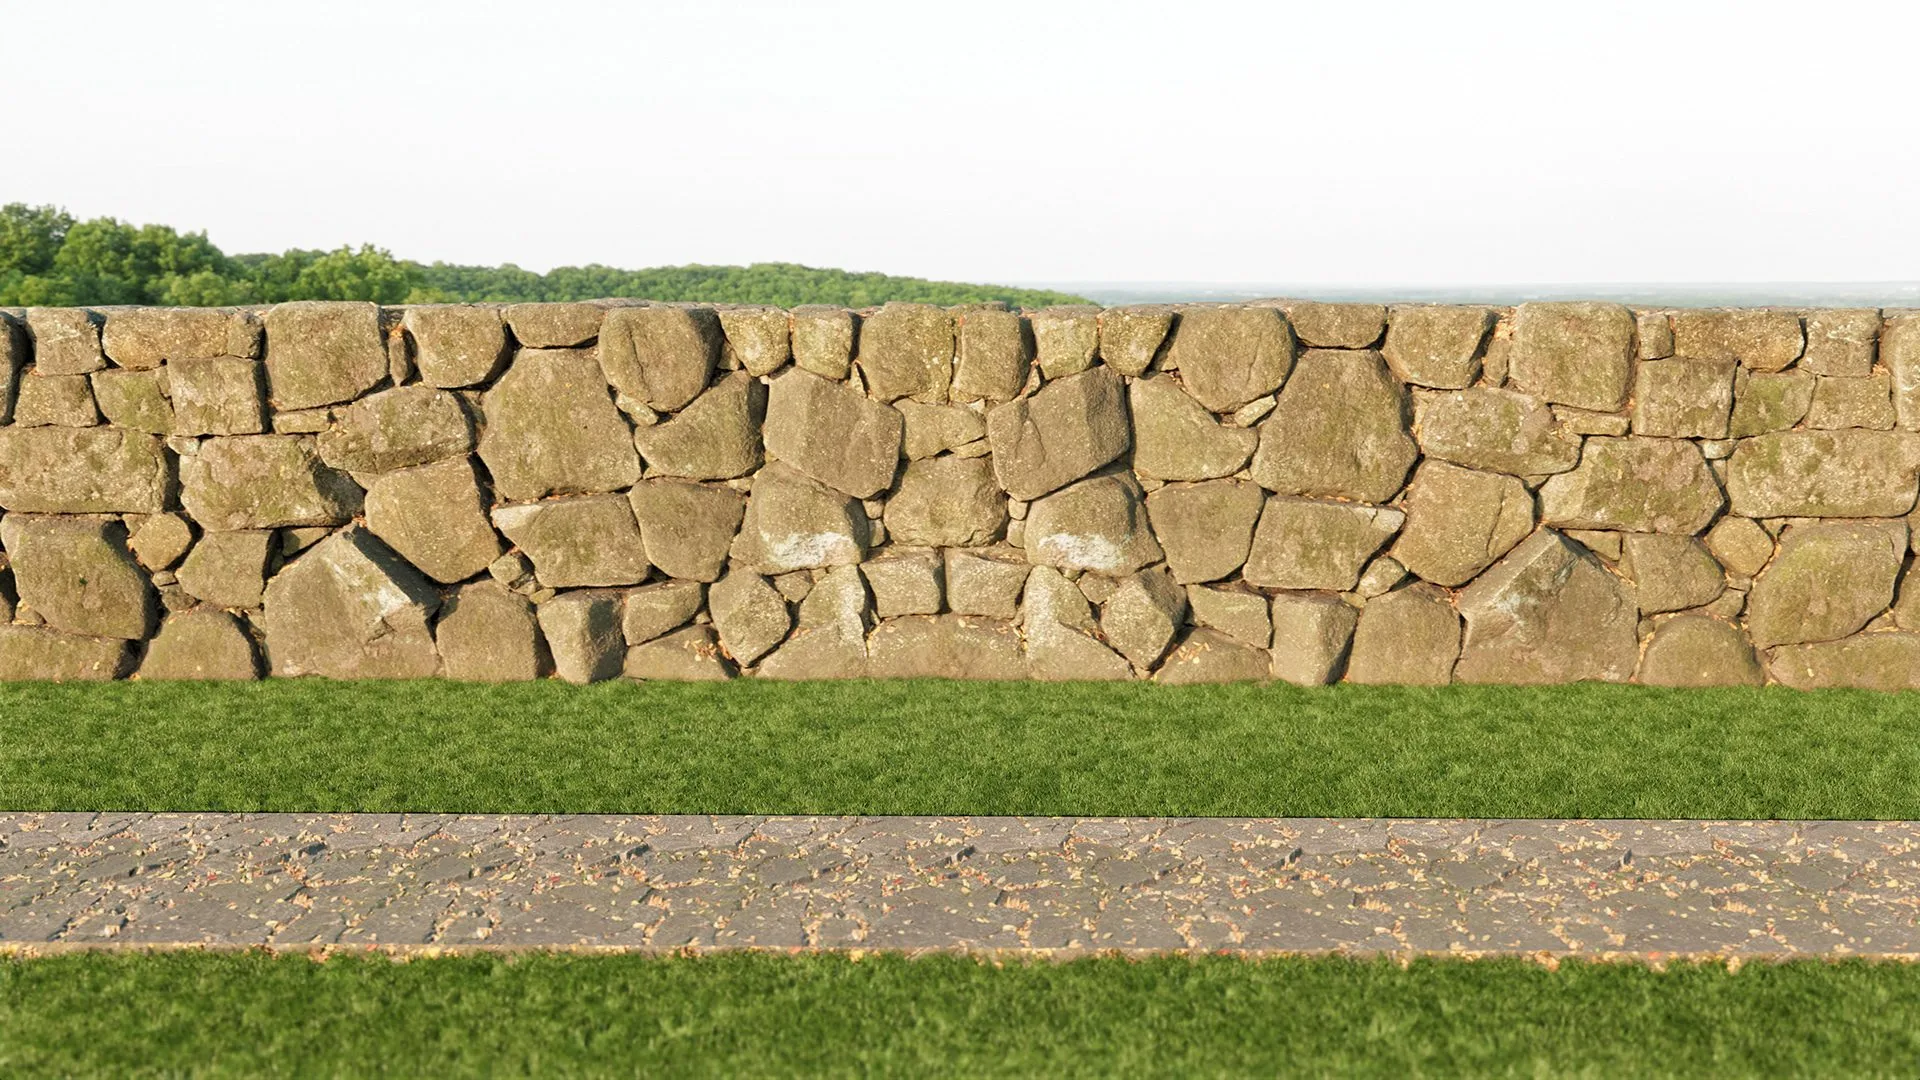
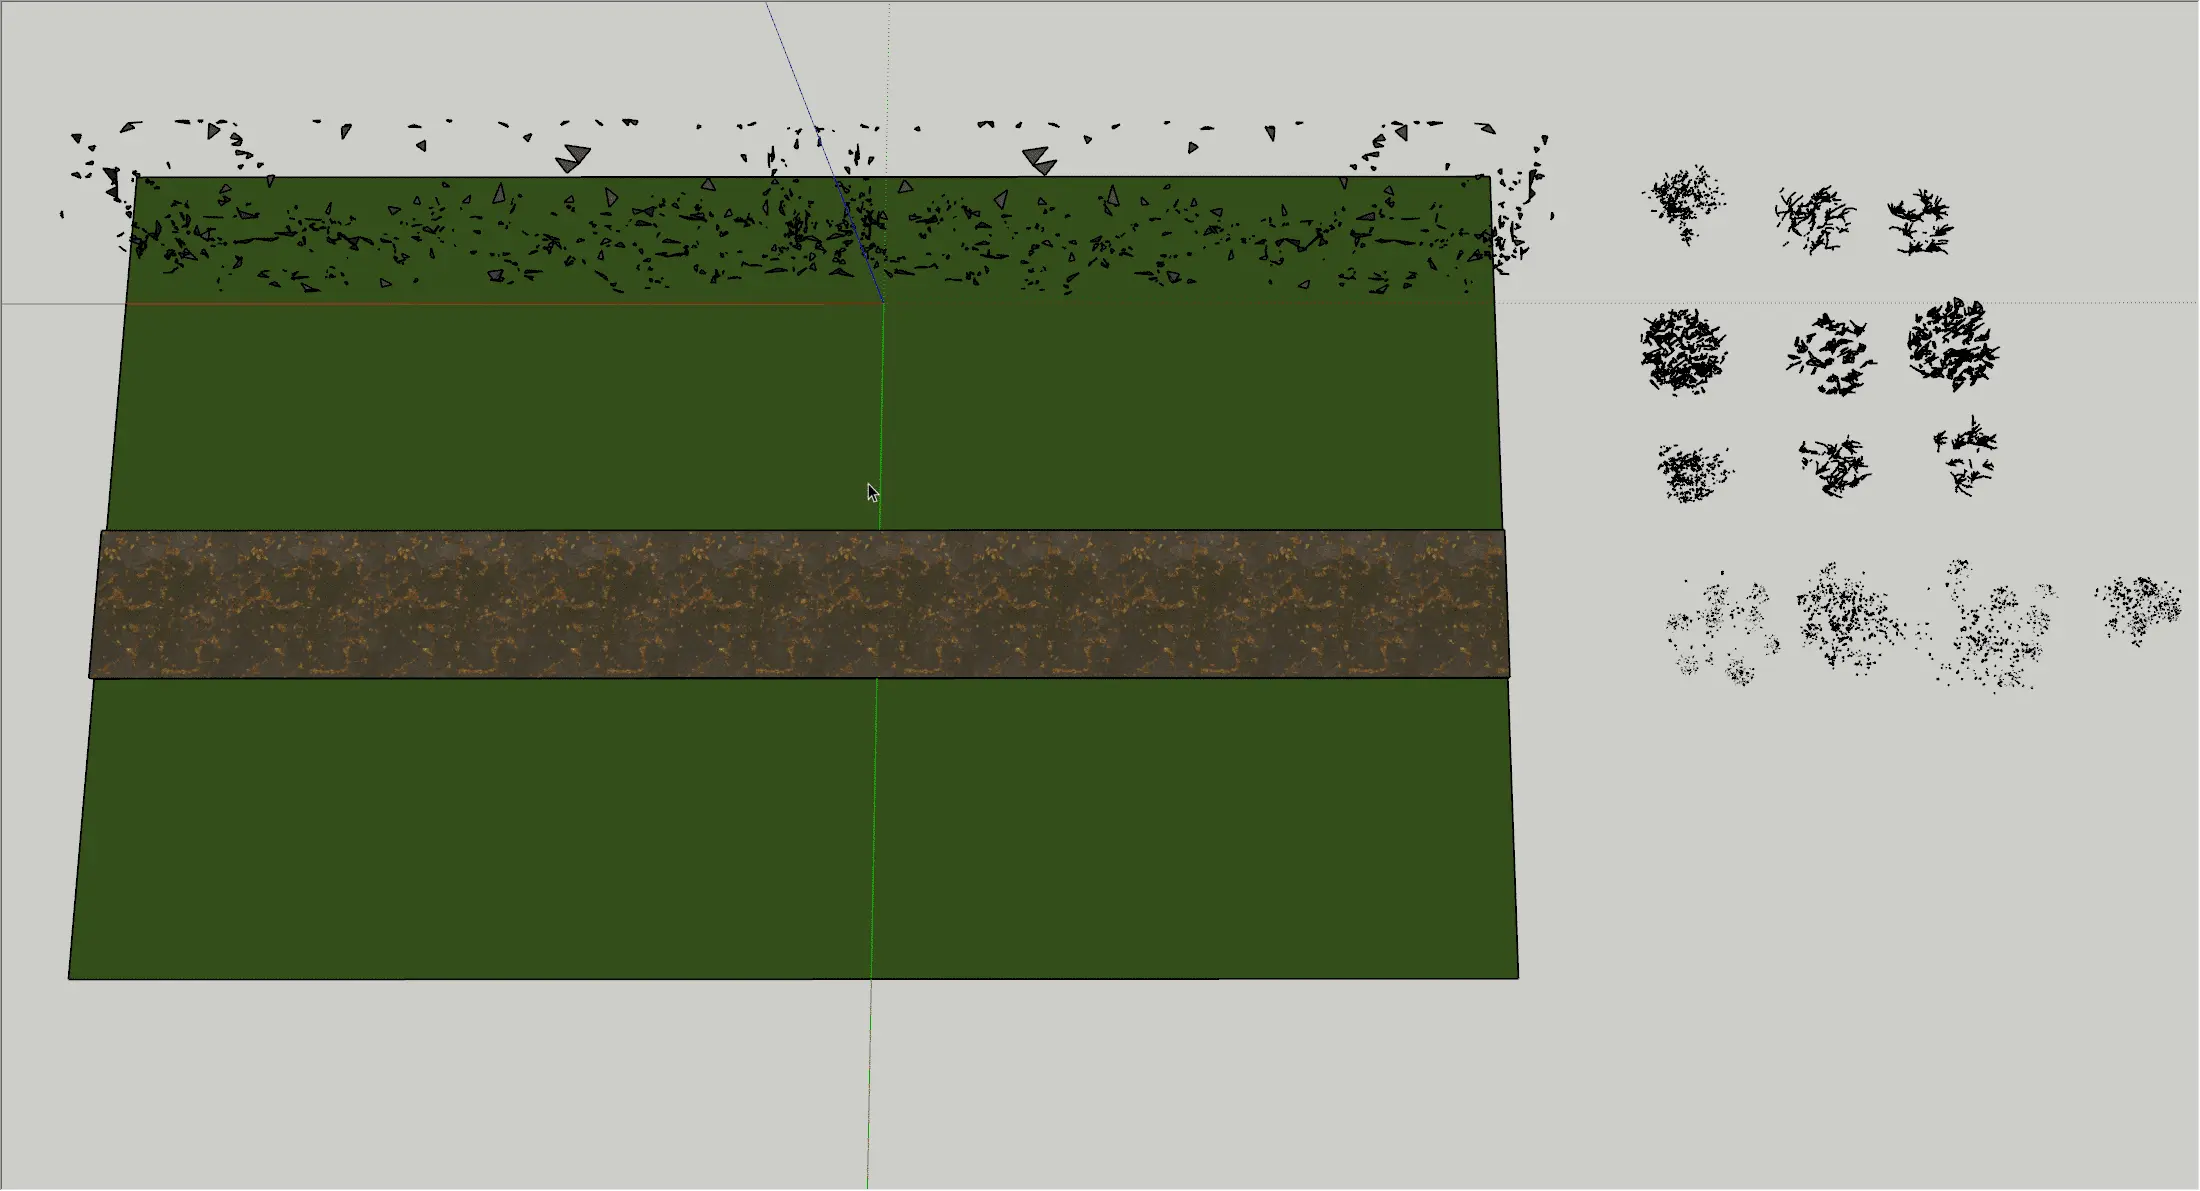
For the next step I copied and mirrored the wall (You could download additional assets from Quixel Bridge instead). I then created a rectangle plane in front of my stone wall, cut out the plane again to create a path through it, then extruded it with the push-pull tool. I then painted the rectangle planes with some basic grass and path textures that come included in SketchUps “Materials” tab.
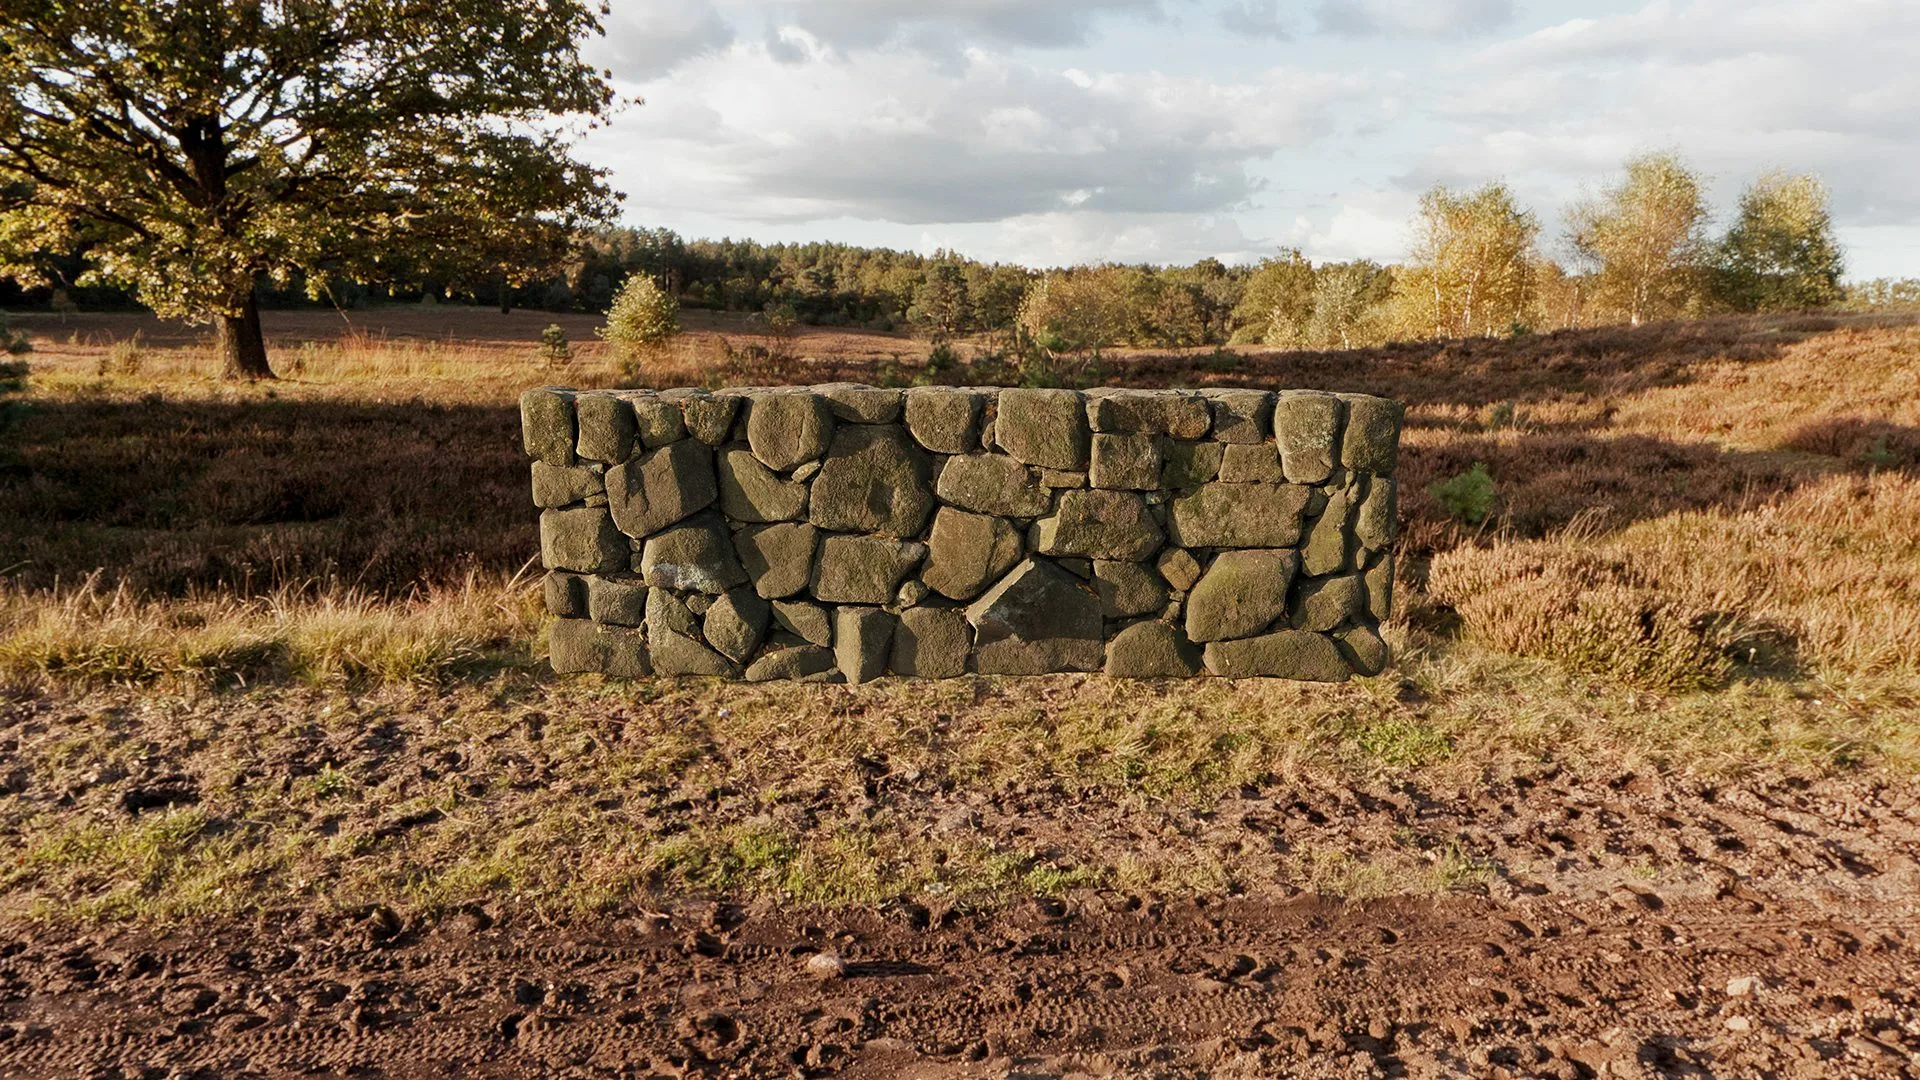
Rendered in real-time with Enscape using SketchUps included basic materials for the grass and path
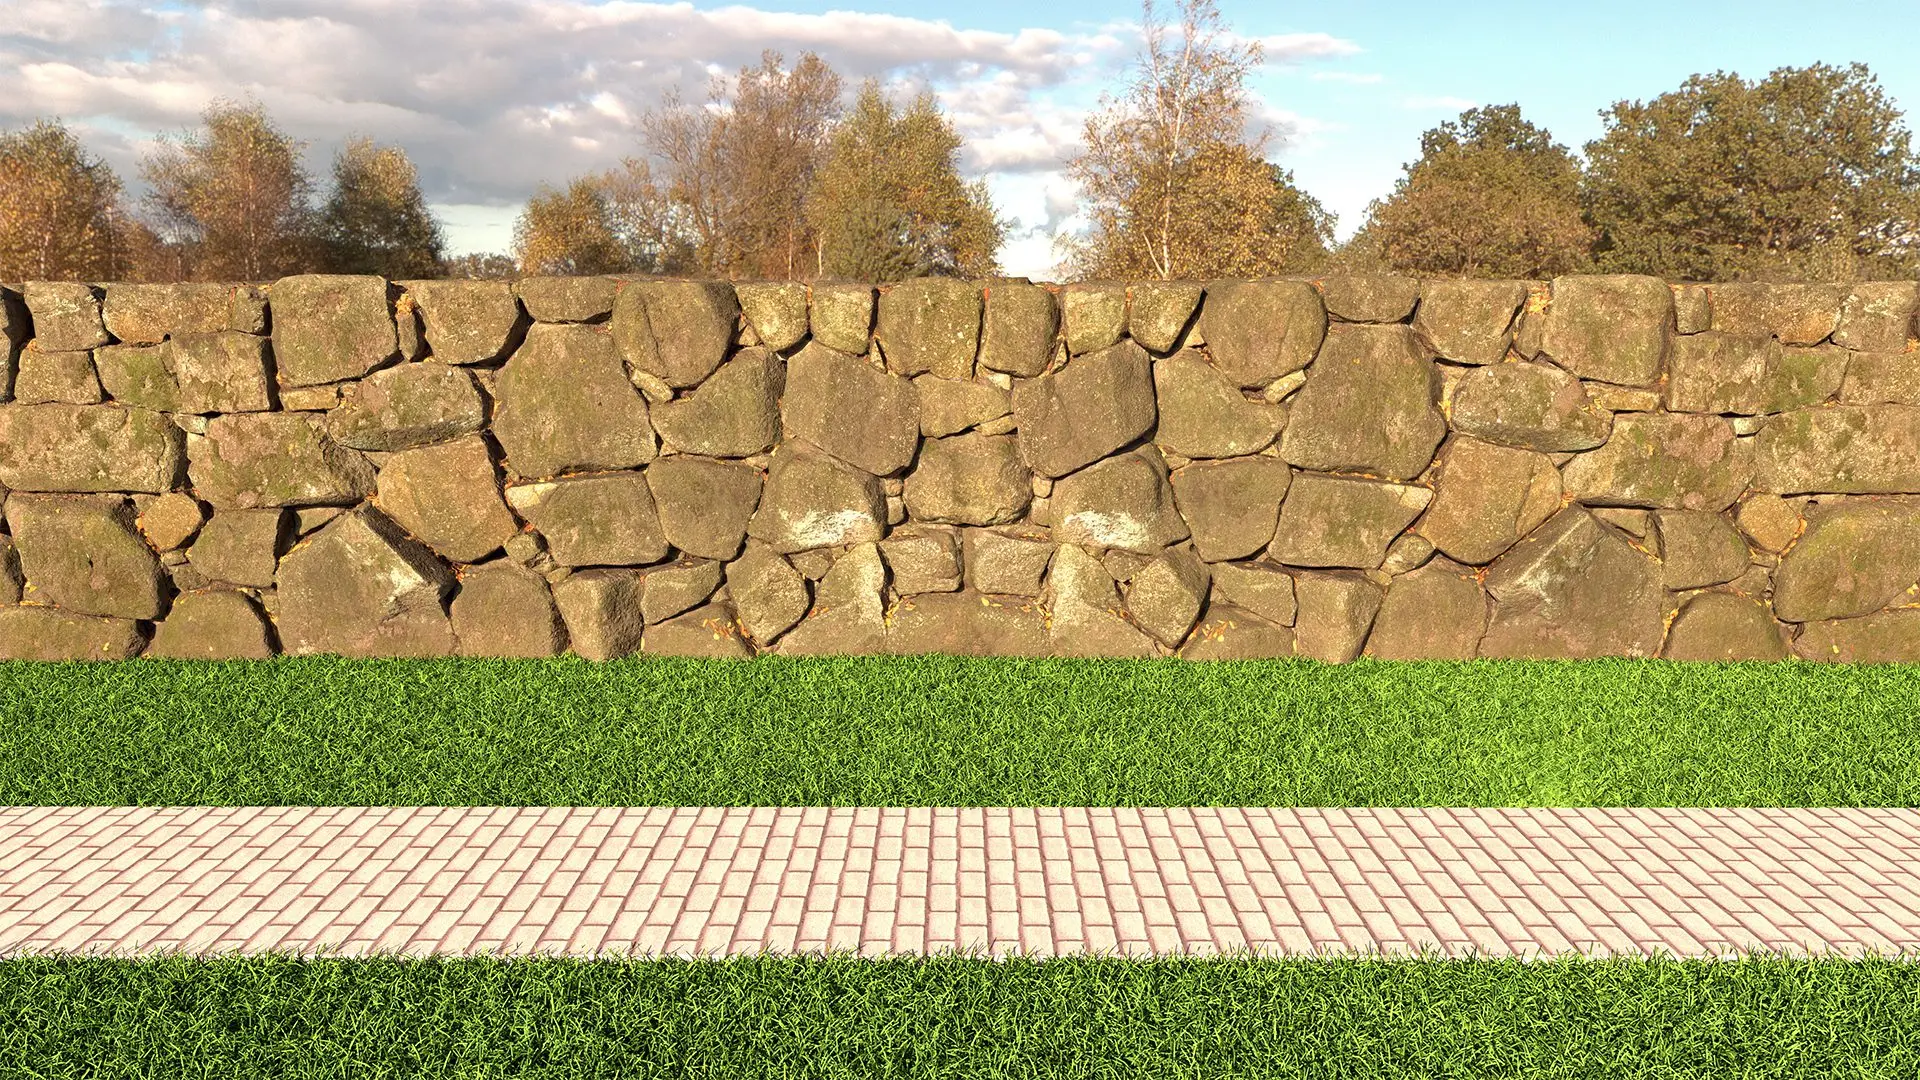
Rendered in ≈10min on an RTX3080 with V-Ray GPU. Using SketchUps included basic materials for the grass and path + V-Ray fur modifier on the grass
I will just be using Enscape for the remainder of this tutorial to save a bit of time but you can still follow along using V-Ray.
Step 4: Importing Quixel Materials into Enscape
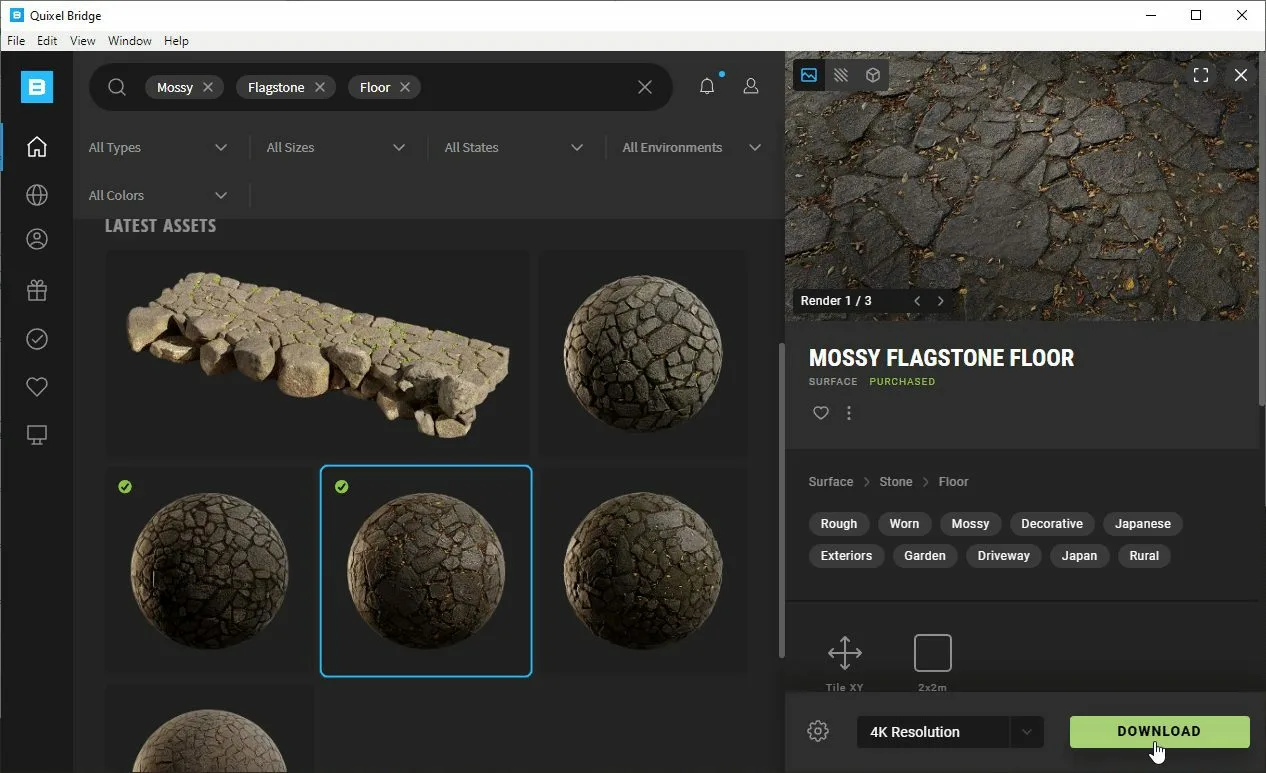
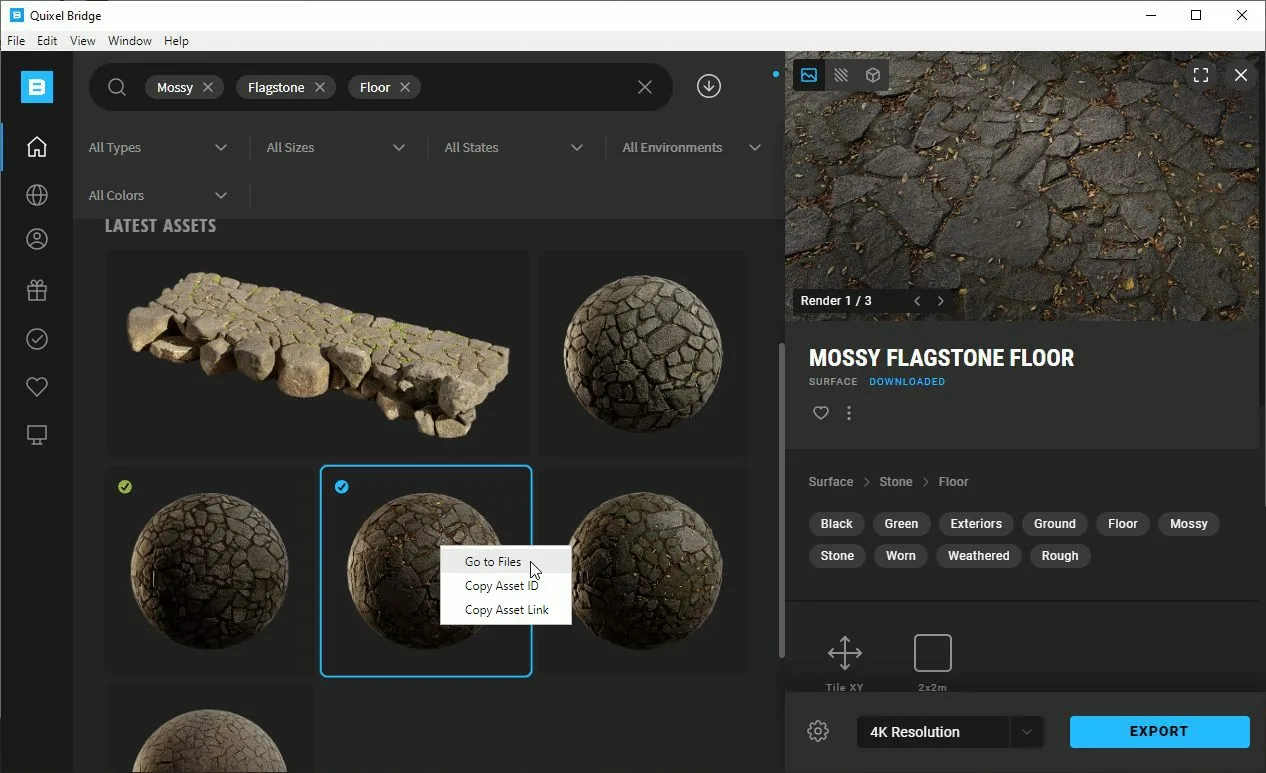
Next step is importing a high quality surface material from Quixel Bridge to replace the default SketchUp one on our path. I used a “Mossy Flagstone Floor” surface material, but you can choose which one you wish.
Click on the green download button after choosing your surface.
After downloading the texture, right click on the thumbnail as shown above and click “Go to Files”. Keep the explorer window open.
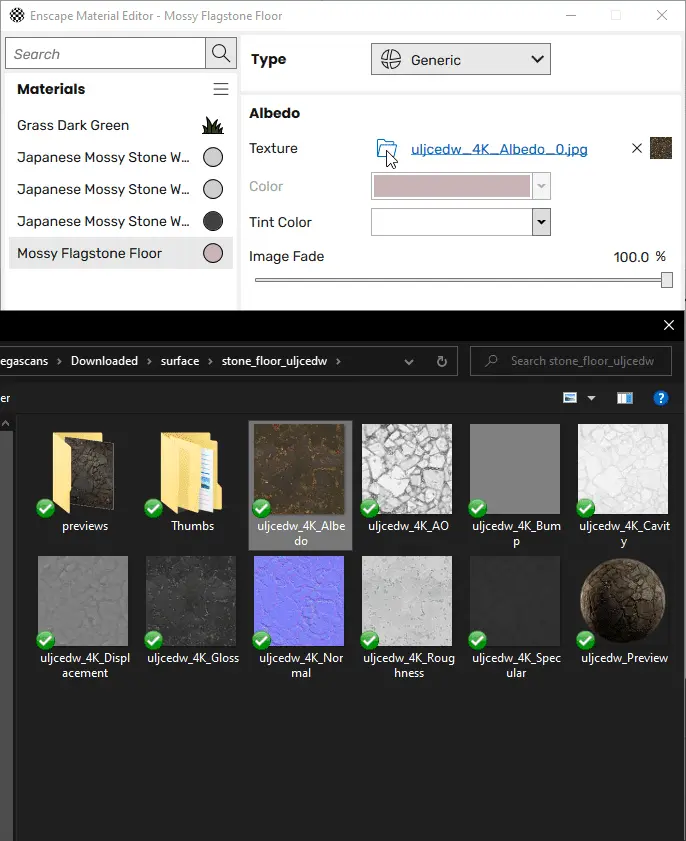
In Enscape, open your material editor and select the path texture. Underneath “Albedo”, load the image file with “Albedo” at the end of it’s filename, from the explorer window Bridge opened in the previous step. Play around with the tint colour and image fade slider until you get the look you want.
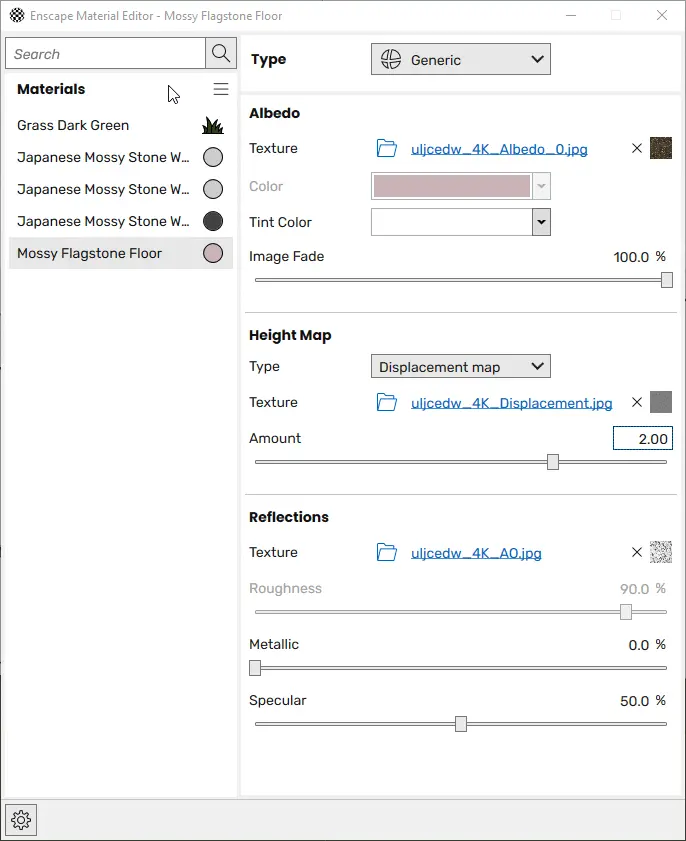
Depending on your computer speed, you can either use the Bump map, the blue Normal map, or the Displacement map images (listed in order of least to most demanding on system resources) to give the path some height. Normal maps are sufficient for most surfaces but for a texture like the one we are using which has a lot of height irregularities it may look better using a displacement map. Have a play around with both to get the look you want. Note that with V-Ray for SketchUp it is possible to use both a normal map in combination with a displacement map for higher quality.
I ended up using the Albedo, Displacement (2x Multiplier Amount) and AO maps. Note that you can also use the AO (Ambient Occlusion) or Roughness map in the reflections slot also. I then swapped the HDRI skybox to Hilly Terrain 01 from Polyhaven:
Step 5: Scattering Vegetation Assets with Skatter 2
We are going to use Skatter to create more realistic grass and add high quality vegetation near the stone walls. First step is to download some grass and plant assets from Quixel Bridge, then use Transmutr to export proxy .SKP files again. Here are the assets I chose:
Once you have exported the assets from Quixel into Transmutr and created proxy .skp files from them you can drag those proxies into your SketchUp scene. Place them somewhere out of the way as we are just going to be using them as references for Skatter.
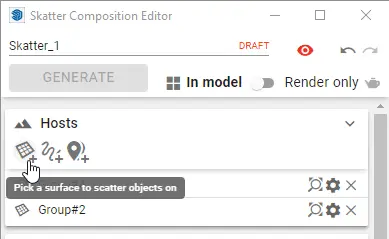
Now we want to start Skatter 2 by clicking on the icon in the toolbar in SketchUp. We then need to choose a host group that we want to scatter objects over. Click on the pick a surface button (as in the image above) and select the two grass plane groups. If the grass planes are not already in two seperate groups divided by the path then you should separate the plane into two groups first.
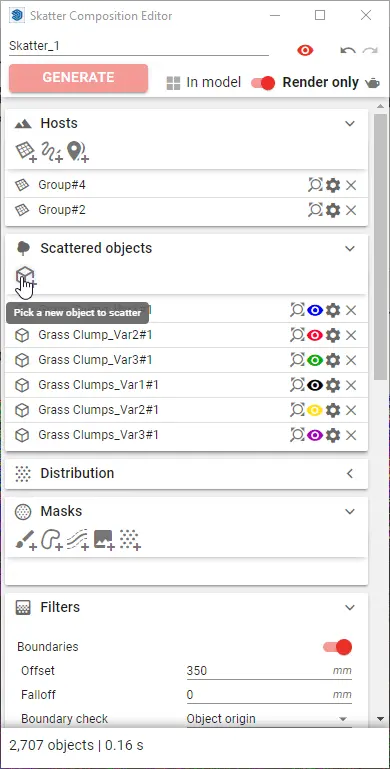
Then we need to pick objects to scatter over the host surfaces we just selected. Click on the “Pick a new object” icon as above then select one of the proxied grass clump assets we just imported. Repeat this process a few times until you have selected all the grass clump assets. You can toggle render only mode to only render the assets, saving resources and allowing you to have unlimited copies by not generating any actual geometry in the SketchUp scene. Turn the density up or down until you get the desired amount of grass, I ended up going with 50 obj/m2. I also set the boundary filter to 350mm offset. Explore the other settings such as transform randomisation and zones if you are interested. Once you are done click the red Generate button.
Now we are going to create another Skatter composition on just the far grass plane and add some plants to it. Click the Skatter icon in the SketchUp toolbar to create another composition. This time we will just select the far plane as a host. We will then add some of the imported Hydrangea proxies (Or whatever plants you downloaded) to the Skatter object list. I chose an object density of 2, tweaked some of the transform randomisation settings, and set the boundary filter to 600mm offset. I then added another Skatter composition to both grass planes, this time using a free daisy asset from the 3DBazaar marketplace(Included with Skatter 2):
You can use this workflow to create some amazing scenes using the high quality assets & materials available on Quixel Bridge, as well as with assets from the free 3DBazaar marketplace, or from any other sources you want to use, thanks to Skatter + Transmutr!