Corona for 3ds Max
Corona Toon Material
This page provides information about the Corona Toon Material in 3ds Max.
Last updated 2 April 2026
This page provides information about the Corona Toon Material in 3ds Max.
Overview
The Toon material changes how the Diffuse and Reflectivity (especially specular highlights) respond to lighting. Instead of following realistic shading, they use color gradients defined by ramps in the material settings. When a strong light source is used—like the Corona Sun—these gradients don’t blend smoothly, but instead create a banded or posterized look, with clear, sharp transitions between different brightness levels.
Toon material is very useful for avoiding becoming locked in to specific materials, letting the focus remain on the building, design, interior layout, etc. This can be handy early in a project, but sometimes can also be useful for final deliverables, too, where a photorealistic render may present a very specific material that will not be the one used in the actual construction giving confusing expectations. Toon material can also be used purely for artistic purposes as well, for conveying a particular feel or mood.

Parameters
General
Diffuse color – Specifies the diffuse color. The Diffuse Ramp value is multiplied by the Diffuse color value.
Roughness – Controls the smoothness of the base layer of the surface. A value of 0 (or black, if a map is used) results in a completely smooth surface, which leads to sharp reflections or refractions of the base layer. A value of 1 (or white, if a map is used) results in a completely rough surface leading to blurred reflections (or refractions).
Ambient color – Specifies an ambient color affecting only direct rays and not the GI.
IOR – Sets the Index of Refractions for a non-metal (dielectric) object, which controls how much a ray is bent when entering the object, and the amount of reflection in a physically plausible way. A value of 1 results in no bending of the ray and no reflection, while the value of 1.52 is good for generic glass.
Diffuse GI suppression – Suppression of the diffuse GI contribution. Set 1.0 for no diffuse GI, 0.0 for full diffuse GI. See the Diffuse GI Suppression example below.
Specular GI suppression – Suppression of the specular GI contribution. Set 1.0 for no specular GI, 0.0 for full specular GI.
Diffuse Ramp
Number – Specifies the number of the currently selected gradient ramp key.
Color – Specifies the color of the key.
Position – Specifies the position of the currently selected key on the gradient ramp within a range from 0 to 1.
Interpolation – Determines the type of the transition effect between the selected gradient ramp key and the other keys. See the Diffuse Ramp Interpolation example below.
Ramp Offset – Shifts the ramp input, as if the ramp keys are moved left. See the Diffuse Ramp Offset example below.
Output Offset – Shifts the ramp output, as if the ramp keys are brighter colors.

Specular Ramp
Number – Specifies the number of the currently selected gradient ramp key.
Color – Specifies the color of the key.
Position – Specifies the position of the currently selected key on the gradient ramp within a range from 0 to 1.
Interpolation – Determines the type of the transition effect between the selected gradient ramp key and the other keys. See the Specular Ramp Interpolation example below.
Ramp Offset – Shifts the ramp input, as if the ramp keys are moved left.
Output Offset – Shifts the ramp output, as if the ramp keys are brighter colors.

Refraction
Amount – Specifies the amount of refraction and the refraction color. Any value above zero (black) enables refraction.
Caustics – Enables physically correct unbiased caustics. When disabled, faster, transparent shadows are used.

Opacity
Level – Both the constant color and the texture map are multiplied by this value. Setting this parameter to 0.5 or using a white color is equal to using 50% gray color, or using a texture map with output level of 0.5.
Clip – When enabled, Clip applies a threshold to the opacity map, so that everything below 50% gray is completely transparent, and everything above 50% gray is completely opaque. This option can speed up rendering significantly.
Color – Specifies opacity color, where white is opaque, and black is transparent.

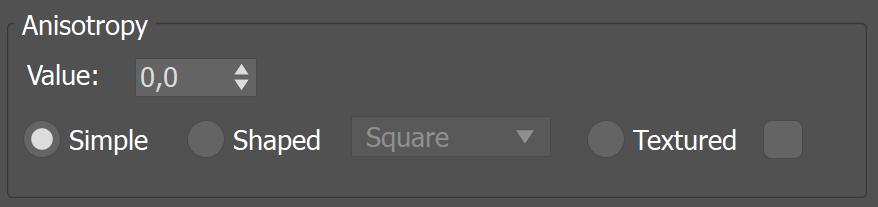
Anisotropy
Value – Specifies the anisotropy of the glossy reflection highlight. A value of 0 disables anisotropy, which creates a perfectly isotropic highlight. A value of -1 creates a maximally anisotropic highlight in one axis, and a value of 1 creates maximally anisotropic highlight in the perpendicular axis.
Simple – This option doesn’t affect the material’s reflection highlights.
Shaped – This option allows picking a custom shape for the material’s reflection highlights. See the Anisotropy example below.
Textured – This option defines the material’s reflection highlight shape based on a custom texture.
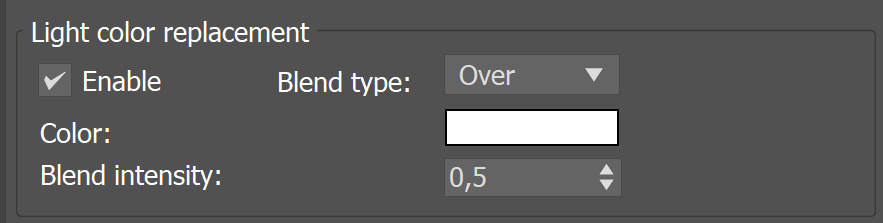
Light color replacement
Enable – When enabled, the color for all lights illuminating an object with the material is replaced by the given color.
Blend type – Specifies how the original light color is blended with the replacement color.
Over
Add
Subtract
Multiply
Lighten
Darken
Saturate
Desaturate
Color – Specifies the color that replaces the light color.
Blend intensity – Specifies an amount for blending the original light and the diffuse color. A value of 0 results in no light blending, while a value of 1 results in full light blending.
Shadow Control
Enabled – Enables adding color to shadow areas. See the Shadow Control example below.
Shadow tint – The color added to the shadow areas. Use the ramp to further specify the color based on the cosine between light and surface normal.
Shadow opacity – Multiplier of the shadow color. Note that zero opacity does not mean no shadow, it means there is no color added to the shadow.
Number – Specifies the number of the currently selected gradient ramp key.
Color – Specifies the color of the key.
Position – Specifies the position of the currently selected key on the gradient ramp within a range from 0 to 1.
Interpolation – Determines the type of the transition effect between the selected gradient ramp key and the other keys.
Ramp Offset – Shifts the ramp input (as if the ramp keys were moved left).
Output Offset – Shifts the ramp input (as if the ramp keys were moved left).

Displacement
Min level – Specifies displacement distance applied to areas with black (0.0) texture. This value is measured in world-space units.
Texture – Specifies a texture map that controls the min/max levels of the displacement.
Max level – Specifies strength of the displacement effect. The world-space displacement distance is applied to areas with white (1.0) texture.
Water lvl. – When enabled, specifies a displacement cutoff threshold. Any microtriangle with displacement texture below the Water level is removed.

Advanced
G-Buffer ID override – If set to a value different than 1, it overrides the 3ds Max GBuffer property. This option allows you to set values outside the permitted 3ds Max range of 0 to 15.
Propagate masks – Specifies the propagation of non-shading render elements (masks) after interaction with the material. Available modes are:
Never – Mask passes are never propagated through the material, i.e. the material is always visible in masks.
Through reflection – Mask passes are propagated through the material if reflection occurs.
Through refraction – Mask passes are propagated through the material if refraction occurs.
Always – Mask passes are always propagated through the material, i.e. the material is never visible in masks.
Invisible in masks – This mode makes the material invisible in masks.

Maps
The Maps rollout provides further control over the following parameters: Diffuse color, Roughness, IOR, Refraction amount, Anisotropy, Opacity color, and Displacement. Each of these can be controlled through a texture map.

Examples
The following examples demonstrate the effect that individual Toon Material parameters have on the scene. Click on any image to view it at a higher resolution.
Example: Outlines
This example shows the effect of using the Toon Material in combination with the Outline Material.
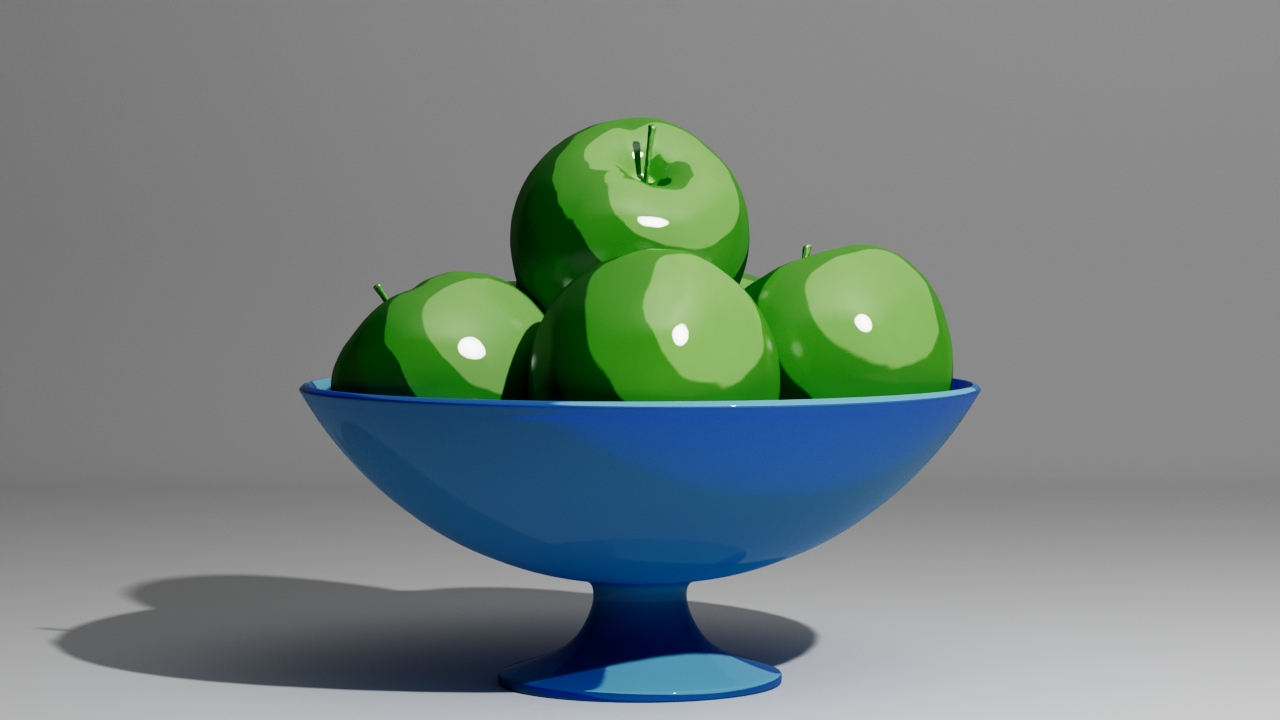
Outlines are disabled
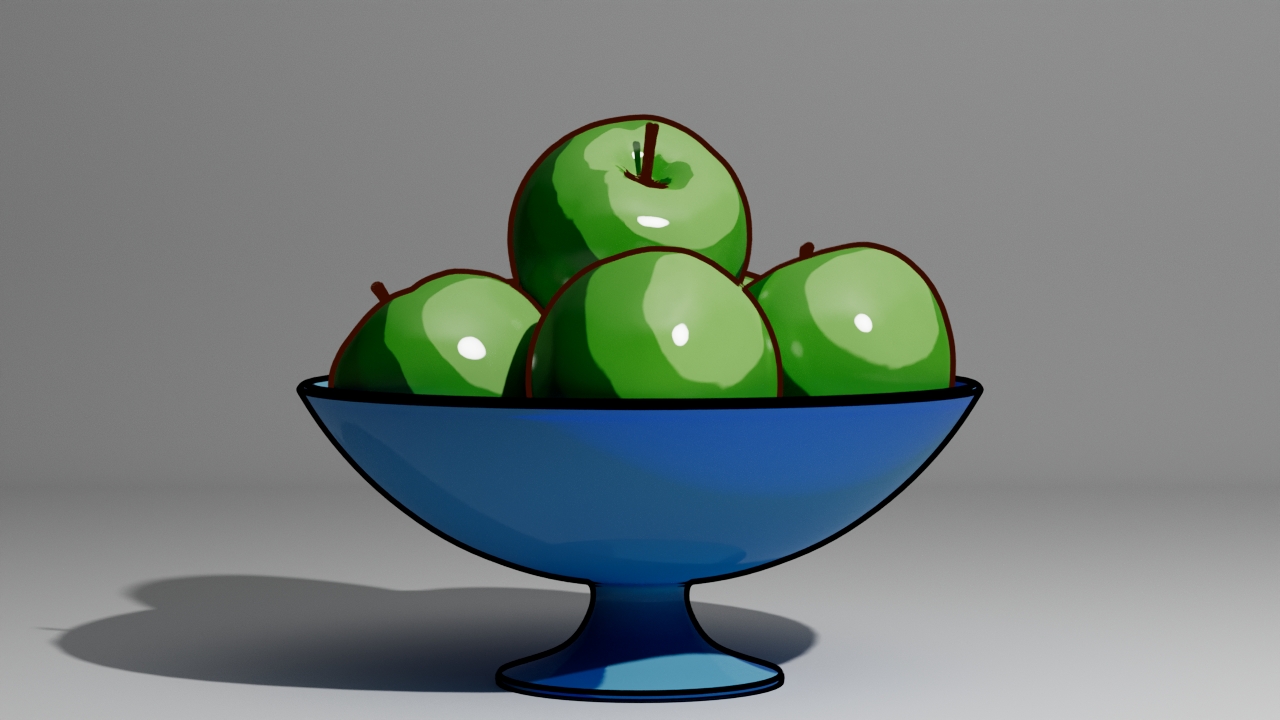
Outlines are enabled
Example: Diffuse Ramp Offset
This example shows the effect of using Diffuse Ramp and offsetting it.

Ramp Offset is -0.2

Ramp Offset is 0
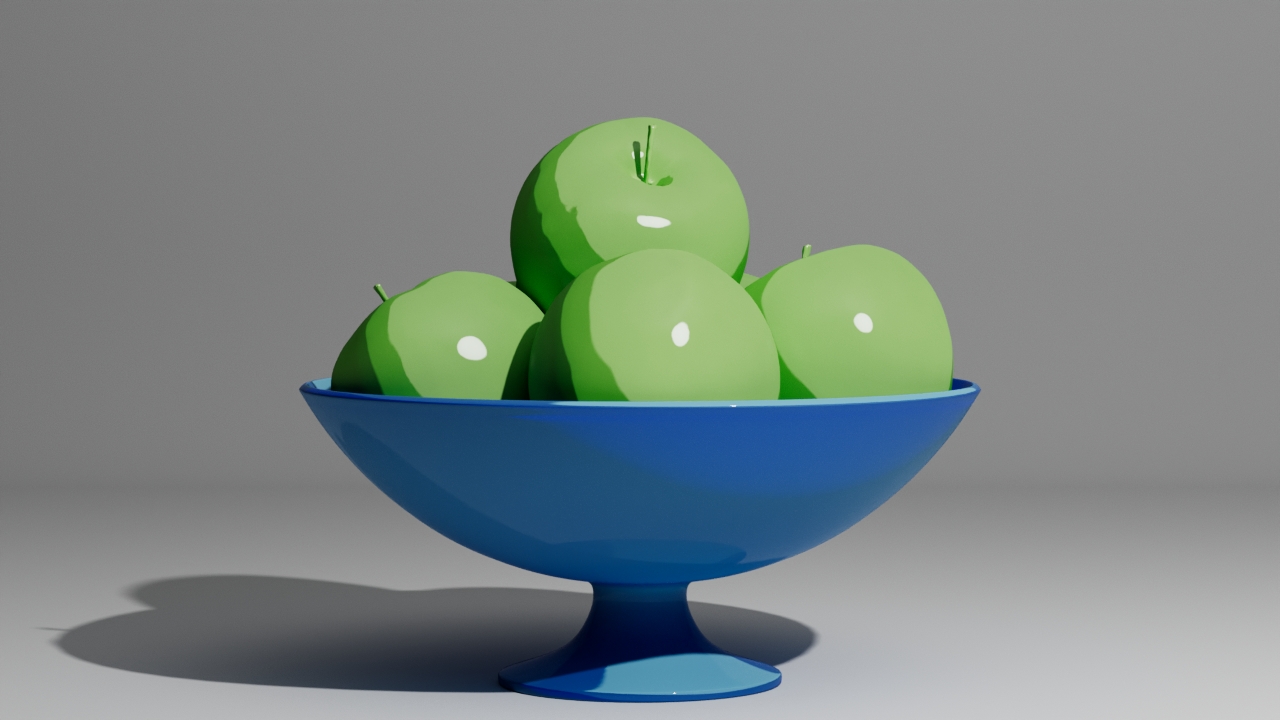
Ramp Offset is 0.2
Example: Diffuse Ramp Interpolation
This example shows the effect of Interpolation.
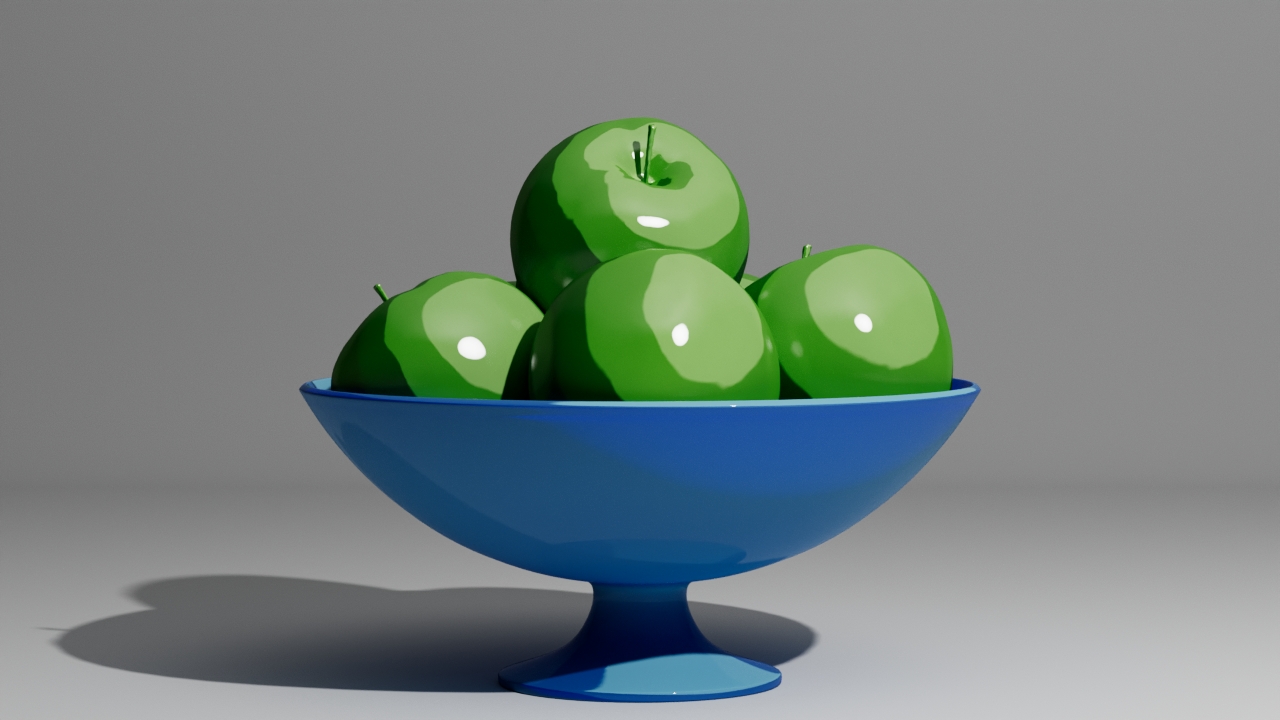
There is no Interpolation

Interpolation is linear

Interpolation is smooth

Interpolation is spline
Example: Specular Ramp Interpolation
This example shows the effect of using Specular Ramp and tweaking its Interpolation.

There is no Interpolation
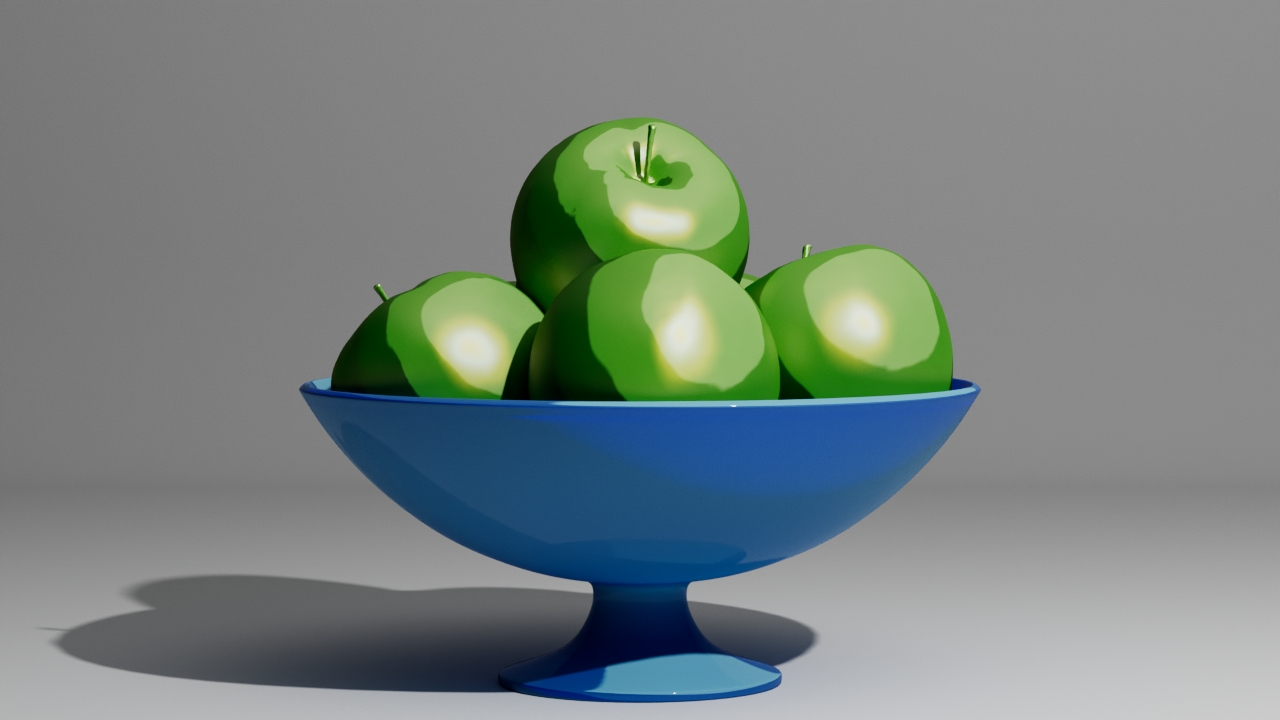
Interpolation is linear

Interpolation is smooth

Interpolation is spline
Example: Anisotropy
This example shows the effect of Anisotropy. The effect is mostly visible in the reflections of the apples.

Anisotropy is default
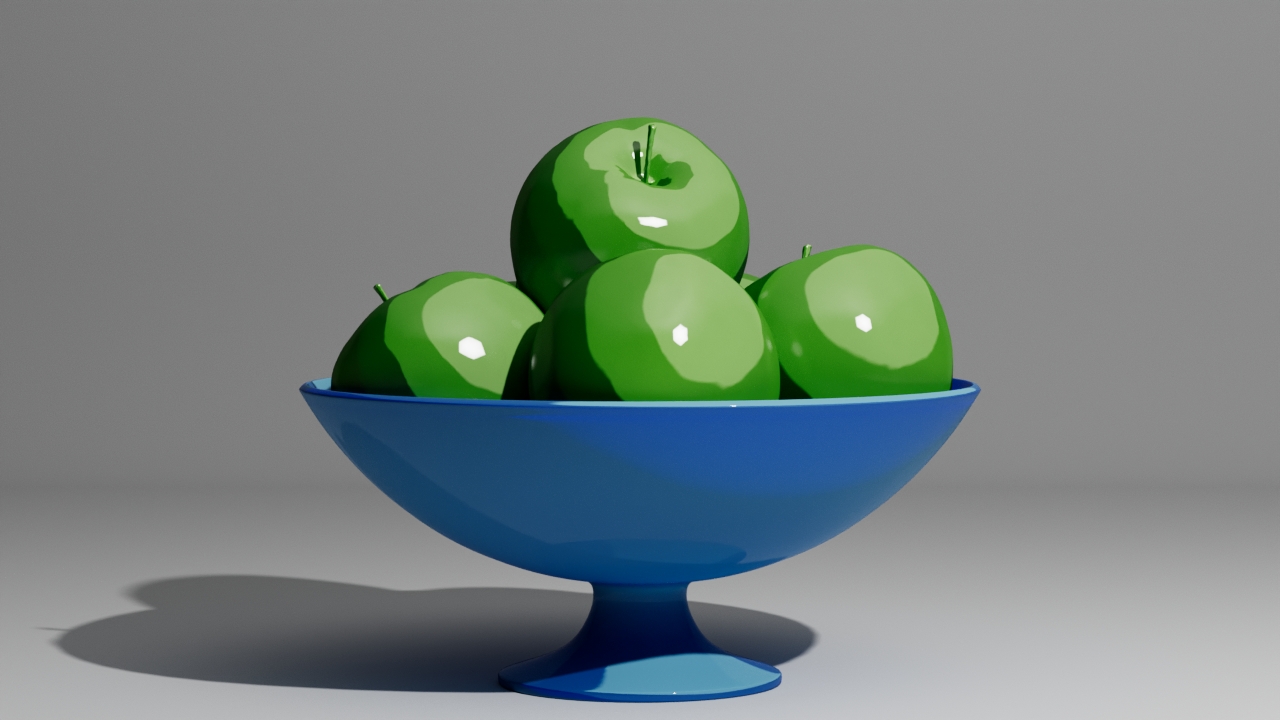
Anisotropy is hexagon

Anisotropy is square
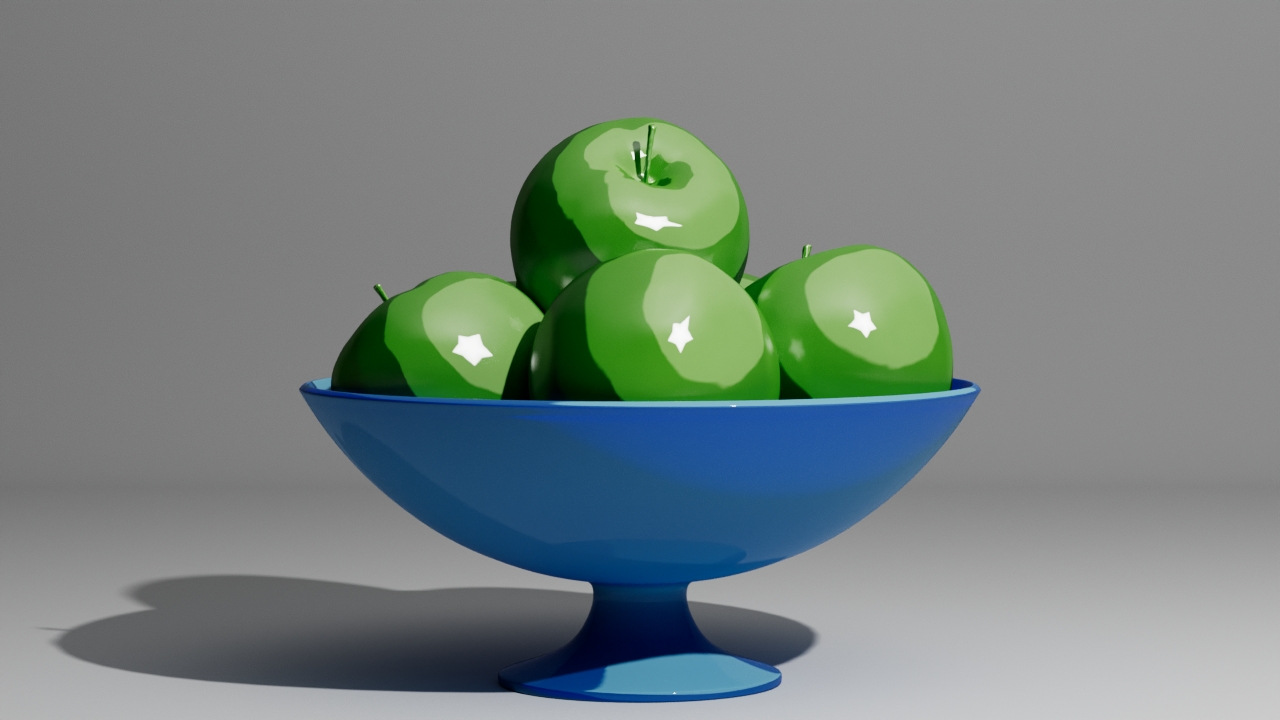
Anisotropy is star
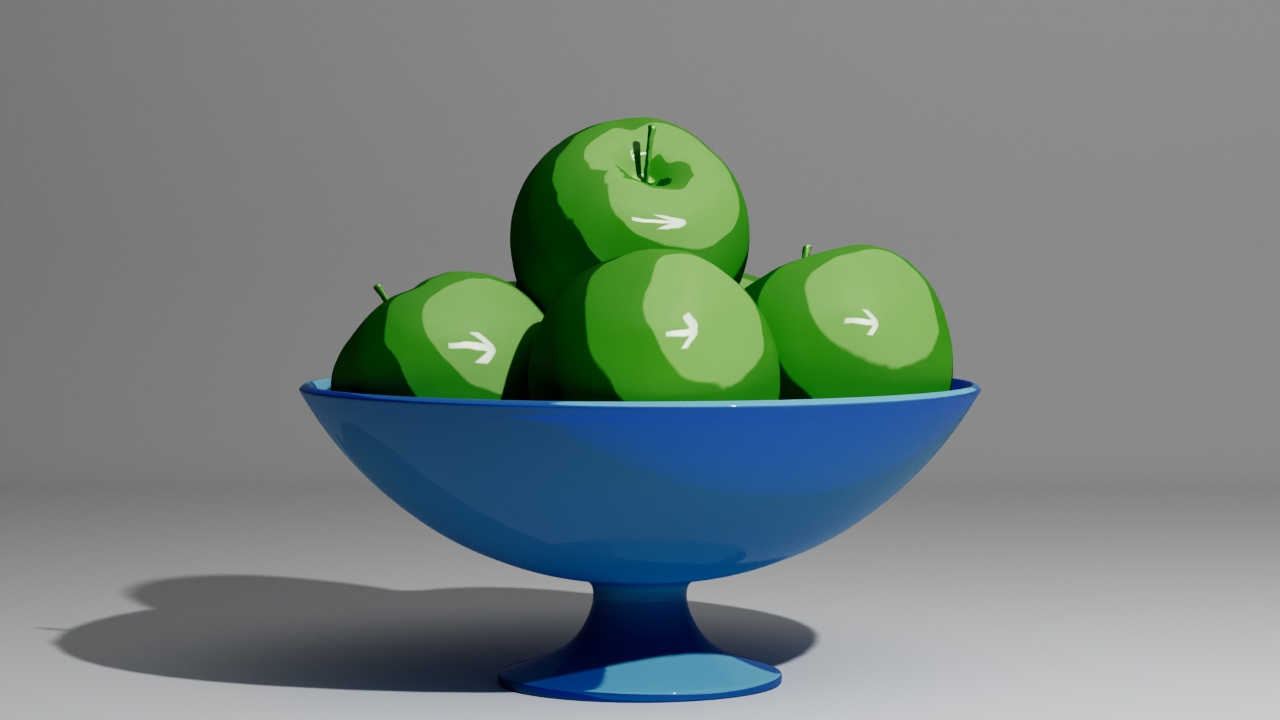
Anisotropy is textured
Example: Diffuse GI Suppression
This example shows the effect of the Diffuse GI Suppression. Increasing the value reduces GI's influence on an object, producing sharper shadows.

Setup

Diffuse GI suppression = 0
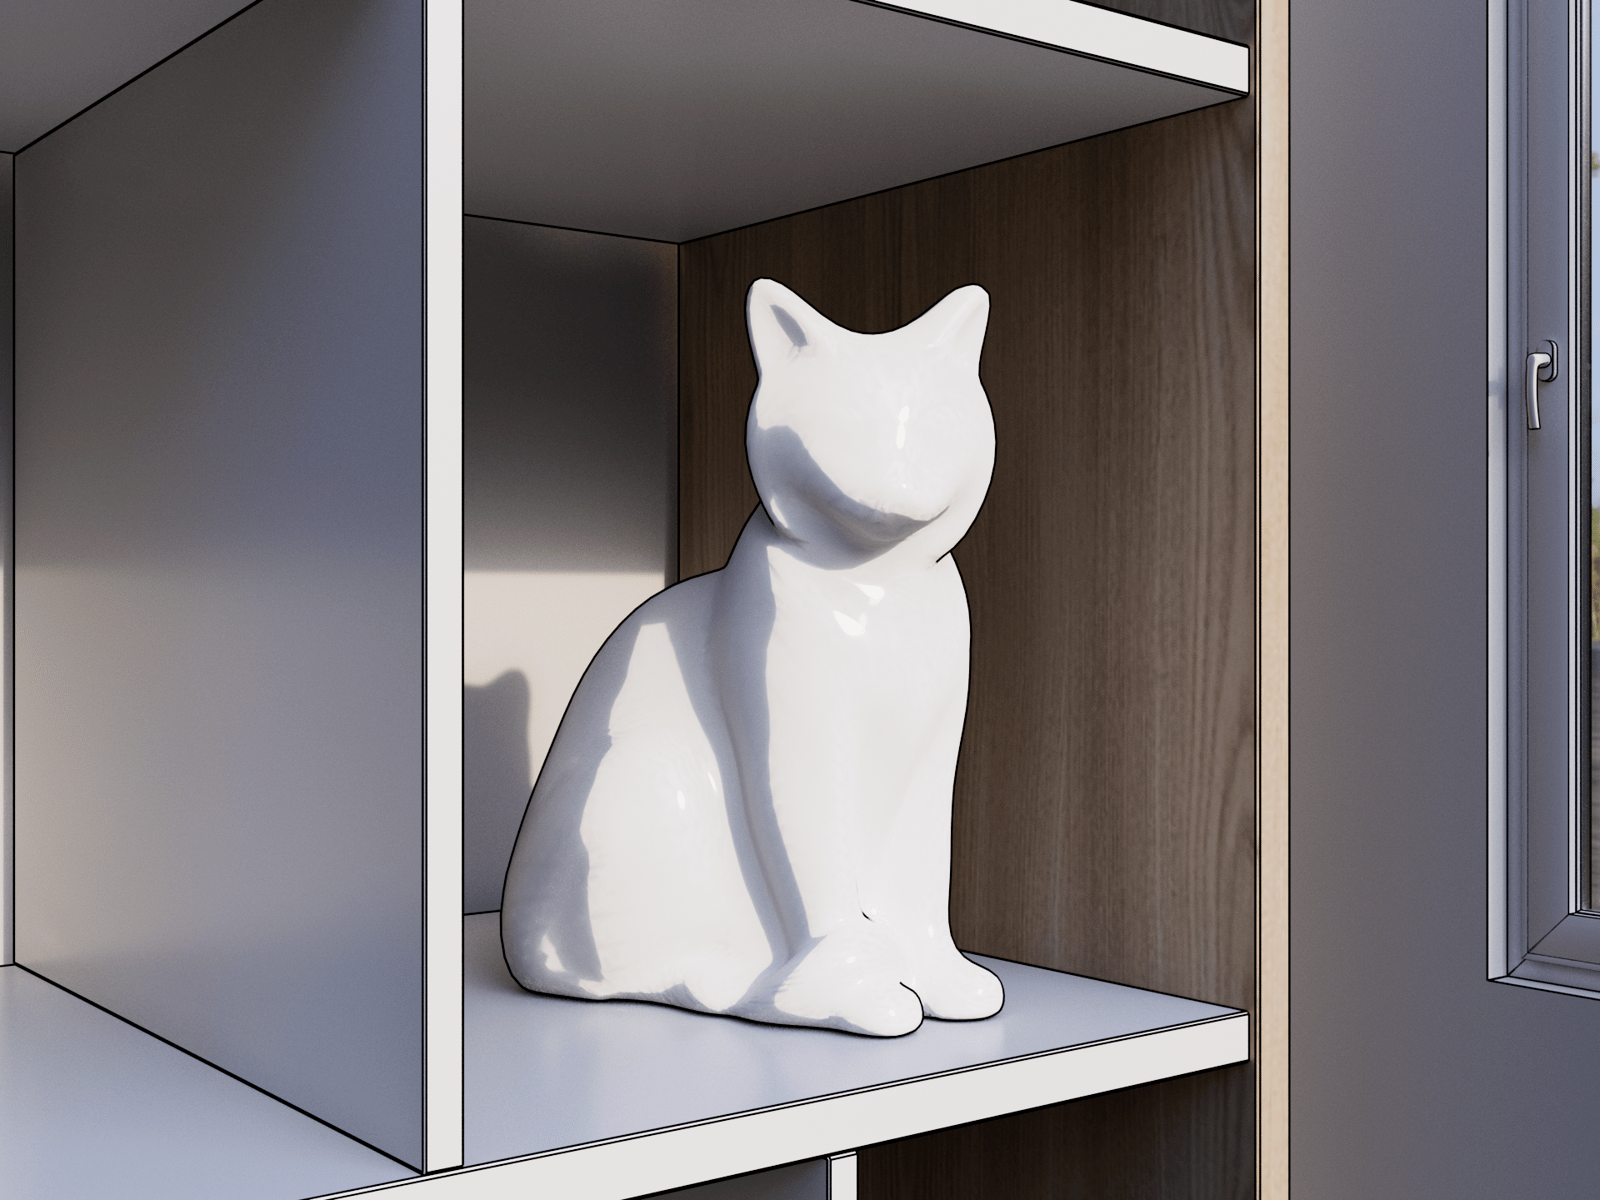
Diffuse GI suppression = 0.5

Diffuse GI suppression = 1
Example: Shadow Control
This example shows the effect of the Shadow control parameters.

Setup

Toon Material on the cat with Shadow control enabled and colors in Shadow Ramp set to white.
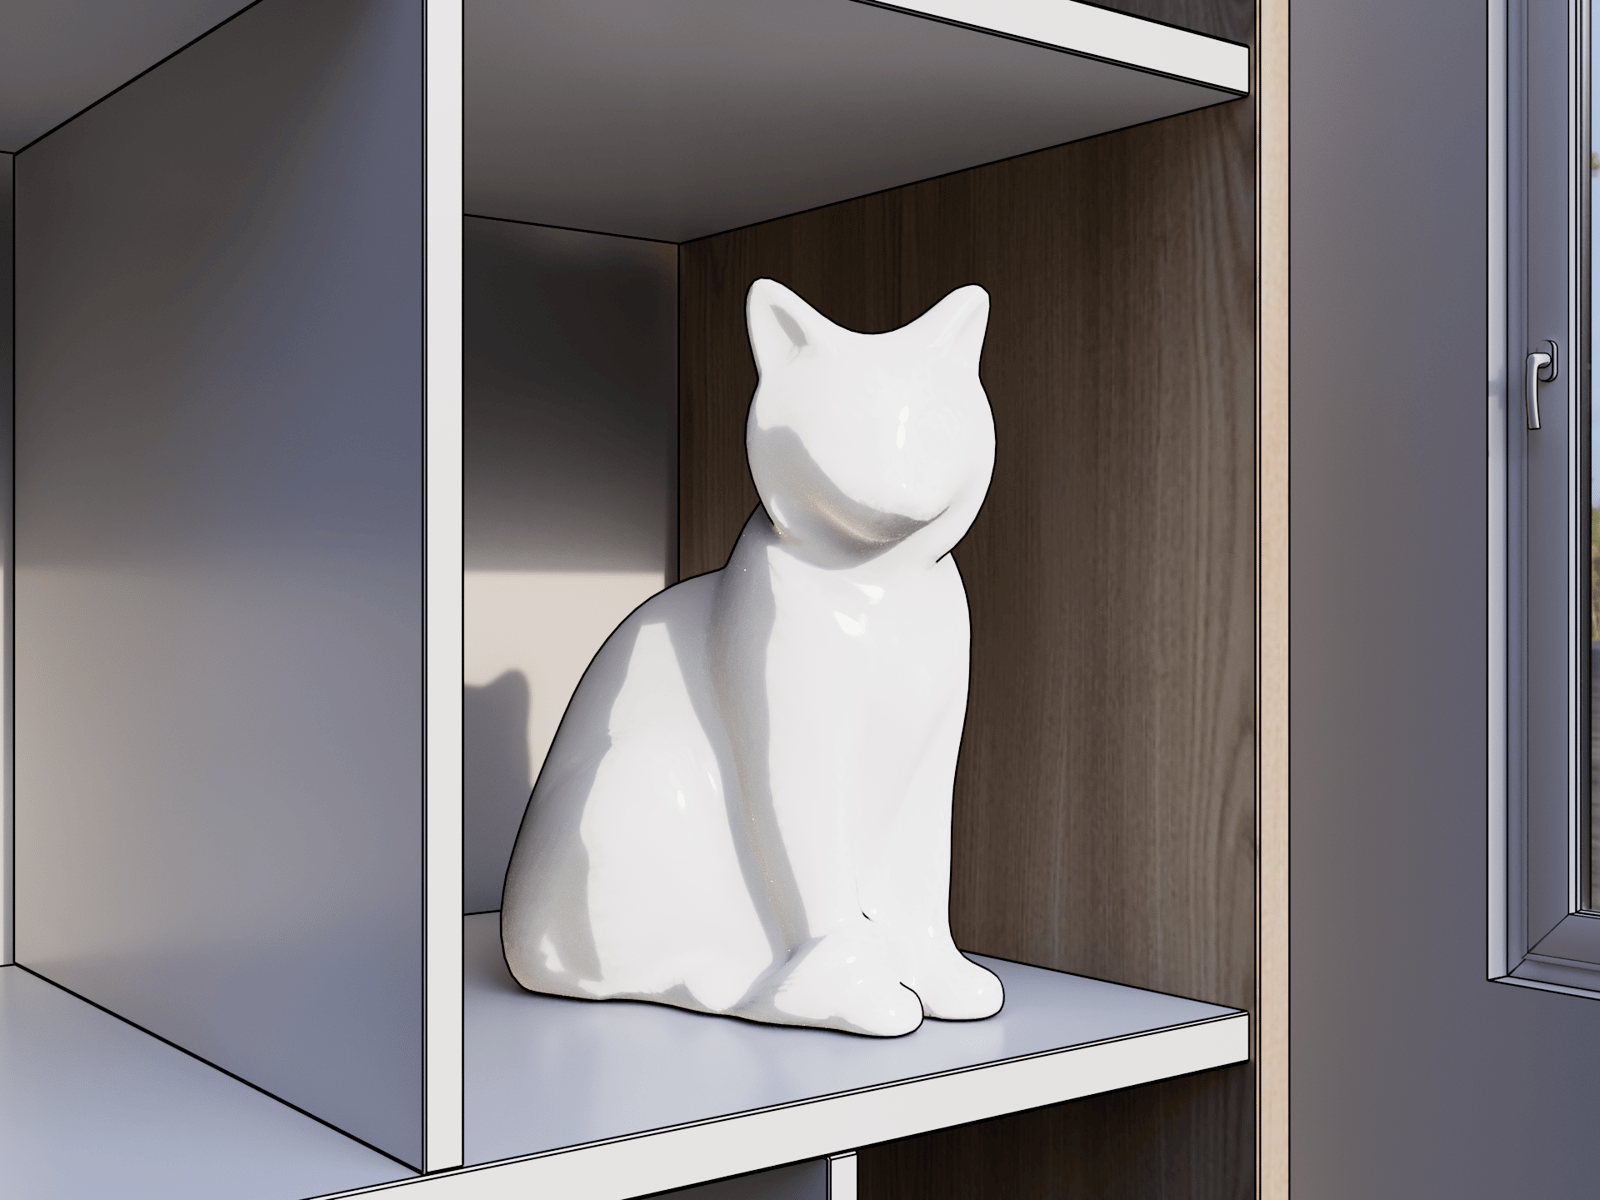
Toon Material on the cat with Shadow control enabled and colors in Shadow Ramp set to black and white.

Toon Material on the cat with Shadow control enabled and colors in Shadow Ramp set to red and blue, and GI Suppression set to 0.7