Enscape
Collaborative Annotation
This page provides information about the Collaborative Annotations tool.
Last updated 1 September 2026
This page provides information about the Collaborative Annotations tool.
Overview
Collaborative Annotations is a tool for adding notes or annotations (also called Issues) to aid project collaboration.
This collaboration tool can be opened through the Enscape Viewport, and through the C keyboard key, or by clicking the button in the Enscape Viewport User Interface (UI).

Collaborative Annotation button in the Enscape Viewport Toolbar
The Enscape Viewport adjusts to allow the Collaboration panel to display at the left side of the Enscape window.
The Collaboration tool can be used with locally stored projects or in conjunction with Newforma Konekt projects (which is a web-based issue tracking platform for BIM co-ordination).

Collaboration Tool panel location in the Enscape viewport
Set Source
Initially, define the Collaborations Setting’s Source data, whether it be ‘Local’ or ‘Newforma Konekt’.
This can be done by pressing the small Enscape icon on the right side of the Collaboration panel, which opens up a window to select the source.
This Source button’s icon changes from the Enscape logo to the Newforma Konekt Logo when a Newforma Konekt Source is selected.

Collaboration Tool Source Settings button

Source is set to Newforma Konekt
When the Source is set to Local, you require a Username that you obtain from your local network administrator. Or, you can simply work with the default setting - user@domain.

Select Local Source
Alternatively, when Newforma Konekt is set as the Source, you are prompted to log in to your Newforma Konekt account via your web browser. Therefore, you need to set up a Newforma Konekt account before you can select it as a Source.

Select Newforma Konekt Source
Create Issue - Overview
The options available when creating an Issue differ depending on the Source that is being used, but once you have selected your Source, you can create your first Issue.
Otherwise, click on either of the Create Issue buttons - in the list or at the bottom of the Collaborative Annotation’s panel.
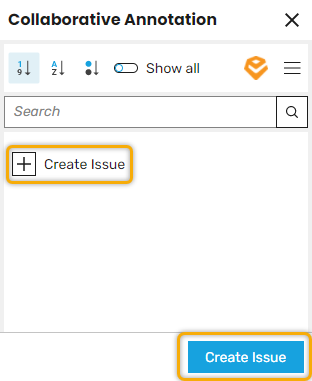
Create Issue buttons
Another way to create an issue is to right-click in the Enscape window and select the Create Issue option.
The Show BIM data option opens the BIM Information Panel. For more information, see the BIM Information Panel page.
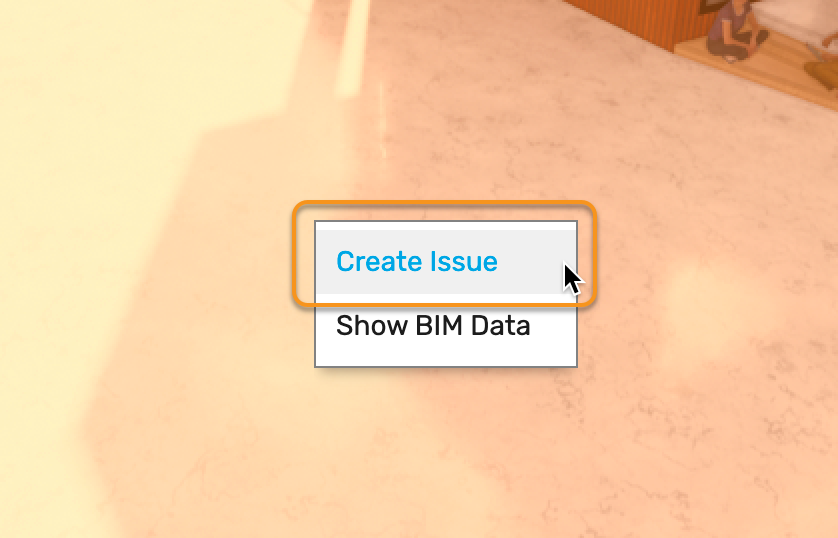
Create Issue via Enscape window option
If you choose to right-click in the Enscape window to create a new Issue, the Issue is created where you have initially right-clicked, indicated by the Issue Marker.

Create an initial Issue via right-click
When creating an Issue, a thumbnail for quick visual reference is automatically created from the current camera position. You can change the Issue’s associated thumbnail by repositioning the camera in the Enscape Viewport and then click the small Refresh button

in the thumbnail window to apply that change.

Thumbnail refresh
If you want to change the Issue marker position, then click on the Change Issue Position button.

Change Issue Position
After clicking the Change Issue Position button, you are then instructed to click on a 3D surface in the project in the Enscape Viewport to position the Issue marker.
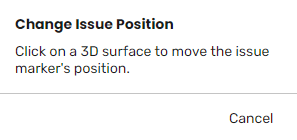
Prompt to move issue marker
Once completed, click the Save button, and the Issue is shown listed as a New Issue, marked by an orange dot.

Newly created Issue
If you try to exit the Issue without saving changes, a warning dialog appears.

Confirm changes to Issue
Once a number of Issues are created, the Sort options become available. From left to right, these options are Sort by ID, Sort by title, and Sort by state. Rolling the mouse pointer over each option reveals a hint box.

Sort Options
By default, only Issues that have a State of Open or In Progress are shown. To show Done and Removed Issues, click on the Show all button.
With the Show all button enabled, Issues that have a State of Done and Removed are visible in the Collaboration panel, and their associated Issue markers are visible in the Enscape Viewport.

Show all button
In the Enscape Viewport, the Issue’s marker color is the same color as that associated with the State in the Collaboration panel.

Show all Issue markers

If you want to remove an Issue, then select the Issue from the list and click on the button.
If the Source is set to Local, then an Issue can not be restored once it has been deleted.
Setting Newforma Konekt as your Source provides an archiving option which allows an Issue to be restored. See the issue creation overview for more information.

Delete Issue button
Local Source Issue Fields
When you create an Issue with the Source set to Local, you need to set the Details, including the State, the Title, the Description, and optionally the Thumbnail image for the Issue.
The Change Issue Position button is also available.

Create Issue using Local Source
You can also notice that a Comments tab is available if more information is required at any point. The State option is available across both tabs.
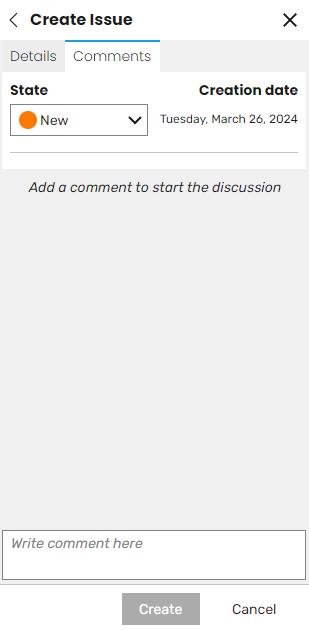
Comment tab
Newforma Konekt Source Fields
Working with a Newforma Konekt Source is slightly more involved than working with a Local Source, as there are more fields available in Newforma Konekt.
The first thing you need to do is set up a Newforma Konekt Account. Although Newforma Konekt works with all the CADs that Enscape supports, if you are using Revit, then Newforma Konekt additionally provide a free Revit Newforma Konekt plugin.
Optionally, once you have created your first HUB Project, you can export the Project from the CAD as an IFC file, which you can then upload via the Newforma Konekt Viewer option. This gives you more control but is not a necessary step.
For information on the full Upload workflow, see the Newforma Konekt workflow.

Upload IFC to Newforma Konekt Hub
The Hub and that Hub’s Projects are then listed in the Source area in Enscape. So, select the project that you want to add Issues to, and click Save.
Issues saved when the Source is set to Local when using Newforma Konekt, cannot be accessed.

Newforma Konekt Source listing
Create an Issue in Enscape, as described in the issue creation overview. The Details tab is in focus in the Collaboration tool, and the State is set to Open for the Issue by default. There is a different set of fields available than when using a Local Source. These fields correspond with those in the Newforma Konekt Hub.

Newforma Konekt Available Fields in Enscape
You will notice that we have a different set of Issue State options in a Newforma Konekt Source, and these relate to the available State options in the Newforma Konekt Hub.

Newforma Konekt State options
Here is a comparison of the options available with both tools.
To the left, the fields available in the Newforma Konekt Hub, and to the right the currently available fields in the Enscape Collaboration tool.

Available fields comparison
Once you have made changes to an Issue’s fields, you need to manually update the data by pressing the Refresh button in the Collaboration tool. The data automatically refreshes every 5 minutes by default. Hovering the mouse over the Refresh button displays an info box that contains the length of time to the next refresh is visible.
Refresh Button in Enscape
In Newforma Konekt, it is possible to Archive Issues, and these can also be restored to the project or deleted forever. Restoring an Issue has to be performed in the Newforma Konekt Hub under the Archived Issues option. This is not the case when working with a Local Source, where no archiving is currently possible.
However, you can preliminarily Archive an Issue in Enscape’s Collaboration tool when Newforma Konekt is set as the Source. To do this, click on the Issue you would like to archive, and then click the Archive button at the bottom left of the Collaboration panel.
Archive Issue button
Known Issue: Newforma Konekt API Change
Newforma is replacing the permission service behind the Newforma Konekt (BIM Track) API. The change is scheduled for 24 August 2026 and alters how user roles are returned by the API. The change applies to all integrations that connect to Newforma Konekt, including Enscape.
What you may experience
If you are signed in to Newforma Konekt in Collaborative Annotation, issue synchronization can fail without an error message. Confirmed effects so far:
- Issue thumbnails are not saved.
- Comments added to new issues are not saved.
Because the failure is silent, other parts of the integration might also behave unexpectedly. The list above shows confirmed examples, not a complete list. Verify in Newforma Konekt that your issues contain everything you expect.
Why this cannot be fixed in older Enscape versions
The change originates on the Newforma side and is not backward compatible. Previously released Enscape versions target the earlier API and cannot be updated retroactively to support the new one.
Import / Export BCF Files
The Import / Export BCF Menu option currently only works if the Source is set to Local.
To export a BCF, choose the Export Issues to BCF option from the menu.
When importing a BCF file, the file must have been originally exported from the same project file.
It is possible to import a BCF file into a Newforma Konekt project via the Newforma Konekt Hub, but the Issue Markers will require repositioning.

The Import / Export BCF Menu.