V-Ray for Cinema 4D
Node Materials
This page provides information about the V-Ray Node materials available in V-Ray for Cinema 4D, find out how to create, assign, and use them.
Last updated 19 September 2025
This page provides information about the V-Ray Node materials available in V-Ray for Cinema 4D, find out how to create, assign, and use them.
Overview
V-Ray Node Space offers a number of nodes and node categories. Some of these nodes are Material nodes, used to add shaders to objects. V-Ray offers two output (Colored) nodes - Material and Two Sided Material. Each Node system holds only one output (Colored) node.
Node Materials
Surface
Node | Description |
Node | Description |
Reproduces the appearance of skin. | |
Layers several V-Ray-compatible surfaces in an efficient manner. | |
Adds bump map and normal map effects when using any material. | |
Simulates metallic car paint. | |
Designed for Rendering translucent materials like skin, wax, marble, etc. | |
Designed for rendering hair and fur. | |
Produces self-illuminated surfaces. | |
Loads OSL shader code files (.osl) or OSL object code files (.oso) and renders them directly with V-Ray. | |
Allows a surface to look different, depending on whether it is seen through reflections, refractions, or GI. | |
Allows the rendering of scanned BRDF material data stored in .vrscan files. | |
Simulates car paints, snow, and other glittery materials. | |
Switches between different materials based on a value sampled from a texture. | |
Creates 2D cel and cartoon effects. | |
This surface node can be easily set up to simulate a huge variety of surfaces like plastics, metals, glass and more by adjusting a handful of parameters. | |
Loads a V-Ray shader from a file (.vrmat, .vismat, .vrscene, .mtlx) and makes the materials in these files available for use in the scene. |
Material
Node | Description |
Node | Description |
An output node. All other shading nodes can be inputs to this node. | |
Allows two surface nodes to be set as inputs, whereas the Material allows only one surface node. |
How to Create Node Materials
For Cinema 4D version R26 or newer
Make sure V-Ray is your Renderer. This is done through Render Settings > Renderer.
Go to the Material Manager and from V-Ray > V-Ray Node Materials, select a node material from the list.
If the Separate menu for V-Ray materials option in the Preferences is disabled, go to Create > V-Ray > V-Ray Node Materials.
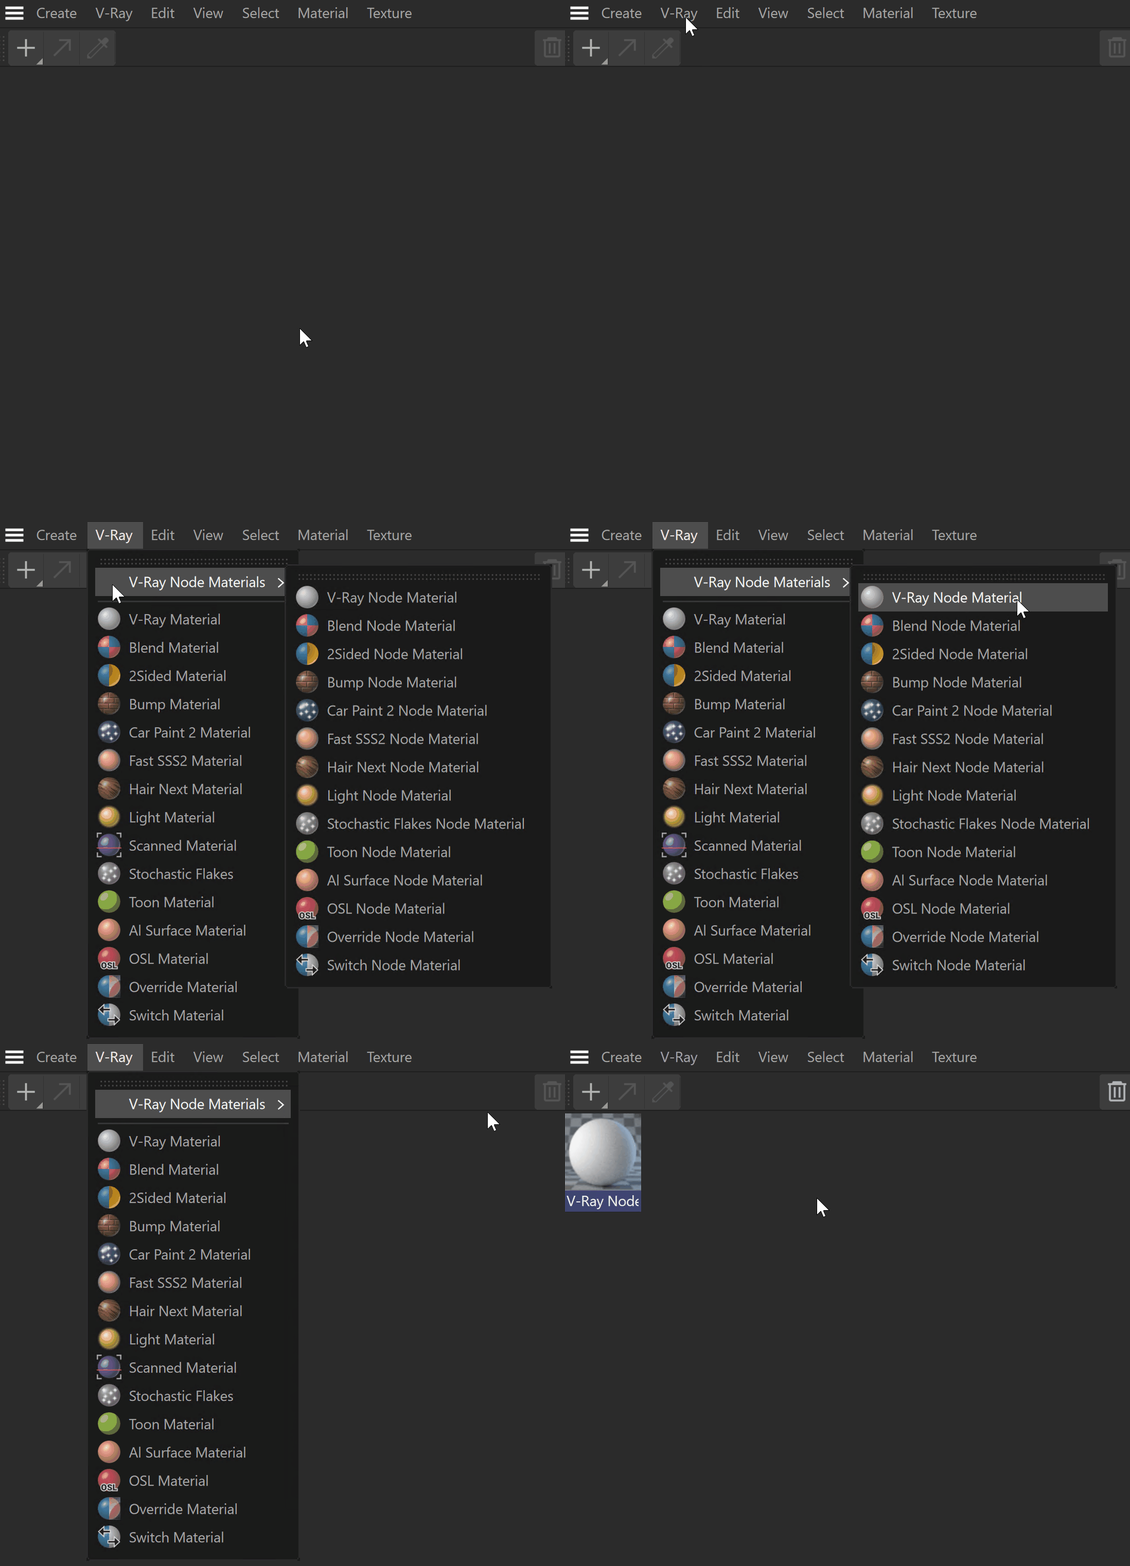
Click on the GIF to view it in full size
For Cinema 4D version R25
Make sure V-Ray is your Renderer. This is done through Render Settings > Renderer.
Go to the Material Manager and from Create > Materials, select New Node Material.
Alternatively, go to V-Ray > V-Ray Node Materials and select a V-Ray surface material from the list. If the Separate menu for V-Ray materials option in the Preferences is disabled, go to Create > V-Ray > V-Ray Node Materials.
The Node editor opens and you can now work with all available V-Ray nodes.
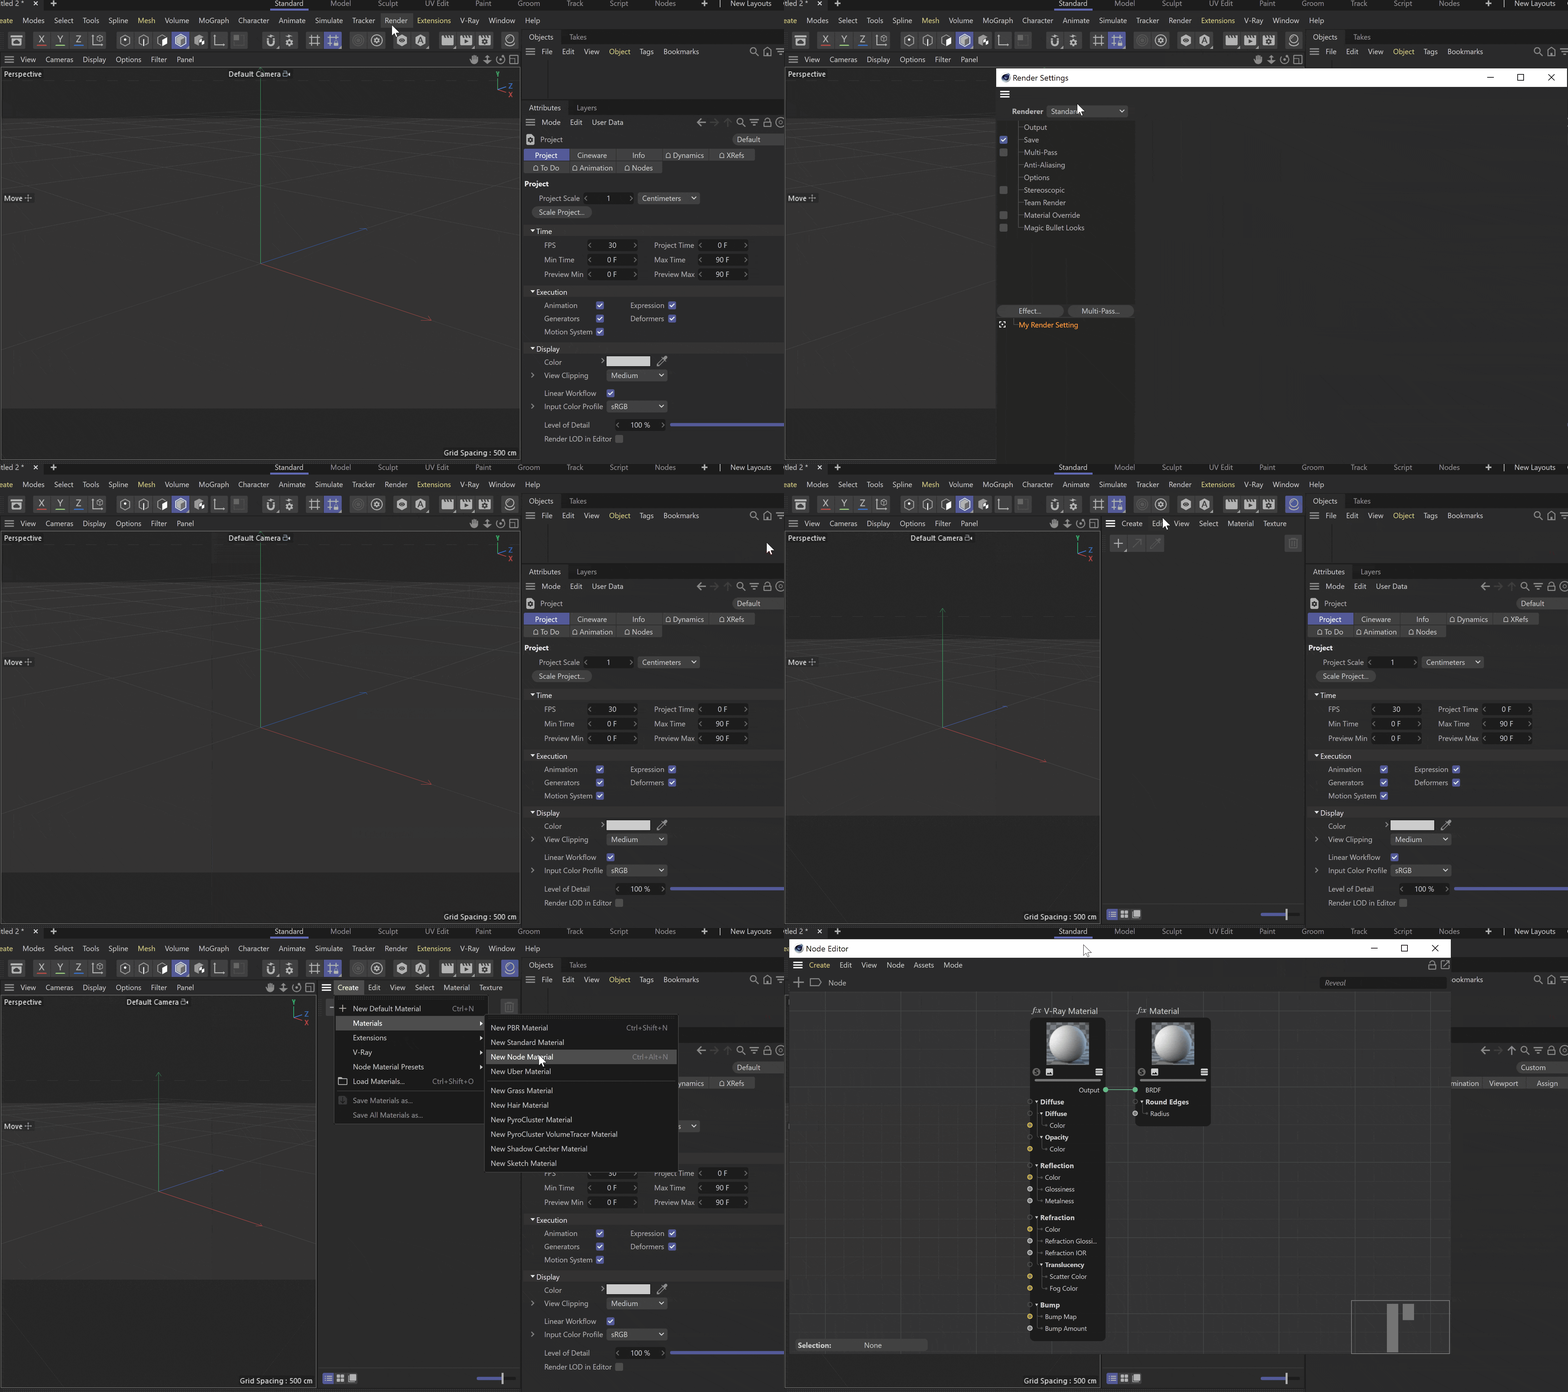
Click on the GIF to view it in full size
Alternatively, there is a V-Ray Node Materials option available. If a scene is saved with the default Cinema 4D node materials, you can use this menu to create and open the V-Ray Nodes.
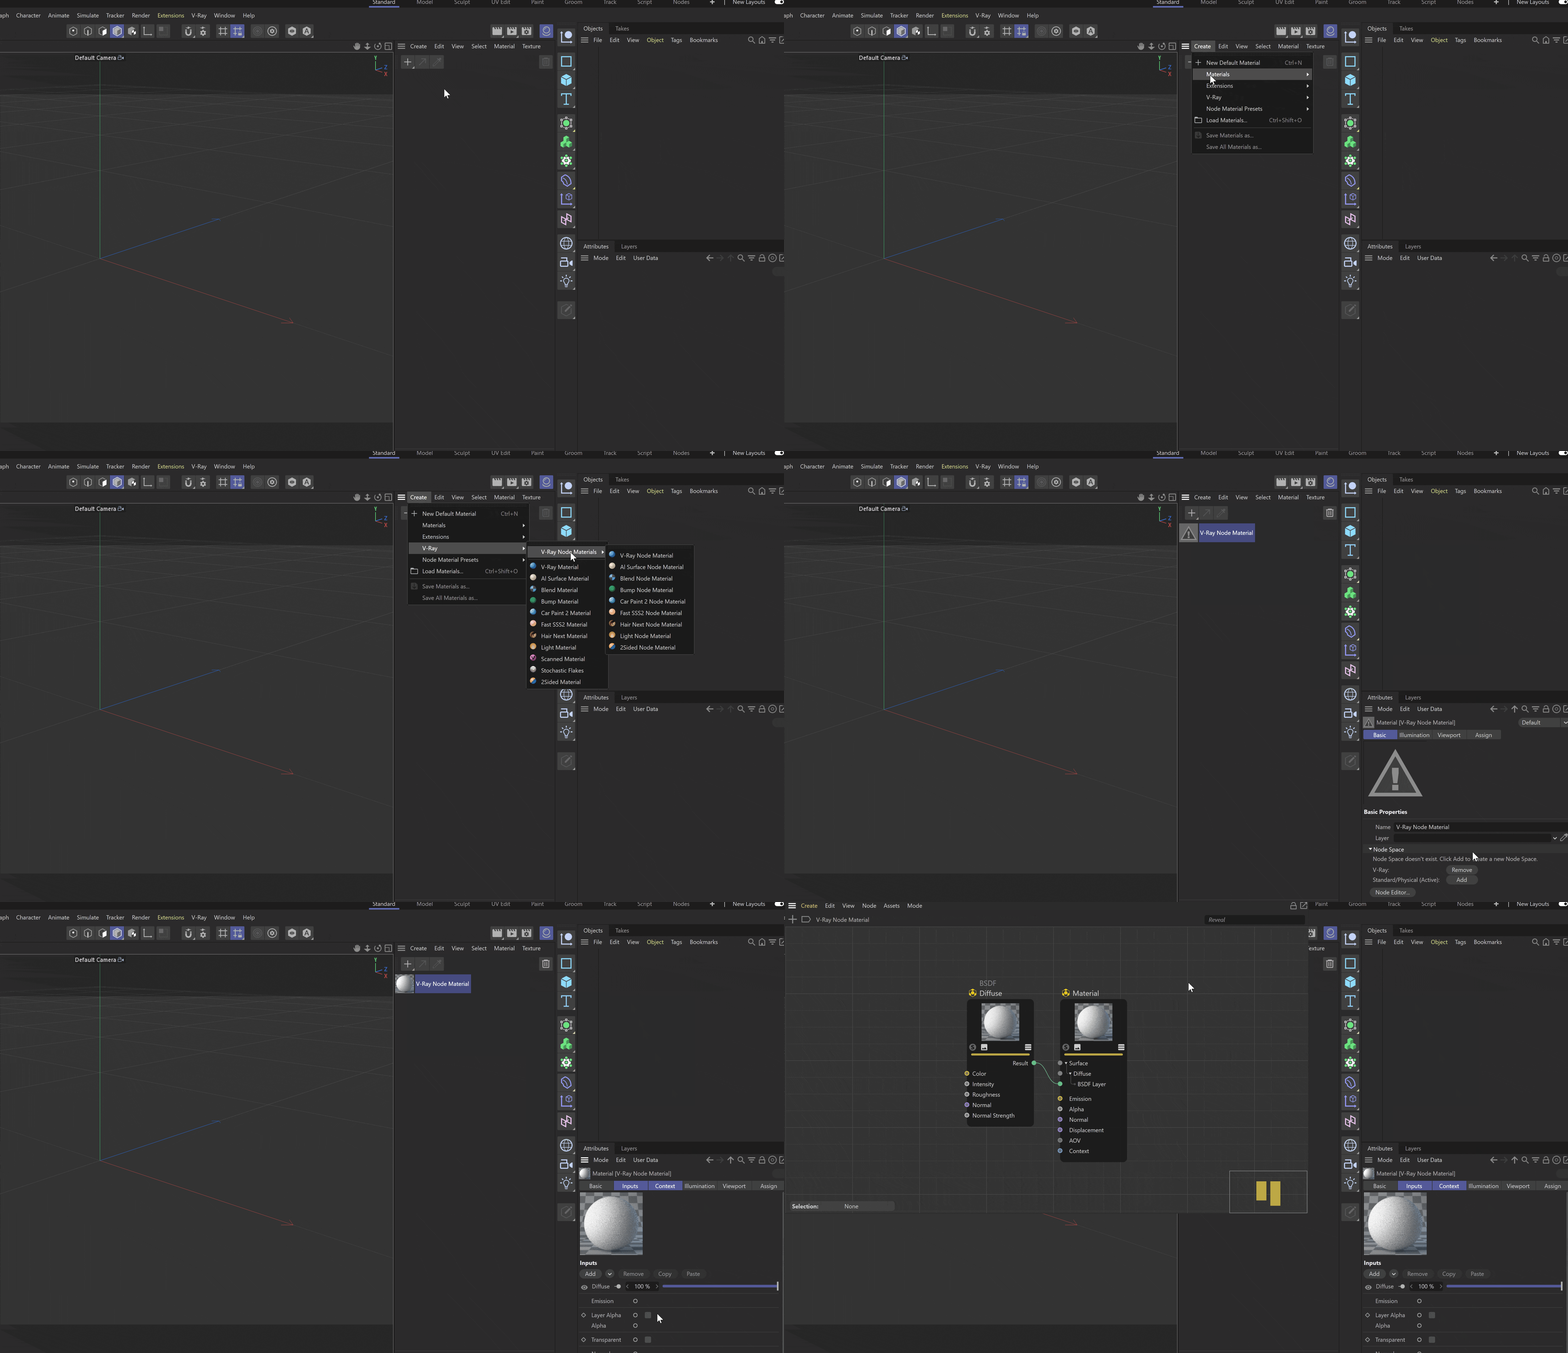
Click on the GIF to view it in full size
For Cinema 4D up to version S24
First, make sure you work in the V-Ray Node Space. You can select it from the drop-down menu of the Node Space option.
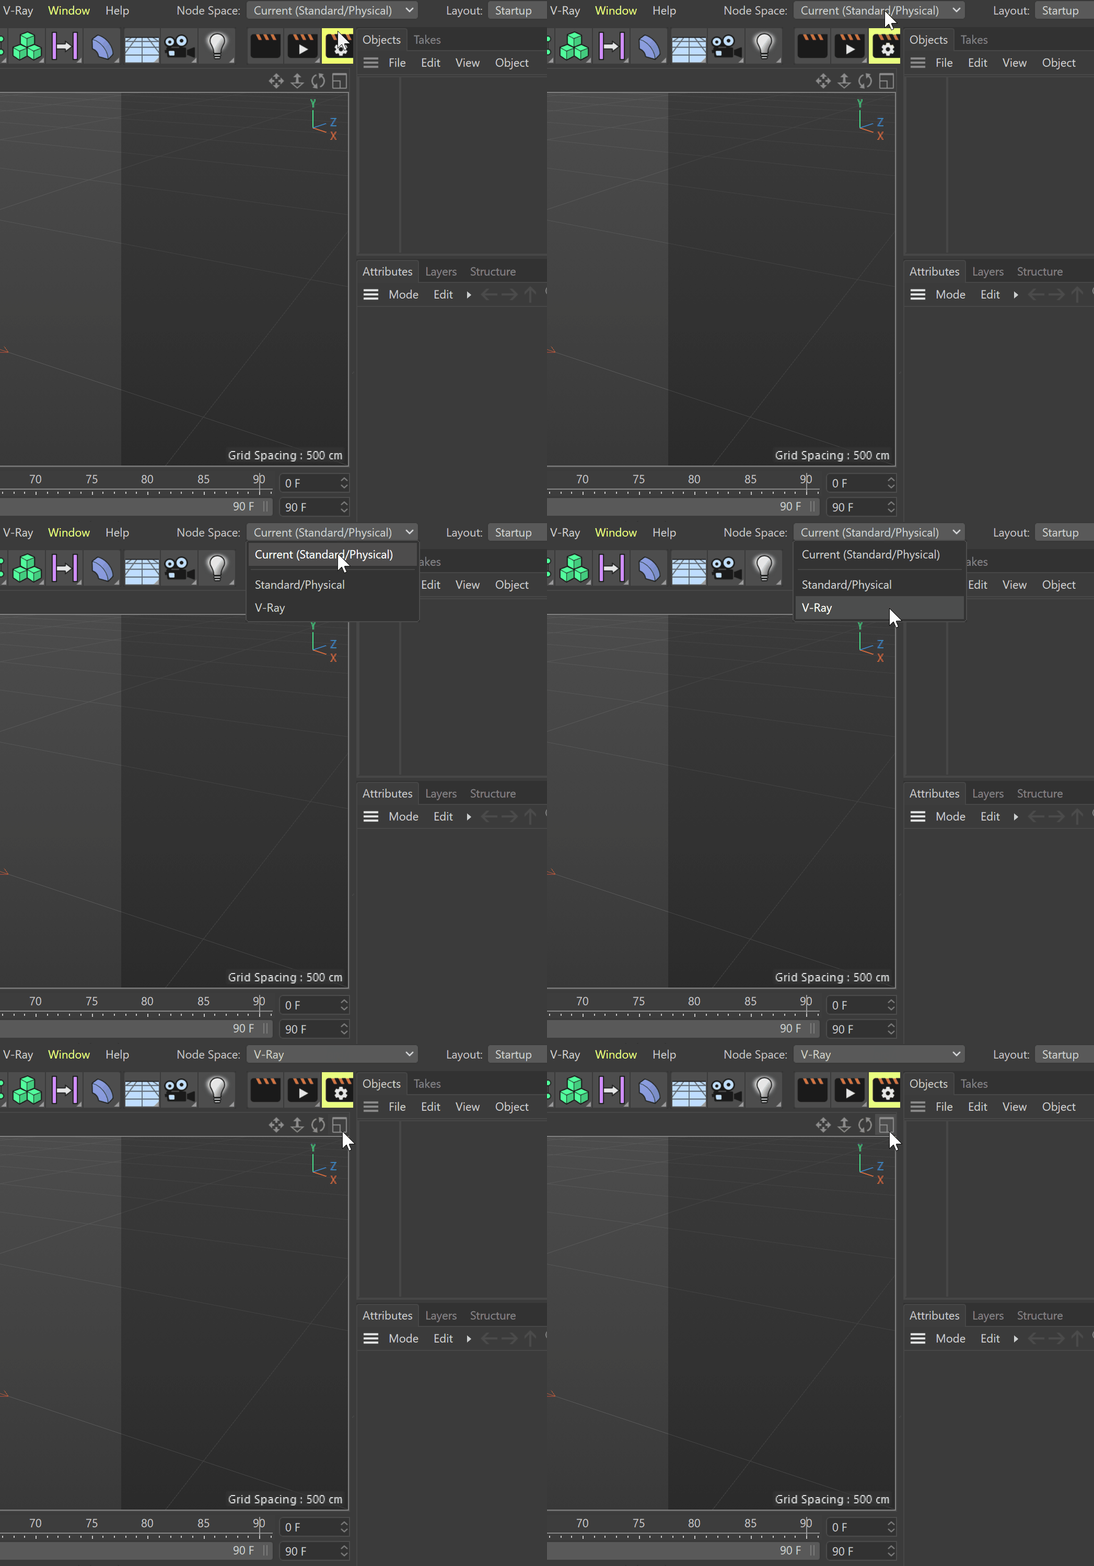
Click on the GIF to view it in full size
Then, go to the Create menu > Materials and select the New Node Material option.
A new Material node is created. When you double-click on the node, the Node Editor is opened. Now you can work within the Node Editor by creating and adjusting V-Ray nodes.
Alternatively, you can open the Node Editor by going to Window > Node Editor... and switching the Mode to Material.
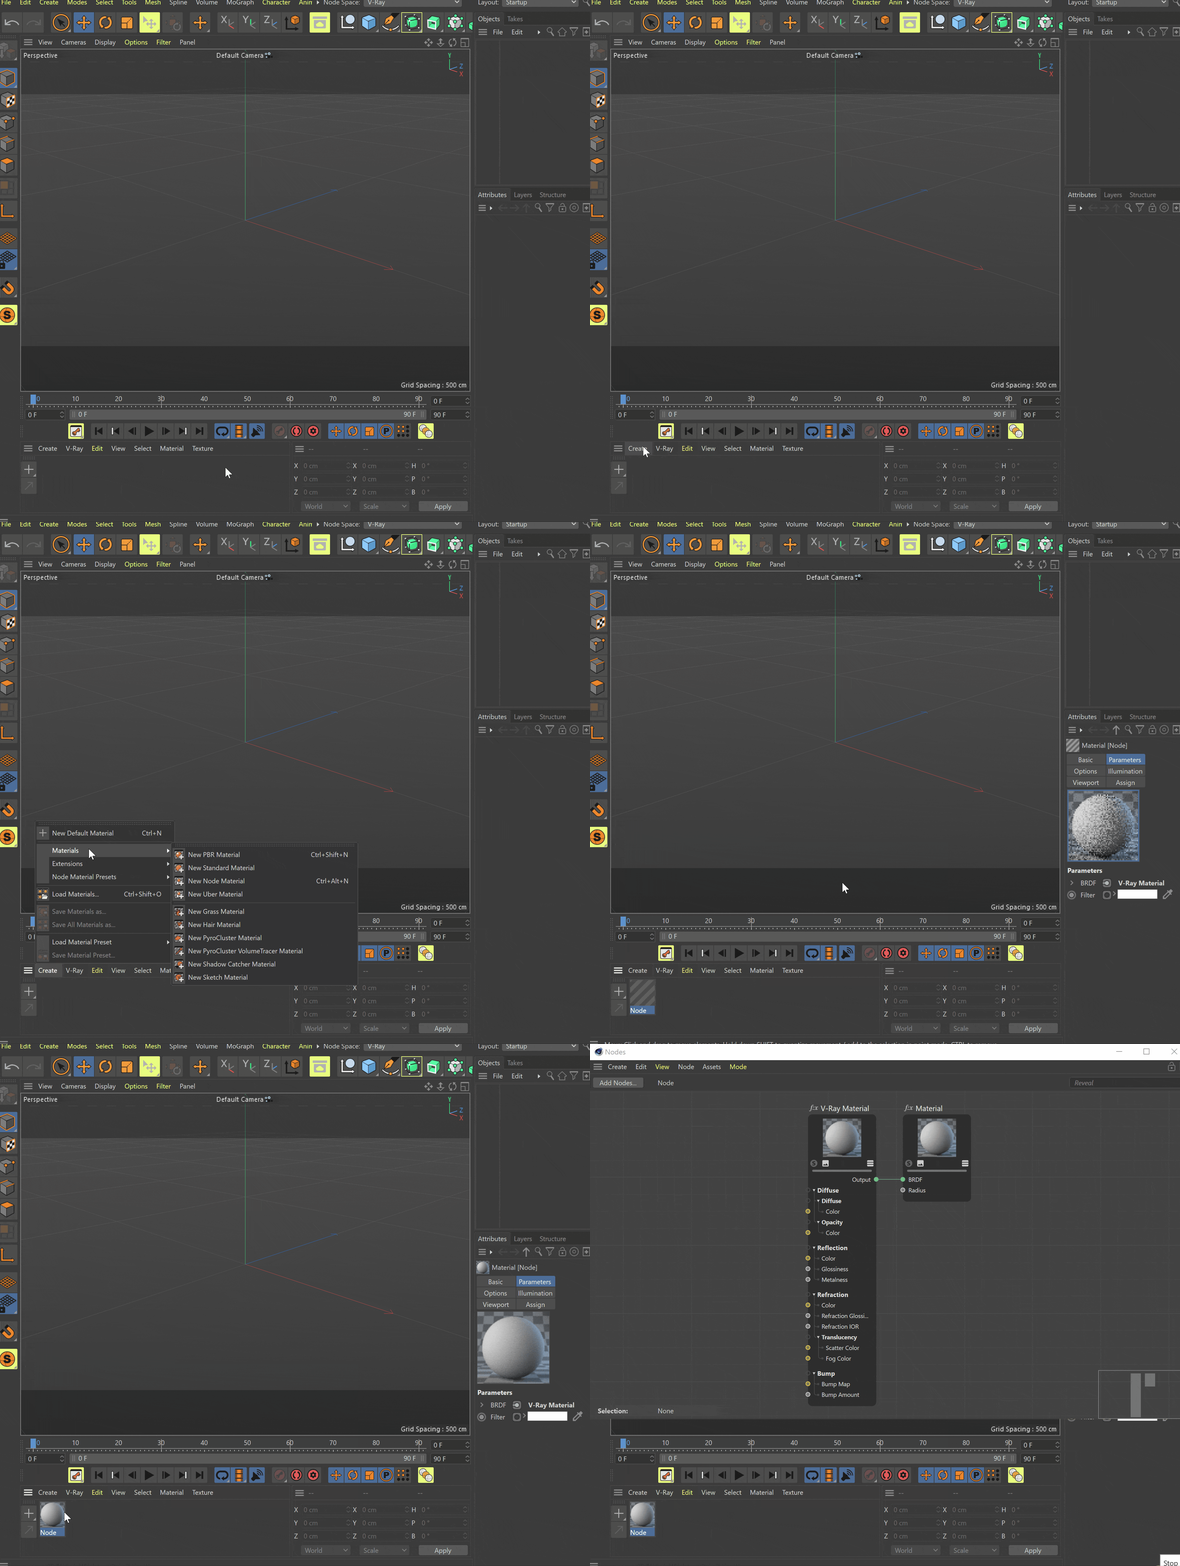
Click on the GIF to view it in full size
V-Ray Nodes can also be created directly from the Node Editor. Go to the Add Nodes... menu, and from the Materials folder, choose either Material or Two Sided Material, as these are V-Ray's Color nodes.
To connect a surface node, open the Surface folder and select from the list. Drag-and-drop onto the editor or directly into the desired port of the Material (or Two Sided Material).
Click on the GIF to view it in full size
Alternatively, there is a V-Ray Node Materials option available. If a scene is saved with the default Cinema 4D node materials, you can use this menu to create and open the V-Ray Nodes.
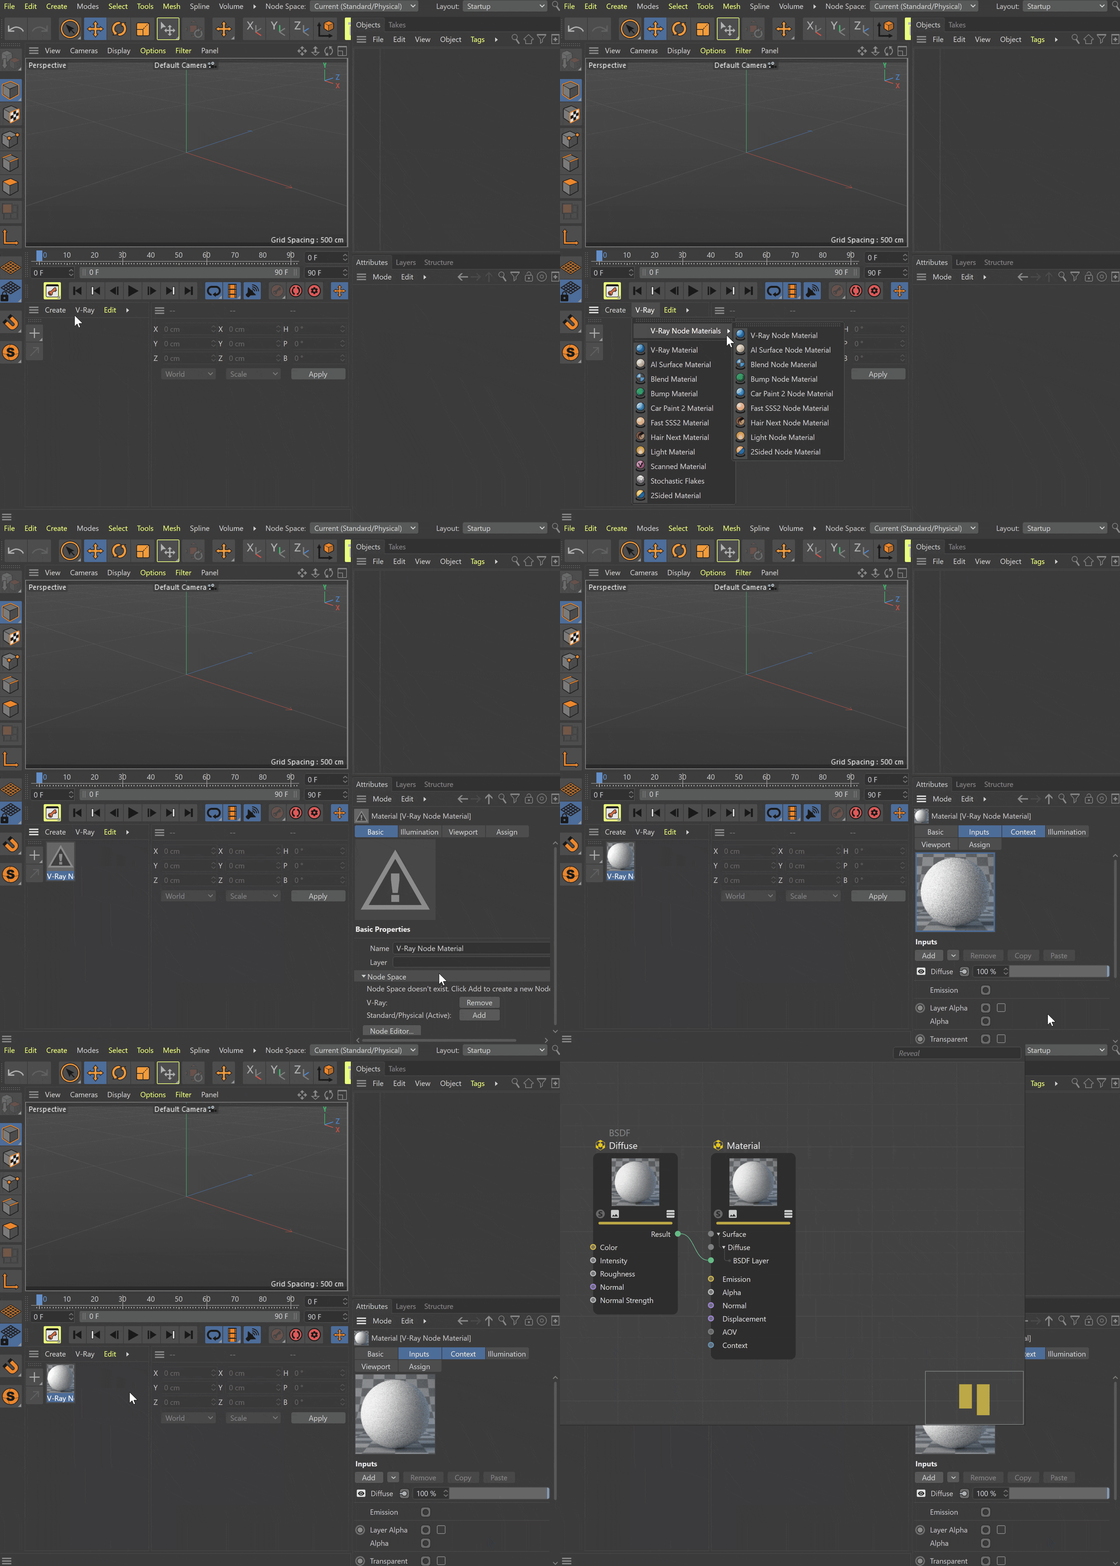
Click on the GIF to view it in full size
How to Assign a Node to an Object
From the Attributes tab, select the Material node (or the Two Sided Material node) and drag-and-drop it over the geometry object.
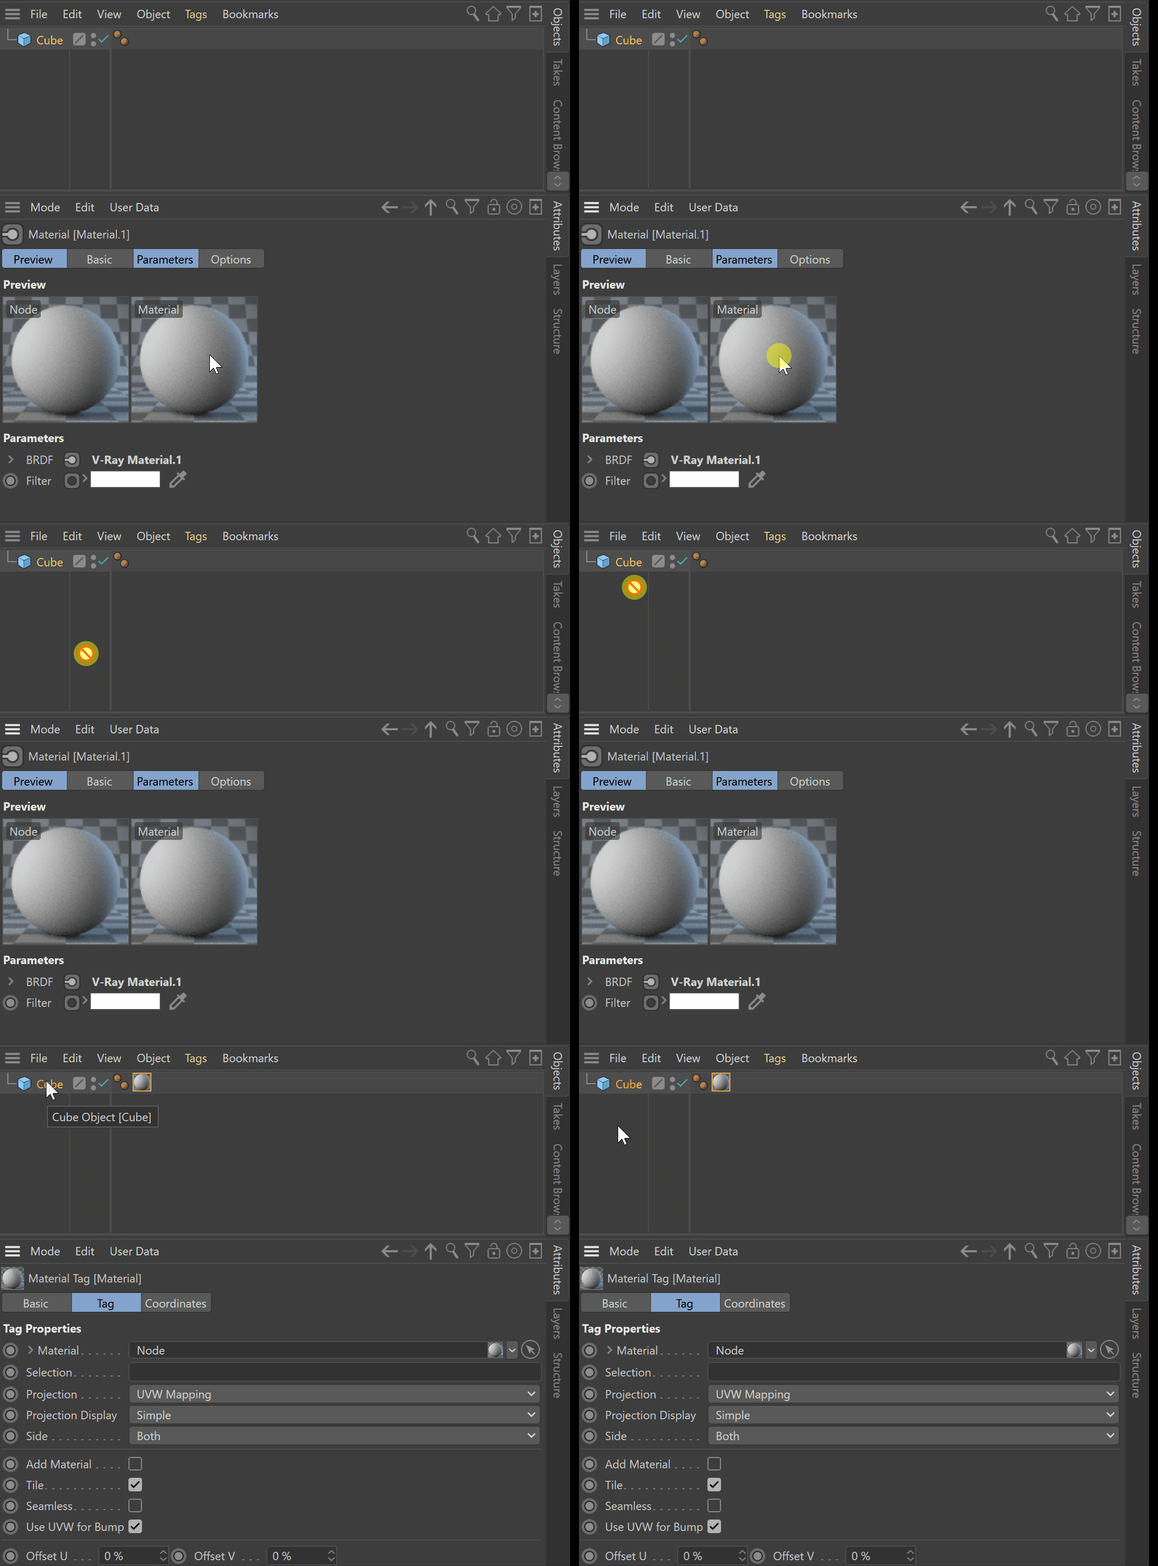
Click on the GIF to view it in full size
How to Use Cinema 4D's Native Solo Node Mode

The Solo Node, represented by the button on each node, is a native Cinema 4D feature. It singles out the selected node, making it the "main" node of the shader. Disabling the Solo Node mode returns the shader's behavior to normal. This is useful for look development and testing.
Click on the GIF to view it in full size
Double-click to Create Materials Workflow
V-Ray supports the Cinema 4D option to quickly create materials by double-clicking in the Material Manager. See the Materials page for an overview of the workflow.
IO Nodes
- If you are working with Floating IO nodes, note that they are not compatible with V-Ray. When you transfer a scene from Cinema 2025 to Cinema R26, an extra node Group is added. To work around this, delete the Group and link the node directly to the V-Ray Material.
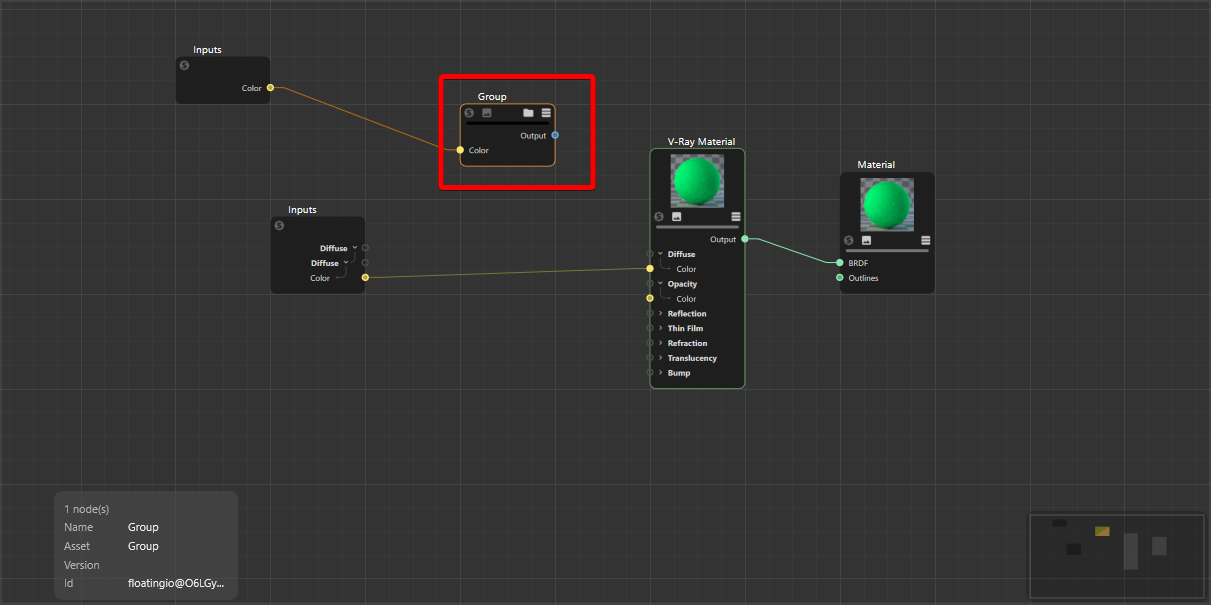
Node Editor in Cinema R26