V-Ray for Rhino
Sky
This page provides information on the V-Ray Sky Texture.
Last updated 18 May 2026
This page provides information on the V-Ray Sky Texture.
Overview
V-Ray Sky is a special feature provided by the V-Ray renderer to work with the V-Ray Sun. Together, V-Ray Sun and V-Ray Sky reproduce the real-life Sun and Sky environment of the Earth. Both are coded so that they change their appearance depending on the direction of the V-Ray Sun.
When the V-Ray Sun and Sky systems are connected together, they share a number of parameters. For example, changes made to the Sun section of the Sky Texture directly affect the V-Ray Sun. See the SunLight page.
To add the Sky texture as an Environment one, go to Textures and select the auto-generated Environment Texture. Press the Replace With New Texture button and select the Sky texture instead.


UI Paths
||V-Ray Asset Editor|| > Textures (right-click) > Sky
||V-Ray Asset Editor|| > Create Asset (left-click) > Textures > Sky
Parameters
Sun – Specifies the V-Ray Sun node that is used for the Sky texture creation. The Sun orientation (position) affects the Sky gradient. The following parameters affect this specific Sun light.

Custom Orientation
Enable – Enables custom orientation.
Horizontal Angle – Controls the custom sun azimuth angle (horizontal rotation).
Vertical Angle – Controls the custom sun altitude angle (vertical rotation).

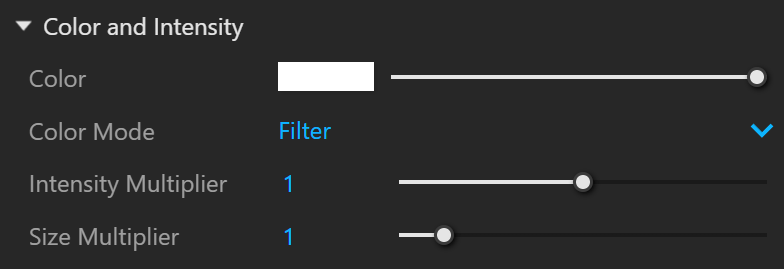
Color and Intensity
Color – Shifts the hue of the SunLight system towards the color specified in the field.
Color Mode – Determines the way the color in the Filter color parameter affects the color of the sun.
Filter – Shifts the V-Ray sun's hue according to the Filter Color parameter.
Direct – Sets the color of the V-Ray sun to the color in the Filter Color parameter. The intensity of the light no longer depends on the V-Ray Sun's position in the sky. Instead, intensity is controlled through the Intensity Multiplier.
Override – Sets the color of the V-Ray sun to the color in the Filter Color parameter. The intensity of the light still depends on the V-Ray Sun's position in the sky.
Intensity Multiplier – Determines the brightness of the sun and can be used to reduce the default brightness. See the Intensity Multiplier example below.
Size Multiplier – Determines the visible size of the sun. This includes the appearance of the sun disc as seen by the camera and reflections, as well as the blurriness of the sun shadows. See the Size Multiplier example below.
Example: Intensity Multiplier
Common settings in this example are Turbidity: 3.0, Size Multiplier: 1.0, EV: 14,48 (default).
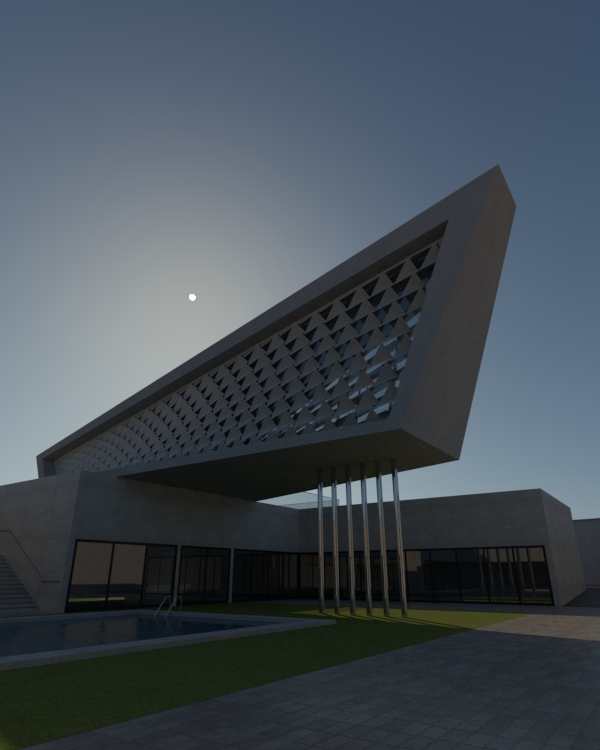
Altitude:
30 degrees,
Intensity Multiplier:
0.5
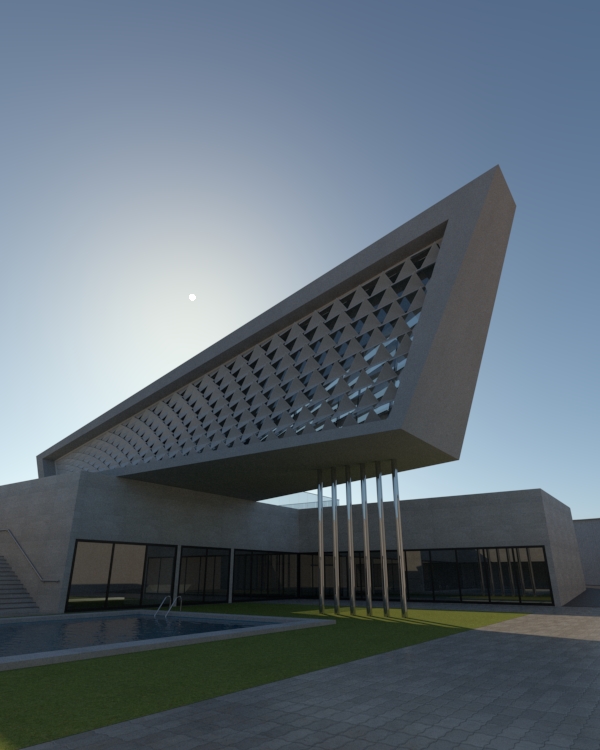
Altitude:
30 degrees,
Intensity Multiplier:
1

Altitude:
50,
Intensity Multiplier:
0.5

Altitude:
50,
Intensity Multiplier:
1.0
Example: Size Multiplier
Common settings in this example are Turbidity: 3.0. This example demonstrates the effect of the Size multiplier parameter. Notice how changes in this parameter affect both the visible sun size and the shadow softness (however overall illumination strength remains the same).
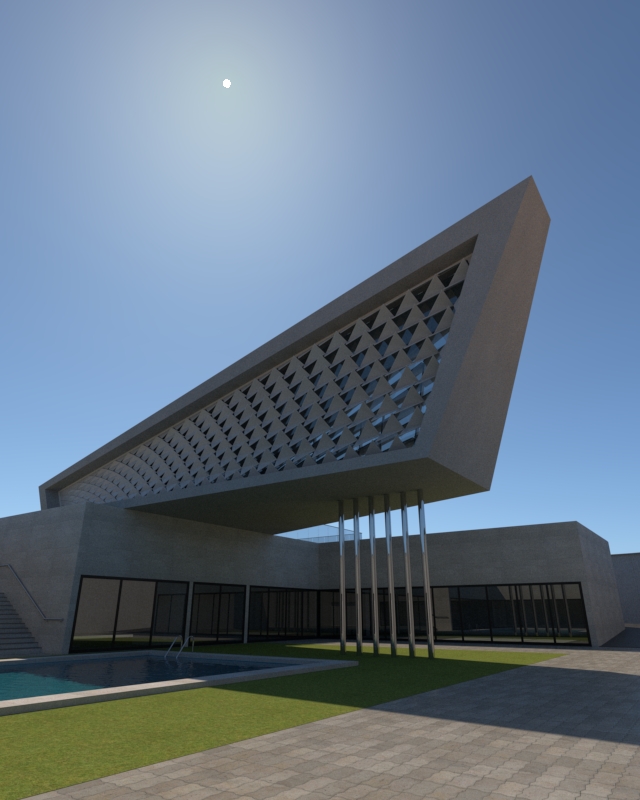
Size Multiplier
= 1

Size Multiplier
= 5

Size Multiplier
= 10
Sky
Sky Model – Specifies the procedural model that is used to generate the V-Ray Sky texture.
Preetham et al. – V-Ray Sky procedural texture is generated based on the Preetham et al. method.
CIE Clear – V-Ray Sky procedural texture is generated based on the CIE method for clear sky.
CIE Overcast – V-Ray Sky procedural texture is generated based on the CIE method for cloudy sky.
Hosek et al. – V-Ray Sky procedural texture is generated based on the Hosek et al. method.
PRG Clear Sky – V-Ray Sky procedural texture is generated based on the PRG Clear Sky method which has enhanced sunrise and sunset sky. See the New PRG Clear Sky Altitude, Turbidity, and Nautical Twilight Effect examples below.
Horizon Illum. – Specifies the intensity (in lx) of the illumination on horizontal surfaces coming from the sky.
Altitude – Controls the observer's altitude in meters. As the altitude increases, sky clarity improves, and the horizon line becomes less defined.
Turbidity – Determines the amount of dust in the air and affects the color of the sun and sky. Smaller values produce a clear, blue sky and sun as seen in rural areas, while larger values make them yellow and orange as seen in a big city's atmosphere. See the Turbidity example below.
Ozone – Affects the color of the light. Values closer to 0.0 make the sunlight yellow, and values closer to 1.0 make it blue. See the Ozone example below.

Example: PRG Clear Sky New - Altitude
This example shows how the Altitude values affect the visualization of the sky. Higher Altitude values result in better sky clarity and a less defined horizon line.
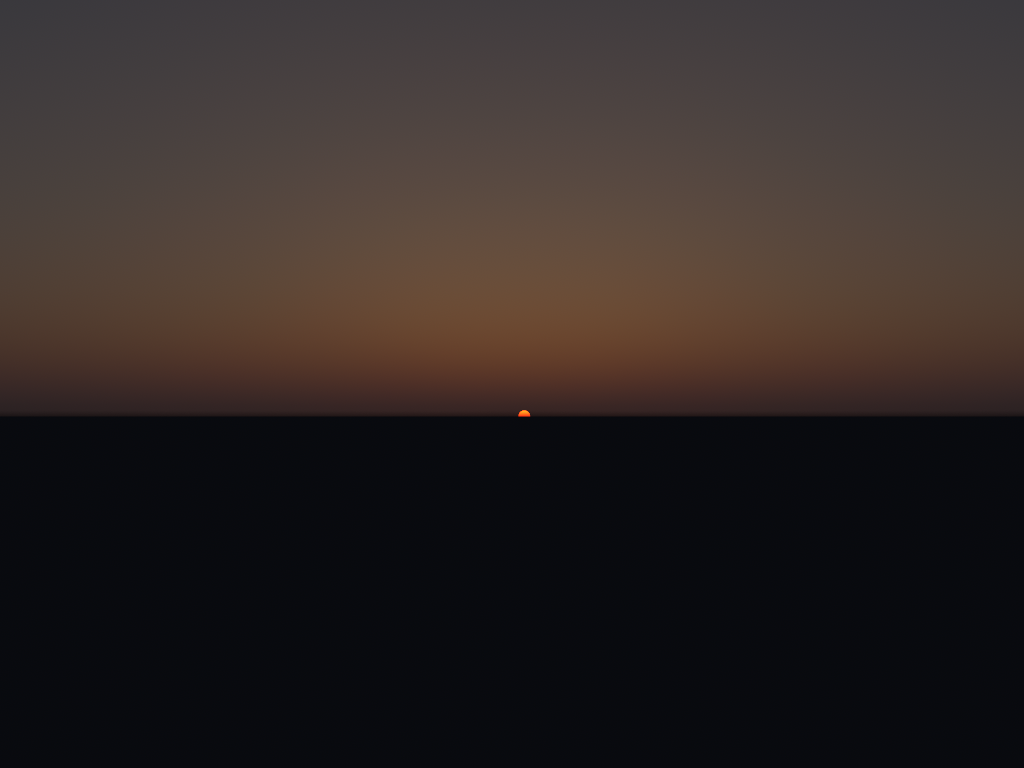
Altitude
= 0

Altitude
= 1000

Altitude
= 2000

Altitude
= 10000

Altitude
= 15000
Example: PRG Clear Sky New - Turbidity
In this example, you can see how the amount of dust in the air affects the color of the sun and sky. Smaller values produce a clear image, while higher values dim the sun and sky.

Turbidity
= 2

Turbidity
= 2.6

Turbidity
= 3

Turbidity
= 4

Turbidity
= 5
Example: PRG Clear Sky New - Nautical twilight effect
This example shows how the sun's position affects the sky, creating a twilight effect. Changing the sun's position could require adjusting the Exposure Value as well.

Exposure Value
= 10;
Sun below the horizon
= 0°

Exposure Value
= 10;
Sun below the horizon
= -2°

Exposure Value
= 10;
Sun below the horizon
= -4°
Example: Turbidity
This example demonstrates the effect of the Turbidity parameter. Generally, this controls the amount of dust particles in the air. Notice how larger values cause the sun and the sky to become yellowish, while smaller values make the sky clear. Enabled: on, Intensity multiplier: 0.01, Size multiplier: 1.0

Turbidity
= 2.0
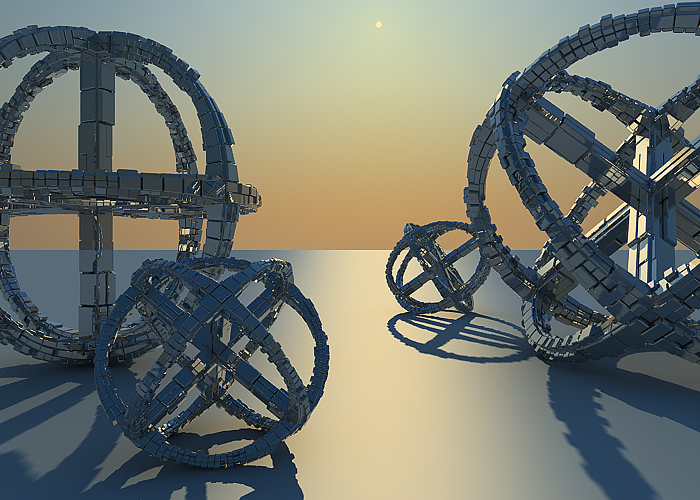
Turbidity
= 4.0

Turbidity
= 8.0
Example: Ozone Value
Common settings in this example are Turbidity: 2.0, Intensity Multiplier: 0.01, Size Multiplier: 10.0. The Ozone parameter affects only the color of the light emitted by the sun.

Ozone
= 0.0

Ozone
= 0.5

Ozone
= 1.0
Night Sky
Simulates a realistic procedural night sky, complete with the Moon, stars, and the Milky Way. As part of the Sun and Sky system, Night Sky allows users to create accurate nighttime environments based on real-world positioning.
The location and time used to position the stars and the moon are determined by the host application. They can be manually defined using the Custom Location and Time parameters.
Stars
Enabled – Enables the appearance of stars and the Milky Way in the night sky.
Size Multiplier – Controls the size of the stars. A default value of 1 renders the stars with radius of 1 pixel, a value of 2 makes the stars twice as large. If set to 0 the stars are rendered with the minimum size possible.
Size Difference Mult – Controls the size difference between faint and bright stars. When set to 0, all stars have the same size, and a value of 1 makes the brightest stars twice as large, the second magnitude stars (e.g. Polaris) keep their size, and the faintest stars disappear.
Direct Light Mult – Controls the brightness of the directly visible stars in the sky or in perfect mirror reflections/refractions. See the Direct Light example below.
Indirect Light Mult – Controls the brightness of the scene illumination caused by the stars. See the Indirect Light example below.
Milky Way Mult – Amplifies the brightness of the Milky Way.

Example: Direct Light
The Direct Light parameter controls the brightness of the stars in this example.

Brightness = 0.5

Brightness = 1

Brightness = 2
Example: Indirect Light
The Indirect Light parameter controls the intensity of the stars in this example.

Intensity = 1
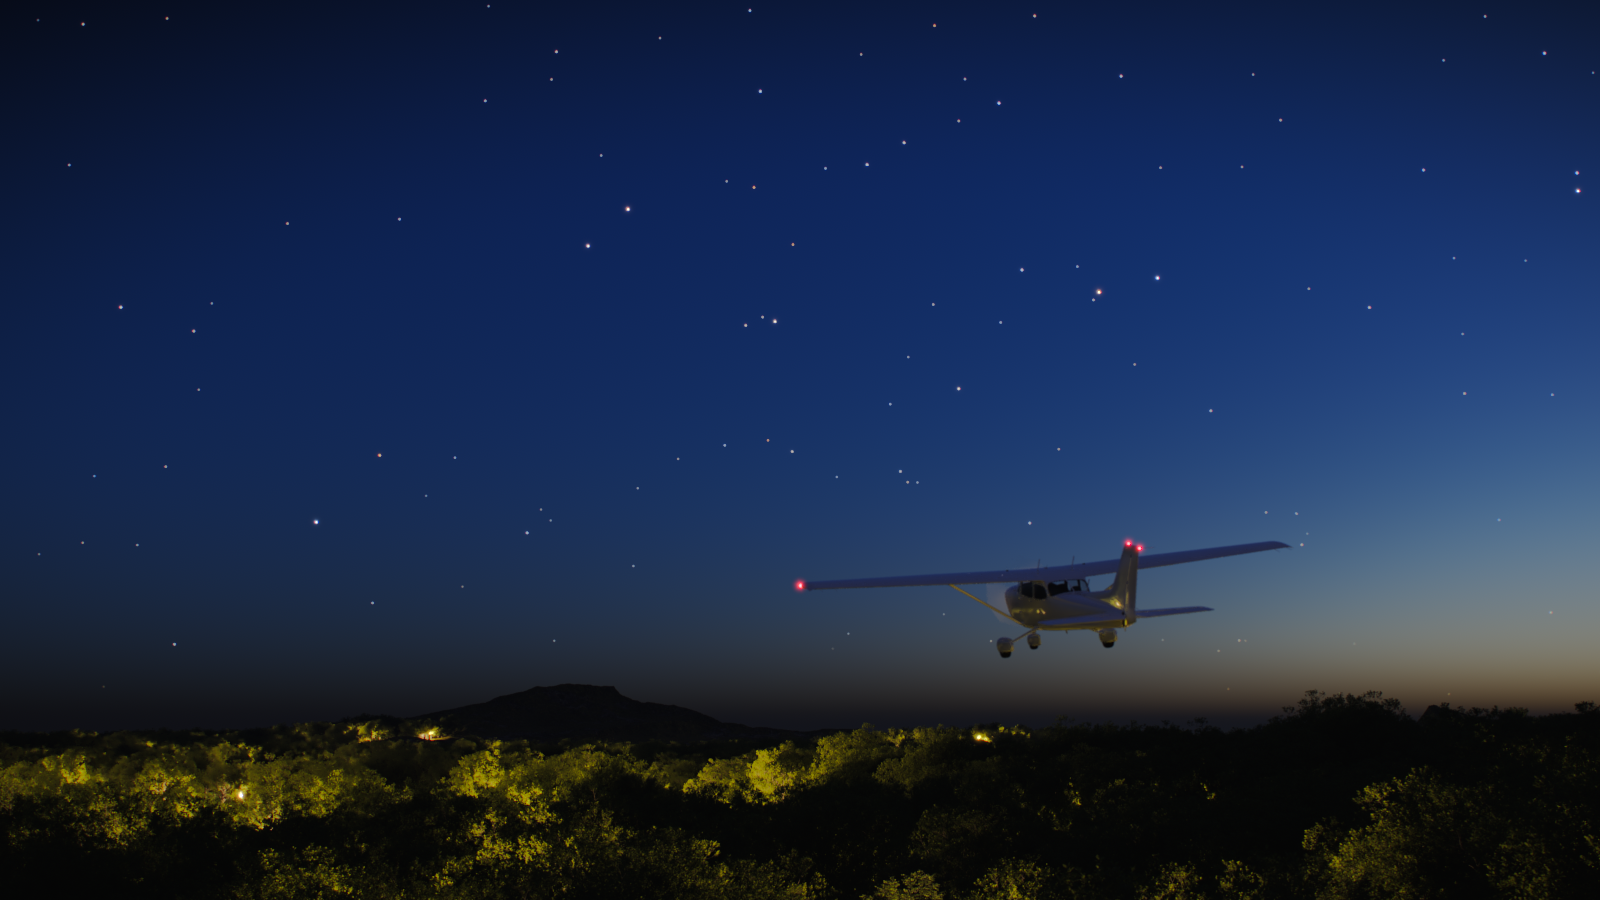
Intensity = 4
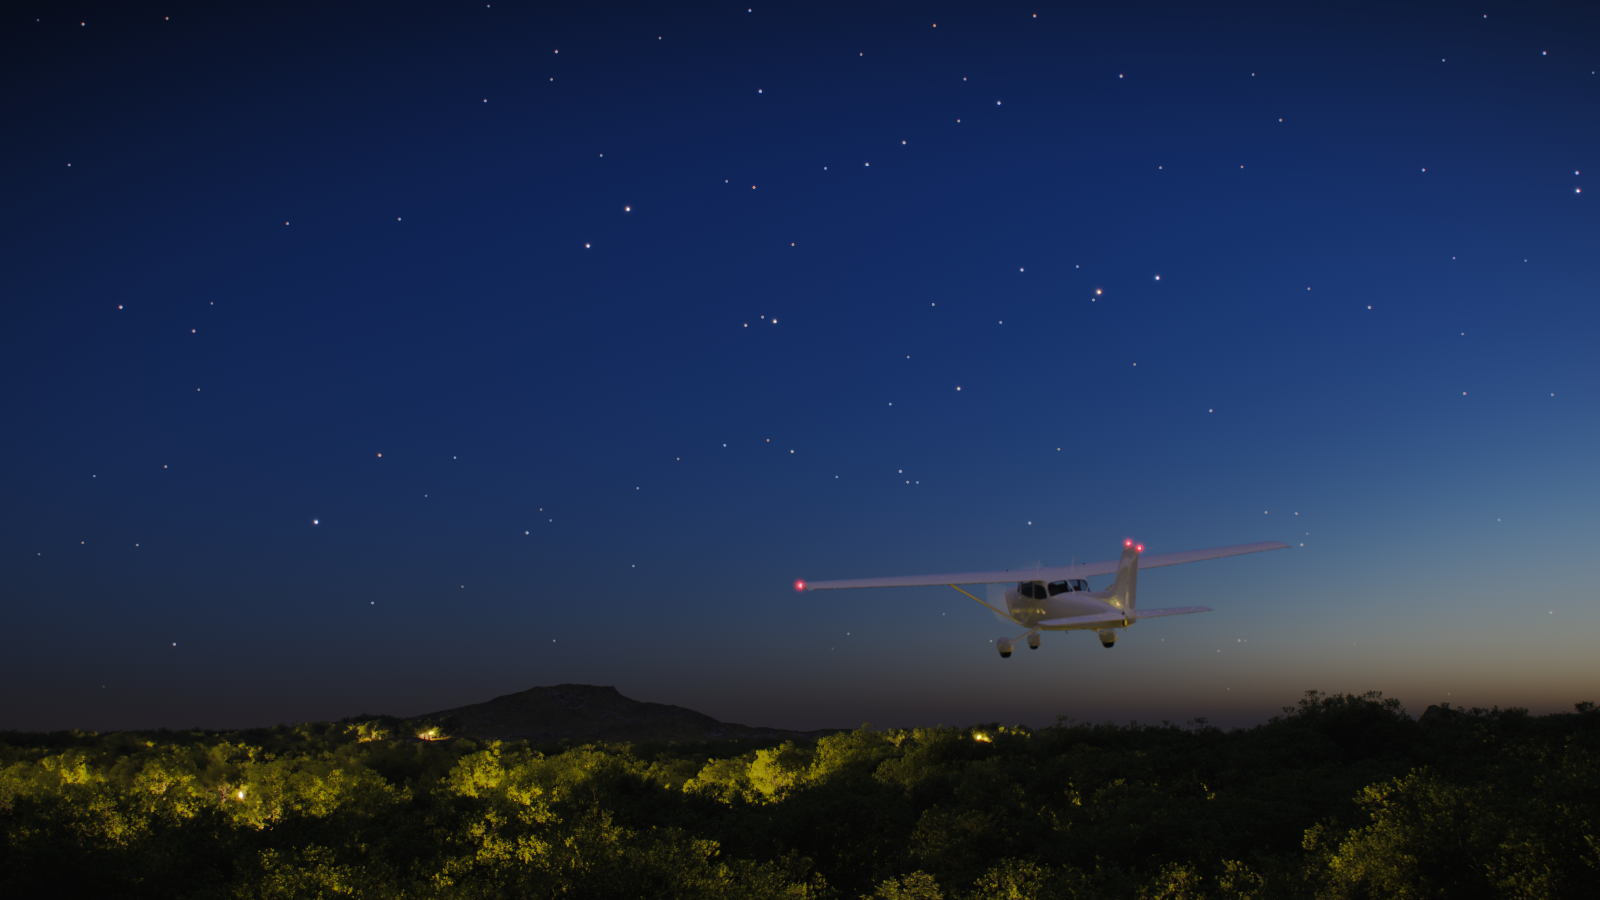
Intensity = 8
Moon
Enabled – Enables the appearance of the Moon in the night sky.
Size Multiplier – Controls the visible size of the Moon. Affects the appearance of the Moon disc as seen by the camera and reflections, as well as the blurriness of the Moon shadows.
Direct Light Mult – Controls the brightness of the Moon as seen directly in the sky or in perfect mirror reflections/refractions. See the Moon Direct Light example below.
Indirect Light Mult – Controls the brightness of the scene illumination cast by the Moon. See the Moon Indirect Light example below.
Glow Multiplier – Controls the brightness of the glow around the Moon. A value of 0 disables the glowing effect.
Filter Color – Specifies the moonlight color. The default white (1, 1, 1) color means no change of color.
Custom Azimuth – Specifies the Moon azimuth angle measured from the scene North to Eastward. A value of 90 aligns with the X-axis (Solid red line) or East.
Custom Elevation – Controls the angle between the Moon and the ground. A value of 0 makes the Moon to be exactly at the horizon, and a value of 90 makes the Moon in the zenith.
Custom Phase – Specifies the phase of the Moon, where a value of 0 is full Moon, 90 is first quarter, 180 is new Moon, and 270 the last quarter. See the Phase example below.
Custom Rotation – Rotates the Moon disc in the sky, where 0 makes it match the Moon appearance in its highest point when observed in the Northern hemisphere, and 180 corresponds to the Southern hemisphere.

Example: Moon Direct Light
This parameter controls the brightness of the moon in this example.
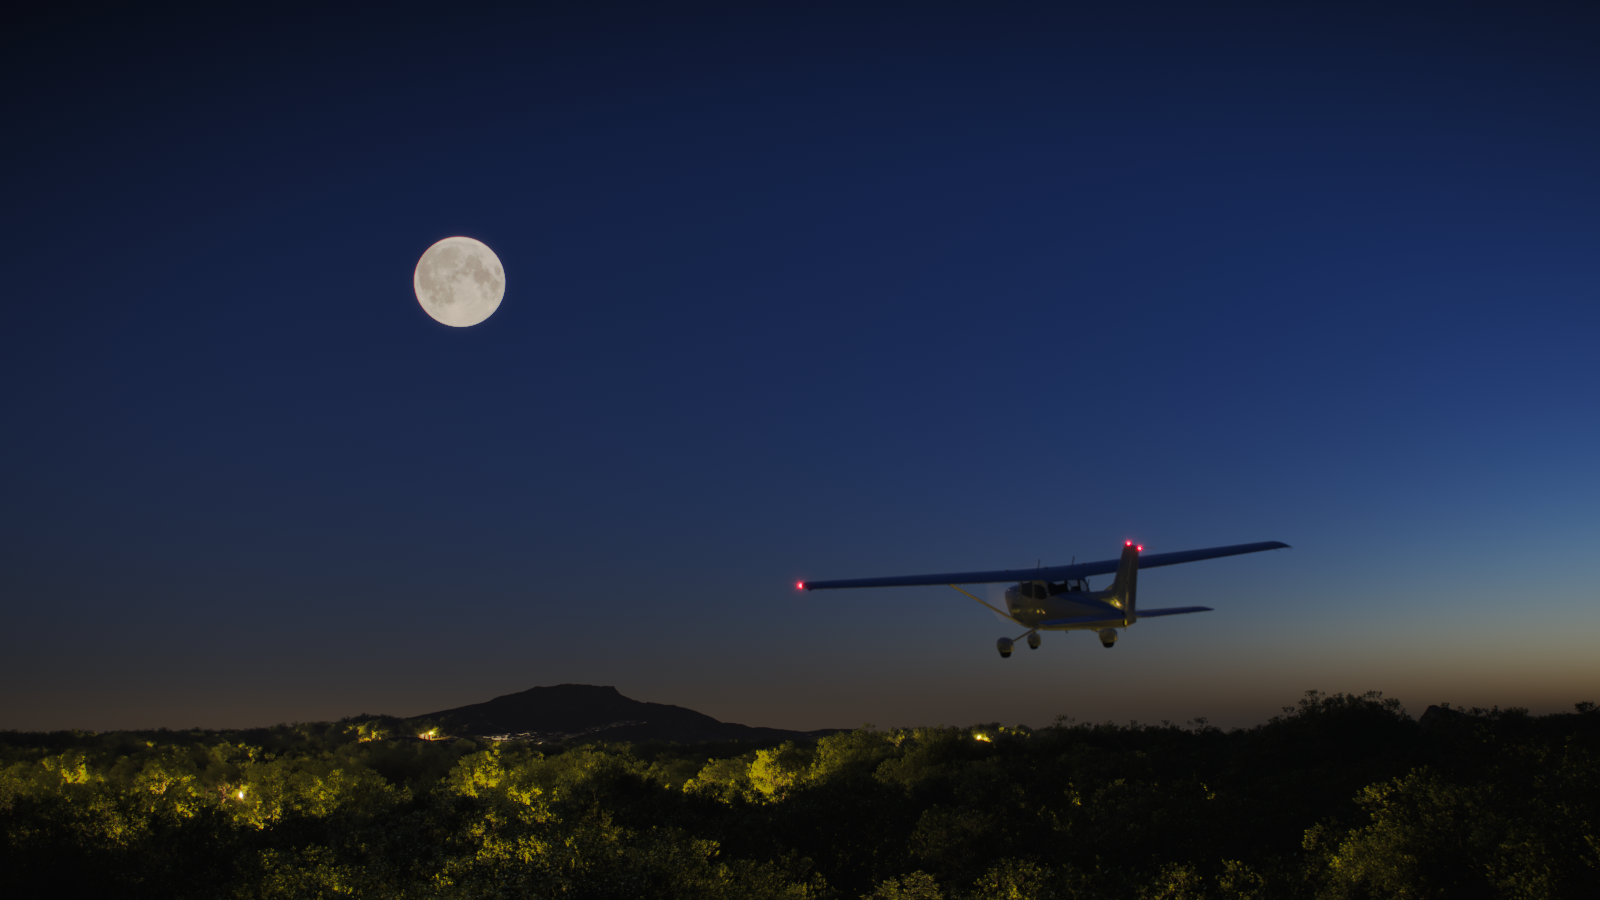
Direct Light Mult = 0.025

Direct Light Mult = 0.05

Direct Light Mult = 0.01
Example: Moon Indirect Light
This parameter controls the intensity of the moon in this example.

Indirect Light Mult = 0.25

Indirect Light Mult = 0.5

Indirect Light Mult = 1
Example: Phase
This example shows how the Phase parameter controls the Phases of the moon where 0 is full moon and 180 is new moon.
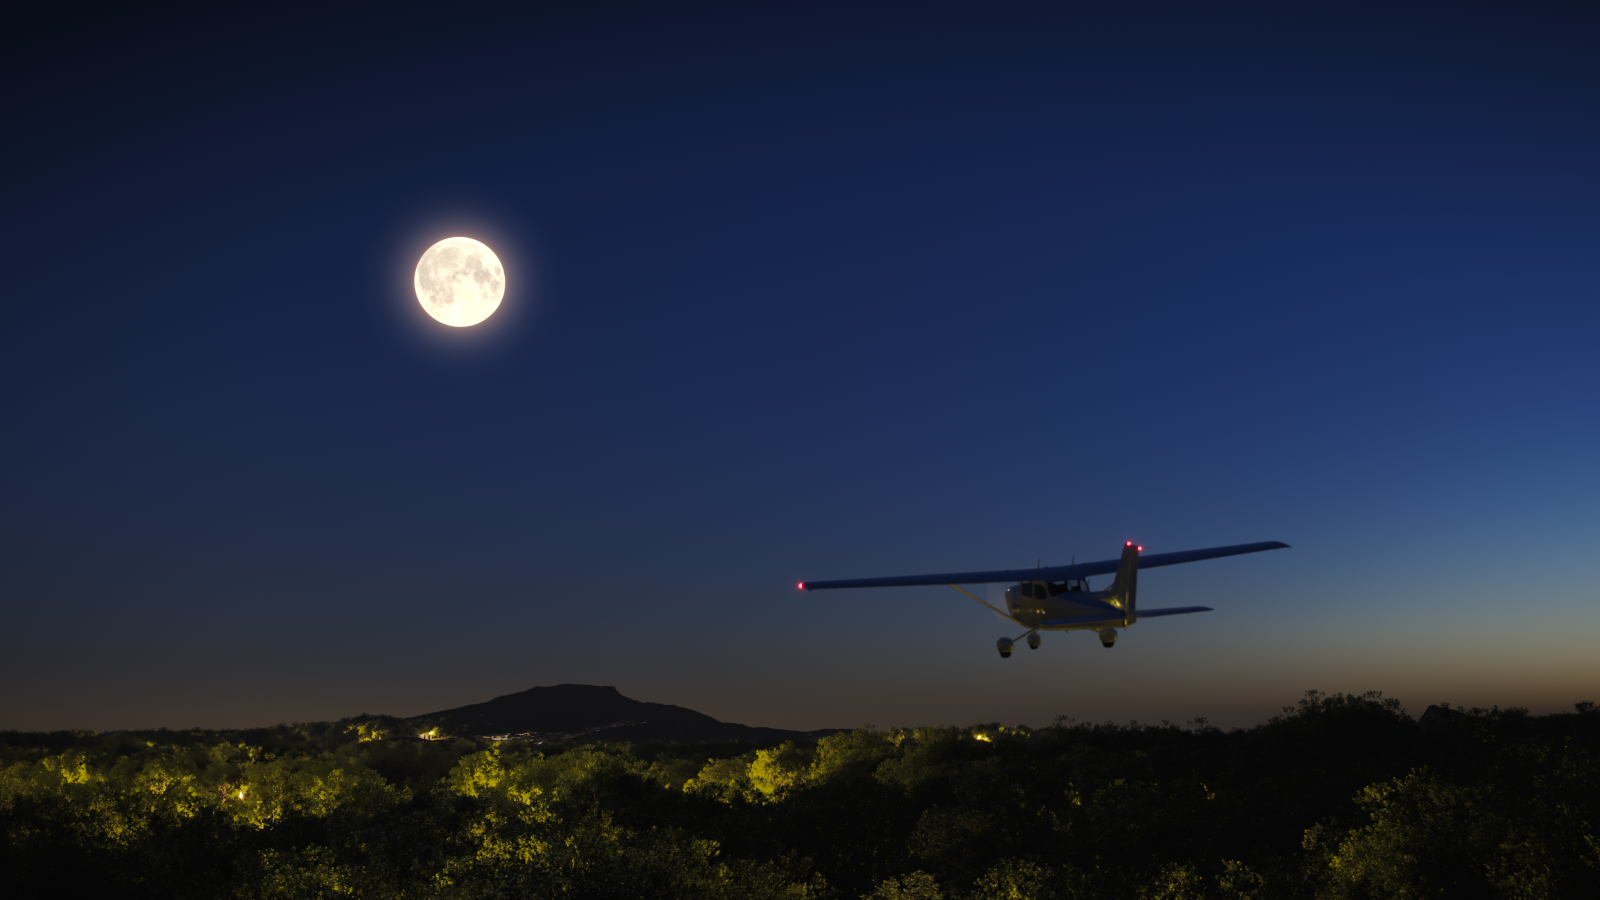
Phase = 0

Phase = 90
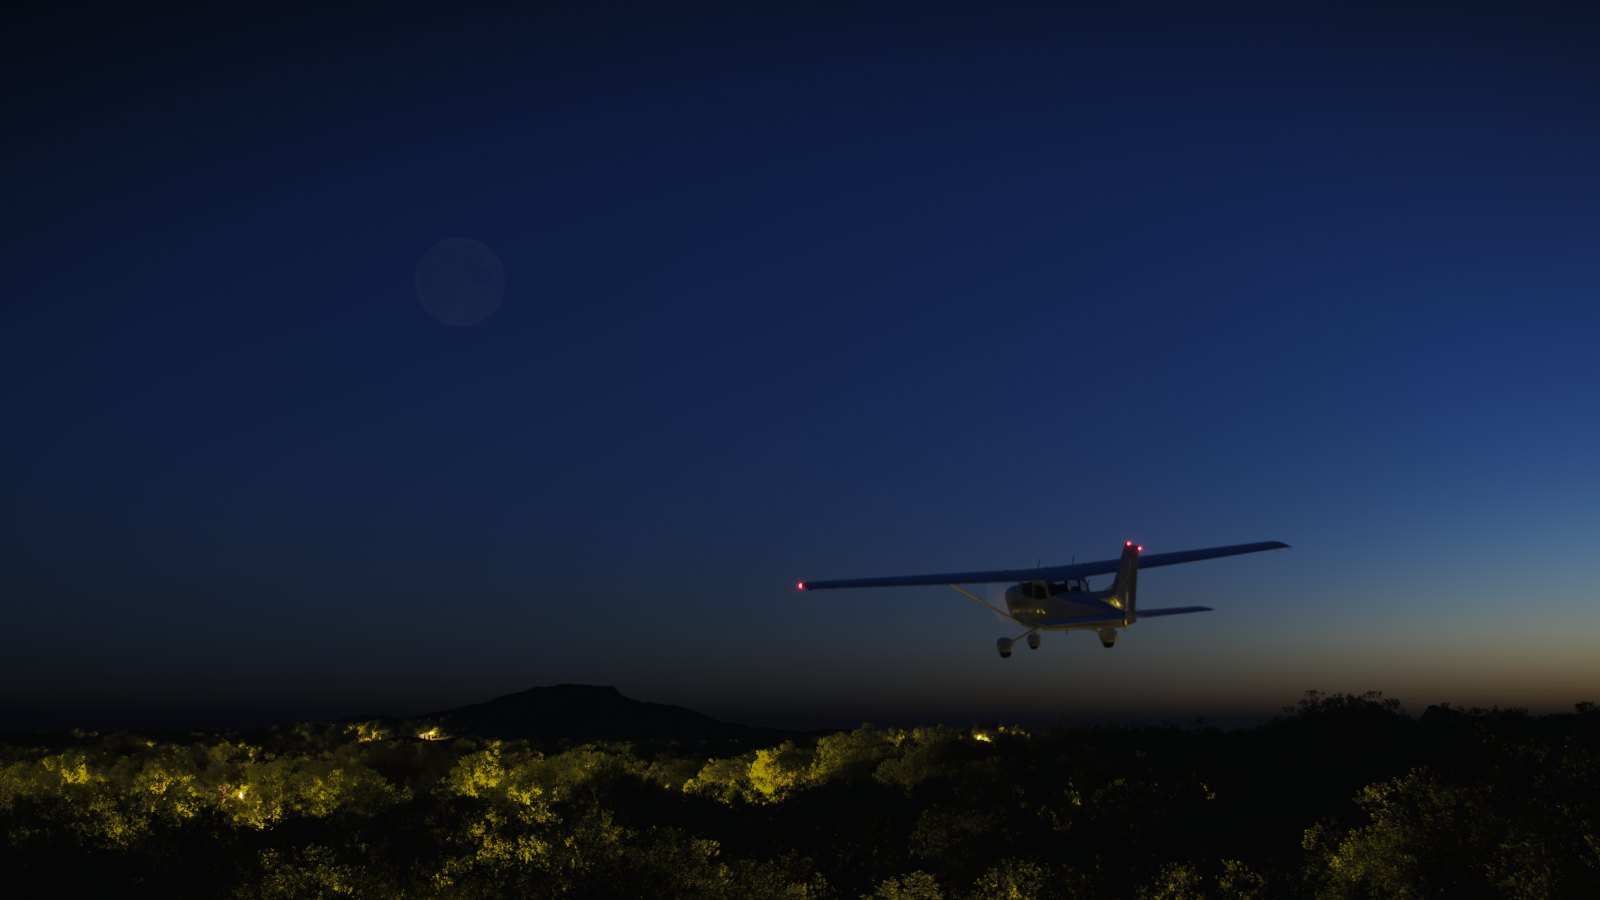
Phase = 180
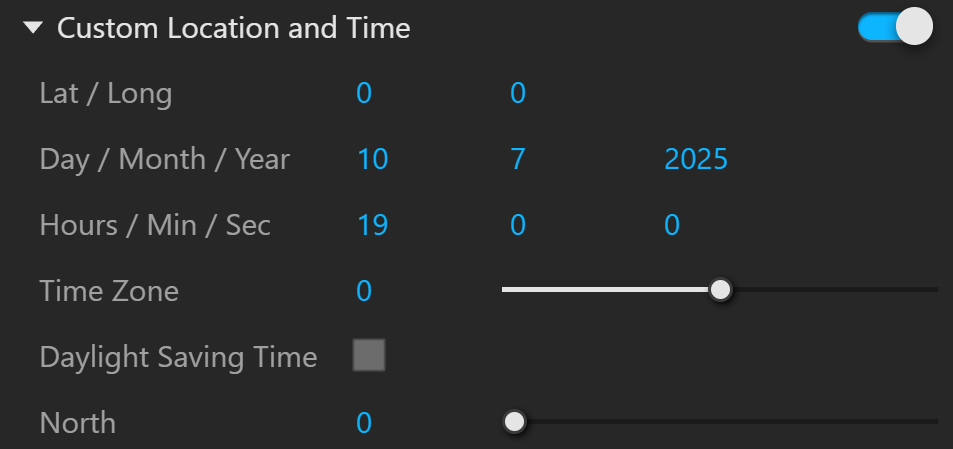
Custom Location and Time
Enabled – When enabled, the location and time used to position the stars and the Moon can be manually defined. When disabled, they are determined by the host application.
Lat / Long – Latitude and longitude of the location used to position the stars.
Day / Month / Year – Date used to position the stars.
Hours / Min / Sec – Time used to position the stars.
Time Zone – Time zone applied to the time used to position the stars.
Daylight Saving Time – Determines if DST is applied to the time used to position the stars.
North – Specifies the North vector direction.
Ground
Albedo Color – Sets the ground color of the V-Ray Sun and Sky system.
Blend Angle – Specifies the angle in degrees where blending occurs between the horizon line and sky. Values close to 0.0 produce a sharper horizon line, while larger values produce a softer horizon line.
Horizon Offset – Allows the user to manually lower the horizon line.

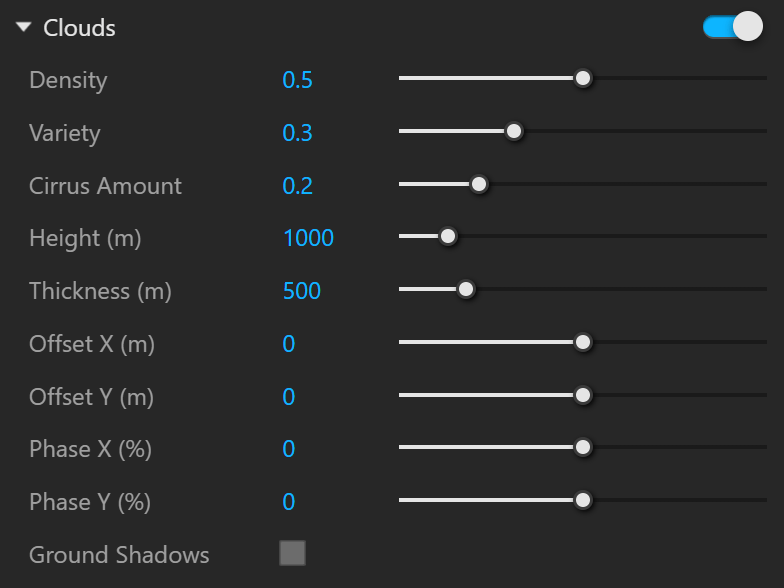
Clouds

Clouds () – Enables the clouds.
Density – Controls the clouds density. A higher value leads to more clouds. See the Density example below.
Variety – Controls the cloud variety in space and shape. See the Variety example below.
Cirrus Amount – Controls the amount of high-altitude cirrus clouds. See the Cirrus Amount example below.
Height (m) – Controls the clouds height. See the Height example below.
Thickness (m) – Controls the clouds thickness. See the Thickness example below.
Offset X (m) – Controls the offset in the X direction measured in meters.
Offset Y (m) – Controls the offset in the Y direction measured in meters.
Phase X (%) – Clouds phase in X direction specified in percentage (%).
Phase Y (%) – Clouds phase in Y direction specified in percentage (%).
Ground Shadows – Enables the cloud shadows. Note that it is recommended to use a Dome light with a Sky texture for high quality shadows. See the Clouds Shadows example below.
Example: Cloud Density
The Density parameter controls the amount of clouds in the sky. The higher the value, the more clouds appear in the render.

Density
= 0
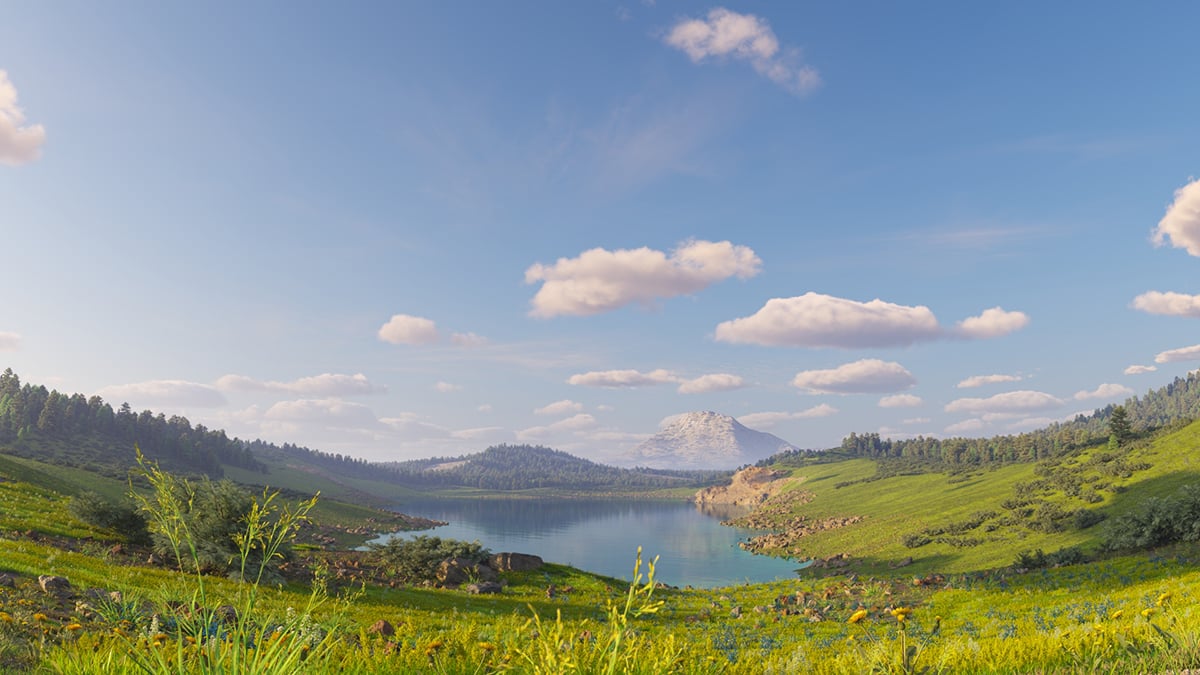
Density
= 0.4

Density
= 0.8
Example: Clouds Variety
This example shows the effect of the Variety parameter on the distribution and appearance of the clouds.

Variety
= 0

Variety
= 0.5

Variety
= 1
Example: Cirrus Amount
This example shows how increasing the Cirrus Amount increases the appearance of the cirrus clouds in the render.

Cirrus Amount
= 0
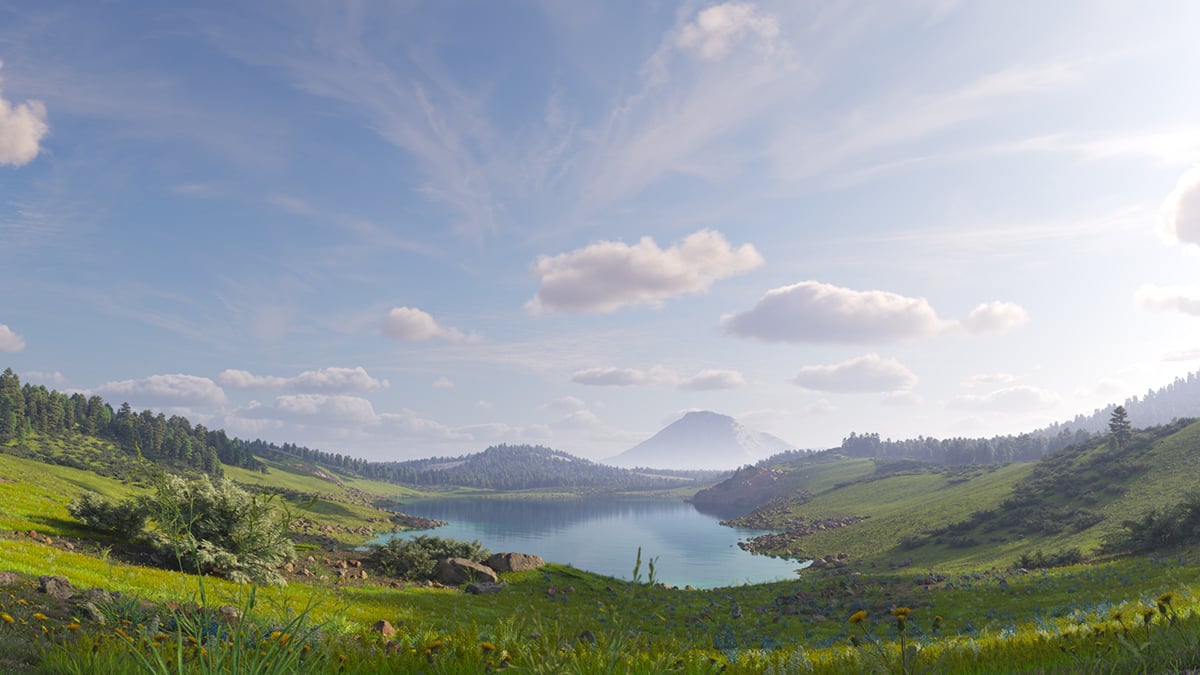
Cirrus Amount
= 0.5

Cirrus Amount
= 1
Example: Cloud Height
This example shows how the clouds change their position in the sky with increasing the Height value.

Height
= 500

Height
= 1000
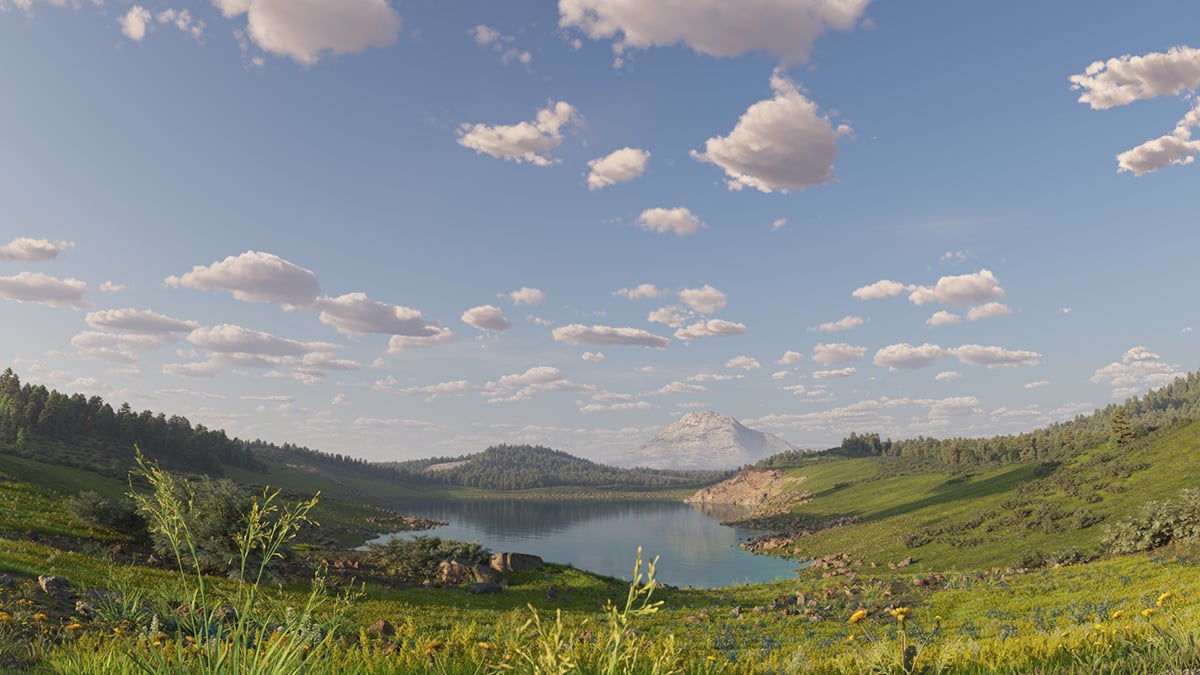
Height
= 1500
Example: Cloud Thickness
The Thickness parameter specifies how full the clouds are. Smaller values make them thinner and sheer, while higher values make them look heavier.

Thickness
= 200

Thickness
= 500

Thickness
= 800
Example: Ground Shadows
This example shows the effect of the Ground Shadows option.
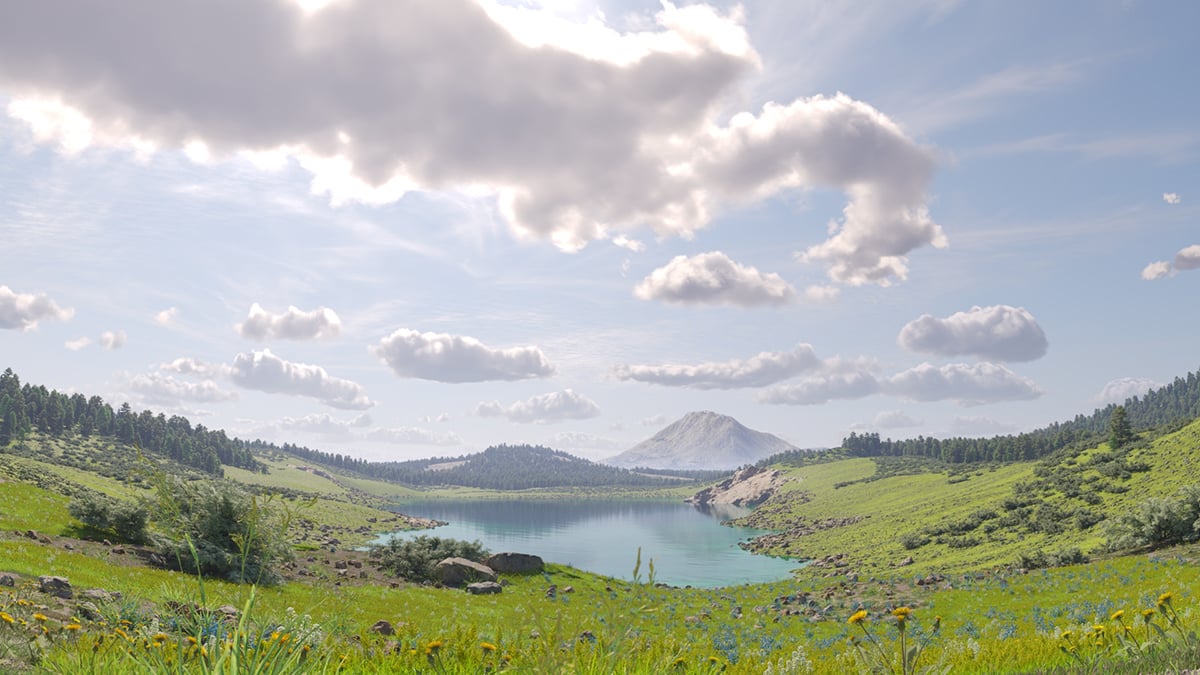
Ground Shadows
= Off
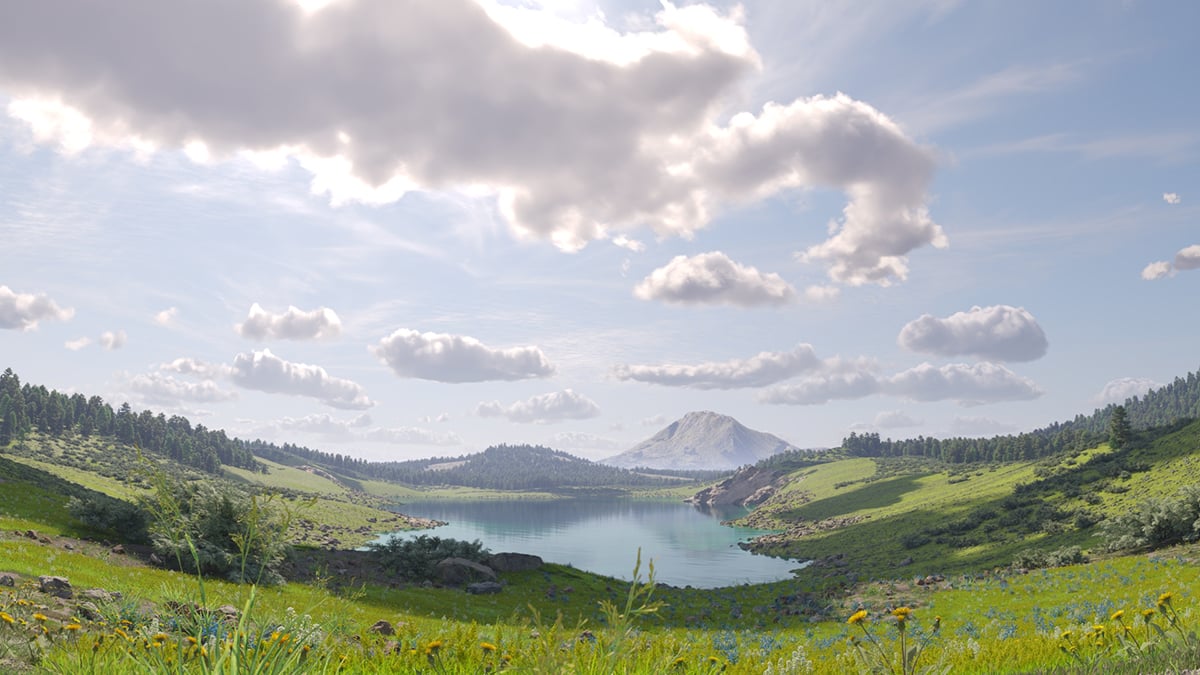
Ground Shadows
= On
Contrails – When enabled, plane contrails are simulated in the sky.
Contrails Number – Determines the number of contrails generated. See the Contrails Number example below.
Contrails Strength – Determines the opacity of the contrails. Lower values create less opaque trails, which look older. See the Contrails Strength example below.
Contrails Distortion – Determines the amount of distortion in the contrails. See the Contrails Distortion example below.
Contrails Offset X (m) – Offsets the contrails by a given value. See the Contrails Offset example below.
Contrails Offset Y (m) – Offsets the contrails by a given value.
Contrails Pace (%) – Determines how fast airplane contrails progress along the sky. A value of 100% represents an approximate airplane speed of 800km/h. A value of 0% makes the contrails static. Increasing this multiplier value makes contrails appear faster and persist in the sky for a shorter amount of time. See the Contrails Time example below.
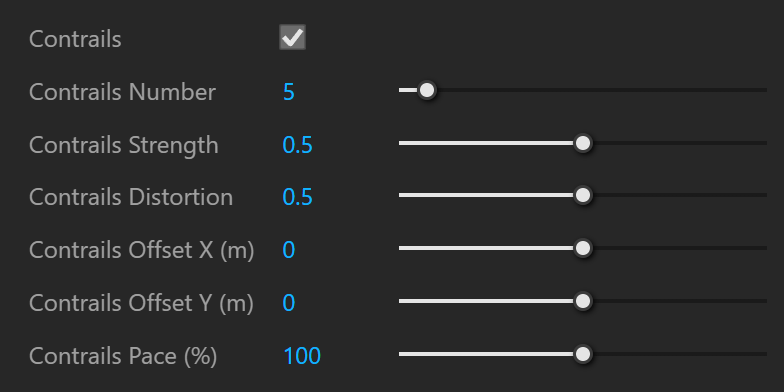
Example: Number of Contrails
Note that the contrails are spread randomly across the sky. In most cases, the camera does not capture all of the contrails.

Contrails Number
= 5

Contrails Number
= 20

Contrails Number
= 40
Example: Contrails Strength
This example shows how the strength parameter makes the contrails more visible and prominent in the sky.

Contrails Strength
= 0.1

Contrails Strength
= 0.5

Contrails Strength
= 1
Example: Contrails Distortion
The Contrails distortion parameter is used to add variety to the trace line.

Contrails Distortion
= 0.1

Contrails Distortion
= 0.5

Contrails Distortion
= 1
Example: Contrails Offset
The Contrails offset option introduces an offset along the X or Y direction in the sky.

Contrails Offset
= X 0, Y 0

Contrails Offset
= X 5000, Y 0

Contrails Offset
= X 0, Y 5000
Example: Contrails Pace
The frames in this animation show the Contrails Pace parameter, with values ranging from 0 to 2.0, in steps of 0.2.
Dynamic Clouds – Enables the automatic clouds formation. When enabled, the clouds use unique offset and phase values based on the current time of the day.
Wind Direction (deg) – Specifies the wind direction vector rotation in the horizontal plane. A value of 0 means that the clouds move in the positive X direction. Increasing the wind direction value horizontally rotate this vector clockwise.
Wind Speed (m/s) – Specifies the clouds movement speed measured in meters per seconds.
Phase Velocity (%/s) – Specifies the phase change measured in percent of the cycle per second. A value of 1 means that the phase loops to its initial state every 100 seconds. Smaller values result in slower changes and a longer phase loop.

Example: Creating custom skies with procedural clouds
www.youtube.com
Invisible – When enabled, the sun becomes invisible to both the camera and reflections. This is useful to prevent bright speckles on glossy surfaces where a ray with low probability hits the extremely bright sun disk.
Shadows – When enabled, the Sun produces shadows.
Affect Diffuse – When enabled, the V-Ray Sun affects the diffuse properties of the materials. The slider sets the multiplier that controls the V-Ray Sun's contribution to the diffuse illumination.
Affect Specular – When enabled, the V-Ray Sun affects the specular of the materials. The slider sets the multiplier that controls the V-Ray Sun's contribution to the specular reflection.
Affect Atmospherics – Specifies whether the light influences the atmospheric effects in the scene. The value determines the amount of involvement.
Atmospheric Shadows – When enabled, the atmospheric effects in the scene cast shadows.

Caustic Photons
Caustic Subdivisions – Determines the number of caustic photons emitted from the light source. Lower values produce noisy results, but render faster. Higher values produce smoother results, but take more time.
Emit Radius – Defines the area around the V-Ray Sun from where the photons are shot.

Notes
- Procedural Clouds are visually similar to the ones in Enscape by default from 6.00.02 on. When opening scenes saved with an earlier version - 6.00.00 or 6.00.01, there is an Enscape Compatibility parameter which can be enabled to make the Clouds match the Enscape ones. Note that once enabled the checkbox will disappear from the Interface.
- V-Ray 7 introduces the PRG Clear Sky New model, which is similar to the old PRG Clear Sky. The old PRG Clear Sky is loaded for scenes containing suns and skies created with previous V-Ray versions. The new Sky model is also available in the dropdown menu for old scenes.