KeyShot Studio
KeyShotXR Wizard
Create a KeyShotXR using the KeyShotXR Wizard. The KeyShotXR Wizard is accessed by pressing the KeyShotXR button on the KeyShot Studio Toolbar, through the main menu by selecting Window > KeyShotXR…, or by hitting the X-key.
Last updated 3 August 2026
Create a KeyShotXR using the KeyShotXR Wizard. The KeyShotXR Wizard is accessed by pressing the  KeyShotXR button on the KeyShot Studio Toolbar, through the main menu by selecting Window > KeyShotXR…, or by hitting the X-key.
Pick KeyShotXR Mode
There are six KeyShotXR modes to choose from. When you select one of the six modes, you will see an animated preview of the KeyShotXR view rotation.
After choosing a mode, click Next.
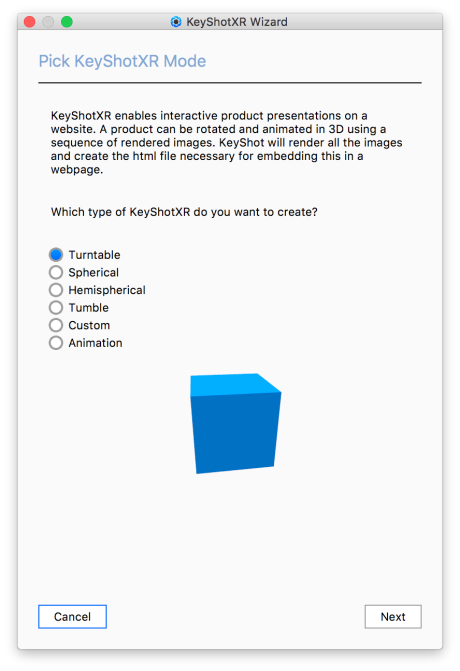
Turntable Spherical Hemispherical Tumble Custom Animation |
Pick KeyShotXR Rotation Center
Next, you will be able to select the center of rotation for your KeyShotXR. After selecting a center of rotation, click Next.
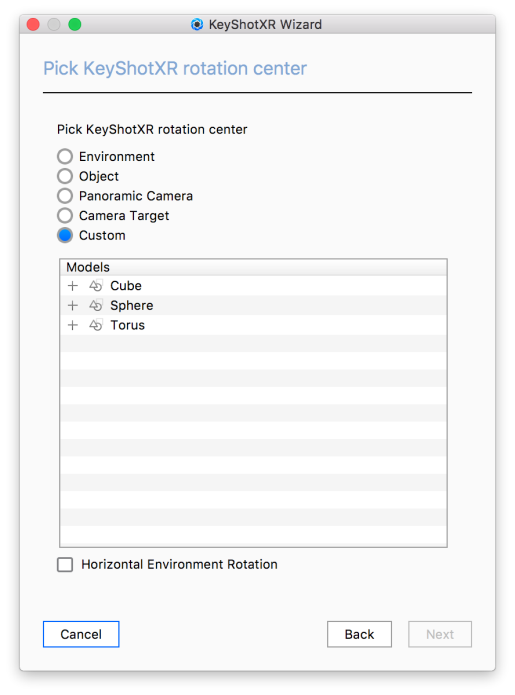
Environment Object Panoramic Camera Camera target Custom Horizontal Environment Rotation |
Pick Initial KeyShotXR View
Next, you can fine tune the initial camera view of your KeyShotXR. Set the Distance, Azimuth, Inclination, and Perspective as you would on the Camera tab. Use the Grid option to help locate or center the model for optimal rotation. You can adjust the camera using mouse, pen or touch in the Real-time View or by using the sliders. Once finished choosing your initial camera view, click Next.
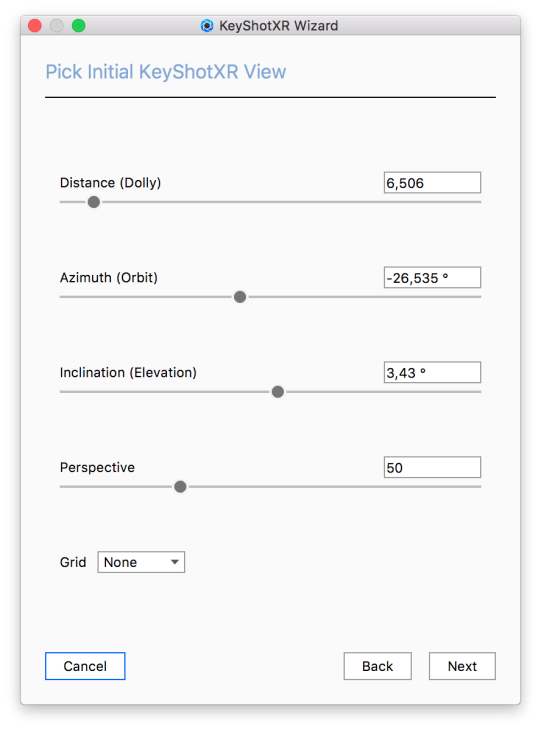
Distance Azimuth Inclination Perspective Grid |
Set KeyShotXR Smoothness
This step allows you to control the smoothness of your KeyShotXR. The options you see below will depend on the KeyShotXR Mode selected. You will see a preview of the KeyShotXR in the Real-time View which will give you an idea about the smoothness of the KeyShotXR with the options entered. Once the number of frames has been set, click Next.
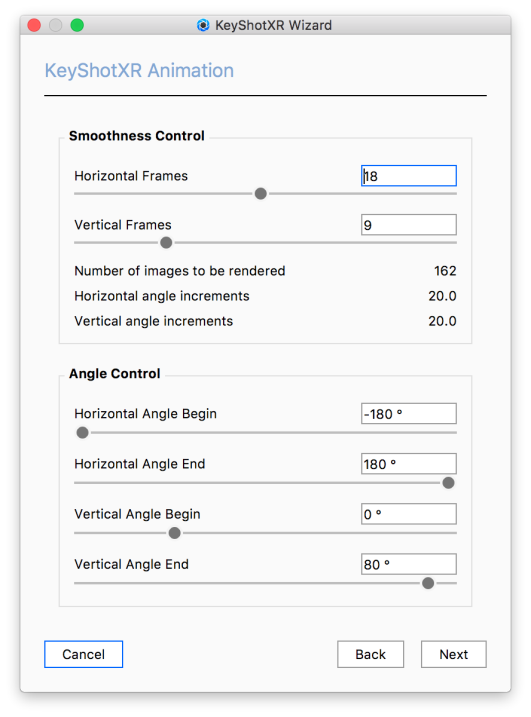
Smoothness Control These settings allow you to control the smoothness of the KeyShotXR rotation. Here, you will also find details on the number of frames that will be rendered and what the horizontal and vertical angle increments will be. Horizontal Frames Vertical Frames This option will not be seen for Turntable KeyShotXR Mode. |
Angle Control
If Custom KeyShotXR Mode is chosen, you will also see options for Angle Control. Angle Control allows you to enter beginning and end angles for both the horizontal and vertical rotation.
Horizontal Angle Begin
Start angle for the horizontal movement. Default is -180 degrees.
Horizontal Angle End
Finish angle for the horizontal movement. Default is 180 degrees.
Vertical Angle Begin
Start angle for the vertical movement. Default is -90 degrees.
Vertica Angle End
Finish angle for the vertical movement. Default is 90 degrees.
Set KeyShotXR Output
In the final step, you configure the KeyShotXR output as well as the viewing resolution for the KeyShotXR.
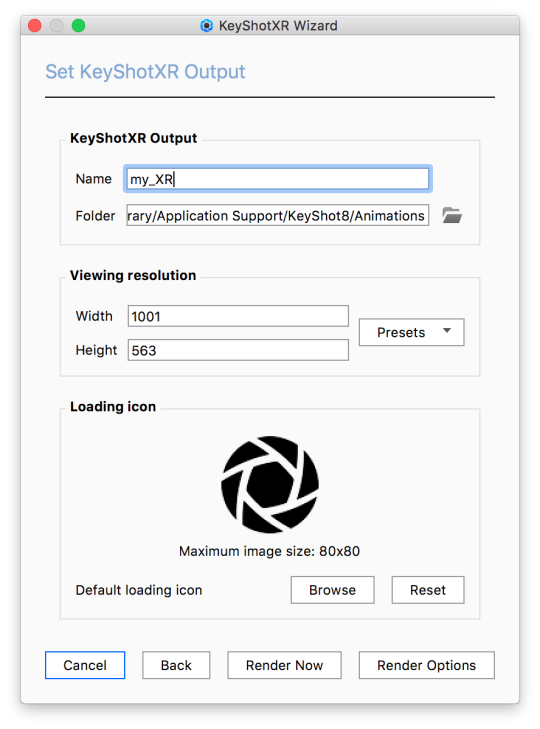
KeyShotXR Output Name Folder Viewing Resolution Width/Height Presets |
Loading Icon
Each KeyShotXR has a default image for the loading icon. To change the icon, click Browse and select an image file to replace the default image. Maximum image size is 80px x 80px.
Time to Render!
After you’ve gone through each step, you have three options to continue:
- Select Back to change any of the settings in the previous steps.
- Select Render Now to start rendering the KeyShotXR.
- Select Render Options to open the Render window to adjust additional KeyShotXR Output options.