Chaos Vantage
Edit Menu
This page provides information about the Edit menu and its sub-menus in Chaos Vantage.
Last updated 29 April 2026
This page provides information about the Edit menu and its sub-menus in Chaos Vantage.
Menu Options
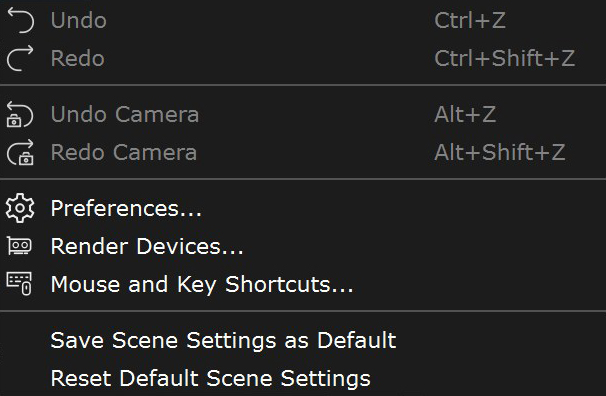
Undo – Reverses the last action. Multiple actions can be reversed. (Shortcut: Ctrl+Z )
Redo – Reverses the last Undo action. Multiple undone actions can be reversed. (Shortcut: Ctrl+Shift+Z )
Undo Camera – Reverses the last camera transformation. (Shortcut: Alt+Z )
Redo Camera – Reverses the last Undo Camera action. (Shortcut: Alt+Shift+Z )
Preferences – Opens the Preferences window. See the Preferences section below.
Render Devices – Opens the Render Devices window. See the Render Devices section below.
Mouse and Key Shortcuts – Opens the Shortcuts window. See the Shortcuts page for additional information.
Saves Scene Settings as Default – Saves the current scene settings as default settings for all projects. This overrides the defaults.vantage file located in %Appdata%\Chaos\Vantage.
Reset Default Scene Settings – Resets the scene settings to their default values. This resets the default.vantage file located in %Appdata%\Chaos\Vantage to its default state.
Preferences
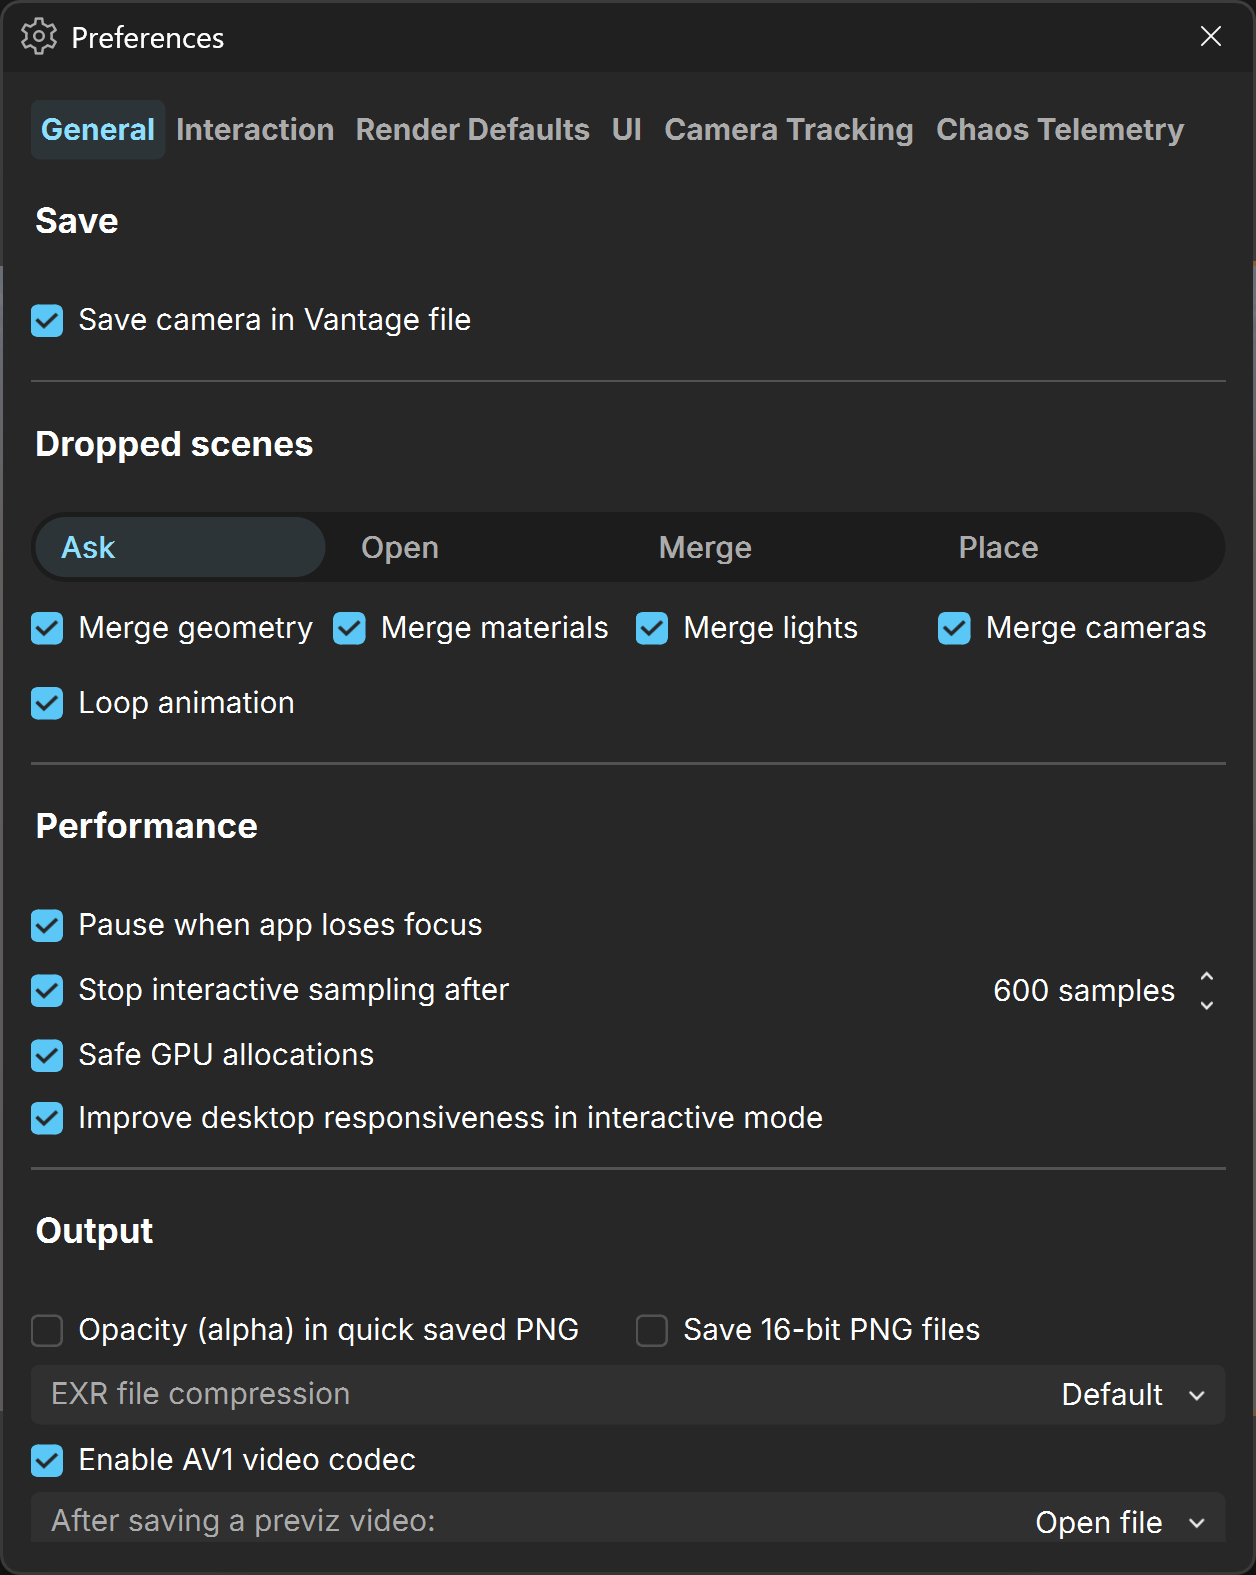
The Preferences window has six tabs: General, Interaction, Render Defaults, UI, Camera Tracking, and Chaos Telemetry. Click any image to view it in higher resolution.
General
Save camera in Vantage file – Saves the last camera position in the viewport to a .vantage file. When disabled, saves the render settings to a .vantage file without saving camera changes.
Dropped scenes
Ask – When a .vrscene file is dropped into the viewport, Chaos Vantage asks you whether to open, merge or place the scene.
Open – When a .vrscene file is dropped into the viewport, Chaos Vantage opens the scene.
Merge – When a .vrscene file is dropped into the viewport, Chaos Vantage merges the scene at origin 0,0,0.
Place – When a .vrscene file is dropped into the viewport, Chaos Vantage merges the scene at the position of the red arrow indicator aligned to the normal of the surface.
Merge geometry – When a new .vrscene file is dragged into the viewport, the geometry is merged into the scene.
Merge materials – When a new .vrscene file is dragged into the viewport, the materials are merged into the scene.
Merge lights – When a new .vrscene file is dragged into the viewport, the lights are merged into the scene.
Merge cameras – When a new .vrscene file is dragged into the viewport, the cameras are merged into the scene.
Loop animation – When a new animated .vrscene file is dragged into the viewport, the animation loops from the start. Useful when the timeline length is longer than the animation length.
Pause when app loses focus – Pauses rendering when the app loses focus. Applies to interactive rendering only.
Stop interactive sampling after – Pauses rendering and sets the app to IDLE mode after the specified sampling limit. This reduces GPU load.
Safe GPU allocation – When enabled, Chaos Vantage avoids using more GPU memory than the available physical memory. This prevents crashes and/or reduces system performance. Disabling this option may cause crashes with heavy scenes.
Improve desktop responsiveness in interactive mode – When enabled, reduces the impact on other applications while Vantage is rendering.

Opacity (alpha) in quick saved PNG – When enabled, stores the environment in the alpha channel of the quick saved .png file using the Quick save snapshot button() or File>Save Image, File>Save Image in Folder.
Save 16-bit PNG files – When enabled, saves .png output files in 16-bit rather than the default 8-bit. The dynamic range remains the same, but it has better color precision. Uses additional video memory.
Enable AV1 video codec – AV1 provides better quality. It is available on Ada generation or newer GPUs. Disable AV1 to fall back to H264 codec for wider compatibility.
EXR file compression – Specifies the compression type from ZIP (default), DWAA, or DWAB.
Default (ZIP) – Implements lossless compression using zlib's DEFLATE algorithm. Achieves moderate file size reduction while keeping pixel values exact. Decompression speed is good, making it suitable for visual effects pipelines where fidelity is critical.
DWAA – Uses lossy wavelet-based compression applied in 32-scanline chunks. Provides high compression ratios while maintaining visually acceptable quality. Decompression is extremely fast, making it well-suited for animation and production pipelines with large image sequences.
DWAB – Variant of DWAA that operates on 256-scanline blocks. Produces even greater compression efficiency but sacrifices some flexibility in random access to scanlines. Best used for very large EXR sequences where maximum storage savings and high I/O throughput are prioritized.
After saving a previz video – Specifies the action taken after the animation video is saved.
Open file – Opens the saved animation file.
Open folder – Opens the folder where the animation file is saved.
Do nothing – Doesn't take any further actions.
Interaction
Selection
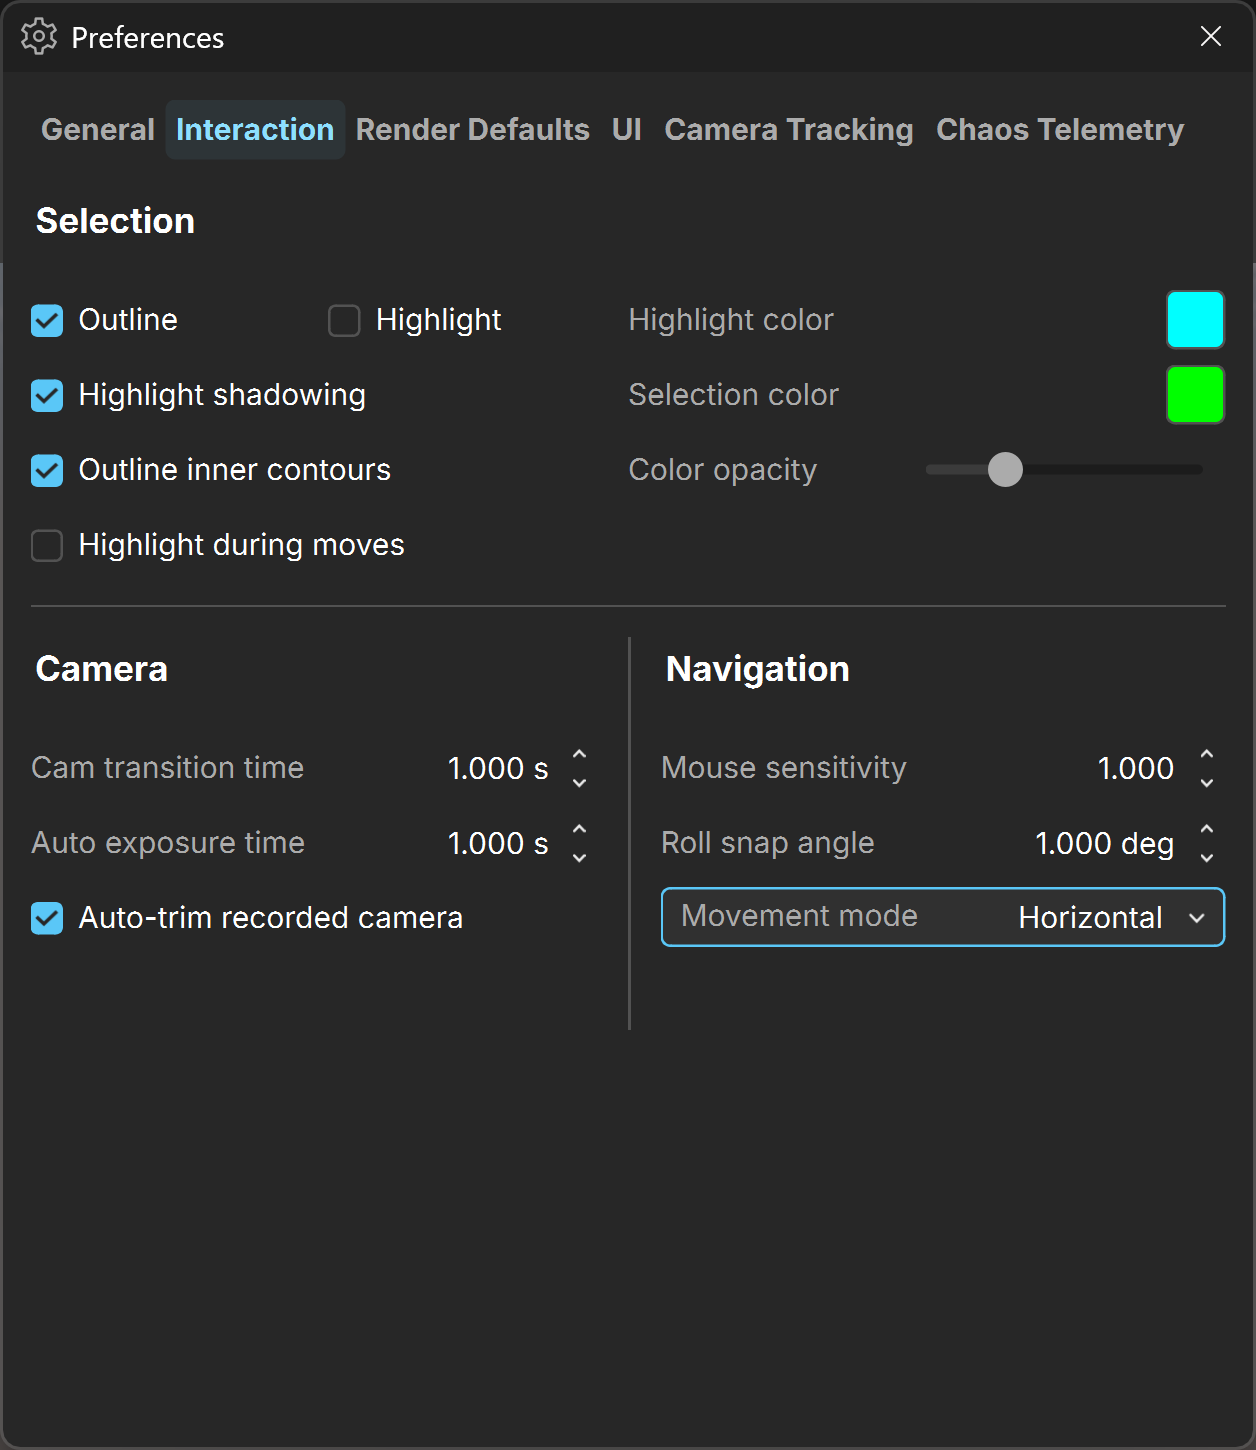
Outline – Enables outlining of objects in the scene. Selected or highlighted objects have a thin line around them with color specified in the Highlight color and Selection color.
Highlight – Enables highlighting of objects in the scene. Selected or highlighted objects are filled with a semi-transparent color specified in Highlight color and Selection color.
Highlight shadowing – Enables occlusion of the highlighted/selected objects behind other objects in the scene.
Outline inner contours – Outlines objects when multiple overlapping objects are selected.
Highlight during moves – Enables highlighting of objects during transformations.
Highlight color – Specifies a color for the outline when highlighting an object.
Selection color – Specifies a color for the outline for the selected object.
Color opacity – Controls the opacity of Highlight and Selection colors.
Cam transition time – Specifies the time for transition between saved cameras.
Auto exposure time – Specifies the duration of the smooth transition between calculated exposure values.
Auto-trim recorded camera – Removes repeated frames without movement from both ends of the recording.
Navigation
Mouse sensitivity – A multiplier for the mouse sensitivity when using dolly, orbit and camera zoom.
Roll snap angle – When using the roll hotkey(Ctrl+MMB drag), if the roll angle falls below this value, the camera snaps back to horizontal position/0 degrees roll.
Movement mode – Controls whether the camera moves horizontally or along the view direction. This option is applied only when camera collisions are disabled.
Render Defaults
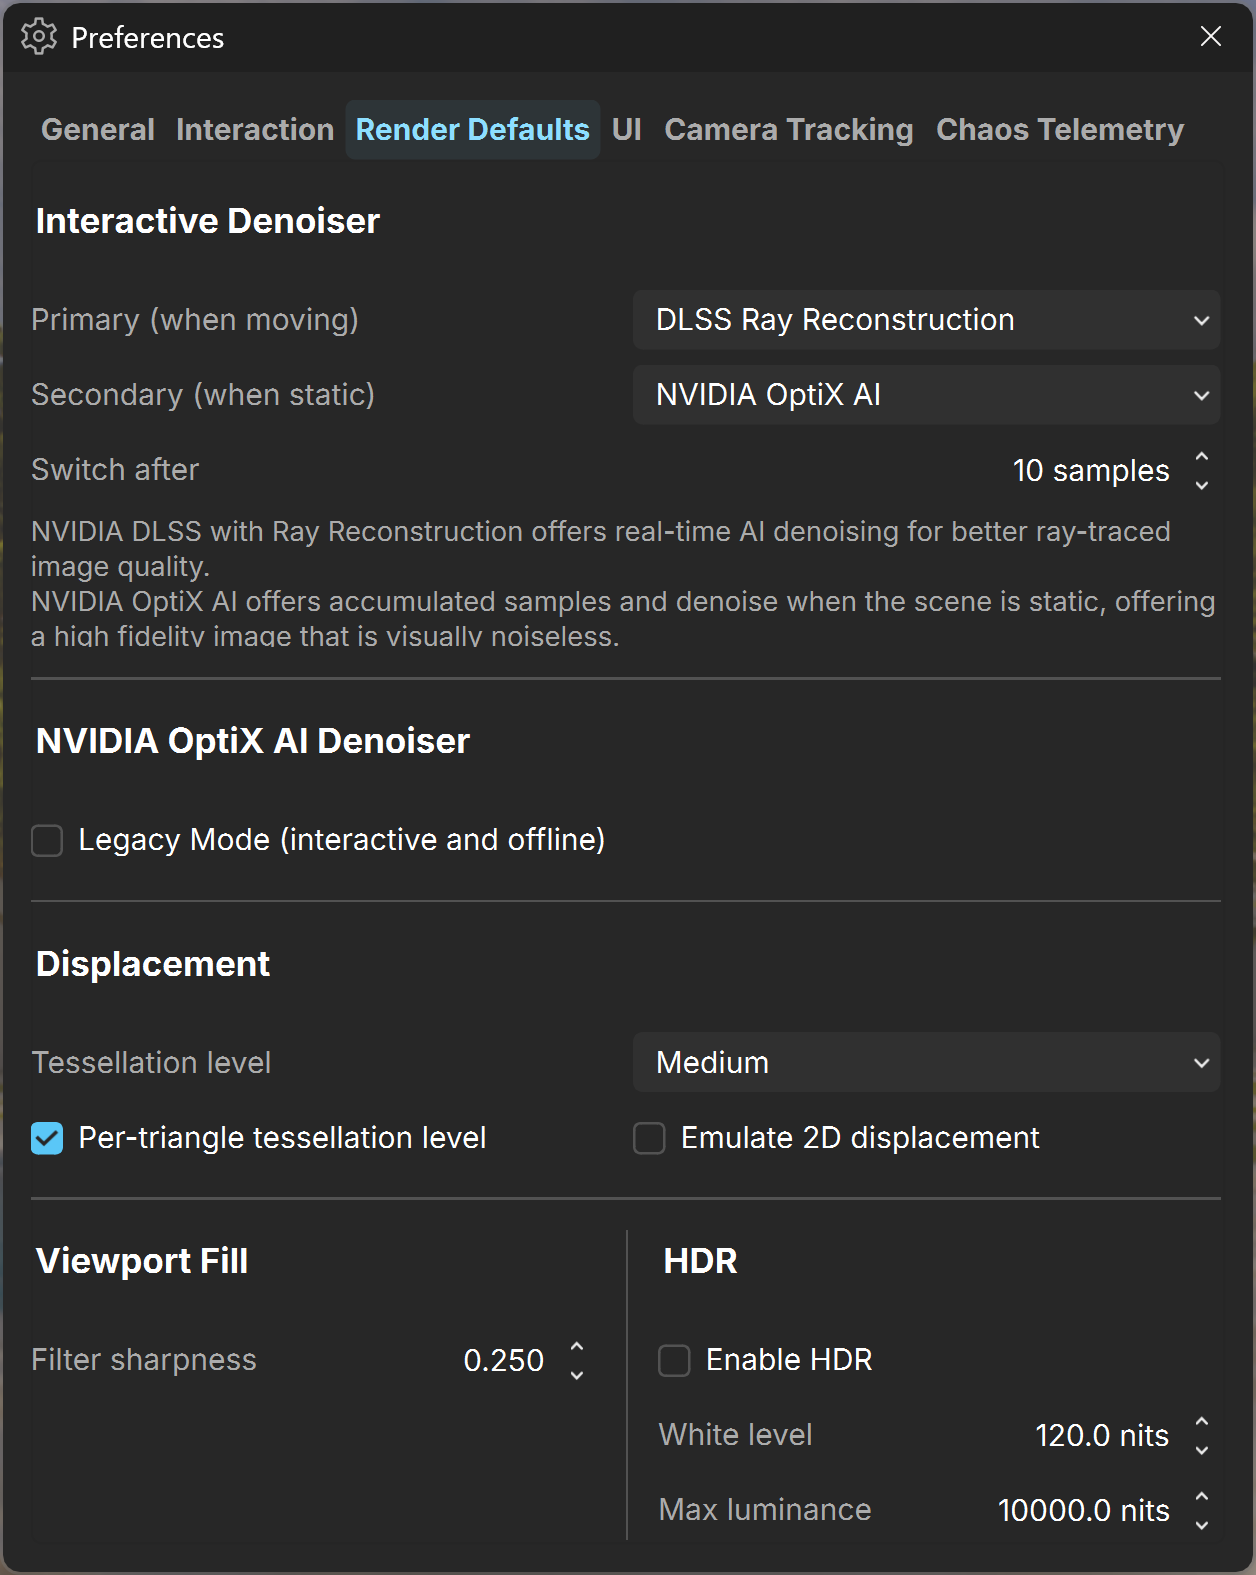
Interactive Denoiser
Primary (when moving) – Sets the type of the denoiser that will be used in the viewport during navigation or object manipulation.
DLSS Ray Reconstruction – Uses NVIDIA DLSS 3.5 with Ray Reconstruction that offers real-time AI denoising for a better ray-traced image quality.
NVIDIA OptiX AI – Uses NVIDIA OptiX AI denoiser that offers accumulated samples and denoise when the scene is static, offering a high fidelity image that is visually noiseless.
Intel Open Image Denoise – Uses Intel Open Image Denoise that provides quality greatly superior to the Vantage denoiser when many samples are accumulated over time. It may also be slightly better than NVIDIA OptiX AI, but slightly slower as well.
Vantage – Uses the native Vantage denoiser that produces sharp initial image, but some artifacts remain even when more render samples are accumulated.
Secondary (when static) – Sets the type of the denoiser that will be used in the viewport when nothing in the viewport is moving or being manipulated.
Same as Primary – Uses the same denoiser that is set as Primary.
NVIDIA OptiX AI – Uses NVIDIA OptiX AI denoiser. Available when DLSS Ray Reconstruction or Vantage denoiser is set as Primary.
Intel Open Image Denoise – Uses Intel Open Image Denoise. Available only when Vantage denoiser is set as Primary.
Switch after – Specifies the amount of render samples that need to be accumulated before switching to the NVIDIA OptiX AI denoiser or Intel OIDN when the Secondary denoiser type is set to other than Same as Primary.
Spatial filter strength – A multiplier for the spatial denoising. Only available when Vantage denoiser is set as Primary.
Spatial denoising – Enables/disables spatial denoising for the Vantage denoiser. Only available when Vantage denoiser is set as Primary.
Special iterations – Specifies the quality of the Vantage denoiser. Higher values make denoising more stable. Only available when Vantage denoiser is set as Primary.
Temporal denoising – Enables denoising of the previous frames. When disabled, the current frame is denoised on its own. Only available when Vantage denoiser is set as Primary.
Temporal AA – Applies time based anti-aliasing. Only available when Vantage denoiser is set as Primary.
NVIDIA OptiX AI Denoiser
Legacy mode (interactive and offline) – In some specific cases may produce better results than the new mode. For example, when there is ghosting on deformable meshes in offline sequences.
Displacement
Tessellation level – Specifies the level of tessellation for geometries that have displacement. Available levels are None, Low, Medium, High. None means that no tessellation is applied to the displaced mesh. Note that the High tessellation level requires more GPU memory.
Per-triangle tessellation level – When enabled, allows the tessellation rate to vary within the mesh based on distance to the camera, potentially saving memory. If the fixed tessellation at the given camera distance is too low, this option may use slightly more memory than the fixed tessellation rate. Disable this option if the transitions between different tessellation levels in the mesh are too visible. For optimum results, the base mesh should have some tessellation.
Emulate 2D displacement – When enabled, 2D displacement is rendered as 3D displacement, using more memory. If this option is disabled, 2D displacement does not render. It is recommended to enable Per-triangle tessellation level when using this option.
Viewport Fill
Filter sharpness – Applies filter sharpness only when Viewport fill button is enabled and the viewport is stretched larger than the render resolution. When set to 0.0, no filter sharpening is applied.
HDR
The HDR options are available only when an HDR device is detected.
Enable HDR – Enables HDR output on/off.
White level – HDR white level in nits. Specifies the brightness of a white color with intensity 1.
Max luminance – HDR maximum luminance in nits for clamping the output.
UI
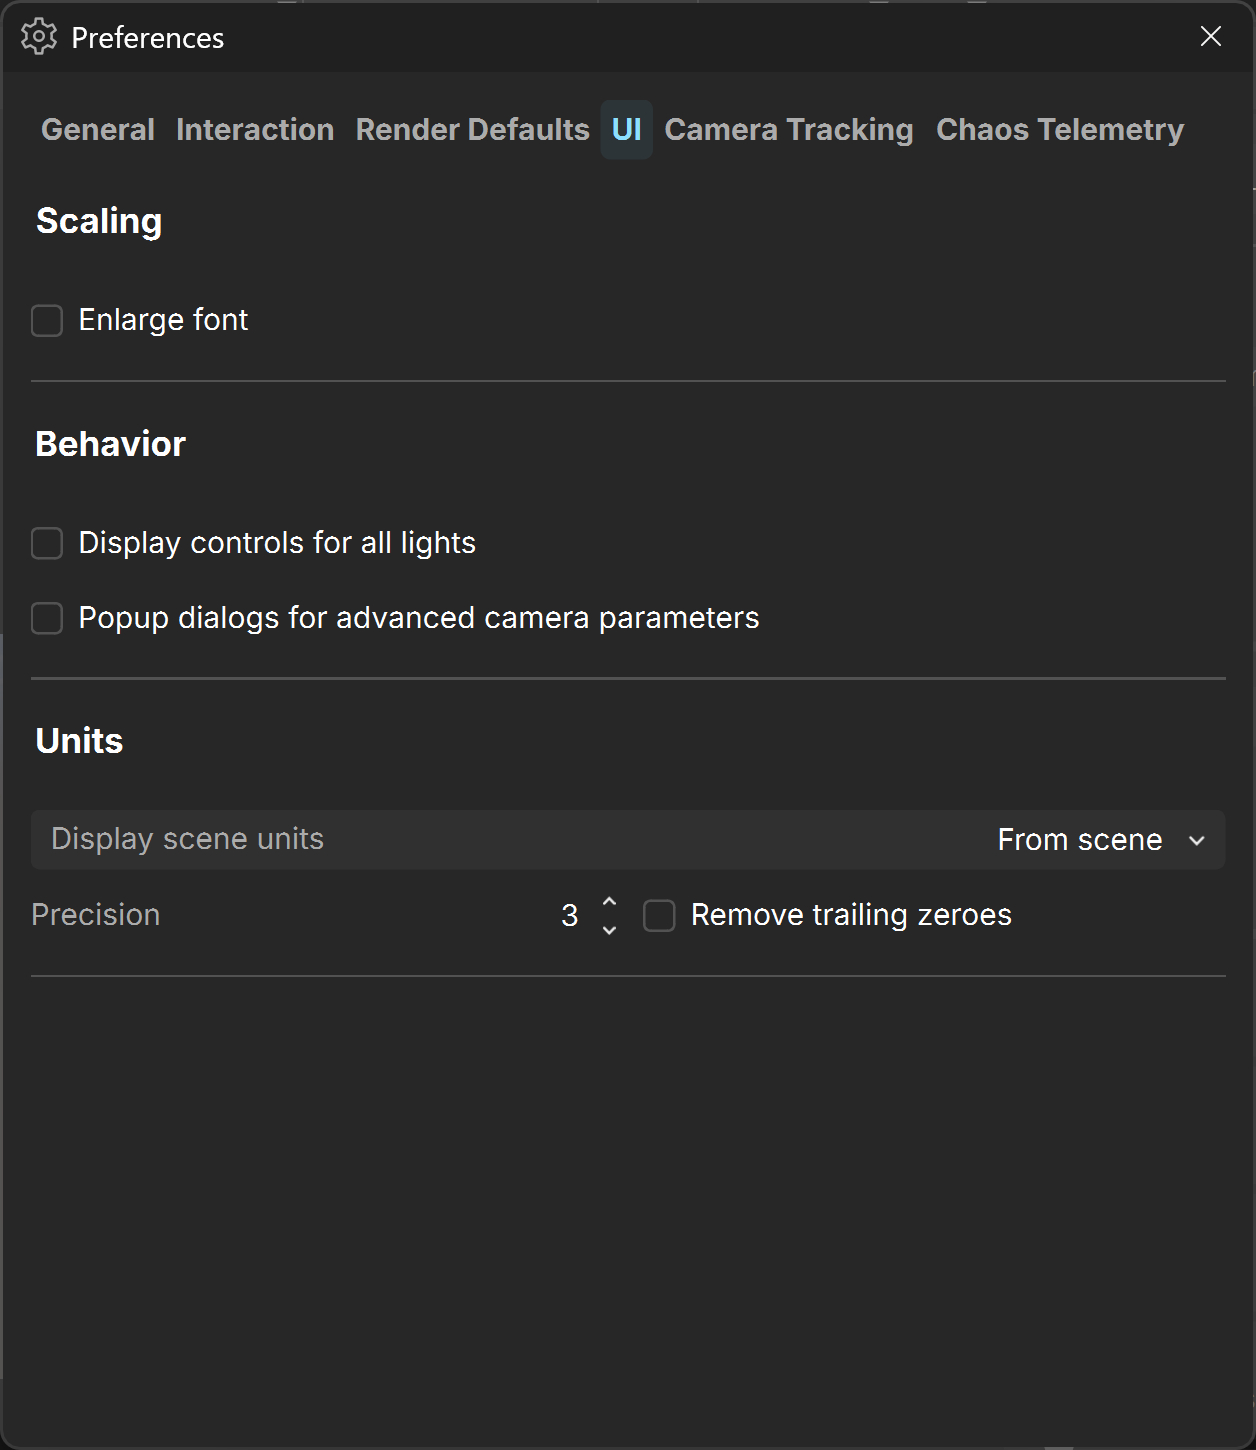
Scaling
Enlarge font – When enabled, enlarges the UI font for better readability.
Behavior
Display controls for all lights – When enabled, each light is listed individually in the Lights tab. When disabled, lights are grouped in the Lights tab, and lights with identical parameters are treated as instances.
Popup dialogs for advanced camera properties – When enabled, advanced camera properties are displayed in a separate popup window.
Units
Display scene units – Sets the unit system used to display scene measurements for properties that use scene units.
Precision – Number of decimal places shown for unit values.
Remove trailing zeroes – Hides unnecessary zeroes after the decimal point.
Camera Tracking
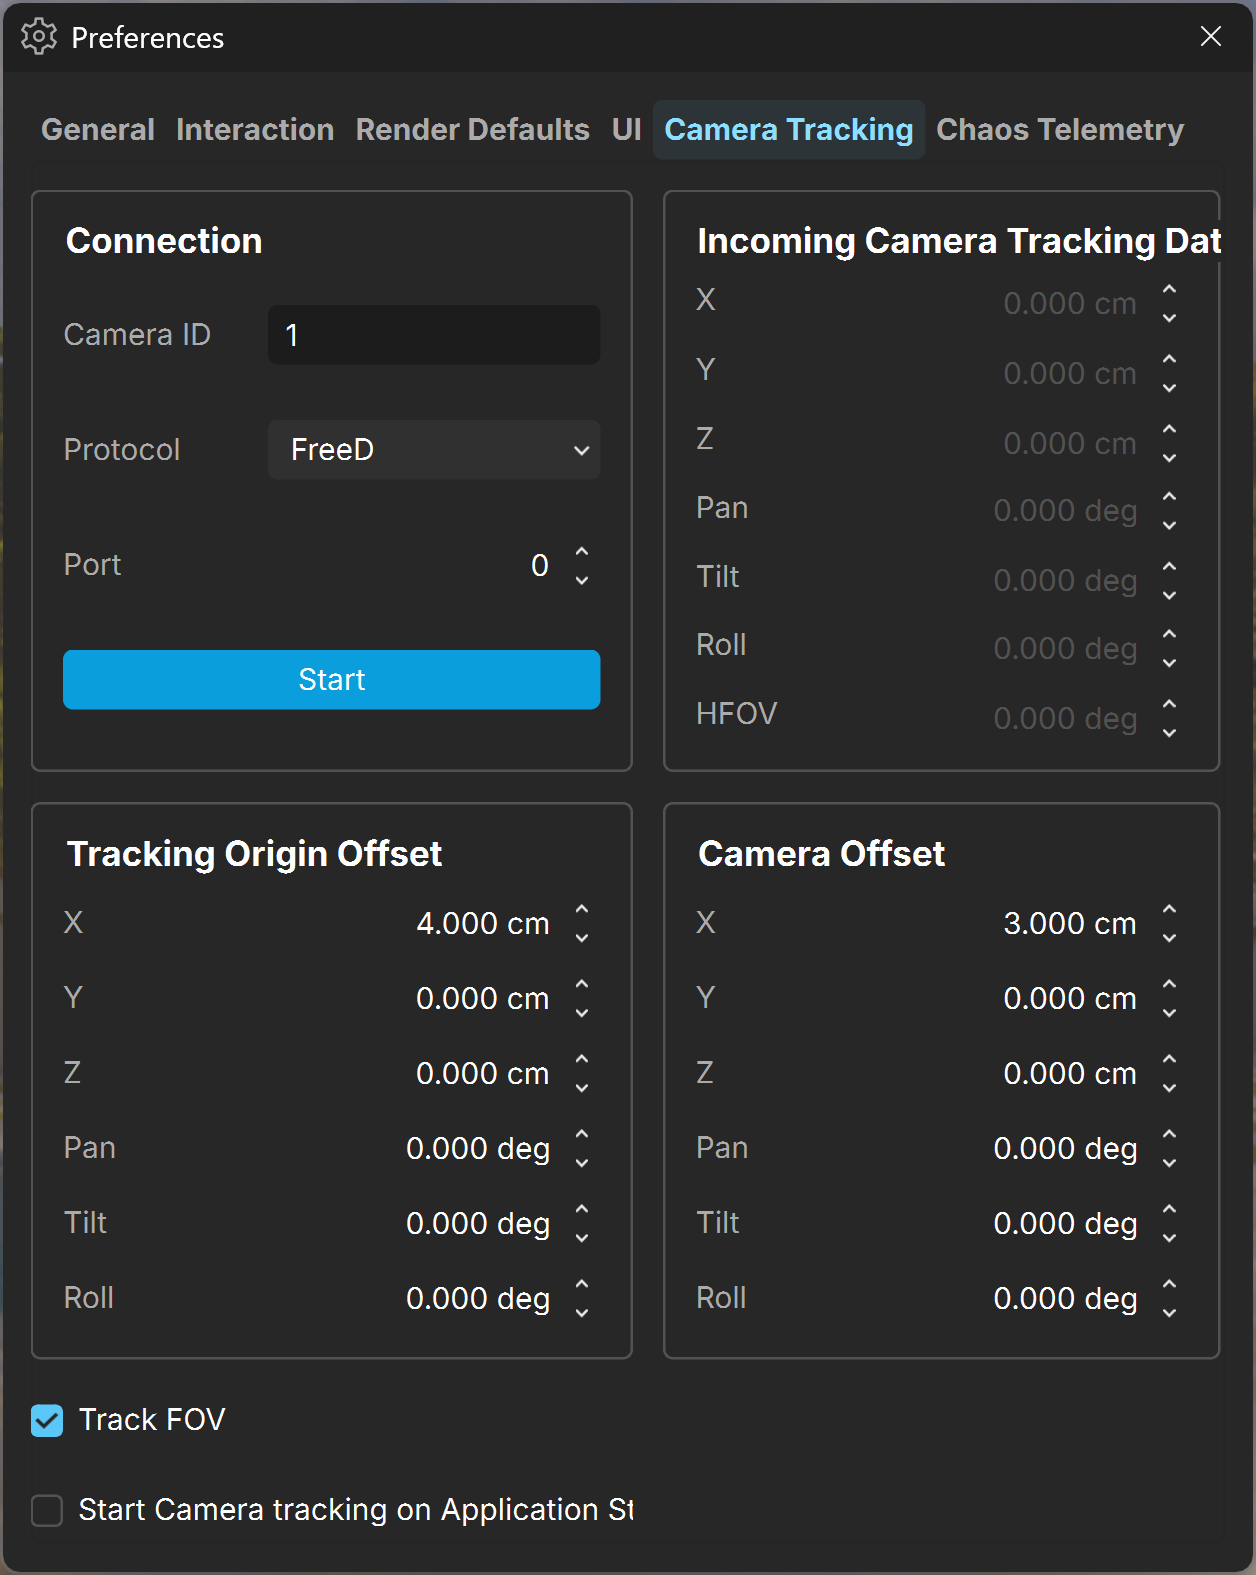
Camera ID - ID string of the tracker to be used for the camera tracking. The tracking systems can send data for multiple physical trackers at the same time and this ID can filter them. For stYpe, this should always be "0".
Protocol – The tracking system (protocol) to use. The currently supported protocols are: LONET 2, EZtrack TCD, FreeD, and stYpe HF.
Port – The UDP port on which to listen for tracking data.
Start – Initiates tracking. Click Stop to terminate the tracking.
Incoming Camera Tracking Data
X/Y/Z – The X/Y/Z position of the camera relative to the current tracking origin in the configuration.
Pan – Shows the rotation of the camera around its vertical axis. A value of 0° means the camera points straight ahead (reference orientation).
Tilt – Shows the rotation of the camera around its horizontal axis. A value of 0° means the camera points forward horizontally.
Roll – Shows the rotation of the camera around its forward axis. A value of 0° means the camera is leveled.
HFOV – Horizontal field of view override in degrees. This option is used to override the FOV value from the tracking system or the scene. By default, it's 0.0, which means that the override is disabled and the value from the tracking system or the scene is used. When disabled, the FOV is taken from the tracking system if it supports FOV tracking and currently provides a valid positive value or from the main camera exported in the scene.
Tracking Origin Offset
Specifies additional position and rotation offset of the tracking system relative to the current tracking origin in the configuration. It's in the tracking coordinate system and it's applied on the tracking data.
Camera Offset
Specifies the position and orientation of the camera’s entrance pupil (nodal point) relative to the tracker’s coordinate system.
Track FOV – Changes the inner frustum size dynamically, according to the current focal length of the camera lens.
Start Camera tracking on Application Start – Initiates camera tracking when Chaos Vantage is started.
Chaos Telemetry
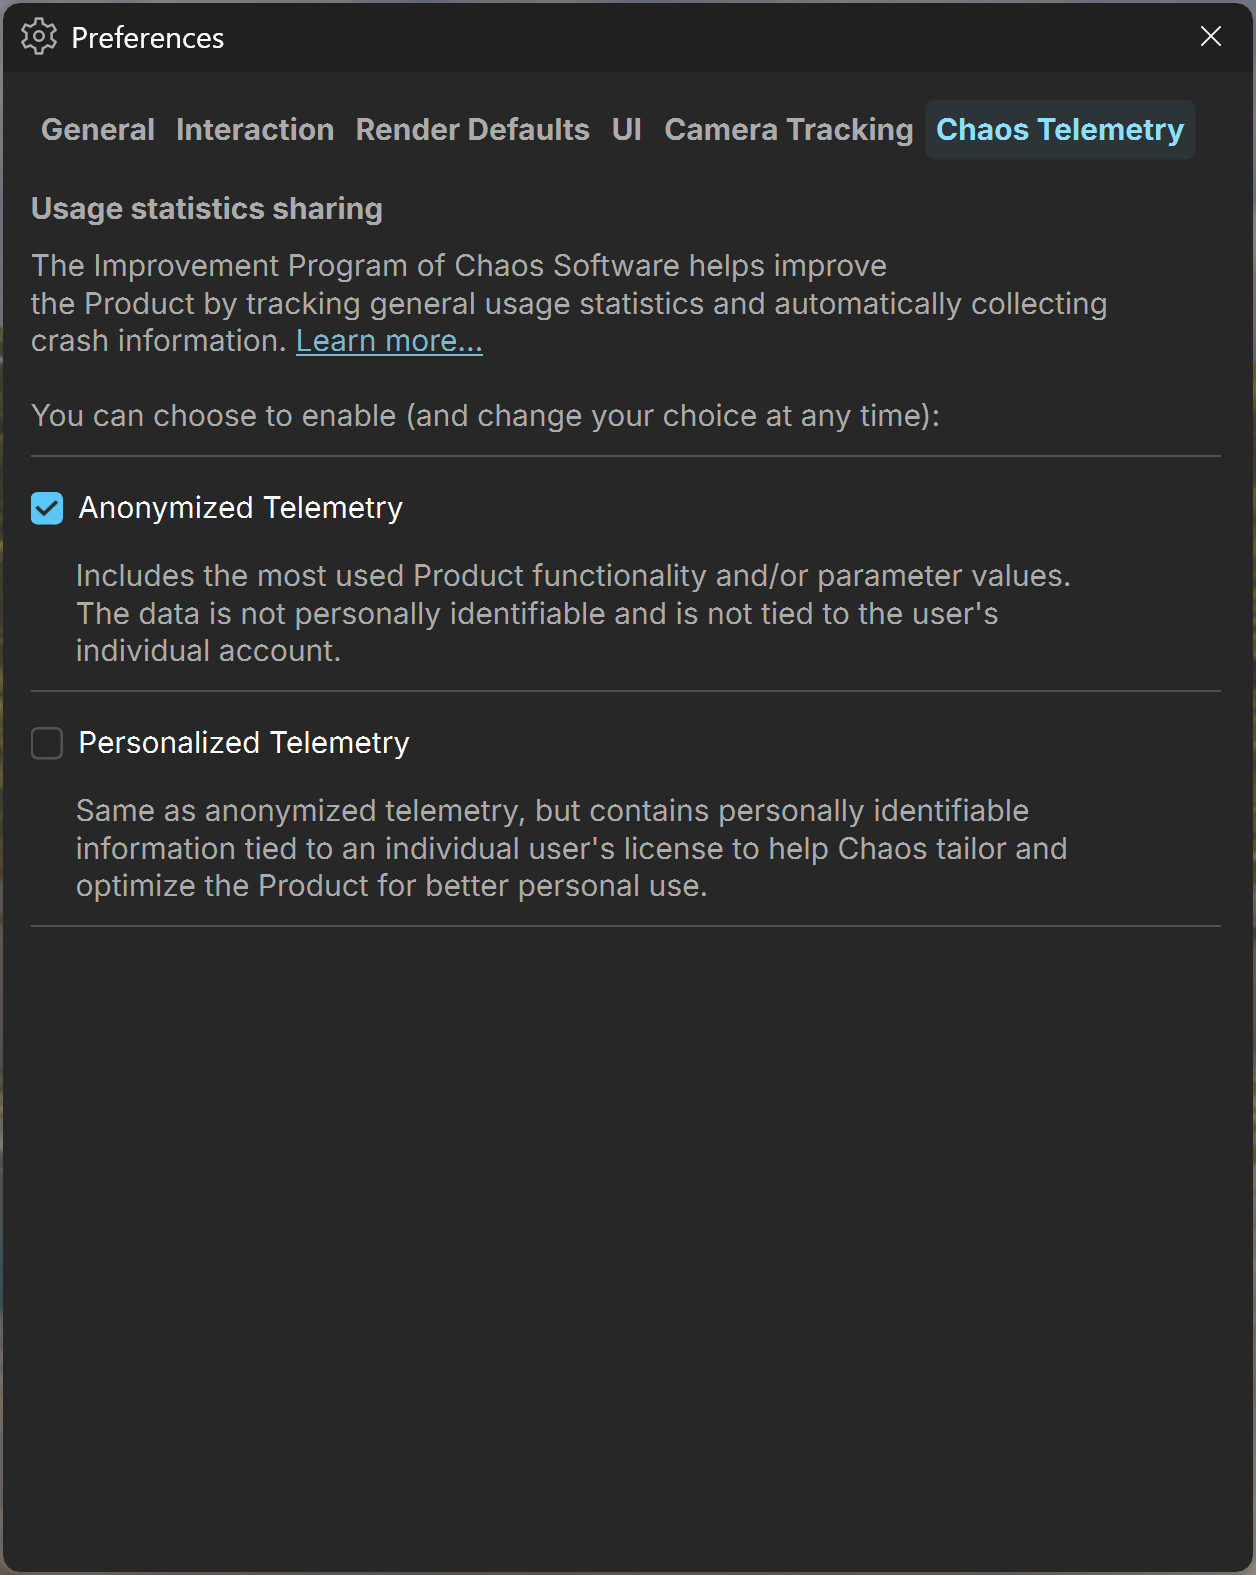
In the Chaos Telemetry tab the participation for usage statistic settings for Chaos Vantage can be changed.
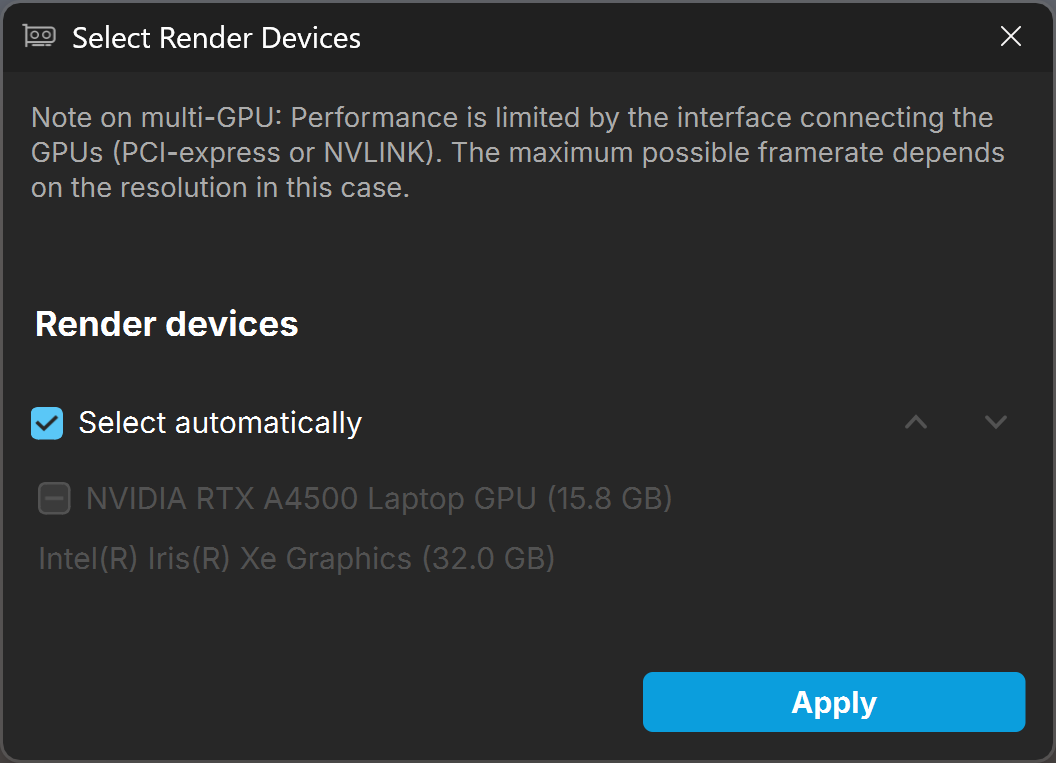
Render Devices
Select automatically – Selects the render device(s) based on their compute power automatically.
Change device order – Moves the selected device up or down in the list when Select automatically is disabled. The first devices has some additional load than the secondary.
List of available devices – Specifies which render device(s) are used for rendering when Select automatically is disabled.