Chaos Vantage
Rendering Mode
This page provides detailed information about the rendering mode in Chaos Vantage.
Last updated 9 July 2026
This page provides detailed information about the rendering mode in Chaos Vantage.
Overview
In rendering mode, you can specify the render settings for still, sequence, and batch rendering. Entering this mode replaces the default user interface with rendering panels and toolbar buttons that contain render options. There are two panels with sets of options:
- Render queue – Contains options for selecting camera views and animations for batch rendering.
- Common settings – Contains render settings for still images and animations.
UI Path
To enter rendering mode, go to:
||Tools menu|| > High Quality Render (Shortcut: Ctrl+R )

||Top toolbar|| > Hight Quality Render button ()
Render Queue
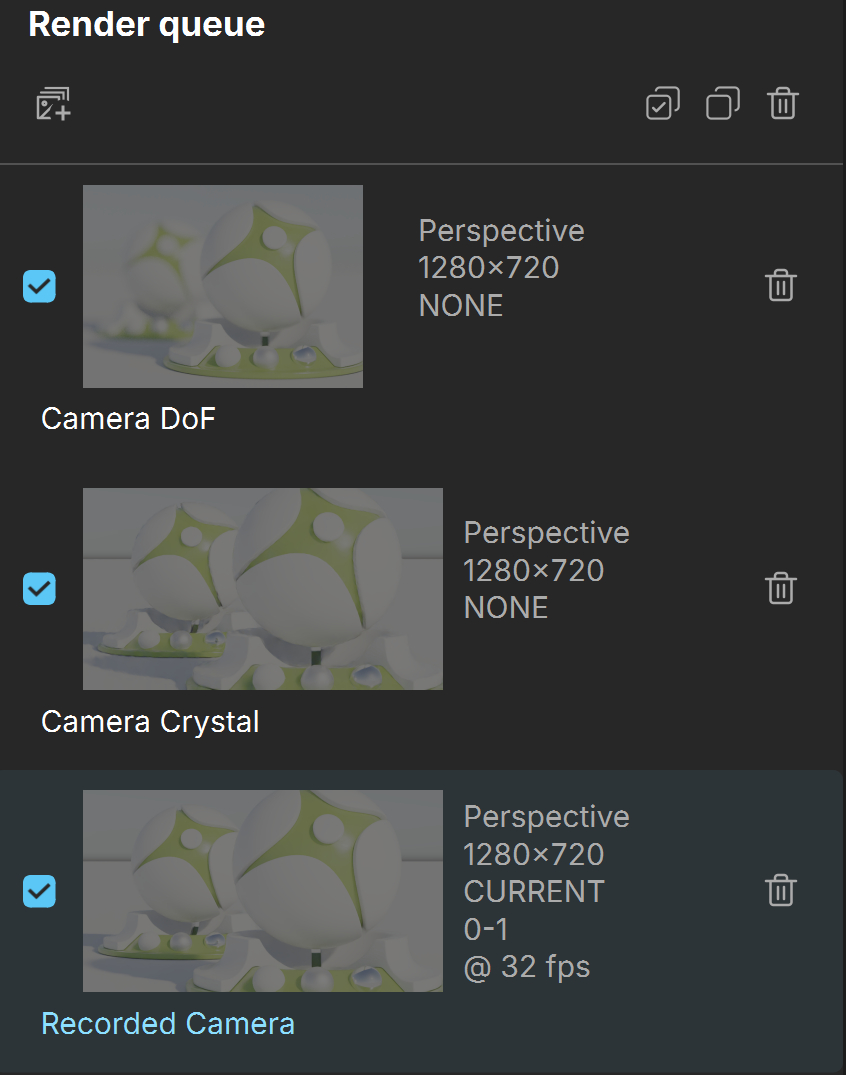
The Render queue panel allows you to add items for batch rendering. When items are added to the queue, the top toolbar button changes to Start queue. Clicking the toolbar button initiates the batch rendering process.
The Render queue panel displays the following information about each render queue item:
- name of the render queue item
- thumbnail of the render camera
- camera type
- camera resolution
- selected scene state
- samples (displayed only on hover)
- output file path (displayed only on hover)
- denoiser (displayed only on hover)
- light cache (displayed only on hover)
For animation sequences additional information is displayed:
- frame range of animation sequence
- FPS of animation sequence
- motion blur (displayed only on hover)
Select for rendering – Adds a camera/animation sequence item, with current settings, to the render queue. |
Select for rendering – Adds a camera/animation sequence item, with current settings, to the render queue. | |
Enable queue items – Enables all queue items in the render queue for rendering. | |
Disable queue items – Disables all queue items in the render queue for rendering. | |
Delete – Clears the entire render queue. Delete from the queue – Removes the selected queue item from the render queue. | |
Enabled – A toggle that enables/disables the rendering of the specified queue item in the render queue. When hovering over the toggle, the name and main settings of the queue item are displayed. |
Common Settings
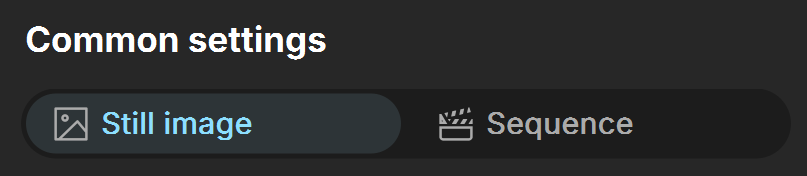
Render output – Specifies the render output - a still or an animation sequence.
Most of the settings are the same for Still images and Sequences.
Camera

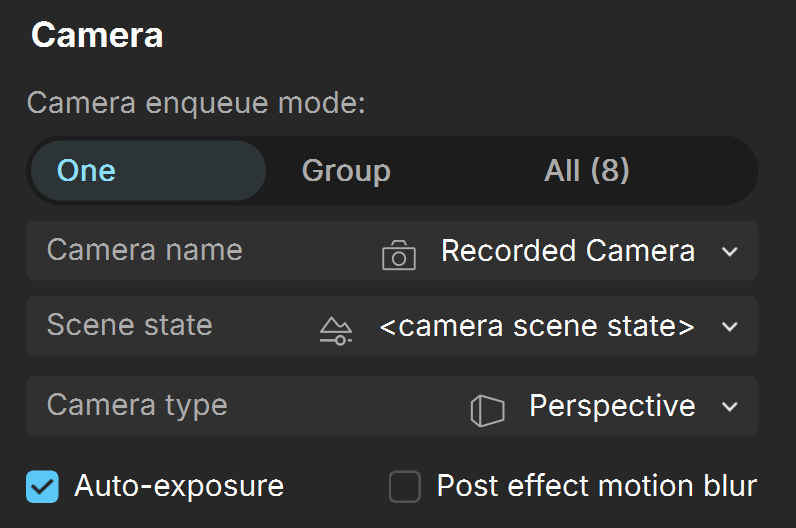
Camera enqueue mode – Sets the mode that specifies how cameras are added to the render queue when the Add to Queue() button is clicked.
One – Adds only the cameras specified in the Camera dropdown to the render queue.
Group – Adds the specified group of cameras from the Camera dropdown list to the render queue.
All – Adds all scene cameras to the render queue.
Camera – Specifies the rendering camera from a list of available scene cameras or <current camera> position.
Scene state – Specifies a scene state from a list of available scene states to apply when rendering or to use the scene's current state when <chosen scene state>.
Camera type – Specifies the type of the camera to be used when rendering a snapshot.
Perspective – Sets the current scene camera to be used to render the snapshot.
Cube 6x1 – Sets the use of a Box camera with the cube sides arranged in a single row useful in generating cubic VR output.
Stereo Cube 6x1 – Sets the use of a Left/Right stereo Box camera with the cube sides arranged in a single row useful in generating cubic stereo VR output.
Spherical – Sets the use of a spherical camera with independent horizontal (FOV X) and vertical (FOV Y) FOV selection that is useful for generating latlong images for spherical VR use.
Stereo spherical – Sets the use of a spherical Left/Right stereo camera with independent horizontal (FOV X) and vertical (FOV Y) FOV selection and that is useful for generating latlong images for spherical VR use. The stereo strength can be adjusted by modifying the Eye dist parameter.
Orthographic – Sets the use of an orthographic camera with an Orthographic width.
FOV X – Specifies the horizontal field-of-view angle. Available only when Camera Type is set to Spherical or Stereo spherical.
FOV Y – Specifies the vertical field-of-view angle. Available only when Camera Type is set to Spherical or Stereo spherical.
Eye dist – Specifies the eye distance for which the stereoscopic image is rendered. Available only when Camera Type is set to Stereo Cube 6x1 or Stereo spherical.
Focus rotation – When enabled, the left and right views are rotated so that their focus points coincide at the distance specified by the Focus Distance parameter in the Camera tab. When disabled, the left and right views directions are parallel.
Top/Bottom – When enabled, the output layout for the views is Top(for left eye) and Bottom(for right eye). When disabled, the output layout is Left(for left eye) and Right(for right eye).
Orthographic width – Specifies the width (in scene units) of the orthographic camera. It controls how much of a scene the camera can see and has the same effect as zooming a perspective camera.
Auto-exposure – When enabled, exposure is automatically calculated. Set exposure in camera is ignored.
Motion Blur – Enables the rendering of motion blur for the rendered image with the settings set in Camera tab.
Still image
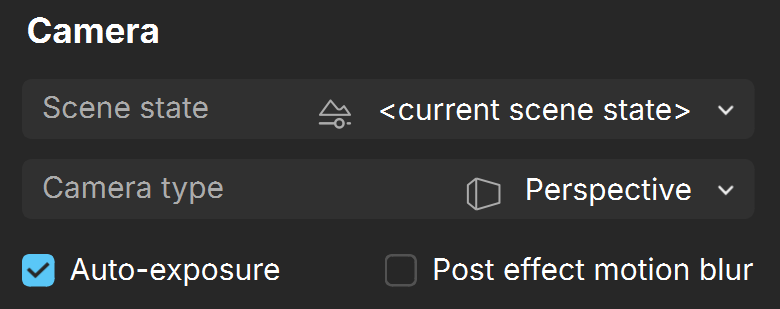
Scene state – Specifies a scene state from a list of available scene states to apply when rendering or to use the scene's current state when <chosen scene state>.
Camera type – Specifies the type of the camera to be used when rendering a snapshot.
Perspective – Sets the current scene camera to be used to render the snapshot.
Cube 6x1 – Sets the use of a Box camera with the cube sides arranged in a single row useful in generating cubic VR output.
Stereo Cube 6x1 – Sets the use of a Left/Right stereo Box camera with the cube sides arranged in a single row useful in generating cubic stereo VR output.
Spherical – Sets the use of a spherical camera with independent horizontal (FOV X) and vertical (FOV Y) FOV selection that is useful for generating latlong images for spherical VR use.
Stereo spherical – Sets the use of a spherical Left/Right stereo camera with independent horizontal (FOV X) and vertical (FOV Y) FOV selection and that is useful for generating latlong images for spherical VR use. The stereo strength can be adjusted by modifying the Eye dist parameter.
Orthographic – Sets the use of an orthographic camera with an Orthographic width.
FOV X – Specifies the horizontal field-of-view angle. Available only when Camera Type is set to Spherical or Stereo spherical.
FOV Y – Specifies the vertical field-of-view angle. Available only when Camera Type is set to Spherical or Stereo spherical.
Eye dist – Specifies the eye distance for which the stereoscopic image is rendered. Available only when Camera Type is set to Stereo Cube 6x1 or Stereo spherical.
Focus rotation – When enabled, the left and right views are rotated so that their focus points coincide at the distance specified by the Focus Distance parameter in the Camera tab. When disabled, the left and right views directions are parallel.
Top/Bottom – When enabled, the output layout for the views is Top(for left eye) and Bottom(for right eye). When disabled, the output layout is Left(for left eye) and Right(for right eye).
Orthographic width – Specifies the width (in scene units) of the orthographic camera. It controls how much of a scene the camera can see and has the same effect as zooming a perspective camera.
Auto-exposure – When enabled, exposure is automatically calculated for each frame. Set exposure in camera is ignored.
Motion Blur – Enables the rendering of motion blur for the rendered image with the settings set in Camera tab.
Animation sequence
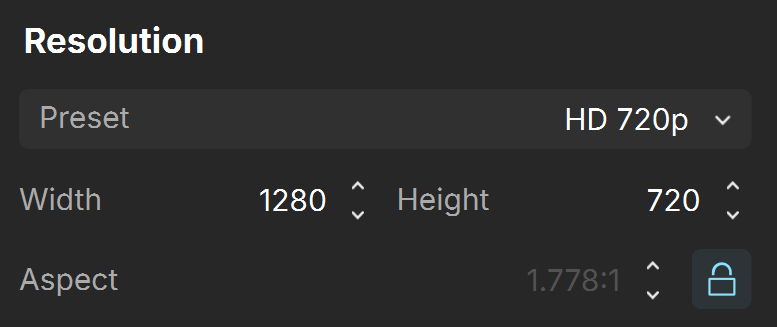
Resolution
Width – Sets the width of the rendered snapshot in pixels.
Height – Sets the height of the rendered snapshot in pixels.
Preset – Sets the render resolution from several predefined resolutions:
<from camera> – Sets the render resolution from the camera resolution in the Camera tab. Available for still images.
<from Live Link> – Sets the render resolution to the forced resolution set in the host app that is sending animation for rendering via Live Link.
<from editor> – Sets the render resolution to the forced resolution set in the Playback settings of the Animation editor. Available for animation sequences.
<current resolution> – Sets the render resolution to the current core render resolution. Current core render resolution can be seen from the Rendering status tag in the status bar.
540p(960x540); HD 720p(1280x720); 900p(1600x900); FHD 1080p(1920x1080); 1440p(2560x1440); UHD 4K(3840x2160); UHD 8K(7680x4320); PC Video(640x480); NTSC(720x486); PAL(720x576); 1K Super 35(1024x778); 2K Super 35(2048x1556); 4K Super 35(4096x3112); 8K Super 35(8192x6224); 1K Cinemascope(914x778); 2K Cinemascope(1828x1556); 4K Cinemascope(3656x3112); 8K Cinemascope(3656x3112); 16K Cinemascope(7312x6224); 1K DCP(1024x540); 2K DCP(2048x1080); 4K DCP(4096x2160); 8K DCP(8192x4320); 512 Square(512x512); 1K Square(1024x1024); 2K Square(2048x2048); 4K Square(4096x4096);
Aspect – Sets the aspect of the render resolution.
Lock aspect – When enabled, locks the Width value to the Height value. When changing the Height value, the Width changes proportionally according to the Aspect value.
Render
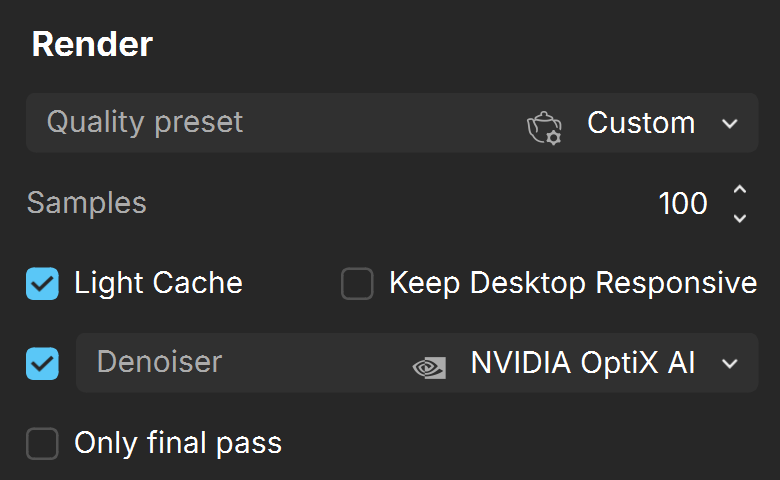
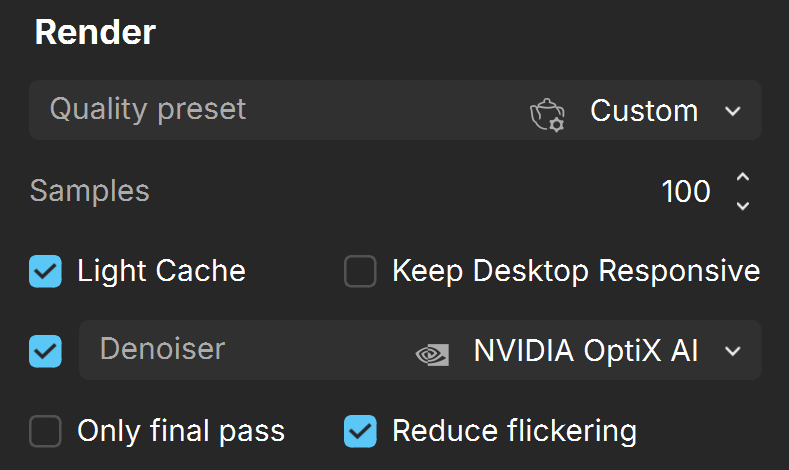
Samples – Specifies the samples per pixel for refining the image.
Quality – Sets the rendering quality based on 4 predefined presets:
Low – Sets the rendering quality using the following values:
GI – Off;
GI bounces – 1;
Reflection bounces – 2;
Refraction bounces – 4;
Coat – On;
Shading graph – Off;
Noise threshold – 0.5;
Opacity maps(clip) – Off;
Shading graph for glossy/GI – Off;
Medium – Sets the rendering quality using the following settings:
GI - On;
GI bounces – 2;
Reflection bounces – 2;
Refraction bounces – 8;
Coat – On;
Shading graph – On;
Noise threshold – 0.1;
Opacity maps(clip) – Off;
Shading graph for glossy/GI – Off;
High – Sets the rendering quality using the following settings:
GI – On;
GI bounces – 3;
Reflection bounces – 8;
Refraction bounces – 8;
Coat – On;
Shading graph – On;
Noise threshold – 0.05;
Opacity maps(clip) – On;
Shading graph for glossy/GI – Off;
Ultra – Sets the rendering quality using the following settings:
GI – On;
GI bounces – 4;
Reflection bounces – 15;
Refraction bounces – 15;
Coat – On;
Shading graph – On
Noise threshold – 0.01;
Opacity maps(clip) – On;
Shading graph for glossy/GI – On;
Custom – Sets the rendering quality using the settings from the Render settings tab.
Light Cache – Enables Light Cache when rendering.
Keep Desktop Responsive – When enabled, reduces the effect on other applications while Vantage is rendering.
Denoiser – When enabled, applies denoising to the rendered image. It allows choosing between the NVIDIA AI denoiser or Intel Open Image Denoise.
NVIDIA AI – Vantage's integration of NVIDIA's AI-based denoising algorithm. The NVIDIA AI denoiser requires an NVIDIA GPU to work.
Intel Open Image Denoise – Vantage's integration of Intel Open Image Denoise.
Only final pass – Applies the denoiser only during the final pass. This greatly reduces render time when used with high Samples count.
Reduce flickering – Enables temporal rendering of the NVIDIA AI denoiser. Results and details may be blurry when enabled. Disabling it may increase image sharpness. Available only for animation sequences when Denoiser is set to NVIDIA AI.
Still image
Animation sequence
Render Elements
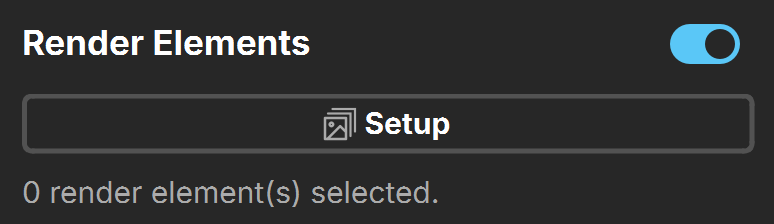
Render Elements – When enabled, outputs render elements for use in compositing software. Specific render elements can be set from the Setup button.
Setup – Opens the Render elements selection dialog.
Output
Output path – Specifies the output file path where the still image is saved.
Bake CC in EXR – When enabled, bakes color corrections and post effects in the EXR file. Note that this will clamp the dynamic range.
Save PNG alpha – When enabled, stores the environment in the alpha channel of the .png file. In the Save Image window, a .png file format must be specified.
Export render elements to separate files – When enabled, render elements are generated into separate files. When disabled, render elements are stored into a single file. Note: exr file must be specified as an output file.
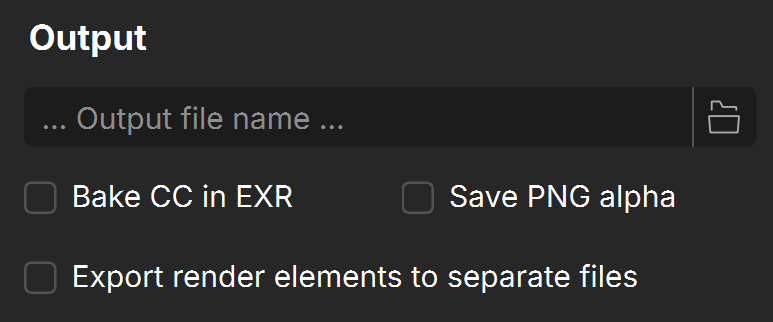
Still image
Frame range
First frame – Specifies the first frame of the animation sequence.
Last frame – Specifies the last frame of the animation sequence.
Interval – Specifies the frame output at regular intervals. 1 renders every frame of the animation while for example 5 renders every 5th frame.
FPS – Specifies the frames per second for the animation.
Custom frames
Specify custom frame – Specifies custom frames and/or frame ranges to render. Example: 1, 5, 7-25, 50-100.
Output file type – Specifies the file type for the rendered sequence.
Image – Output of the animation is an image sequence. In the Save Image window, a .png or .exr file format can be specified for the image sequence.
Image + MP4 – Output of the animation is an image sequence and an .mp4 file. In the Save Image window, a .png or .exr file format can be specified for the image sequence.
Image + MKV – Output of the animation is an image sequence and an .mkv file. In the Save Image window, a .png or .exr file format can be specified for the image sequence.
MP4 – Output of the animation is an .mp4 file.
MKV – Output of the animation is an .mkv file.
Output path – Specifies the output file path where the still image is saved.
Bake CC in EXR – When enabled, bakes color corrections and post effects in the EXR file. Note that this will clamp the dynamic range.
Save PNG alpha – When enabled, stores the environment in the alpha channel of the .png file. In the Save Image window, a .png file format must be specified.
Export render elements to separate files – When enabled, render elements are generated into separate files. When disabled, render elements are stored into a single file. Note: exr file must be specified as an output file.
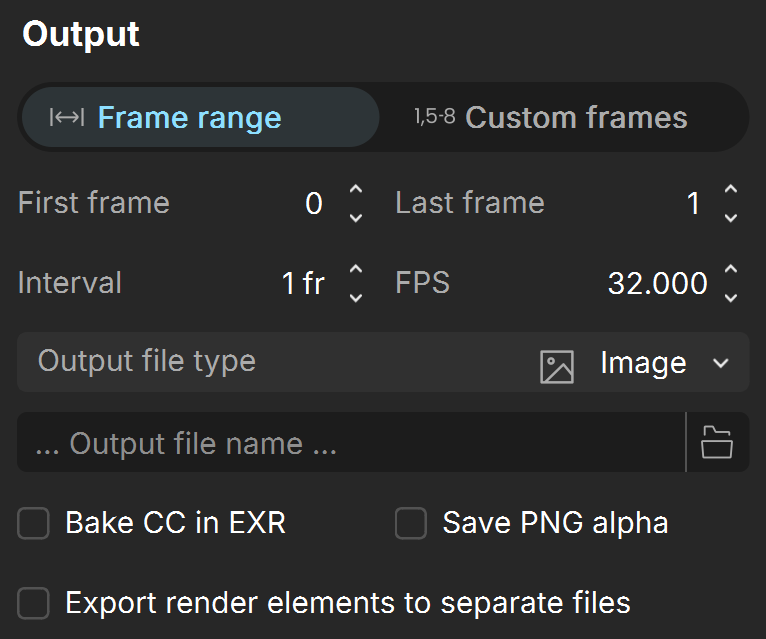
Animation sequence
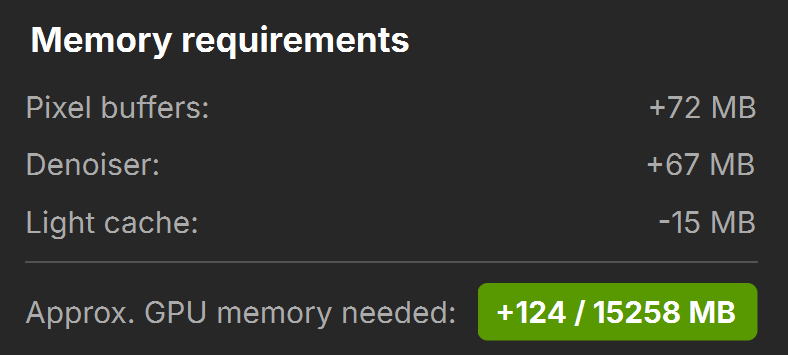
Memory requirements
Pixel buffers – The amount of additional memory required for the currently set render resolution.
Denoiser – The amount of additional memory required for the denoiser.
Light Cache – The amount of additional memory required for the Light cache.
Approx. GPU memory needed – Displays an approximation of the additionally needed GPU memory to that shown on the right-hand side of the status bar for the currently set render resolution and settings. If the value is negative, less memory is required than that shown in the status bar.
Start – Starts rendering of the set Camera and current render settings. The button is disabled if there are cameras in the batch rendering queue.