Chaos Vantage
Toolbars
This page offers information about the toolbars of Chaos Vantage.
Last updated 24 June 2026
This page offers information about the toolbars of Chaos Vantage.
Overview
Chaos Vantage has toolbar buttons that reside in Top and Status toolbars.
Top toolbar

Button | Description |
|---|
Button | Description | |
|---|---|---|
Home | Open Home screen – Opens the Chaos Vantage Home screen, where you can create new scenes or open existing ones, find sample scenes, tutorials, links to Chaos learning and help sources, and more. | |
Selection | Select – Makes a single selection. (Shortcut: Q) Not available when in Live Link. | |
Select group – Selects a group of objects in the viewport. (Shortcut: Shift+Q). Found by clicking and holding the Select button. Not available when in Live Link. | ||
Transformations | Move – Enters Move mode. (Shortcut: W). Use the move gizmo's center cube to place objects on surface normal. Use Shift + move gizmo's center cube to place objects on surface without changing object orientation. Right-click opens the Move Transform dialog. Not available when in Live Link. Find more information at Transforms Dialog Menu. | |
Rotate – Enters Rotate mode. (Shortcut: E). Right-click opens the Rotate Transform dialog. Not available when in Live Link. Find more information at Transforms Dialog Menu. | ||
Scale – Enters Scale mode. (Shortcut: R). Right-click opens the Scale Transform dialog. Not available when in Live Link. Find more information at Transforms Dialog Menu. | ||
Move pivot – Translates an object's pivot point. Right-click opens the Translate Pivot dialog. Find more information at Translate Pivot Menu. Not available when in Live Link. See the How to move and adjust pivot points in Chaos Vantage video. | ||
Snap – Enables Transforms snapping (Shortcut: S). Right-click opens the Snapping options dialog. Visible only when Move, Rotate, Scale, or Translate pivot is selected. Find more information at Snap Dialog Menu. | ||
World space / Local space – Specifies the coordinate space for transformations. The default is World. Click the arrow to choose between World and Local space. Visible only when Move, Rotate, Scale, or Translate pivot is selected. | ||
Cosmos | Chaos Cosmos Browser – Opens the Chaos Cosmos Browser window. Not available when in Live Link. See the Shading Scenes with Chaos Cosmos Materials tutorial. | |
Create Geometry | Create Anima scene – Creates a new Anima scene object. | |
Create new Geometry object – Opens a dropdown menu with different geometry types. Click on a light to create it. Available lights are: Clipper, Decal, Fluid Simulation, Fur, Chaos Scatter, Volume grid, and Water surface. | ||
Chaos Scatter – Creates a new Chaos Scatter object. Not available when in Live Link. See the Working with Chaos Scatter tutorial. | ||
Clipper – Creates a new Clipper object. Not available when in Live Link. | ||
Decal – Creates a new Decal object. Not available when in Live Link. | ||
Fluid Simulation – Creates a new Fluid Volume object. Not available when in Live Link. | ||
Fur – Creates a new Fur object. Not available when in Live Link. | ||
Gaussian splats – Creates a Gaussian Splats object. Not available when in Live Link. | ||
Volume grid – Creates a new Volume Grid object. Not available when in Live Link. | ||
Water surface – Creates a new Water Surface object. Not available when in Live Link. | ||
Create Light | Create new Light object – Opens a dropdown menu with different lights types. Click on a light to create it. Available lights are: Point, Spot, Directional, Rectangle, Disc, Sphere, and IES. Not available when in Live Link. (Shortcut: L) | |
Create Camera | Create new Camera – Creates a new camera from current view. Not available when in Live Link. (Shortcut: Ctrl + K) | |
Create Scene State | Create new scene state – Creates a new scene state with all necessary scene sub-states. Not available when in Live Link. | |
VR settings | Open Virtual Reality Settings – Opens the Virtual Reality settings. Start VR Session – Starts the virtual reality session from the current camera position. Eye Mode – Specifies the rendering mode:
View joystick layout – Opens a VR joystick layout that shows all controls for virtual reality. Resolution multiplier – Lowers the headset rendering resolution directly in Vantage. Depth reprojection – Uses the depth of the scene to reproject objects in the Runtime compositor. Good for low FPS but may cause artifacts. Note that the Depth reprojection works only with DLSS Denoiser. Joystick Rotation Snap – Changes how the Right Thumbstick behaves. When enabled, left and right rotations snap on 45 degrees. When disabled, rotation happens smoothly. | |
Material Node Editor | Material Node Editor – Opens the Material node editor where you can modify materials. | |
Veras | Launch Chaos Veras – Opens Chaos Veras where you can quickly test different styles; use text prompts to add context, vegetation or architectural variations; and create camera paths and transitions based on your AI-enhanced frames. | |
Render Mode | High Quality Render – Opens Rendering Mode where you can set up the rendering settings and start rendering. (Shortcut: Ctrl+R) | |
Snapshot | Quick save snapshot – Saves a high-quality snapshot of the current view in the project folder from where the scene file has been imported. (Shortcut: Ctrl+P) |
Status Bar
The status bar resides in the bottom of Chaos Vantage. Here you can find information about:
Left-hand side
- Open Debug Log button ()
- Important messages such as:
- last frame render time
- loading progress
- quick tips
- etc.

Right-hand side
- Render status – Displays the current Chaos Vantage status. Status can be:
- [RENDERING] – Interactively rendering the scene.
- [HQ RENDER] – Rendering offline image or a sequence.
- [CAM REC.] – Recording camera movement.
- [ENCODING] – Capturing and encoding viewport to an .mp4 file.
- [LIVE LINK] – Live Link session is initiated between Chaos Vantage and a V-Ray compatible DCC.
- [PAUSED] – Rendering is paused.
- [IDLE] – Rendering is idling after the specified samples (in Edit > Preferences > Stop interactive sapling after) are reached.
- [IDLE][LIVE LINK] – Rendering is idling after the specified samples (in Edit > Preferences > Stop interactive sapling after) are reached while in Live Link session.
Click here for UI...


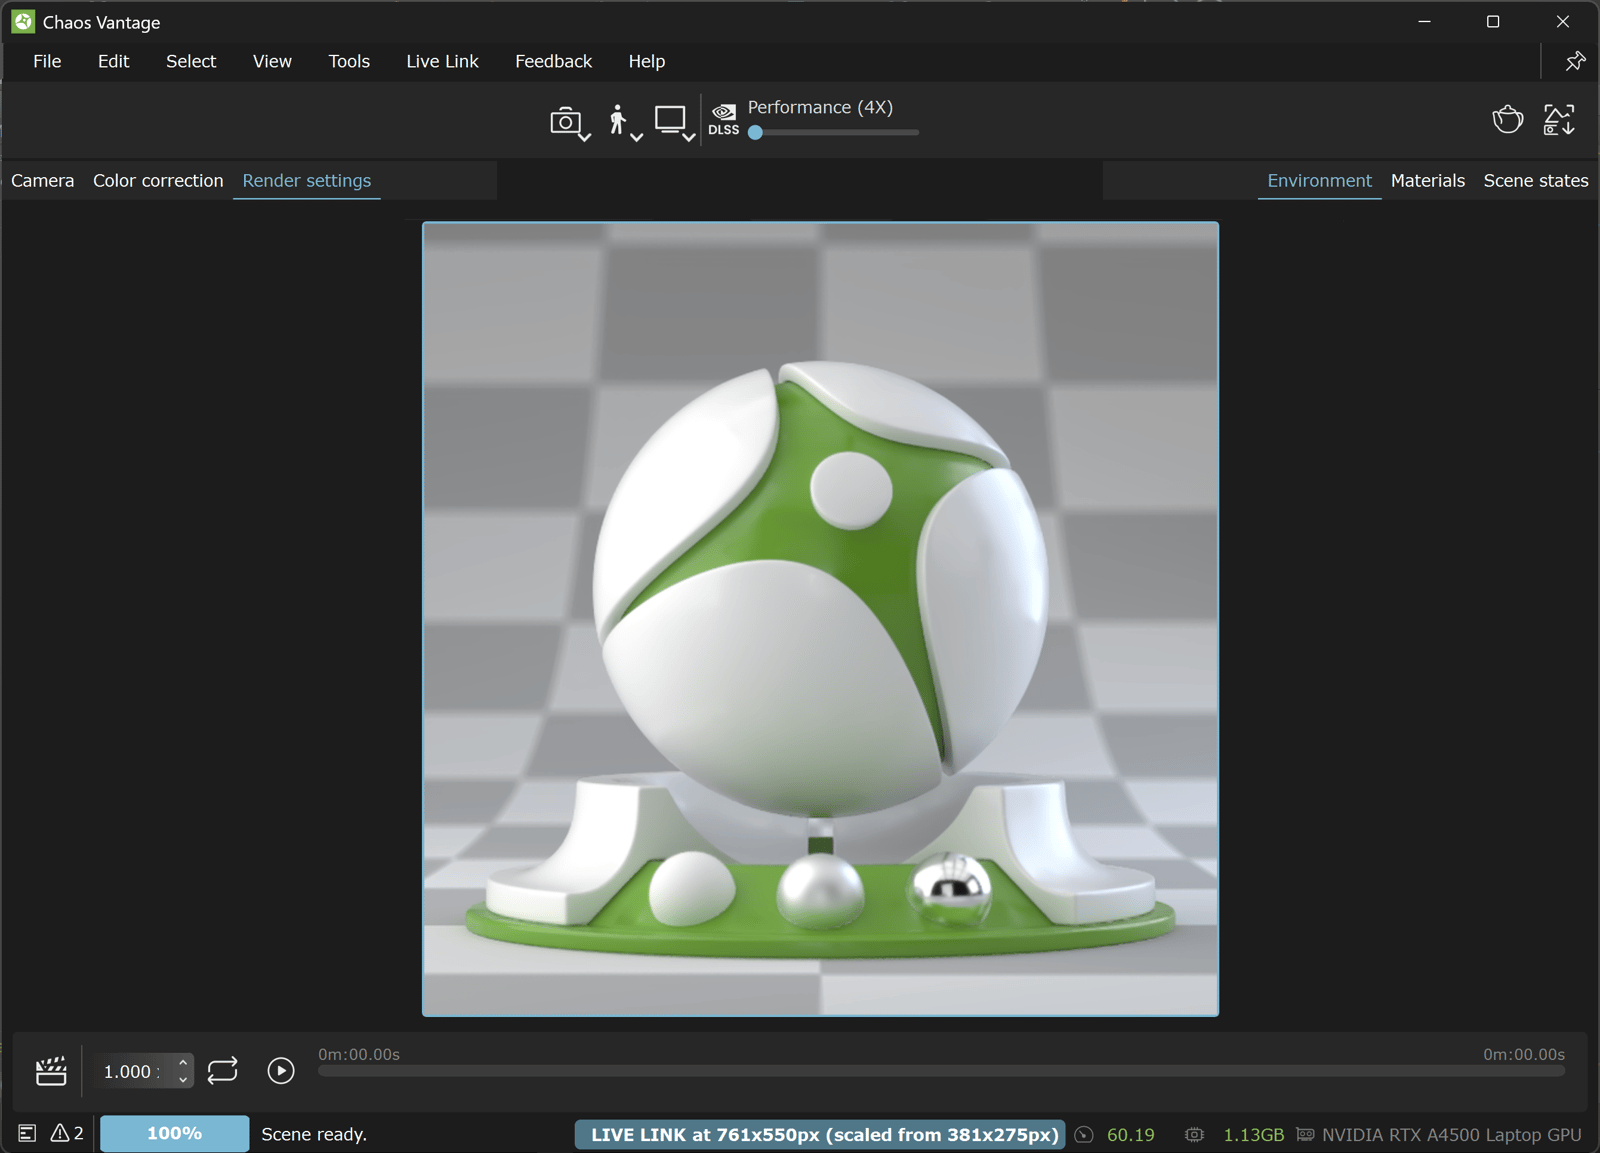



- Rendering device(s) – List of graphic cards used for rendering.
- FPS – Speed of the rendered frames per second. Hovering over displays information about:
- Render time – Time spent in seconds rendering the last frame.
- Samples accumulated – Amount of samples currently accumulated in the last frame.
- Last post-process – Time spent for post-processing effects in the last frame.
- VRAM — Current amount of VRAM used for the scene. Hovering over displays information about:
- Primary device total memory – Memory of the primary graphic card used for rendering.
- Primary device available memory – Currently available memory of the graphic card used for rendering.
- Number of BLASes – Number of Bottom Level Acceleration Structure (BLAS) currently loaded on the GPU.