Chaos Vantage
Volume Grid
This page provides details about the Volume Grid object in Chaos Vantage.
Last updated 16 June 2026
This page provides details about the Volume Grid object in Chaos Vantage.
Overview
The Volume Grid is a special kind of volumetric effect that works with grid-based cache formats, compared to Environment Fog which is a general purpose volumetric effect. The Volume Grid reads its data from an input file which supports grid-based representation of the volume.
Currently, the Volume Grid supports three volume formats:
- OpenVDB (.vdb) – Supported by Houdini®, FumeFX®, and RealFlow®
- PhoenixFD (.aur) – Phoenix FD ® native volume format

Volume Grid Creation
Use the Create new Geometry Grid toolbar button and select Volume grid to create a Volume Grid.
Once the Volume Grid is created, it can be found in the Scene outliner. Its parameters are accessible in the Objects tab.
youtu.be
Settings

The VolumeGrid settings are grouped into four tabs: Input and Rendering, Cache playback, Smoke Color, and Fire. They can be moved to a separate column via the Splitter () button.
Input and Rendering
Cache file path – Loads a supported file: .aur or .vdb
Flip Up axis – When enabled, flips the Y and Z axes of the cached transformation. For example, if the up axis is along Z, it becomes Y and vice versa.
Flip Z axis –
Step size – Specifies the ray marching step of the camera rays as a percentage of the cell size. As the renderer traces rays through the Volume Grid, this value controls how often to get information from the grid. If the value is bigger, some cells start getting skipped and artifacts may appear. If rendering volumetrics with a specific transparency curve, a lower percentage might be necessary so that fine details are not lost. On the other hand, increasing this value increases the rendering speed.
Step size shadow – Specifies the ray marching step of the rays used to evaluate the lighting (shadow rays) as a percentage of the cell size. Usually, this value can be higher than Step size, as generally shadows do not need so much detail. Increasing the Step size shadow also speeds up rendering performance, particularly with dome and area lights.
Smoke density – Specifies the density of the smoke. See the Smoke Density example below.
Scatter GI – When enabled, lets GI rays pass through the loaded cache file, making the volume grid brighter. See the Scatter GI example below.

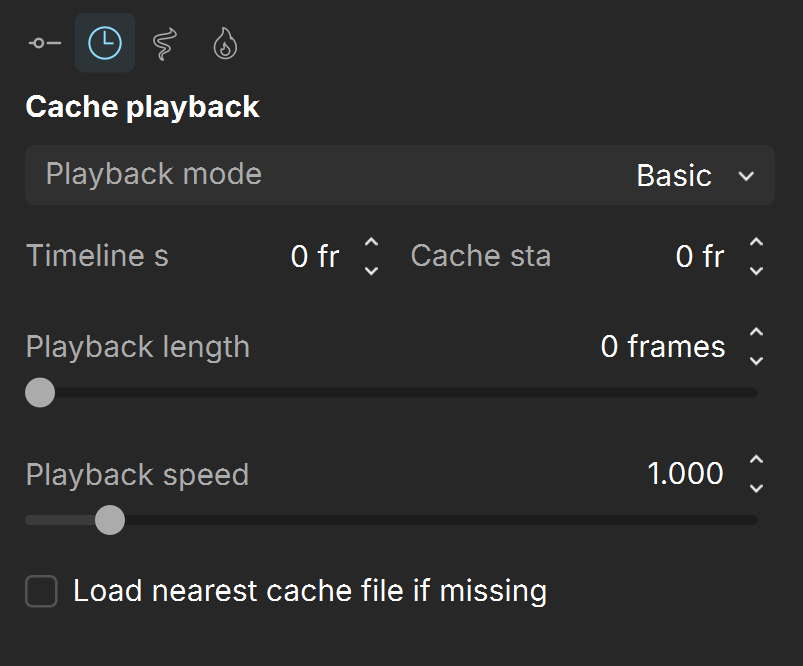
Cache Playback
Playback mode – Chooses between different options for animation control:
Basic (default) – The cache sequence is played with a constant speed and can be offset forward or backward on the timeline, as well as sped up or slowed down.
Looping – A specified piece of the simulated sequence is looped. Can be used for flowing and repeated effects such as fireplaces, campfires or torch fires, water in fountains, waterfalls or boiling liquid.
Direct cache index – Specifies which cache file to be loaded for the current timeline frame. Can be used to either show a static simulation, or the Direct Cache Index can be animated in case you want varying play speed, including playing the simulation backwards.
Direct Cache Index – Specifies the cache file index for the current timeline frame. Can be animated in order to achieve more interesting time-bend effects. Available when the Playback mode is set to Direct cache index.
Timeline start – An offset specifying which timeline frame the starting cache will be placed on. You can think of it this way: "Put cache #(Cache start) on timeline frame #(Timeline start)".
Cache start – An offset specifying which cache file from the sequence will be placed on the timeline at frame Timeline start. You can think of it this way: "Put cache #(Cache start) on timeline frame #(Timeline start)".
Playback length – Specifies the duration in timeline frames. In Basic mode, when this parameter is larger than 0, the sequence length is limited to its value. In Looping mode, this parameter shows the loop length.
Playback speed – A multiplier for the playback speed. A value of 1 means that each timeline frame corresponds exactly to one cache file index. If the play speed is not exactly 1.0, frames are blended between. To blend particles, you must export their ID channel during simulation.
Load nearest cache file if missing – If there is no cache file at the required frame, the nearest cache is found and loaded. This is useful for a simulation that ends with a sequence of static frames (for example, still liquid or freezing fire) as it eliminates the need to render multiple identical frames after movement has stopped.
Smoke Color
Color source – Specifies the source channel that is used to determine the smoke color. By default, a uniform simple color set by the Constant Color option is used.
Disabled – The smoke color is not rendered.
Temperature – The smoke color is based on the values of the Temperature cache channel and can be remapped using the color gradient.
Smoke – The smoke color is based on the values of the Smoke cache channel and can be remapped using the color gradient.
Fuel – The smoke is based on the values of the Fuel channel and can be remapped using the color gradient.
Constant Color – The smoke color is the same for the entire volume and is taken from the Constant Color box.
Smoke color – If Based on is set to Constant Color, this color is used. See the Smoke Color example below.
Smoke opacity:
Based on – Allows you to select how the smoke opacity is computed. By default, this is set to Simple сmoke.
Simple smoke – Uses the Smoke channel directly as opacity, without remapping it through the Opacity Curve. The opacity is controlled by the Simple Smoke Factor. This mode is the same as setting Based on to Smoke and creating a straight line in the Opacity diagram from coordinates [0; 0] to [1; Simple Smoke Opacity].
Temperature – Uses the temperature channel and remaps it through the Opacity Curve to get the rendered opacity. Can be used to produce smoke without needing the smoke channel in the simulation.
Smoke – Uses the smoke channel and remaps it through the Opacity Curve to get the rendered opacity.
Fuel – Uses the smoke channel and remaps it through the Opacity Curve to get the rendered opacity.
Simple Smoke Factor – When the Based on parameter is set to Simple smoke, this value is used as opacity multiplier.
Scale opacity by scene units – When enabled, the opacity per unit length remains constant when changing the Grid resolution. Therefore, the larger the unit scale is, the denser the smoke appears in renders and vice versa. This option is disabled for imported OpenVDB cache files.
Base density scale – If the opacity of a voxel is below this specified value, the voxel is not shaded at all. Increase this value to speed up rendering. Decrease it if parts of the smoke are too transparent and start disappearing in the render.

Fire
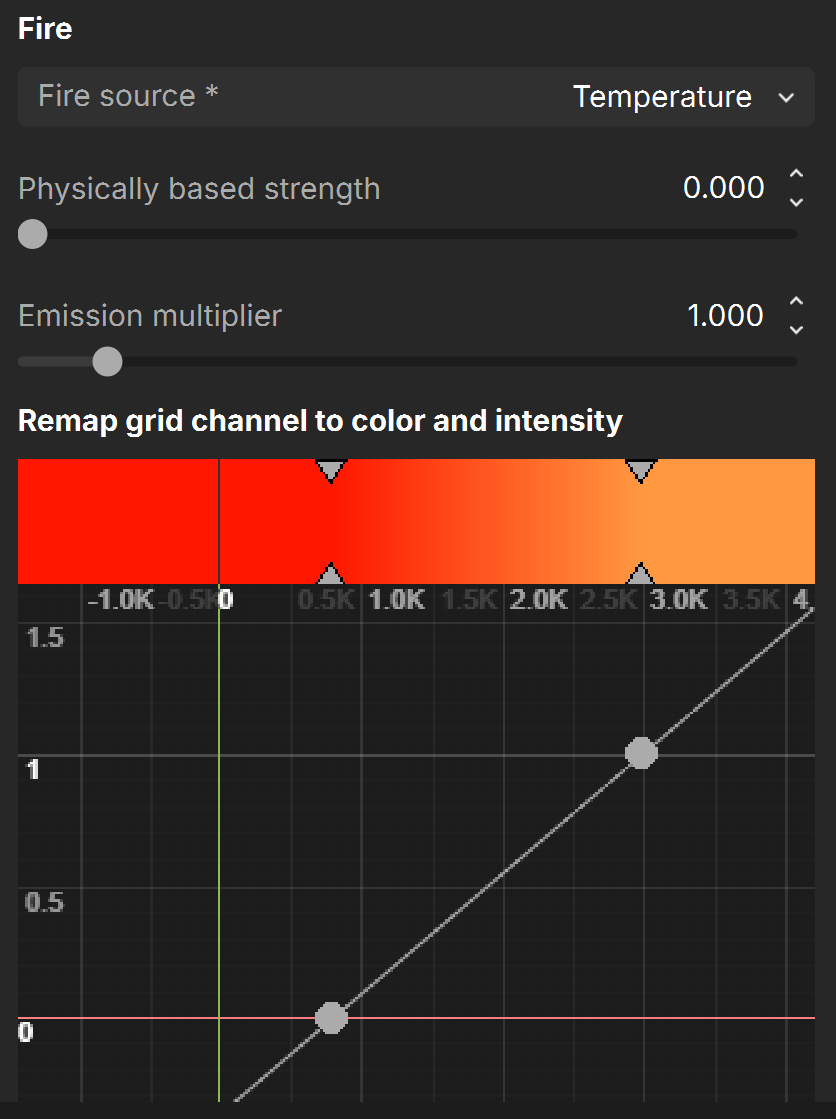
Fire source – Specifies the source channel that will be rendered as fire. By default the Temperature channel is used.
Physically based strength – Transitions between an artistic look of the fire (when set to 0) and a realistic physically-based intensity (when set to 1). The realistic mode multiplies the fire intensity by the Black Body Radiation model, which gives strong brightness to the hot parts of the fire.
Emission multiplier –
Examples
The following examples demonstrate the effect that individual Volume Grid parameters have on the scene. Click on any image to view it at a higher resolution.
Example: Smoke Density
In this example, the Smoke Density value controls how the cloud appears: lower values create a lighter, thinner effect, while higher values result in a denser, thicker cloud.

Smoke density = 0.01

Smoke density = 0.5

Smoke density = 1
Example: Smoke Color
This example shows the effect of the Smoke color parameter.

Smoke color is white

Smoke color is yellow

Smoke color is grey
Example: Scatter GI
This example shows the effect of the Scatter GI parameter.
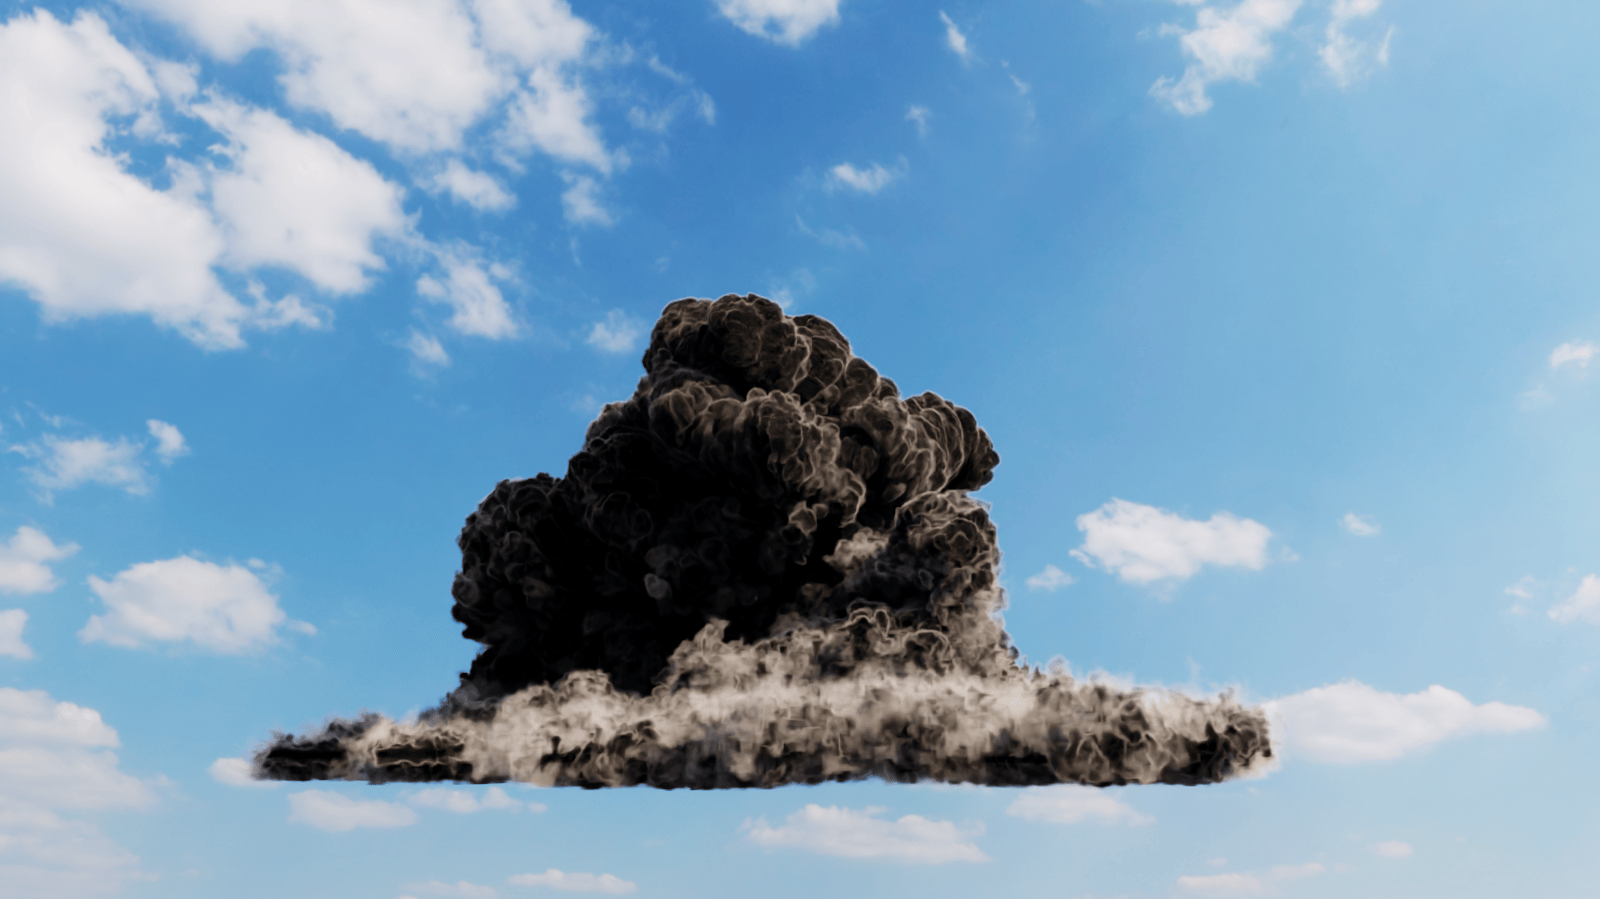
Scatter GI is off

Scatter GI is on