Corona for 3ds Max
Corona Decal
This article provides information on the Corona Decal object, its settings, and usage examples.
Last updated 10 January 2026
This article provides information on the Corona Decal object, its settings, and usage examples.
Overview
Corona Decal is a very convenient way of projecting textures and materials onto your scene objects: graphics, surface imperfections, potholes, all within the 3D viewport and without UVW mapping.
Corona Decal features include:
- Bending in two axes
- Automatic aspect ratio
- Object includes/excludes
- Real-world size texture support
- Depth and angle projection limits
- Different bump and displacement mixing options
- Affecting only specific material properties (color, roughness, opacity,…)
- ...and more
youtu.be
Creating a Corona Decal
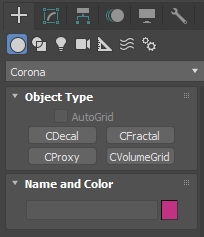
To create a Corona Decal use the dedicated Corona Toolbar icon. It can also be accessed by typing Decal into the 3ds Max X menu or from the Command Panel > Create > Geometry > Corona > CDecal.
Corona Decal toolbar icon


Create Corona Decal in the 3ds Max X menu
Command Panel > Create > Geometry > Corona > CDecal
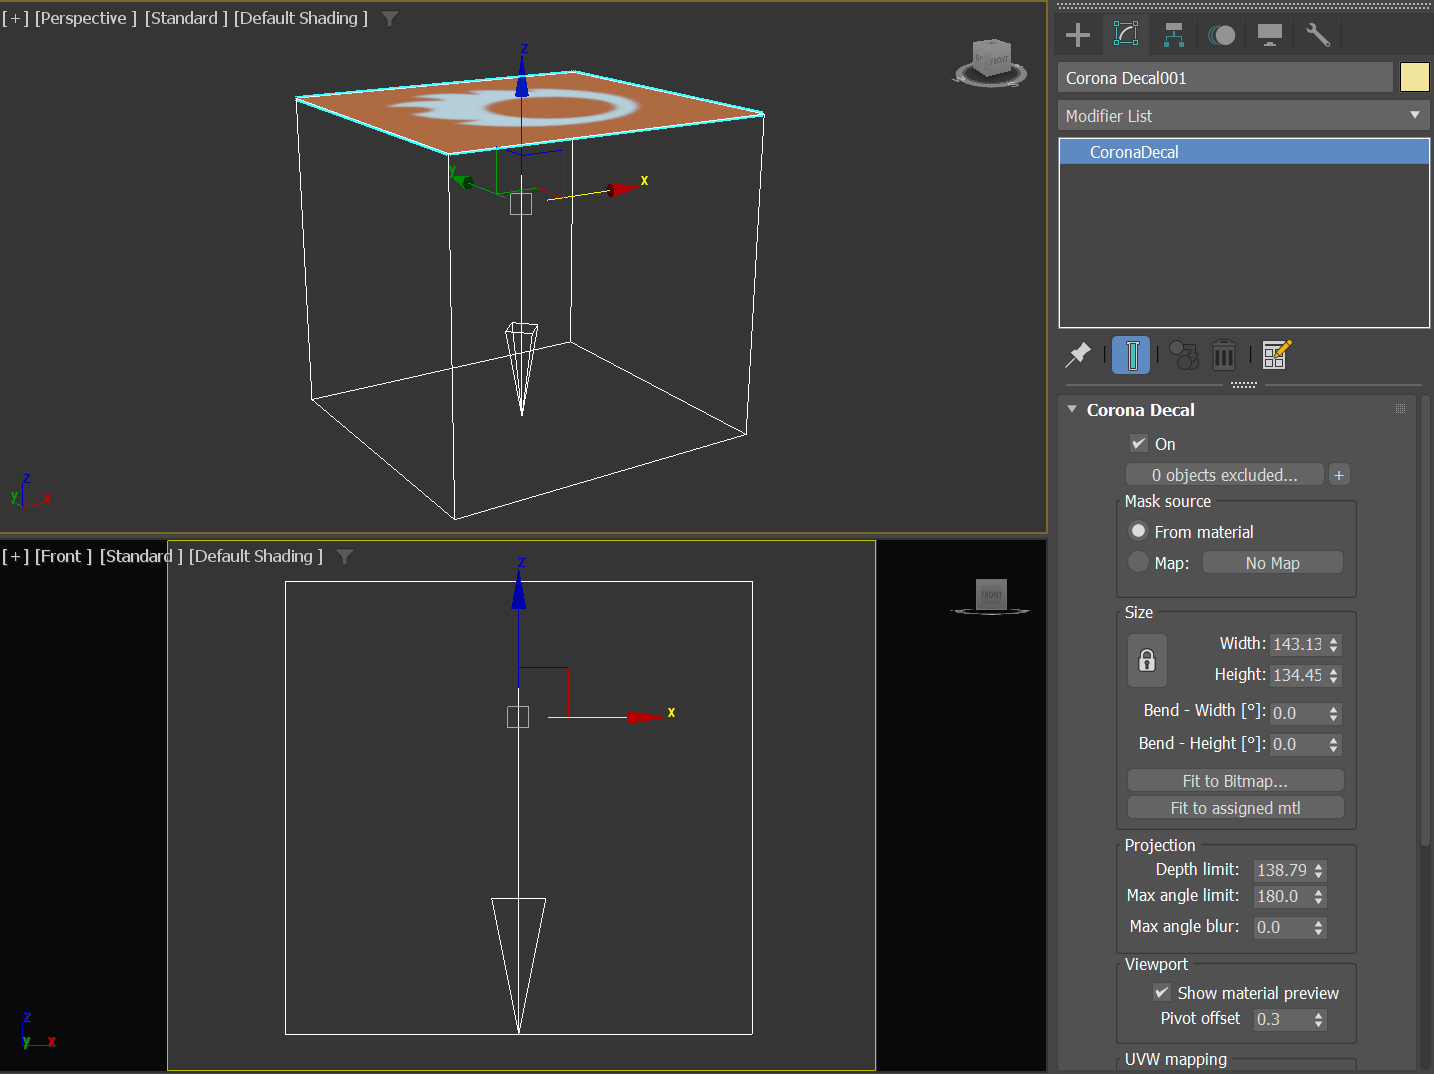
A Corona Decal can be created in a similar fashion as the 3ds Max plane object - by clicking and dragging to specify its width and height or Ctrl + clicking and dragging to create a decal as a cube, starting from its center point.
Corona Decal Settings
Corona Decal
On – Turns Decal On and Off.
Include/Exclude – Enables Include/Exclude objects option.
Mask Source – Source of Decal alpha (blending) mask.
From Material – Assigned material's opacity channel will be used.
Map – Allows selected another, independent map to act as a mask.
Size:
Lock – Toggle constraint of aspect ratio between width and height.
Width – Decal width.
Height – Decal height.
Bend - Width [°] – Specifies bend angle of the decal in the width direction.
Bend - Height [°] – Specifies bend angle of the decal in the height direction.
Fit To Bitmap... – Fits the decal aspect ratio to match selected texture node or a texture inside selected material (use drag and drop) or a bitmap file (use drag and drop or click to select from HDD). The overall area of the decal is preserved.
Fit To Assigned Mtl – Fits the decal aspect ratio to match one of the textures of the currently assigned material.
Projection
Depth Limit – Limits the depth into which this decal is projected. Any surface beyond this distance will not receive the decal.
Max Angle Limit – Maximum angle deviation between the surface normal and the decal direction for which the decal will be used. This can limit the projection to only facing surfaces. A value of 90 degrees will remove projection from backfaces, while 180 degrees will project on all backfaces.
Max Angle Blur – Optional fuzziness (blending) on the edge of the max angel limit.w
Viewport
Show Material Preview – Shows material preview on top of the decal in the 3ds Max viewport when a material is assigned.
Pivot Offset – Changing this value shifts the decal in its Z axis by changing the relative position of its projection start and its pivot. With value 0 the decal projection starts at the pivot and with value 1 it ends there.
UVW mapping
Real-world map size – Enables real-world size mapping for the textures used in the Corona Decal material.

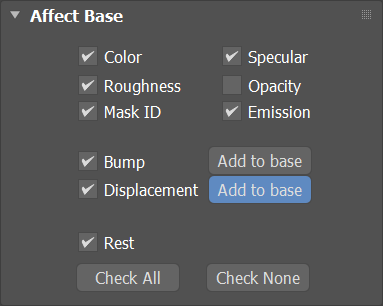
Affect Base
Color – When enabled, the color of base material is replaced with decal material color on geometry where decal is projected. If disabled, the color of base material is unaffected.
Specular – When enabled, the specular (IOR, metalness) layer of base material is replaced with decal material specular layer on geometry where the decal is projected. If disabled, the specular layer of base material is unaffected.
Roughness – When enabled, the roughness of base material is replaced with decal material roughness on geometry where the decal is projected. If disabled the roughness of base material is unaffected.
Opacity – When enabled, the opacity of base material is replaced with decal material opacity on geometry where the decal is projected. If disabled, the opacity of base material is unaffected.
Mask ID – When enabled, the decal will be visible in CMasking_ID render element (only if instance ID option is used).
Emission – When enabled, the emission of base material is replaced with decal material emission on geometry where the decal is projected. If disabled, the emission of base meterial is unaffected .
Bump – When enabled, the bump of base material is replaced with decal material bump on geometry where the decal is projected. If disabled, the bump of base material is unaffected.
Add To Base – When enabled, the decal material bump is added on top of the base material bump on geometry where the decal is projected. If disabled, the bump of base material is replaced with decal material bump.
Displacement – When enabled, the displacement of base material is replaced with decal material displacement on geometry where the decal is projected. If disabled, the displacement of base material is unaffected.
Add To Base – When enabled, the decal displacement is added on top of the base material displacement on geometry where the decal is projected. If disabled, the displacement of base material is replaced with decal material displacement.
Rest – When enabled, the rest of base material properties (those not specified in this rollout) are replaced with decal material properties on geometry where the decal is projected. If disabled, these properties of base material are unaffected.
Check All – Enables all checkboxes.
Check None – Disables all checkboxes.
Examples
Let's create a simple material and apply it to a Corona Decal object.

You can see that the texture on the Decal is stretched. Fit to Bitmap..., just like in UVW Mapping, or Fit to assigned mtl options can be used to quickly get the correct proportions of the texture. In case there is already a material assigned, Fit to assigned mtl is the faster option.

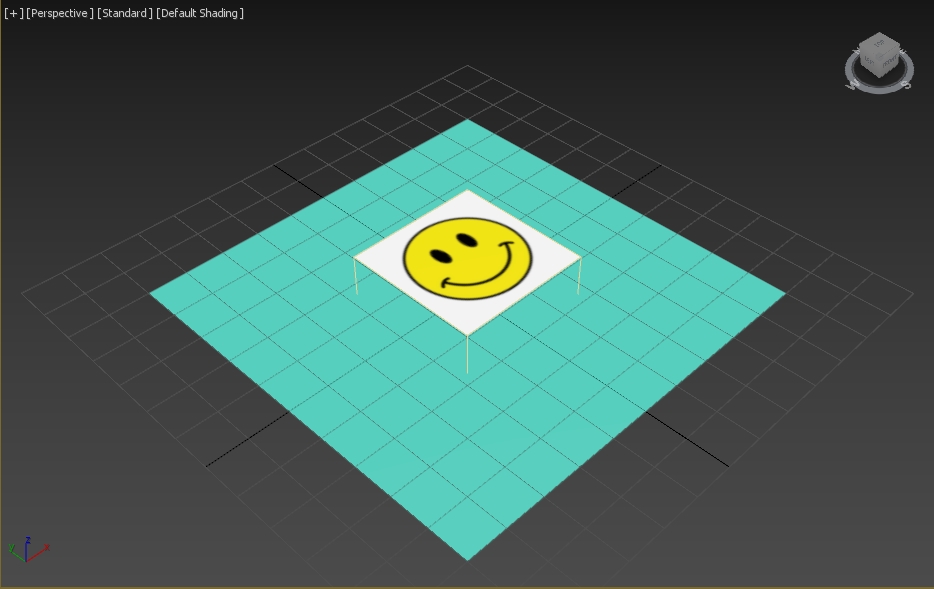
Let's start Interactive Rendering in the viewport. The Corona Decal is projected onto surfaces which intersect with its bounding box. If we move the Decal object higher, the plane isn't intersecting with it any more, resulting in no projection at all.

The Decal currently has no opacity mask and that is why we see a white square around the smiley.

After adding a circular mask, the Decal now appears with a transparent background.
Max Angle Limit
Max angle limit defines the maximum angle at which the projection occurs. If the angle between the Corona Decal and the surface is lower than the specified "Max angle limit", the surface receives the projection. This is how the Decal is projected with default settings.
Max angle limit of 180 degrees means the decal is projected even on the backface (the sphere is hidden in the below image).


Changing the Max angle limit to anything below 180 degrees results in no projection on the backside of the plane.
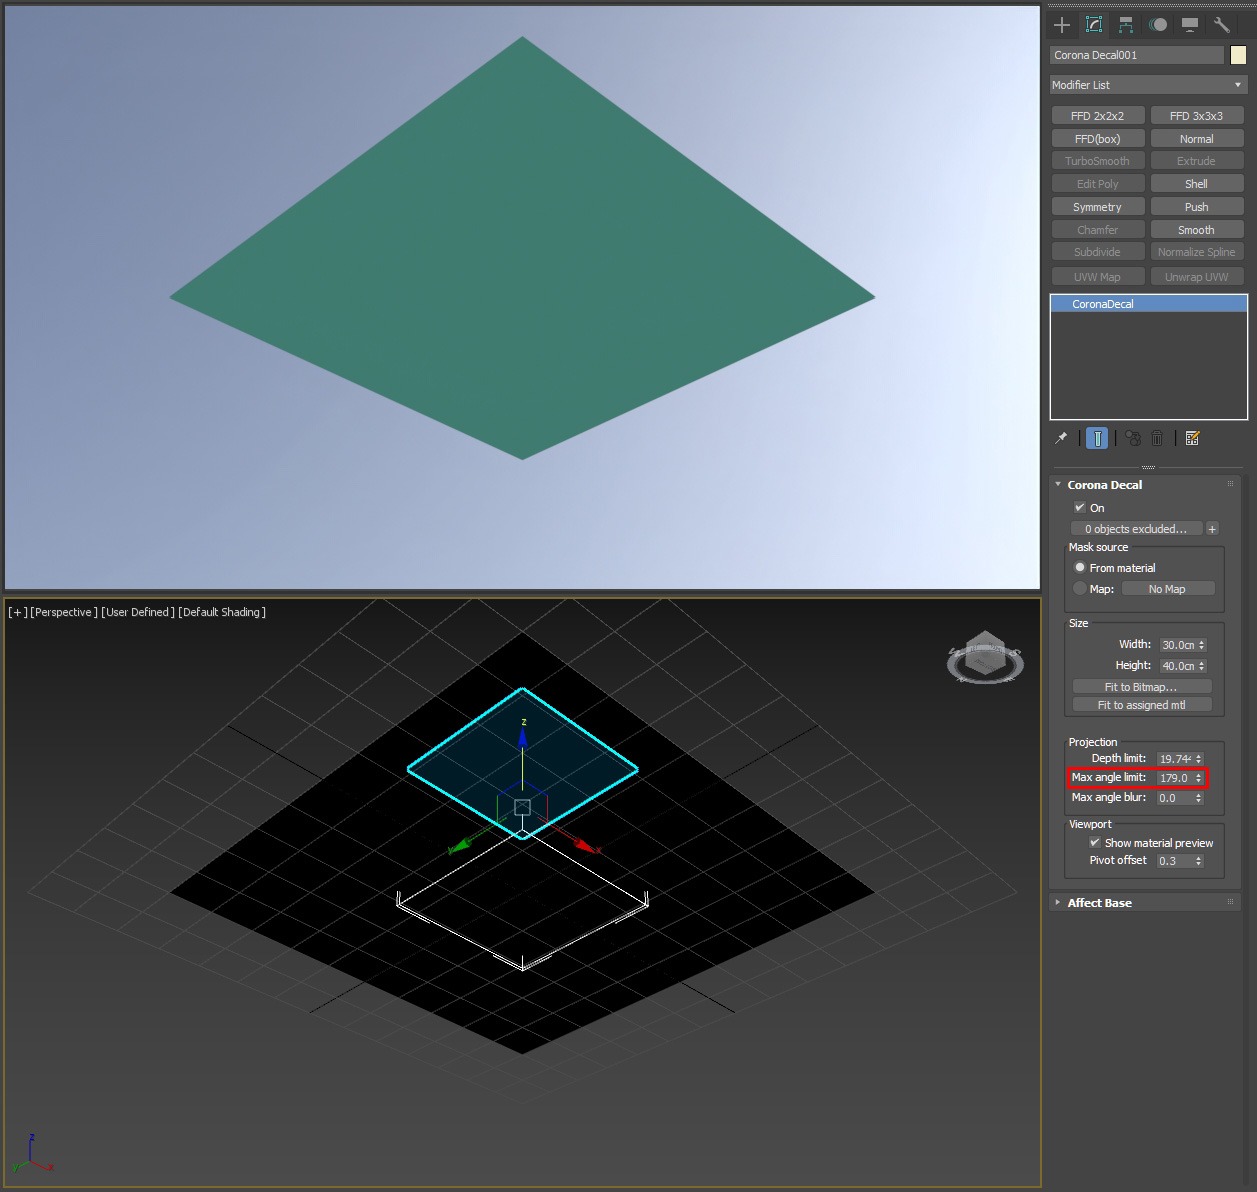
Max angle limit changed to less than 180 degrees. Projecting the Decal onto a surface where the normals are flipped (180 degrees compared to the decal object) is not possible any more.
Max angle limit of 45 degrees results in some clipping of the Decal on the sphere.

The Decal is projected on the the sphere object only up until the specified Max angle limit.
Max angle blur can be used to avoid sharp clippings around the max angle limit.
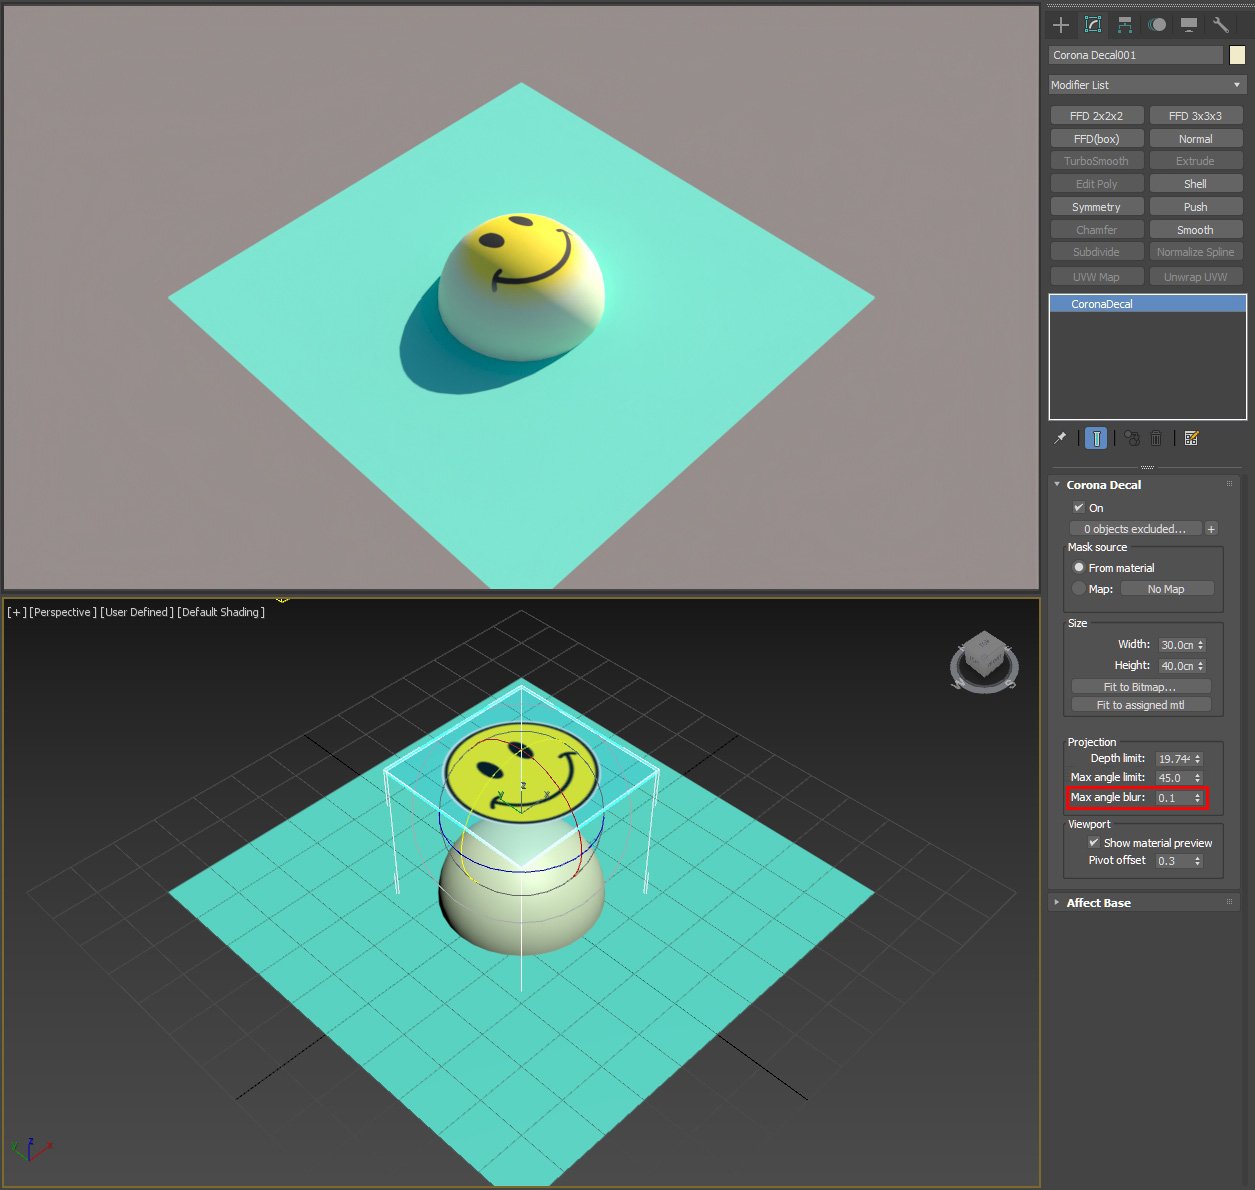
With the Max angle blur option enabled, there is a soft transition between the areas where the Decal is projected and where it isn't
Stacking
Corona Decals can form a stack. The projection order is based on the decals' vertical positions - over or under another decal.

under
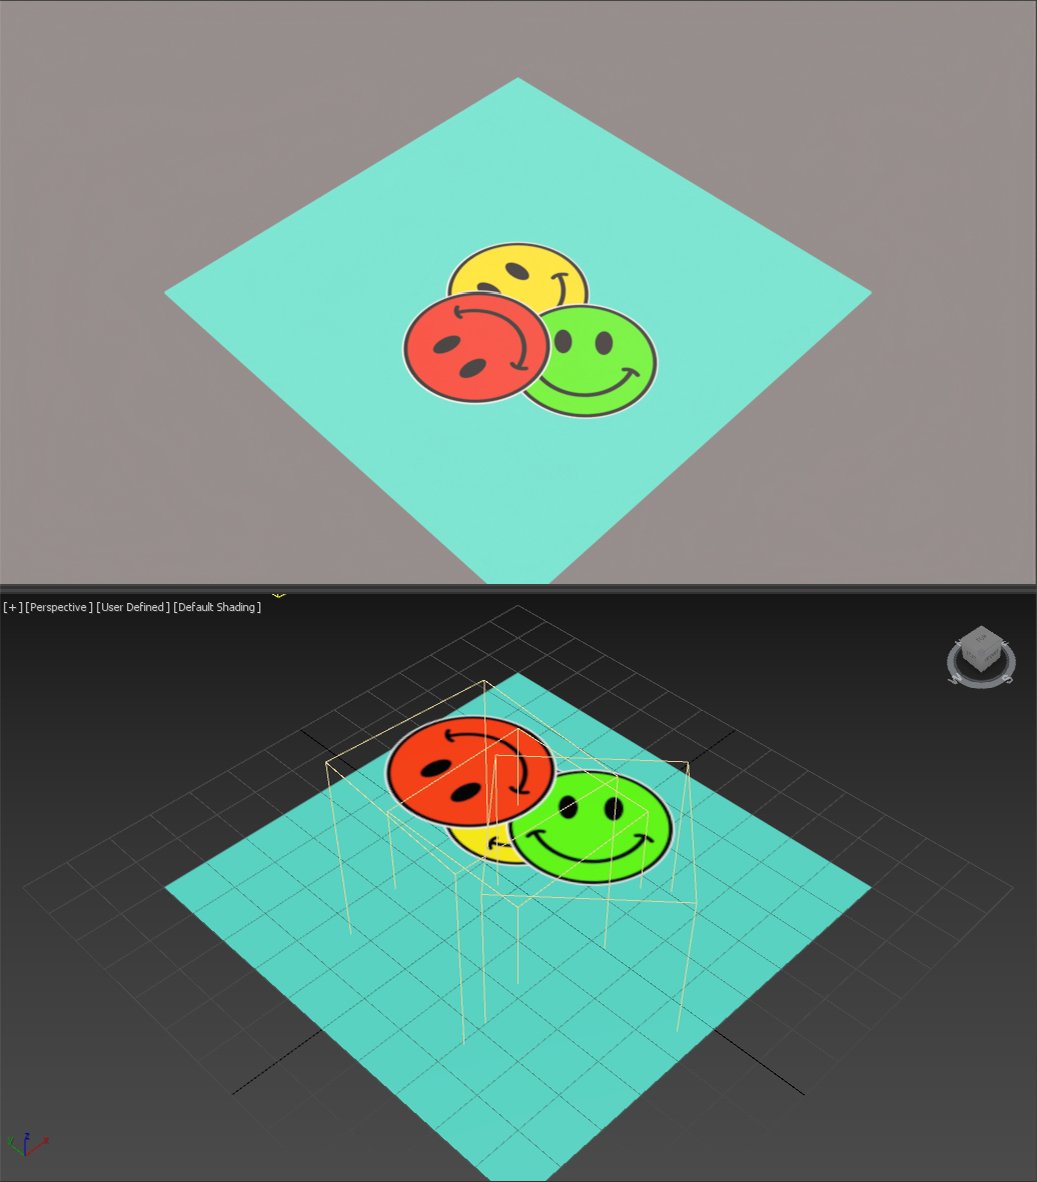
over
Overlaying many decals with varying vertical positions and options can quickly produce good-looking results:

Affect Base
Starting with Corona 10, you can specify which base object(s) material channels a Corona Decal should affect. Both the decal and the base material need to be CoronaPhysicalMtl in order for decal channels to work properly!
If a channel is enabled, it replaces the corresponding base object material channel where the decal is projected. If a channel is disabled, e.g. Color - base object material color is used instead.

"STOP" decal affecting all but Color channel.
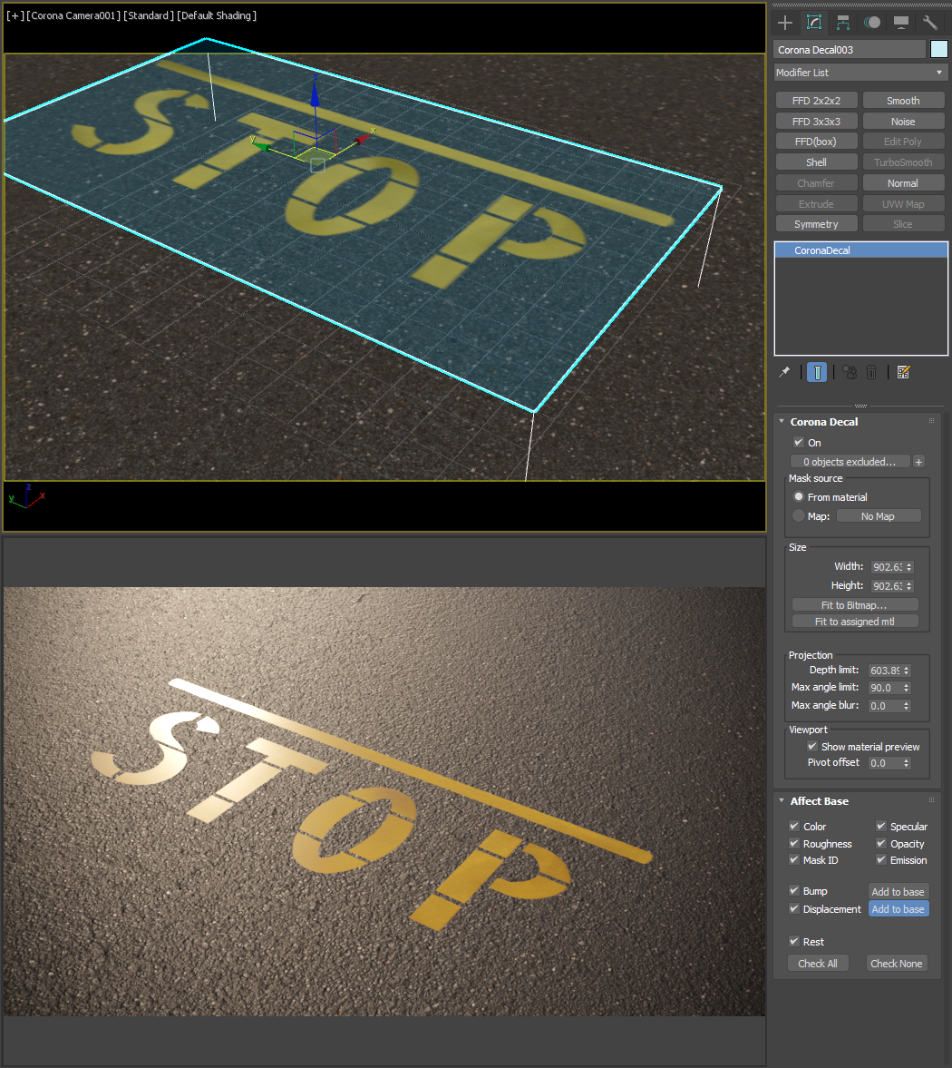
"STOP" decal affecting all channels.
Bump and Displacement channels have an additional option - they can be added to the base layer. If "Add to base" is disabled for Bump or Displacement, they replace the corresponding base layer effects:

Bump channel enabled, "Add to base" disabled.

Bump channel enabled, "Add to base" enabled.
If the decal has no bump in its material, the above result is the same as disabling the Bump channel. This leaves the base bump unaffected:

The Decal can also have its own bump (dotted pattern) added on top of the base bump:

Only “Displacement” is enabled under the “Affect Base” section. This way, only the displacement map of the decal affects the base object's material. Otherwise, we would be also affecting other channels such as diffuse color or reflectivity.
By the way, the ripples on the water surface are also achieved with a decal using a procedural gradient map.

Bending
Bending gives you better control over projecting decals on cylindrical surfaces such as bottles or glasses, or even on spheres thanks to bending in two axes:


Real-world map size
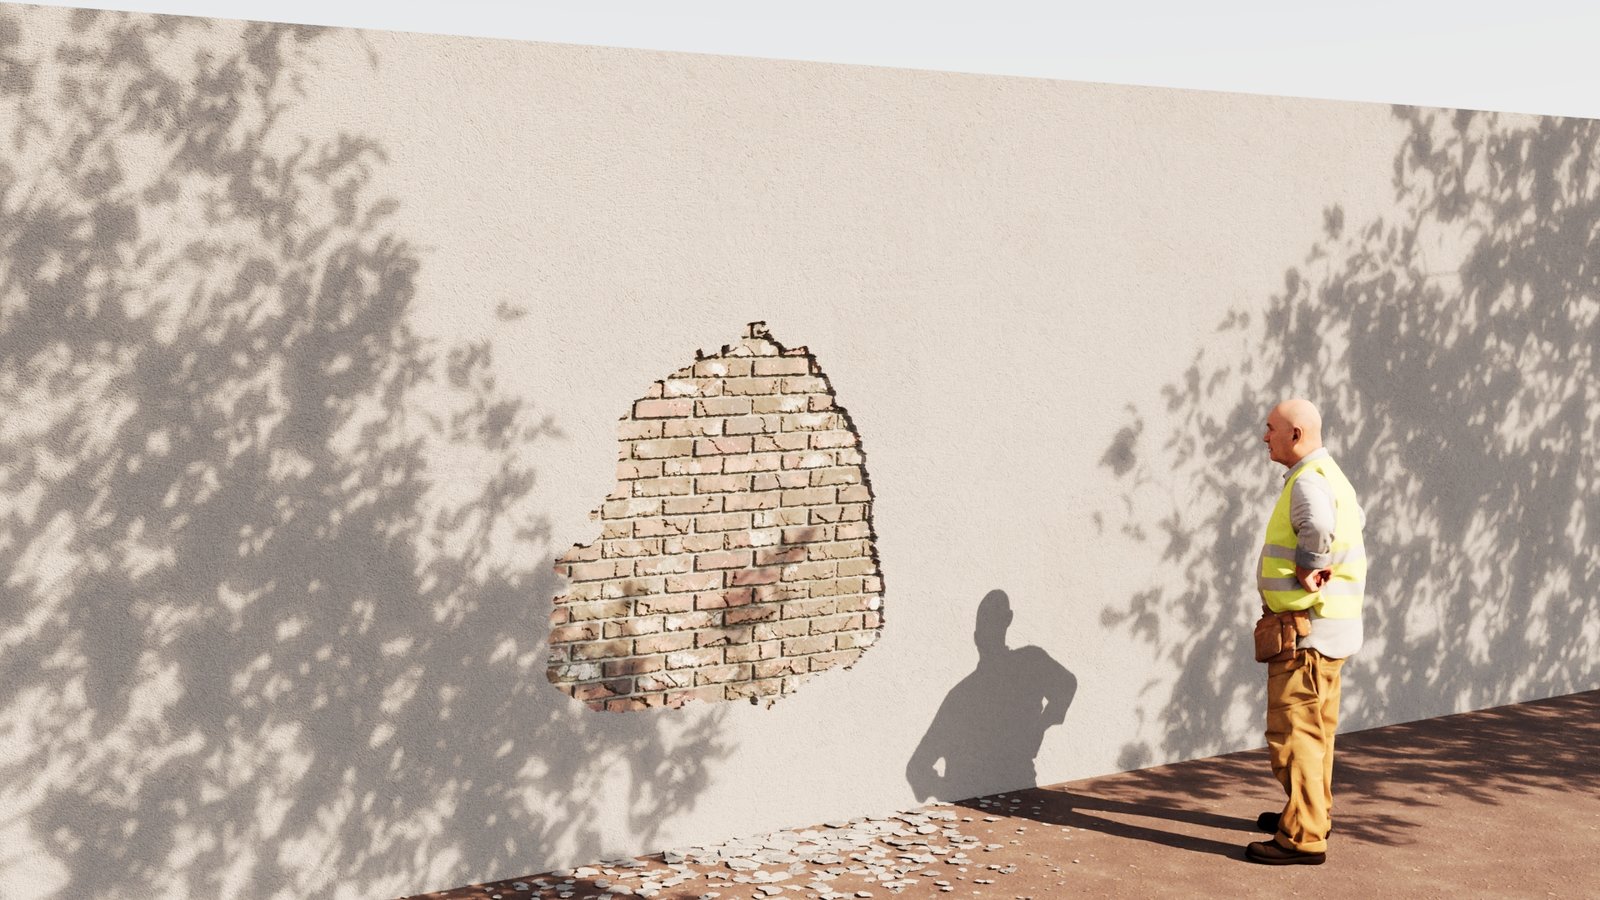
With the "Real-world map size" option enabled, the size of the textures used in the Corona Decal can be precisely controlled using real-world units such as centimeters or inches. In the below example, the size of the hole texture (opacity) is set to exactly 1.5m x 1.5m and the bricks have a realistic scale as well:
Front Back Map
Corona Decal can be used alongside Corona Front Back Map to create advanced material effects. This allows for precise control over decals based on front and back face rendering, enabling more flexible material setups.
