Enscape for SketchUp
Asset Placement
This page provides information about Asset Placement.
Last updated 8 May 2026
This page provides information about Asset Placement.
Overview
Asset placement is done through the Enscape Asset Library, which is accessible from two locations: the CAD toolbar or the Enscape Viewport User Interface (UI) toolbar. This is covered in more detail in the Asset Library article.
The asset placement feature is available for both Enscape Assets and Custom Assets. However, the complete feature is only available when the Asset Library is opened via the Enscape Viewport UI. If you open the Asset Library from the CAD toolbar, you can only use Single Asset Placement. After placing an asset (with the Asset Library opened from the CAD toolbar), you can still adjust it using the tools in the Asset Library opened from the Enscape Viewport UI.
This article focuses on the initial placement of assets via both methods and begins with explaining the tools available in the Enscape Viewport UI, followed by the placement methods available in SketchUp.

Asset Library button in SketchUp

Asset Library button in the Enscape Viewport UI
Asset Library in Enscape
With the Enscape Viewport open and in focus, open the Asset Library panel either by clicking the Asset Library button in the Enscape Viewport UI toolbar or via the [L] key on your keyboard, as illustrated in the video.
The Asset Library panel in the Enscape Viewport, once opened, has the following options available:
- Search Assets function
- Category and Tag filters
- Asset Placement tools
- Enscape and Custom Assets tabs
- Offline Asset Library
asset_library_in_renderer_4-0
mp4
485 KB
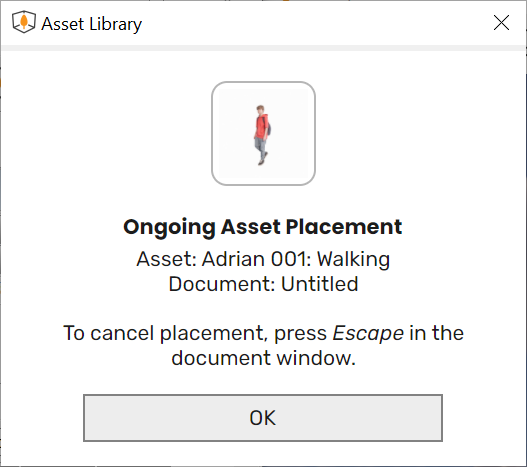
Ongoing Asset Placement notification
Placement in Enscape
The full feature set is only available when opening the Asset Library via the Enscape Viewport UI. When opening the Asset Library via SketchUp, only Single Asset Placement is available. Once assets have been placed via SketchUp, they are then available for further editing from within the Enscape Viewport UI Asset Library.
Single Asset Placement
The Asset Library interface allows you to narrow down your choice via the Search field.
To refine your search further, you can also click the Categories and Tags buttons.

Asset search tools
Once an asset has been selected, move the mouse in the Enscape Viewport over a surface in the project you would like to place the asset on.
A low-poly approximation (proxy) of the asset helps you determine where the asset will be positioned. Once you decide where the asset will be placed, click the surface to fix the asset's position, which will remain shown as a proxy asset. Multiple instances of a single asset can be placed by continuing to click on surfaces within the Enscape Viewport.
To confirm the asset positioning, click Apply Changes after which the proxy will be swapped out with the complete asset geometry and its associated textures.
Whilst an asset is selected, multiple instances can be placed by clicking the available surface multiple times, as in the video on the right.
single_asset_placement_32_4-0
mp4
6 MB
Asset Positioning and Scaling
Once an asset has been placed, individual assets can be selected, moved, rotated, scaled, and deleted from within the Enscape Viewport UI using the transformation tools in the Asset Library panel.
The available tools in the Asset Library are, from top to bottom:
- Select
- Translate [T]
- Rotate [R]
- Scale [G]
- Single Asset Placement
- Multi Asset Placement
- Delete [Del]

Translate
The Translate tool allows you to reposition an asset that has already been placed. It can also be quickly accessed by pressing the [T] key on your keyboard, provided the Asset Library panel is open in Enscape, before or after selecting an asset.
A set of control points appears around the selected asset in the Enscape Viewport. To move the asset, click the arrows, then drag and drop it onto the desired surface. To rotate it, click and drag the green ring left or right. Additionally, you can move it freely by clicking the orange control point located in the center of the asset. You can only drag and drop the asset to an area where a surface exists.
You can also use X,Y,Z coordinates for a more precise placement. You can find these input fields at the bottom-left of the Enscape Viewport.
To confirm the changes, click the Apply Changes button.
translation_32_4-0
mp4
10 MB
Rotation
In addition to the rotation option available in the Translation tool (limited to the XY axis), the Rotation tool allows assets to be rotated around the XYZ axis.
To do so, before or after the selection of an asset, select the Rotation tool (quick access:[R] key on the keyboard).
With the asset selected, 3 control rings surround it. To rotate the asset, simply click on a ring and drag your mouse from left to right (or up/down). Your asset starts rotating around the selected axis. Alternatively, you can rotate your asset more precisely by entering the desired degree of rotation for each axis via the input fields located at the bottom left of the screen.
To implement changes, simply click the Apply Changes button.
translation_32_4-0 (1)
mp4
10 MB
Scale
The Scale tool allows you to increase / decrease the size of an asset. Once an asset has been selected, 3 control handles appear around it. By clicking and dragging your mouse from left to right (up/down), the asset scales up/down on all axes symmetrically. Precision scaling the selected asset can be achieved via the input fields located at the bottom left of the screen.
To implement changes, click the Apply Changes button.
scale_32_4-0
mp4
18 MB
Delete
After placing the assets and applying changes, you can select assets individually and then delete them from the project by clicking the Trash Can icon. This can also be achieved by pressing the [Del] key on your keyboard, or by simply right clicking on the asset and clicking Delete Selection.
To implement any changes, click the Apply Changes button.
To recover the deleted asset, simply click Discard All instead.
al_delete_4-0
mp4
19 MB
Multi Asset Placement
To speed up the asset placement process on large surfaces, you can use the Multi Asset Placement tool. After clicking the Multiple Asset Placement icon, additional options become available below the Asset Library.

Multiple Asset Placement menu
The first step in placing multiple assets is to select all the assets you want to place. You can select one or multiple assets. Selected assets receive a checkbox and are also shown under the Selected Assets area at the bottom of the Enscape Viewport UI.
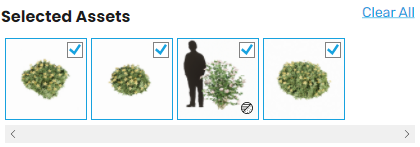
Selected Assets
Enable the checkbox in the asset thumbnail either in the Asset Library panel or under the Selected Assets area to remove individual assets from the selection. To remove all assets at once, click the Clear All option in the Selected Assets area.
If Confirm Placement is clicked, the current placement can be undone by clicking Discard All.
Before or after selecting the assets, you need to choose a selection tool to scatter them on a surface. There are three options available:
- Rectangular Selection
- Circular Selection
- Bucket Selection
- Brush Selection

Area selection tools
During the asset placement process, the selection tool can't be changed until you click the Confirm Placement button. Or, click the Clear All option or uncheck all selected assets in the Selected Assets area first.
Rectangular Selection
Selecting the Rectangular Selection option provides a way to stipulate a limited area in which the assets are placed. Once selected, moving the mouse over a surface in the Enscape Viewport displays a circle with a control point in the middle to help choose the origin of the rectangular area to be specified. Once you click the surface to specify the origin, 2 orange control points appear. One control point anchors itself to the surface to act as a pivot point, and the other control point follows the mouse movement to specify the length of the rectangle. When you finally click to specify the length of the rectangular area, some proxy assets appear within that specified area. You can increase the width of the rectangle at any point during this process by adjusting the Width slider located below the 3 selection tools.
You can continue to adjust the size of the rectangle by clicking on either of the 2 orange control points, which allows you to adjust the rectangle’s orientation and size. The assets are recalculated and regenerated to accommodate changes made to the selection area.
You can continue making adjustments until you click Confirm Placement. Once Confirm Placement is clicked, you can continue specifying other selection areas using any of the 3 selection tools. Only after you click the Apply Changes button will the full asset geometry and the associated asset textures be placed in the project.
At that point, the individual assets are available for individual editing or deletion.
If you want to start placement again, click the Discard All button.
rectangular_selection_32_4-0
mp4
16 MB
Circular Selection
Similarly, the Circular Selection tool allows you to specify a circular area of a surface for a selection of multiple assets to be placed on.
As with the Rectangular Selection option, the first click specifies the point that will be the center of the circular selection. Two control points then become available. The control point at the center of the circular area specifies the pivot point or the center of the circular area. The second control point follows the mouse movement to let you specify the initial diameter of the circular area. Once specified, asset proxy models appear within the defined circular area.
You can continue adjusting the size and position of the circular area by clicking and dragging the corresponding orange control points.
As with the Rectangular Selection tool, click Confirm Placement to continue creating other areas. Click Apply Changes when you are done placing assets to load the full geometry and textures and allow for individual asset editing.
If you want to start placement again, click the Discard All button.
circular_selection_32-1_4-0
mp4
8 MB
Bucket Selection
The Bucket Selection tool places assets onto an available surface.
Hovering the mouse around in the Enscape Viewport when the Bucket Selection tool is selected shows a bucket symbol instead of the mouse pointer, and any surfaces that are available for asset placement are highlighted as you hover over them. Once a surface for asset placement has been identified, click the highlighted surface, and proxy models of the selected assets will be placed on it as a preview. That means the assets aren’t fixed in place until you click the Confirm Placement button.
If you click on another surface before clicking the Confirm Placement button, the proxy assets are removed from the previous surface and applied to the newly selected surface.
Once you are happy with the asset placement, click Confirm Placement, then Apply Changes to finalize the selected assets' placement. If you want to restart the placement, click the Discard All button. This then reverts the tool to a state where you can continue placing assets.
bucket_placement_32_4-0
mp4
11 MB
Brush Selection
The Brush Selection tool lets you paint a freeform area on a surface where you want to place a selection of multiple assets.
Click and hold the left mouse button and move the cursor across the surface to paint. While painting, a canvas overlay is shown in the viewport to indicate the affected area, and asset proxies appear within the painted region. You can adjust the brush size at any time using the Radius parameter. To remove parts of the painted area, switch to Eraser or hold Shift to toggle between painting and erasing while you work. You can also click Preview Selected Area to replace proxies with the full-quality meshes and review the result before committing.
Once you are happy with the placement of the assets, click Confirm Placement and then Apply Changes to finalize the placement of the selected assets. If you want to start placement again, click the Discard All button. This then reverts the tool to a state where you can continue placing assets.
Density
The Density tool determines the total number of assets to be placed.
For example, you may have only chosen a total of 3 assets from the Asset Library. Adjusting the Density slider increases or decreases the number of the 3 selected assets to be placed in the selected area or on the selected surface. This is particularly useful for placing vegetation, for example.
Distribution
The Distribution dropdown menu determines how assets are placed.
The 3 options available include:
- Random: no placement pattern is followed, and assets are placed randomly. This is better suited for large surfaces.
- Jitter: assets are placed on a grid-based layout, but with a random offset. In large areas, the pattern may be more easily noticeable.
- Uniform: assets are placed on a grid layout.
Random Rotation
When checked, the Random Rotation checkbox randomizes the selected assets on the XY plane. This option is enabled by default.
If unchecked, all placed assets in the current selection face the same direction. This can be useful, for example, when placing a group of spectators.
density_distribution_rr_3_4-0
mp4
13 MB
Preview Selected Area
If Preview Selected Area is enabled, the complete assets geometry and textures are loaded and shown in the Enscape Viewport.
Regenerate
If the Regenerate button is clicked, the selected assets appear in another position specified by the currently active placement settings (Density, Distribution, and Random Rotation).
After you click Regenerate, the Preview Selected Area is automatically turned off (unchecked) if it was enabled.
Confirm Placement
Once assets are placed in the desired position, clicking the Confirm Placement button fixes the asset's position, although the asset continues to be shown as the low-poly proxy version by default.
Once Confirm Placement is clicked, assets cannot be edited or deleted as a group and must be handled individually. Additionally, the area selection guides disappear.
Alternatively, you can simply click the Undo option in the SketchUp UI.
Apply Changes
Click the Apply Changes button to load the full asset geometry and its associated textures (if Preview Selected Area is disabled). Apply Changes becomes available only after Confirm Placement is clicked. This also applies to Single Asset Placement.
Discard All
The Discard All button becomes available only after Confirm Placement is clicked, and it removes all that have not been applied by the Apply Changes button.
Multi-Asset Editing
With the Multi-Asset Editing feature, you have the ability to select a group of assets already placed in your project model, instead of selecting individual assets one by one. You can simply select assets visible in your Enscape Viewport by pressing the Shift key on your keyboard and dragging a selection area with your mouse pointer simultaneously over the screen. All selected assets are displayed as groups on the left sidebar. You can easily select and modify assets from that list.
en_variant_2_4-0
mp4
15 MB
You can select all instances of an asset by right clicking on the asset while the Asset Library is open in Enscape, and clicking Select All “[asset_name]” assets.
al_selectall_4-0
mp4
4 MB
You can delete all selected assets at once by right clicking on any of the selected assets and clicking Delete Selection.
al_deleteall_4-0
mp4
5 MB
Asset Library in SketchUp
When the Asset Library is opened via SketchUp, initial placement of assets must be performed in the SketchUp UI, and it is only possible to place single assets via this method. The tools provided within the Enscape Viewport UI to rotate, scale, and move an asset, as well as the Multi Asset Placement feature, are only available when opening the Asset Library from within the Enscape Viewport UI.
What follows is a guide on how to place assets via SketchUp. This is only possible by opening the Asset Library via the associated button available in the SketchUp toolbar or menu, and not from within the Enscape Viewport UI.
Lastly, the Asset Library, when opened via SketchUp, does not require the Enscape Viewport to be open.

SketchUp side Asset Library dialog
Placement in SketchUp
Placing the asset in a SketchUp project is easy because SketchUp indicates placement on a surface with ‘On Face’ displayed in the SketchUp viewport.
The asset sticks to your mouse movement until you select a location for the asset and click in the SketchUp viewport. This places the asset, which will be instantly displayed in the Enscape window as long as Enscape’s Live Updates is enabled.
In the SketchUp window, the asset is displayed in white (for macOS - as a Poly Model), and another of the same asset becomes immediately available for placement, useful for placing multiple instances of an asset. To cancel further placement, press the [ESC] key to exit the Asset Library.
Further adjustment of the asset’s rotation or position must be done after asset placement using the native SketchUp tools.
al_su_place_surface_32_4-0
mp4
10 MB