Enscape
Manage Uploads
This page provides information on how to manage panoramas and web standalones through the Web User Interface.
Last updated 1 September 2026
This page provides information on how to manage panoramas and web standalones through the Web User Interface.
Enscape versions 4.1.1 to 4.18.1

Panoramas and Web Standalone files created in Enscape can be managed through the Upload Management options and within Chaos Cloud.
There are two elements to managing Panoramas and Web Standalone files:
- The Upload Management dialog in Enscape
- The Uploaded projects accessed through your Chaos Account
Individual license holders can access their Enscape uploads through their Chaos account via the Go to Uploads link in the Chaos Account Upload Management tab.
Users working in an organization need to be invited by their account administrator to access their Enscape Uploads. For more information, see the Viewing Your Available Licenses page.
The functions available within Chaos Cloud allow uploading, sharing, moving, renaming, and deleting Panoramas and Web Standalone files. As well as creating Virtual tours where multiple Panoramas from the same project can be linked together.
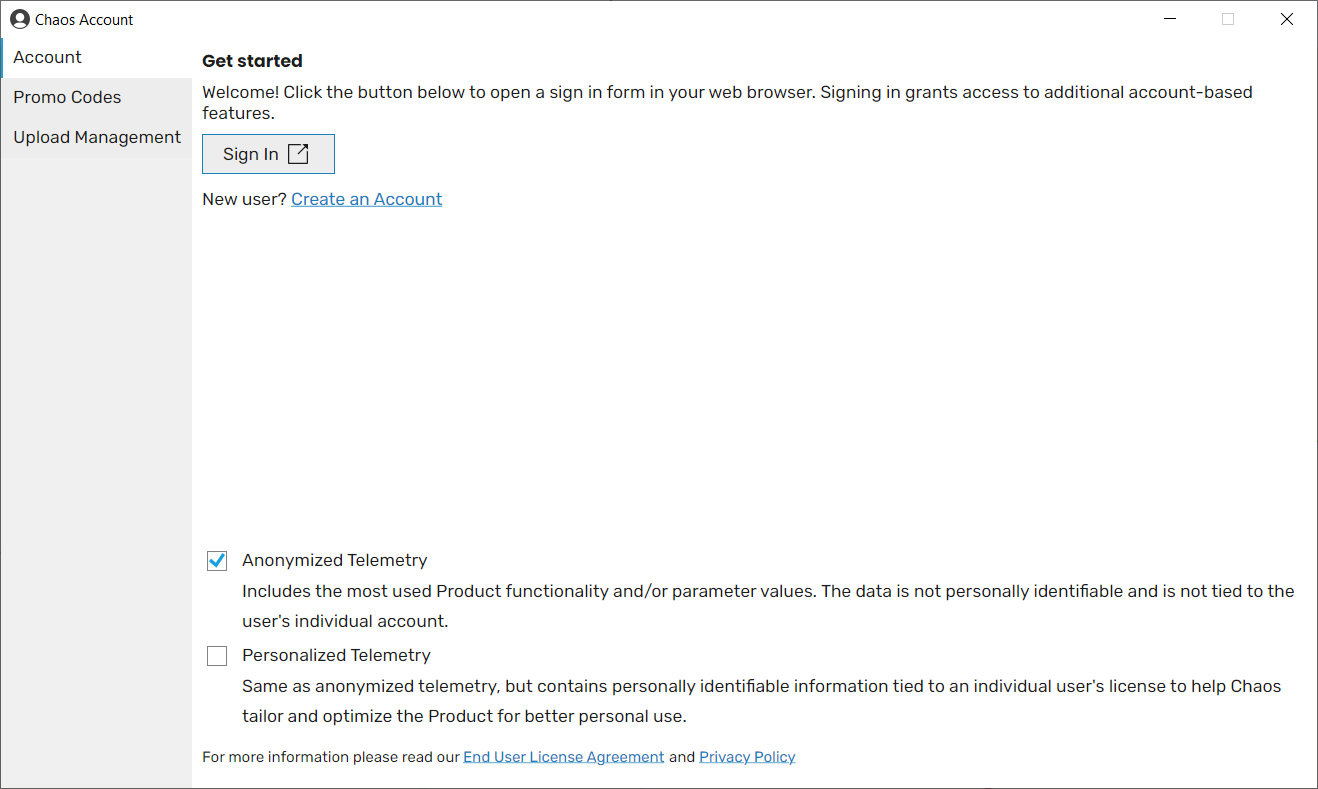
Sign in button in the Chaos Account window
Once you click sign in, you аре directed to the sign-in page. Fill in your login credentials and click Sign in.

Login credentials window

After successfully signing in, you can see your account details in the Chaos Account window > Account.

User signed in
Both Web Standalone files and Panoramas can then be exported. This done through the Upload Management dialog. They can also be managed through the Chaos Account Uploads area, or by viewing them in the Cloud.

The Upload Management dialog in Enscape
Migration to Chaos Cloud
By opening Enscape’s Upload Management dialog via the associated Upload Management button , you can manage your uploads. In order to start the migration, you can either click on the link in the displayed note, or click on the Migrate button.

Migrate button
Please note that the existing URL for each upload is not affected and still remains accessible and unchanged during the migration. Once you are ready to migrate, click Migrate All Items.

Migrate Uploads Window
After this step, Migration to Chaos Cloud starts and you are able to see the status bar for each upload.
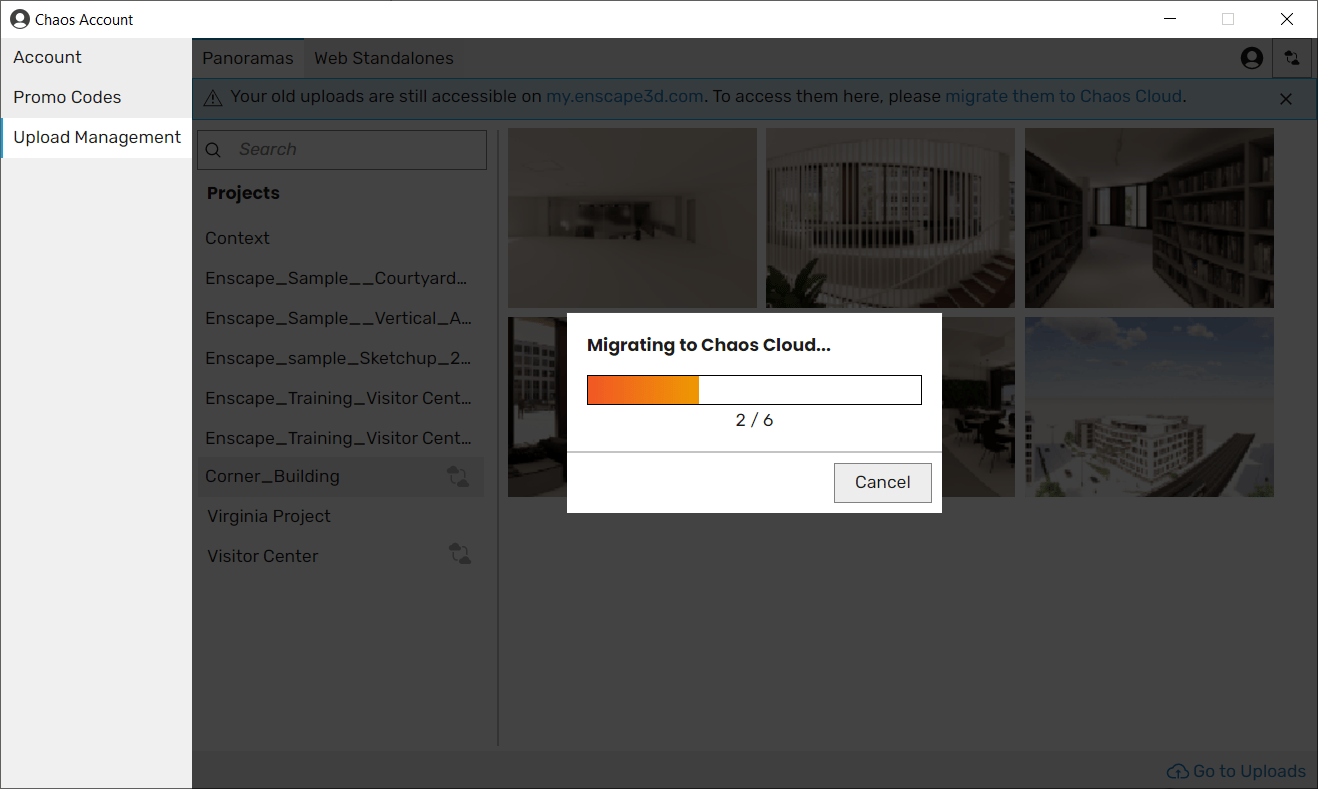
Migrating to Chaos Cloud
When you are done with the migration, click the Go to Uploads link. This takes you to your projects menu in the Chaos Cloud. Here are all your migrated projects sorted under project folders. Within each folder, you can find all your uploads without the need to sort them manually inside Chaos Cloud.
If you are using a Floating License and have a user account associated with it, but at some point in time have uploaded Panoramas and Standalone exports without being logged in to that account, you can migrate these previously uploaded files to your user account as well.

Migrated Projects on the Cloud
Chaos Cloud
Chaos Cloud collaboration helps you share your work with your team and your clients. Invite them to review your images and share their feedback. This speeds up reviews, so you can get your projects done faster.
Create a Project
To start working with Chaos Cloud Collaboration, you first have to create a project. Projects help you organize your files and folders. If you have created Panoramas and Web Standalones for your projects using Enscape 4.1.1 onwards, or migrated them through Enscape, you can see those project folders already in your Chaos Account.
To create a new project directly on Chaos Cloud, press the Create project button, choose a name for your project, and you can start uploading files to that project folder.
pano_4-11_9
mp4
2 MB
Once you have a project ready, you can organize content using the three buttons inside each project:
Create virtual tour – Create and share a Virtual Tour using your content.
Create folder – Organize content within your projects by creating folders.
Upload – Upload content directly from your local files to the Cloud.
Additionally, the Content Menu (the three dots) provides additional options.

Content Menu
File Content Menu
Clicking on the Share button opens the Share pop-up window.
You can either use the Copy button to copy the URL, or you can invite collaborators directly to an email address by adding the recipient’s email address and clicking the Send Invitation button. You can share your images, folders, or projects. You can set the person as a Viewer or Editor.
The link access can have one of the following access levels:
Same as parent – The item inherits the same setting as the parent folder or project.
Invited only – Only invited people are able to access the item.
Anyone can view – Anyone who has the link can view the item.
Anyone can comment – Anyone who has the link can view and comment on the item.
The Lock comments option can prevent new comments from being added, but the comment section will still be seen. View the full list of user permissions in the User Settings page.

Share Options
File Versions

You can upload additional versions of the file. Press the three-dot menu on the image and select the Upload new version. Alternatively, use the plus button in Present mode and choose Version. Previous versions are still accessible after the new one is uploaded.
Open the file in Present mode and click on the drop-down menu. You can see a list of all available versions for this file.
Press the Compare versions button to view the images side by side, or compare them with an A/B slider.
pano_4-11_14 (1)
mp4
5 MB
When the file is open in Present Mode, there is a separate three-dot menu. From there, you can access the File info option, which opens the Information panel. This panel contains information about the date of creation, size, format and creator of the file.
Panorama mode – When enabled, panorama images are displayed as a full panorama. When disabled, the panorama image appears flat.
Premultiplied alpha – Marks the uploaded image as an image with premultiplied alpha and visualizes it as such.
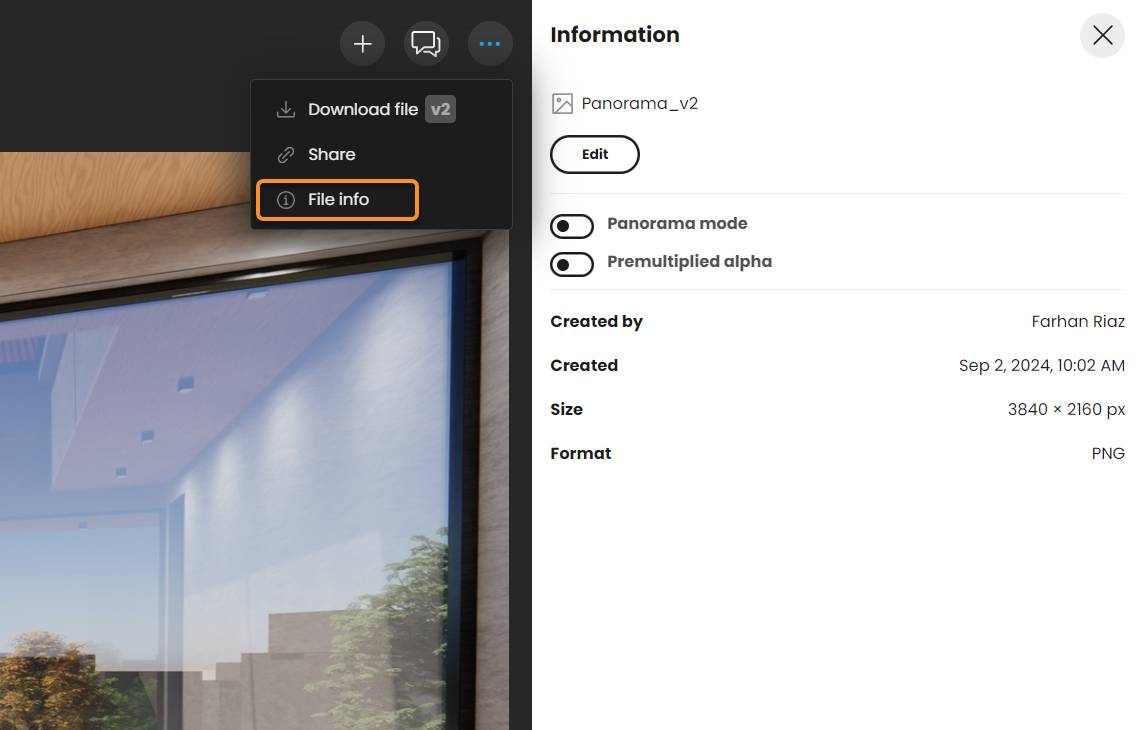
File Information Panel
Collaboration and Feedback
Collaborators can leave comments on folders and files. For files, in Present mode, a comments icon appears when hovering over the image. You can select the specific spot where to leave the comment.
You can add one or more image attachments to your comments, which users can view in a large gallery while reading the comment section. You can also add visual annotations to image files.
p3
mp4
32 MB
Rectangles, arrows, lines, or free drawings can be added to files to communicate visually.

Comments can be resolved by using the green check button . Resolved comments have a separate tab, where you can find them, and, if needed, they can be reopened using the same icon.

Comments Icon
Enscape versions prior to 4.1.1
Panorama and Web Standalone files created in Enscape can be managed via the Upload Management dialog within Enscape. The dialog is accessed through the Enscape CAD toolbar button . These files can also be further managed within the Uploads section of a Chaos Account.
There are two elements to managing Panoramas and Web Standalone files:
- The Upload Management dialog in Enscape itself
- The Uploads area is accessed via your Chaos Account.
Individual users need to be invited by their account administrator to access their Enscape Uploads. For more information, see the Viewing Your Available Licenses page.
The available menu options in the Enscape License Center are limited to Uploads and Login Credentials for a user. The Chaos Accounts Upload area allows sharing, moving, renaming, deleting Panoramas and Web Standalone files, and creating Panorama Galleries where multiple Panoramas from the same project can be linked together.
The account administrator invites users to join the Organization via the Chaos Account Organization menu. Users can then set a password for their account. Users can then log in to their accounts via the Go to Uploads link of the Chaos Account Upload Management tab.
Sign in button in the Chaos Account window
Steps
On the Sign in page, fill in your login credentials and click Sign in.
Login credentials window
After successfully signing in, you can see your account details in the Chaos Account window > Account.
User signed in
Export and upload the Web Standalone files and Panoramas to the Cloud. This is done via the Upload Management dialog. These files can then be managed via the Chaos Account Uploads area.
This means that for a user to see those files they need to be logged in to their account. Additionally, in the Upload Management dialog, only files uploaded when the user was not logged in are shown.
The Upload Management dialog in Enscape
Migrate Uploads
If you are using a Floating License, but have uploaded Panoramas and Standalone exports without being logged in, Enscape allows you to migrate these files to your user account.
To do this, you need to be logged in to your user account. Once you are logged in, open the Upload Management dialog window, and click on the Migrate icon. This opens a dialog informing you as to how many Panoramas and Web Standalones are available for migration. Once migrated, these file are available in the online Upload Manager.

Migration Assistant
Access the Upload Manager
Log in to your Chaos Account and select the Uploads option from the drop-down menu.
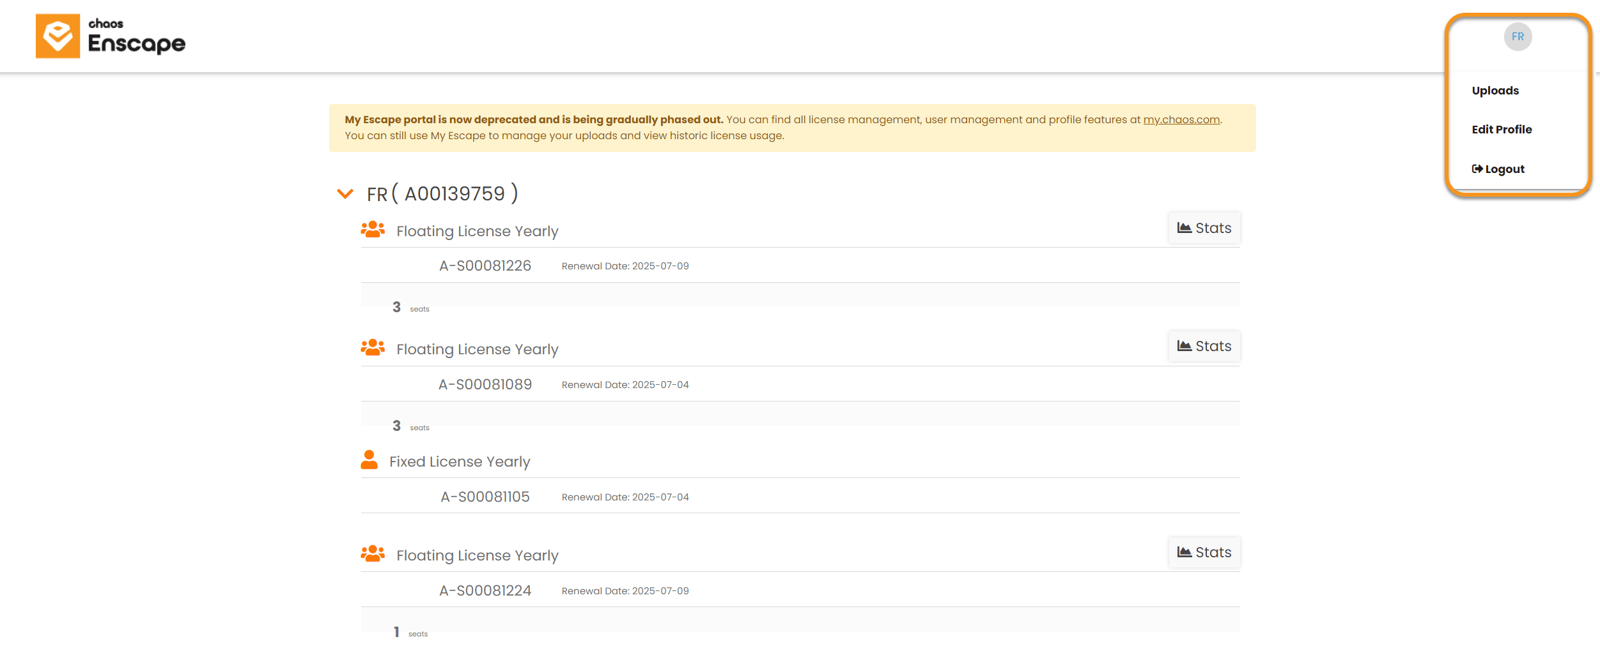
Enscape Account showing the Menu options, including Uploads
Existing Enscape users will see the historic license usage overview by default. They can click Uploads from the menu. Whereas, new users will, by default, be taken directly to the Uploads folder.

Upload Management
Here are the object Types that can managed:
- Folder
- Panorama Mono
- Panorama Stereo
- Panorama Gallery
- Web Standalone
The top level contains all types of Folder objects.

Contents of a Folder
Panorama object Types can be opened and you can view the Panorama in a new browser tab/window. The same process is applied where a WebStandalone object Type may be listed.
There is no limit to the number of items you can place in a Folder. Subfolders can also be added via the New Folder button.
Additionally, there is always a Content Menu option available for each item, no matter what Type the item is.
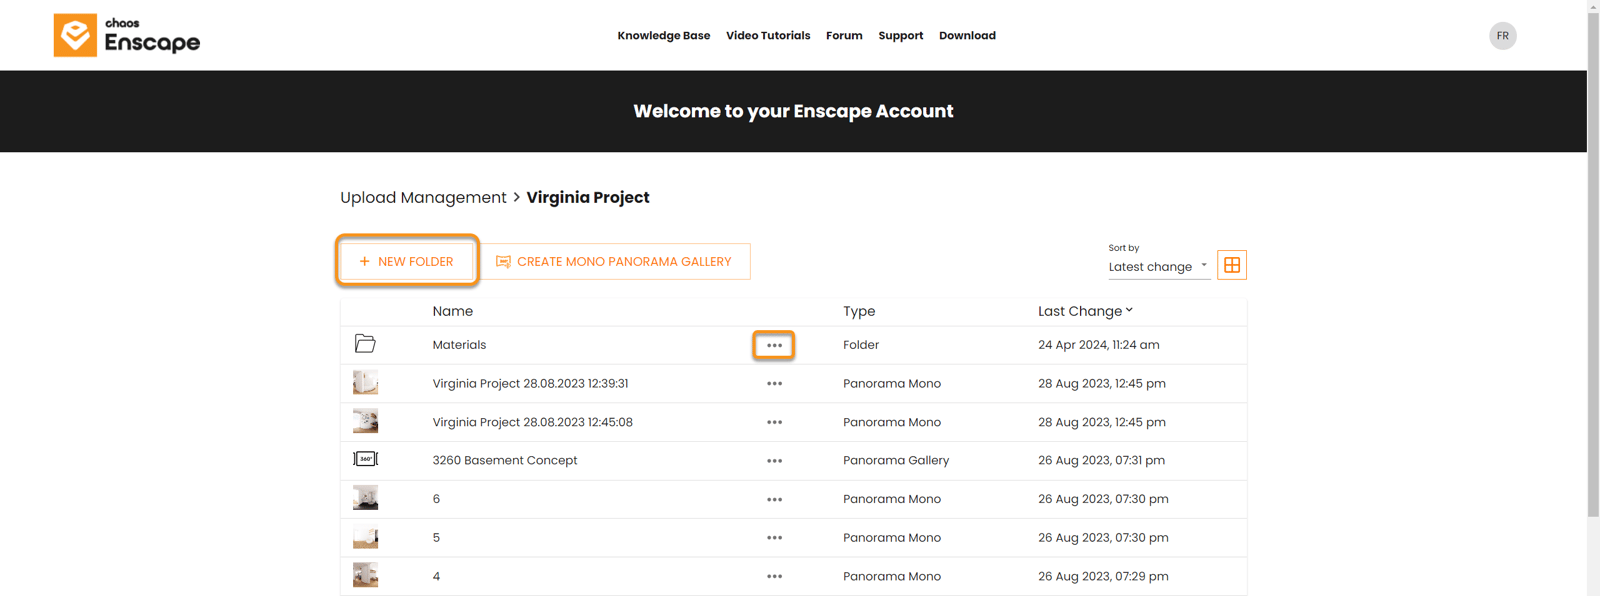
New Folder and Context Menu buttons
This Context Menu is accessed via the three-dots button and provides the following options:
Share Options – Set and share a link to the item.
Open in View Mode – This option is available only in Panorama Galleries.
Rename – Renames the item.
Move – Moves the item to a different location within the Uploads area.
Delete – Delete an item.

The Context Menu
Share Options
Clicking on the Share Options button shows the following popup window:
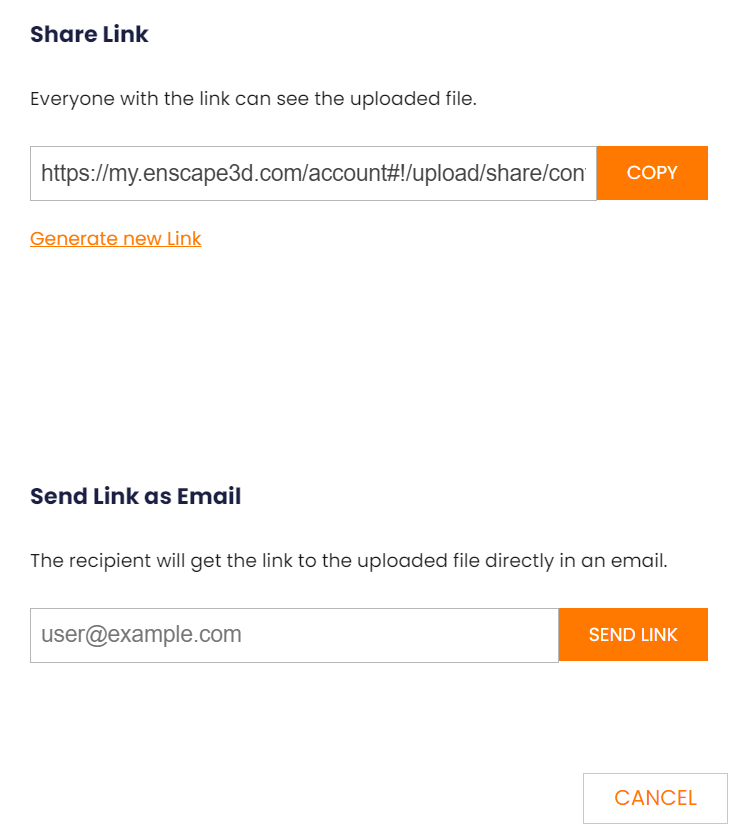
Share Options
You can either use the Copy button to copy the URL, which can then be pasted into an email or document.
Alternatively, you can send the URL link directly to an email address by adding the recipient's email address and clicking the Send Link button.
If a file is already shared, click the Generate new Link option to limit the sharing access.

Generate a new link
Click the Generate button to finalize the URL change.
This function helps you manage access to Panorama and Web Standalone files you have previously shared.

Generation of a new link was successful
Rename
Selecting the Rename option provides a dialog to allow the renaming of a file. This field can not be left empty.
Once filled out, click the Rename button to complete the process.

Rename an Item
Move
The Move option opens a window showing the created folder structure. Select the destination for the item.
Click on the Select Folder button when ready to complete the process.

Move item dialog
Delete
If a user is deleted and their license rights removed, or if a user loses access to their machine, the deletion of Panoramas from that user account can be requested by the account administrator directly from our support.

Delete an item