V-Ray for Blender
Add Stickers to Materials
This tutorial shows how to make stickers using the V-Ray Blend Mtl.
Last updated 18 September 2025
This tutorial shows how to make stickers using the V-Ray Blend Mtl.
Overview
The V-Ray Blend material can be used to simulate stickers. In this tutorial, we will be blending a V-Ray Car Paint 2 material, which mimics the metallic paint on a high-quality toy car with a plain black V-Ray material that will shade the stickers. The stickers themselves will be shaped using a black and white V-Ray Bitmap, which will serve as a mask.
Download the scene to follow along

Steps
1 Initial Setup
To start, select the body of the toy car. Then, set the Editor below the viewport to the V-Ray Node Editor. Switch to the Shader Node Tree. You can now see the default V-Ray Mtl that is assigned. You can view any material's properties either in the Node menu on the right side of the Editor, or in the Material Properties panel.
2 Create V-Ray Blend Mtl
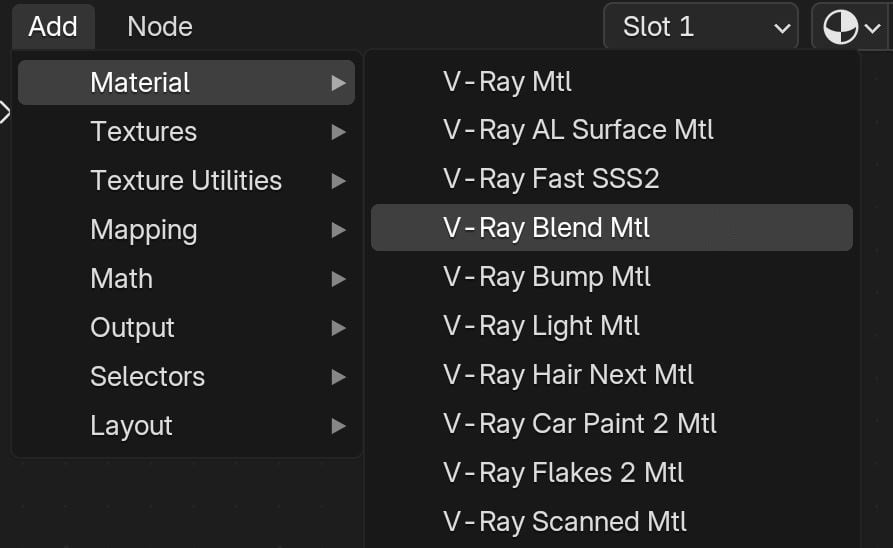
Delete the default V-Ray Mtl. Create a V-Ray Blend Mtl from the Add menu. You can find it either in the editor toolbar > Material > V-Ray Car Paint 2 Mtl, or you can bring it up within the editor using the Shift + A shortcut.
Then, Connect the BRDF output of the Blend Mtl to the Material socket of the Material Output node.
3 Set Up Base Material
Create a Car Paint 2 Mtl node. It is also found in the Add menu. Then, connect it to the Base Material slot of the Blend Mtl. Your setup should look like the one in the screenshot.
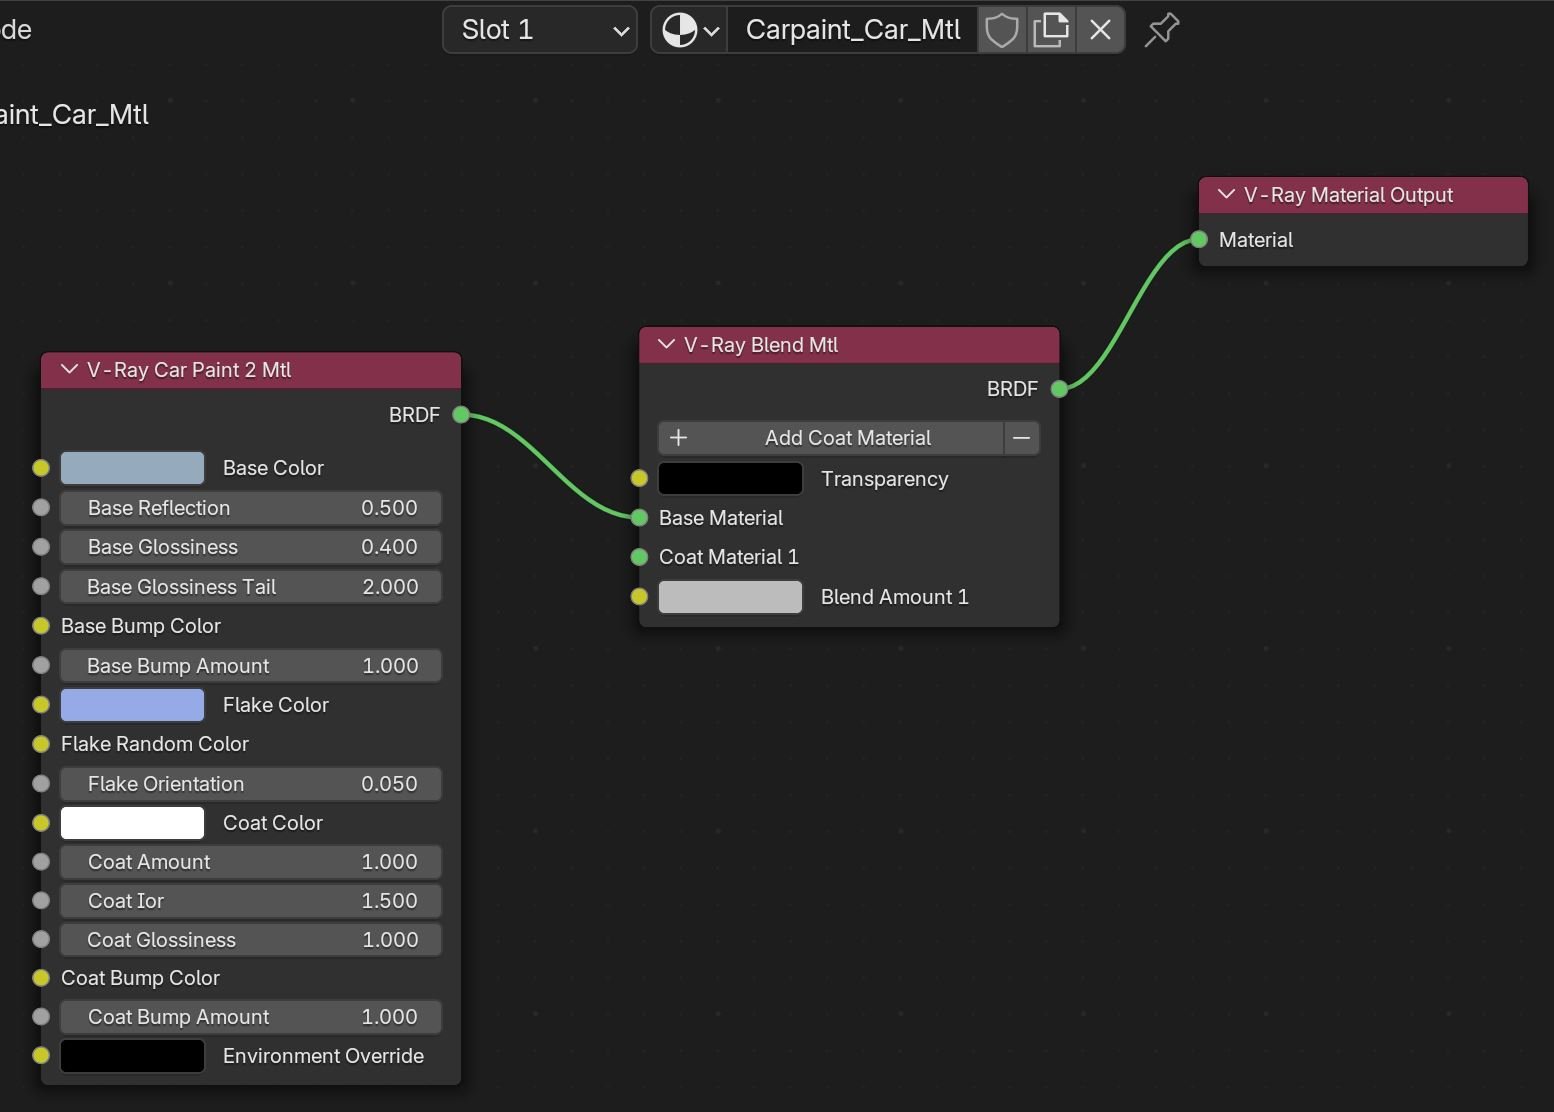
Shader Node Editor Car Paint Base Material setup
Set the following properties for the Car Paint 2 Mtl:
- Base Color = HSV (0.4486, 0.128177, 0.381326)
- Flake Color = HSV (0.585811, 0.441787, 0.879623)
- Flake Orientation = 0.250. Increasing this value rotates the flakes randomly, deviating further from the surface normal. This makes them reflect more light.
- Flake Glossiness = 0.800
- Flake Density = 7.000. The default value of 0.5 produces barely any flakes. To be able to see them clearly in the render, it's best to use a higher value for this property.
- Flake Size = 0.250. We are working with a smaller geometry and don't want to overwhelm it with flakes.

Click on the image to view it in full resolution
4 Create Coat Material
Create a V-Ray Mtl from the Add menu. It will serve as the coat material.
Connect its BRDF output to the Coat Material 1 socket of the Blend Mtl.
Set the V-Ray Mtl's Diffuse Color to: HSV ( 0.0, 0.0, 0.490942 ).
Set the Reflection Color to fully white: HSV ( 0.0, 0.0, 1.0 ).
Set the reflection's Glossiness parameter to 0.9, so that the reflections are not perfectly sharp.
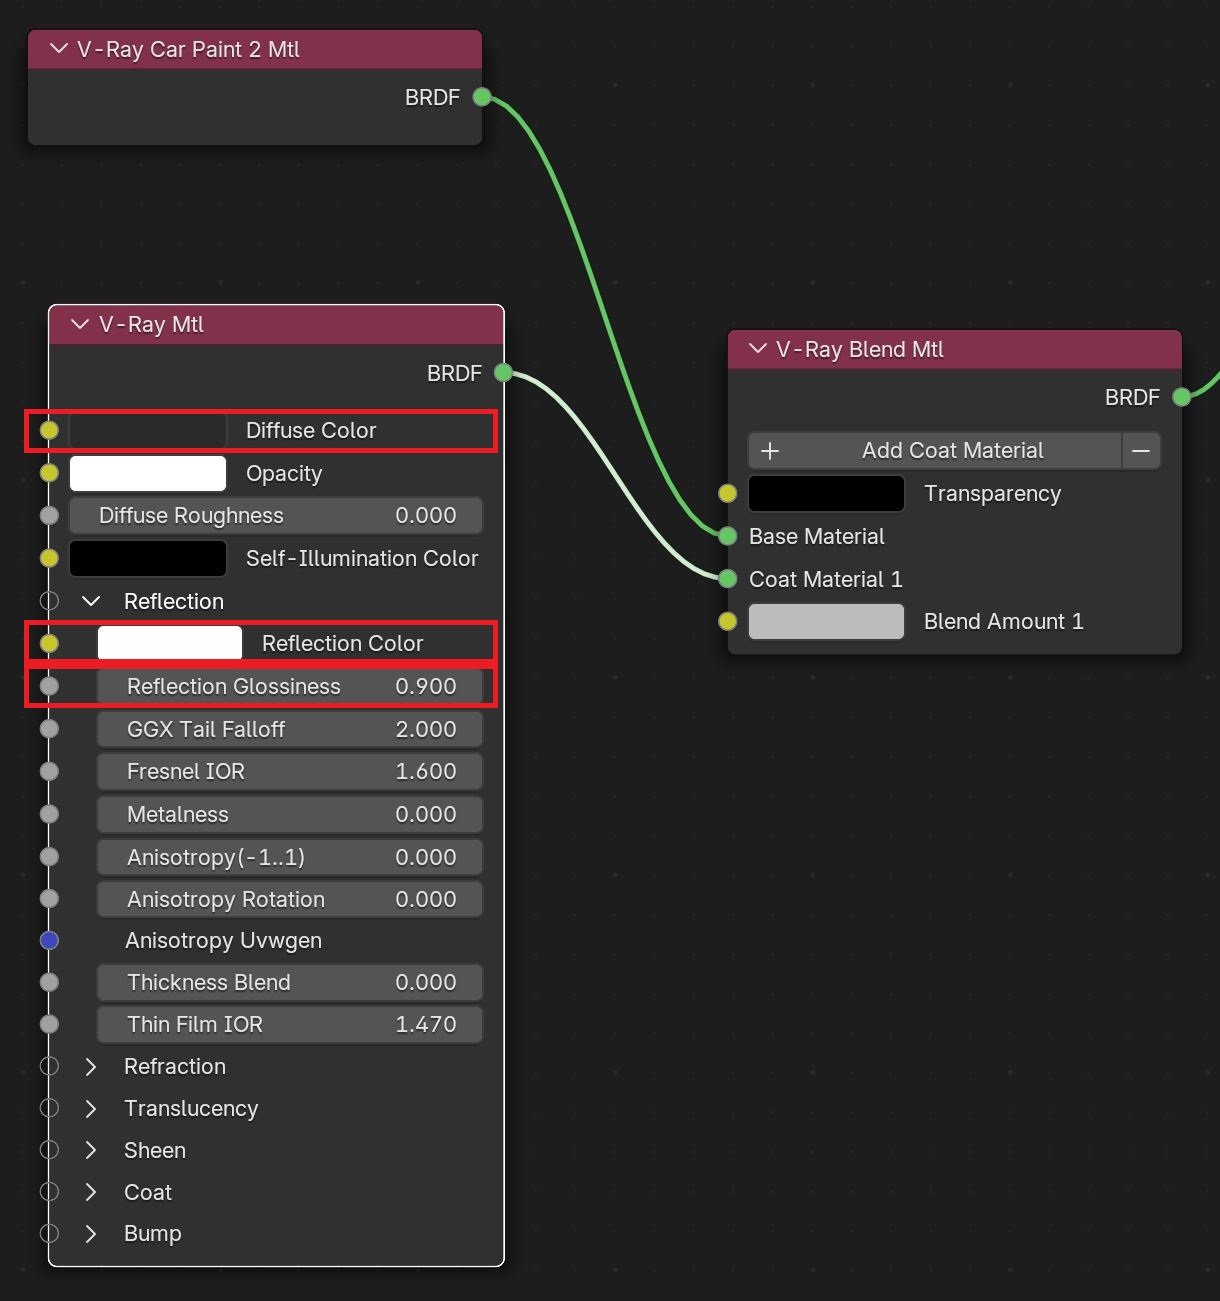
Click on the image to view it in full resolution
5 Add Blend Texture
Now that we have both materials, let's add the sticker mask.
Create a V-Ray Bitmap node from the Add menu > Textures > V-Ray Bitmap. Click on the Open button. In the popup window, locate the Assets folder that comes with the scene. Inside, select the Car_Blend.png image and click Open Image.
We won't adjust the Bitmap settings much, only set the Filter Blur to 0.1. This disables filtering, minimizing optimization and increasing texture details. This increases render time slightly.
Connect the V-Ray BItmap's Color output to the Blend Amount 1 socket of the V-Ray Blend Mtl.
6 Final Render
Those are all the needed settings! You can now start a production render to see the final result.
The render settings are preset; you can view them in the Render Properties tab. The Image Sampler is one of the most crucial factors for the noise and quality of any render, so if anything, check its settings. They are found in the Sampler rollout.

Here are the before and after versions of the toy car.
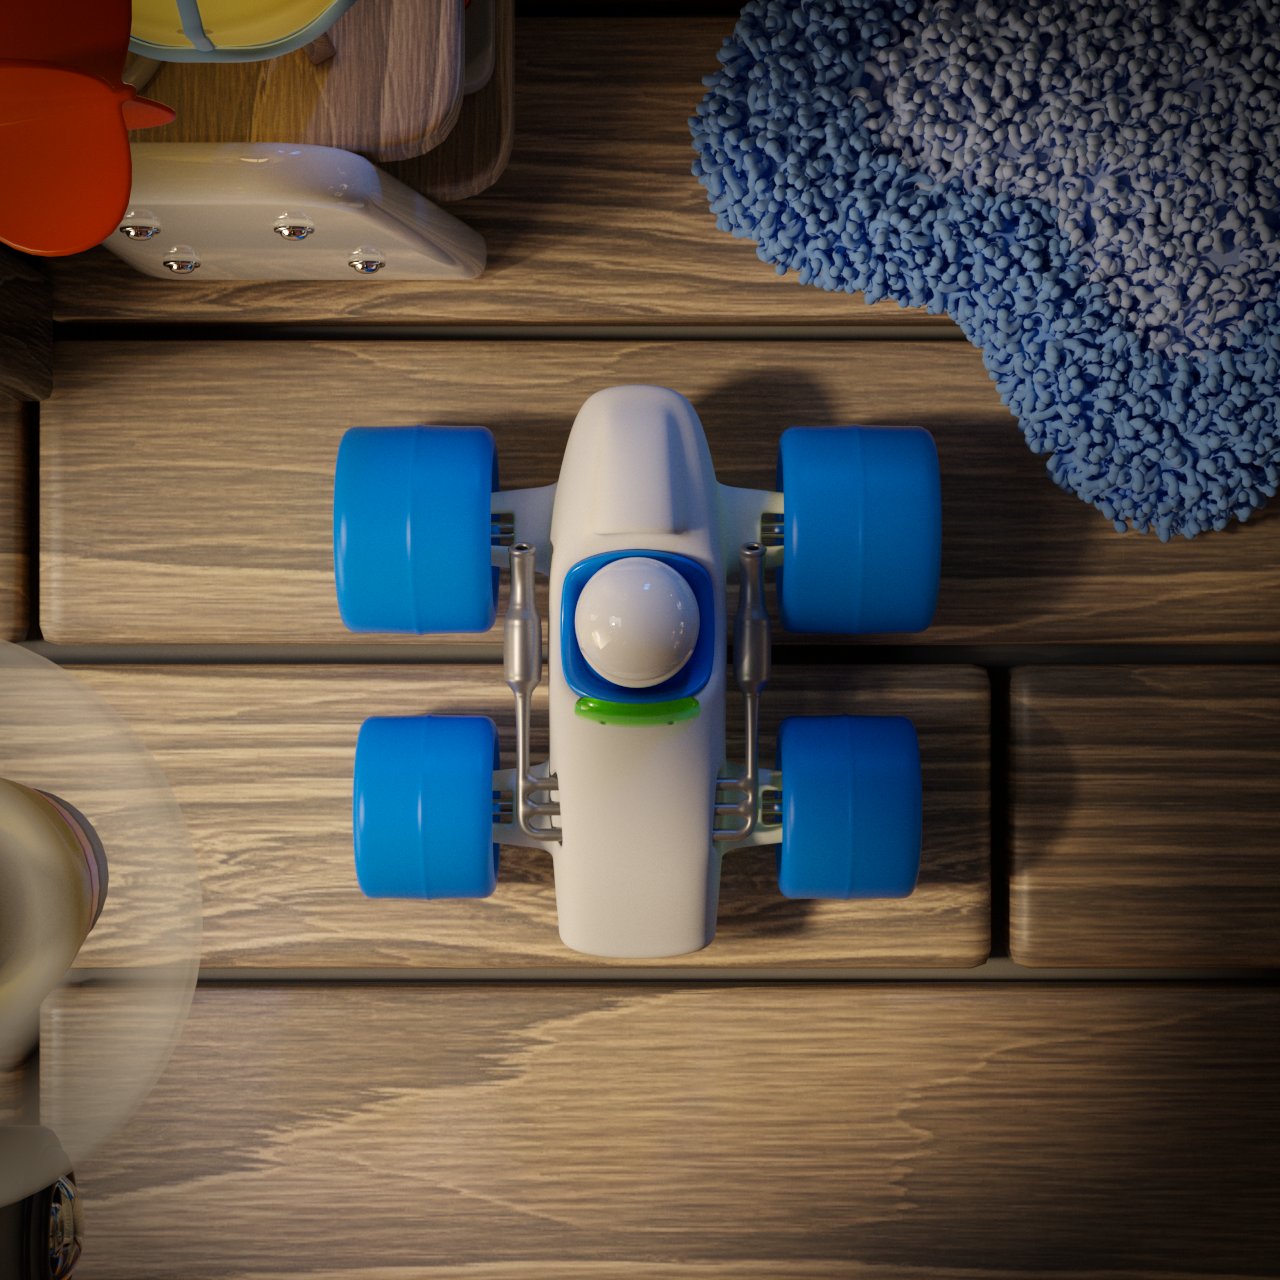
Before
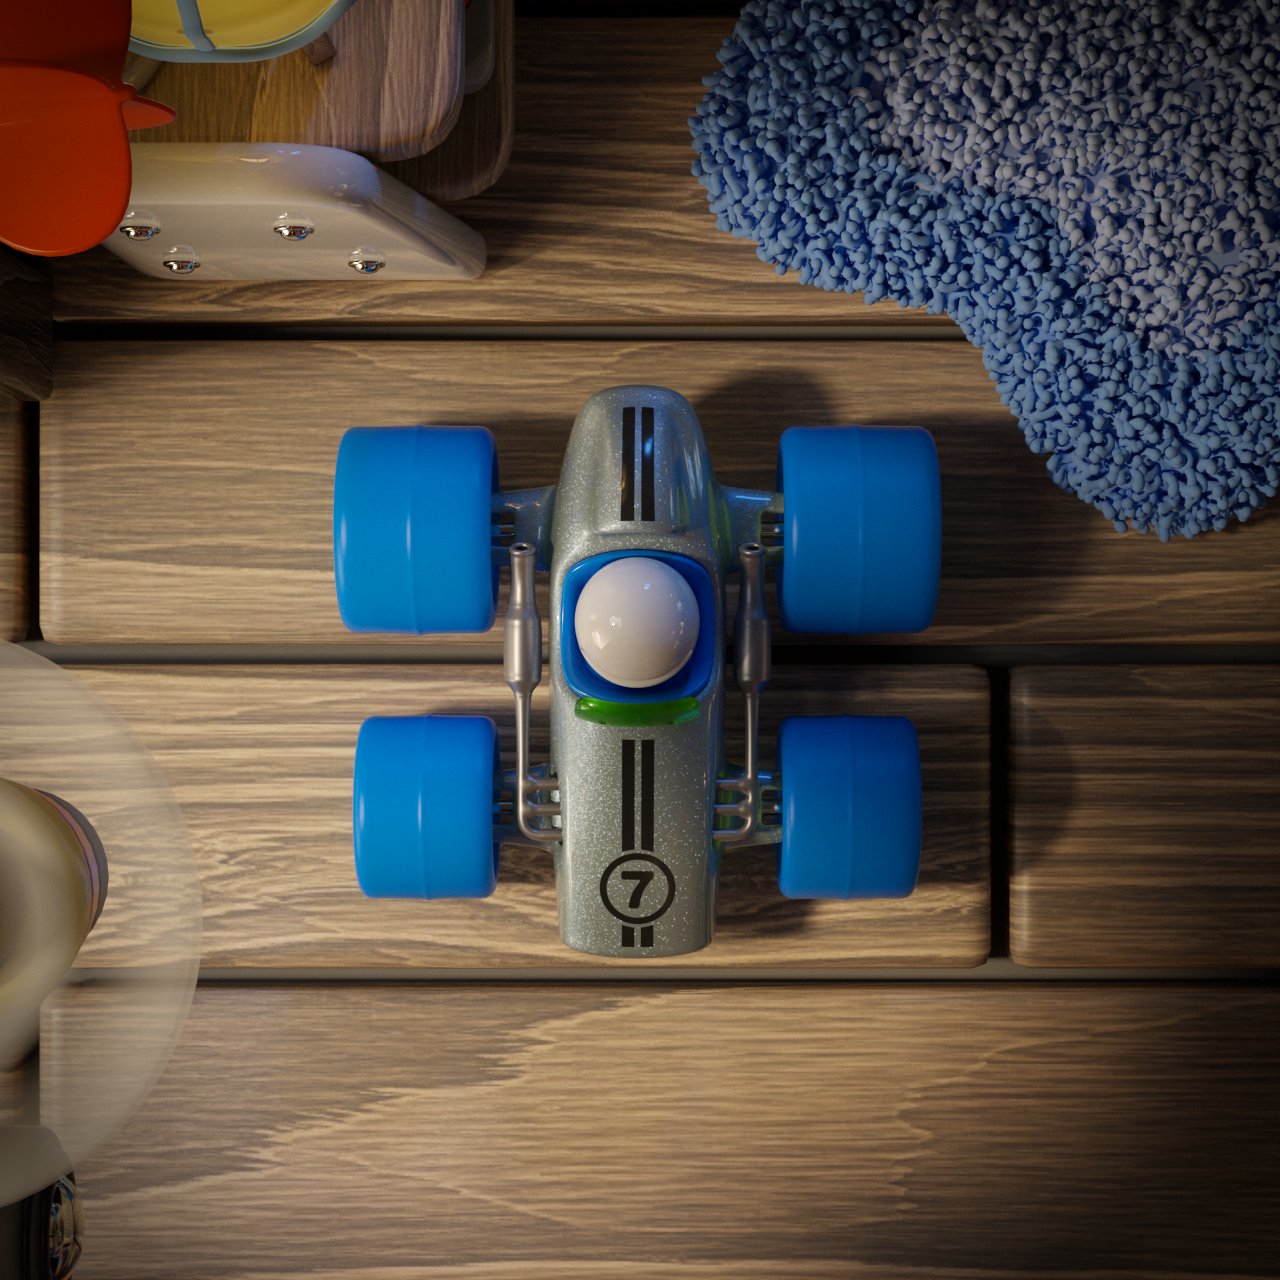
After