V-Ray for Blender
Creating a Sheen Fabric
This tutorial shows how to use the V-Ray Mtl node to simulate sheen fabrics like satin, velvet, and silk.
Last updated 18 September 2025
This tutorial shows how to use the V-Ray Mtl node to simulate sheen fabrics like satin, velvet, and silk.
Overview
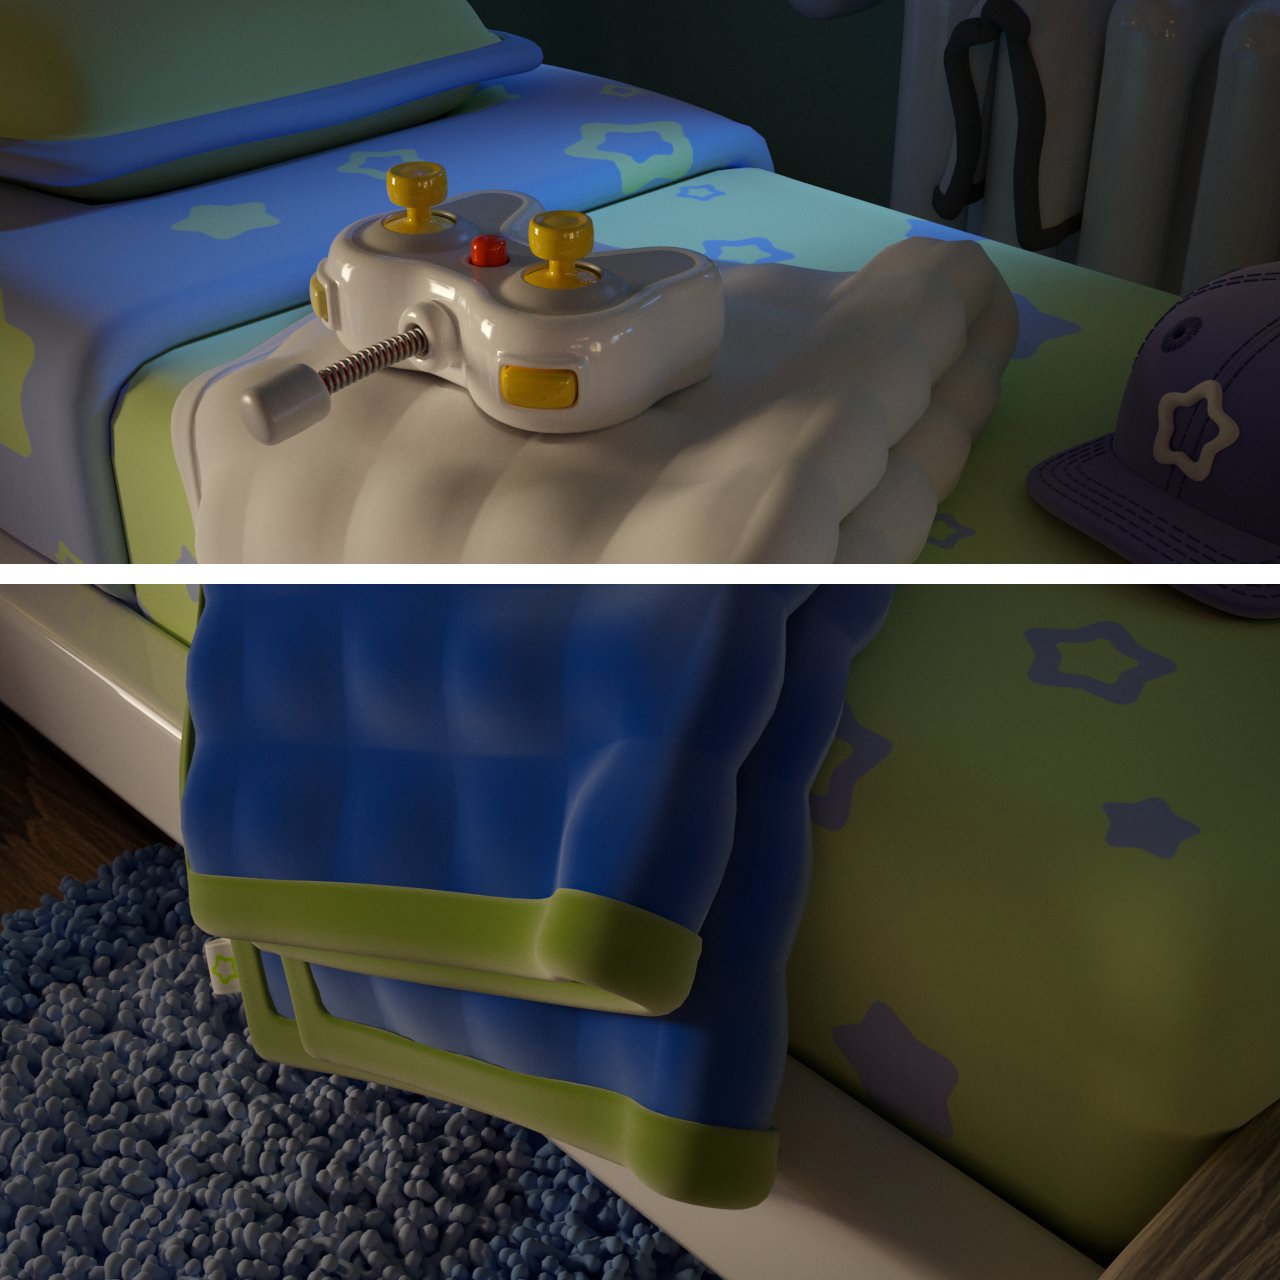
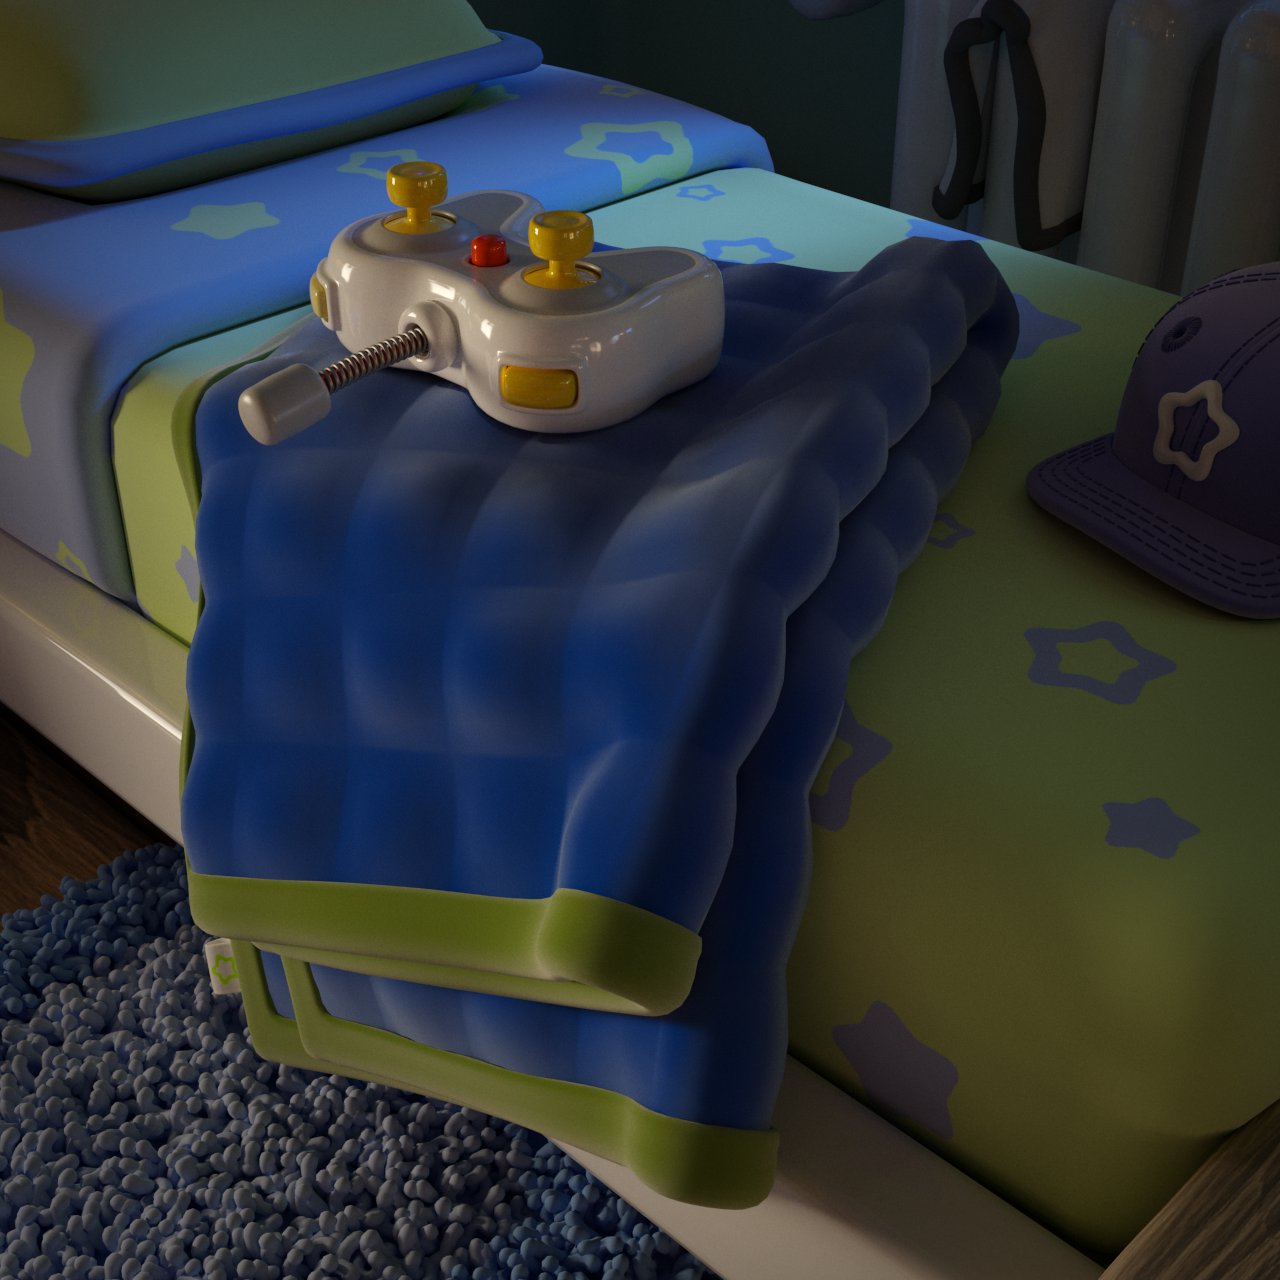
Sheen fabrics have a distinct reflective feature that makes them instantly recognizable. This fabric reflection can be simulated with the V-Ray Mtl's Sheen properties. This workflow shows how to apply and adjust them.
Download the scene to follow along
Steps
1 Initial Setup
To start, select the blanket geometry. You can do so either from the viewport or from the Outliner. Then, set the bottom Editor to the V-Ray Node Editor. Switch to the Shader node tree. Click on the button New. This creates a new default V-Ray Mtl and assigns it to the geometry automatically. You can also rename the materials, to define them better.
2 Set Up the Blanket Material
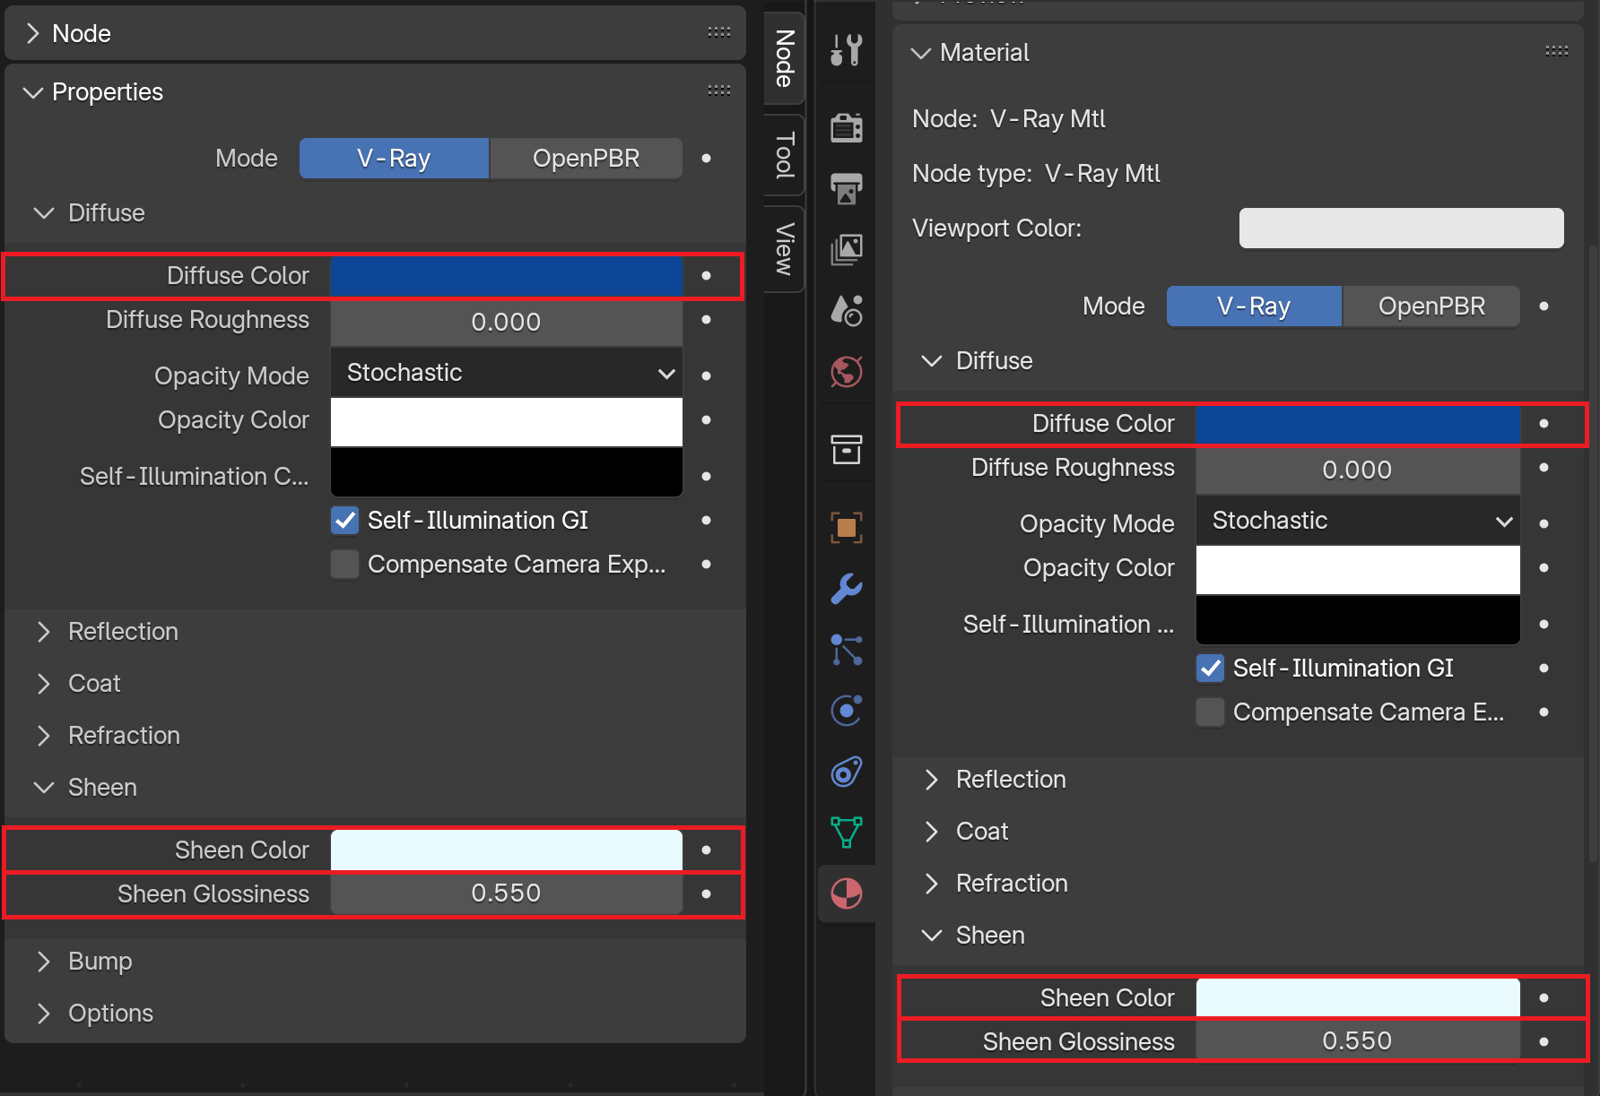
You can find any material's properties either in the Node material on the right side of the V-Ray Node Editor, or in the Material Properties tab, under the Material rollout.
Set the following parameters for the material applied to the blanket:
- Diffuse Color = HSV ( 0.636, 0.987, 0.310 )
- Sheen Color = HSV ( 0.530, 0.185, 1.00 )
- Sheen Glossiness = 0.550
3 Set Up the Blanket End Material
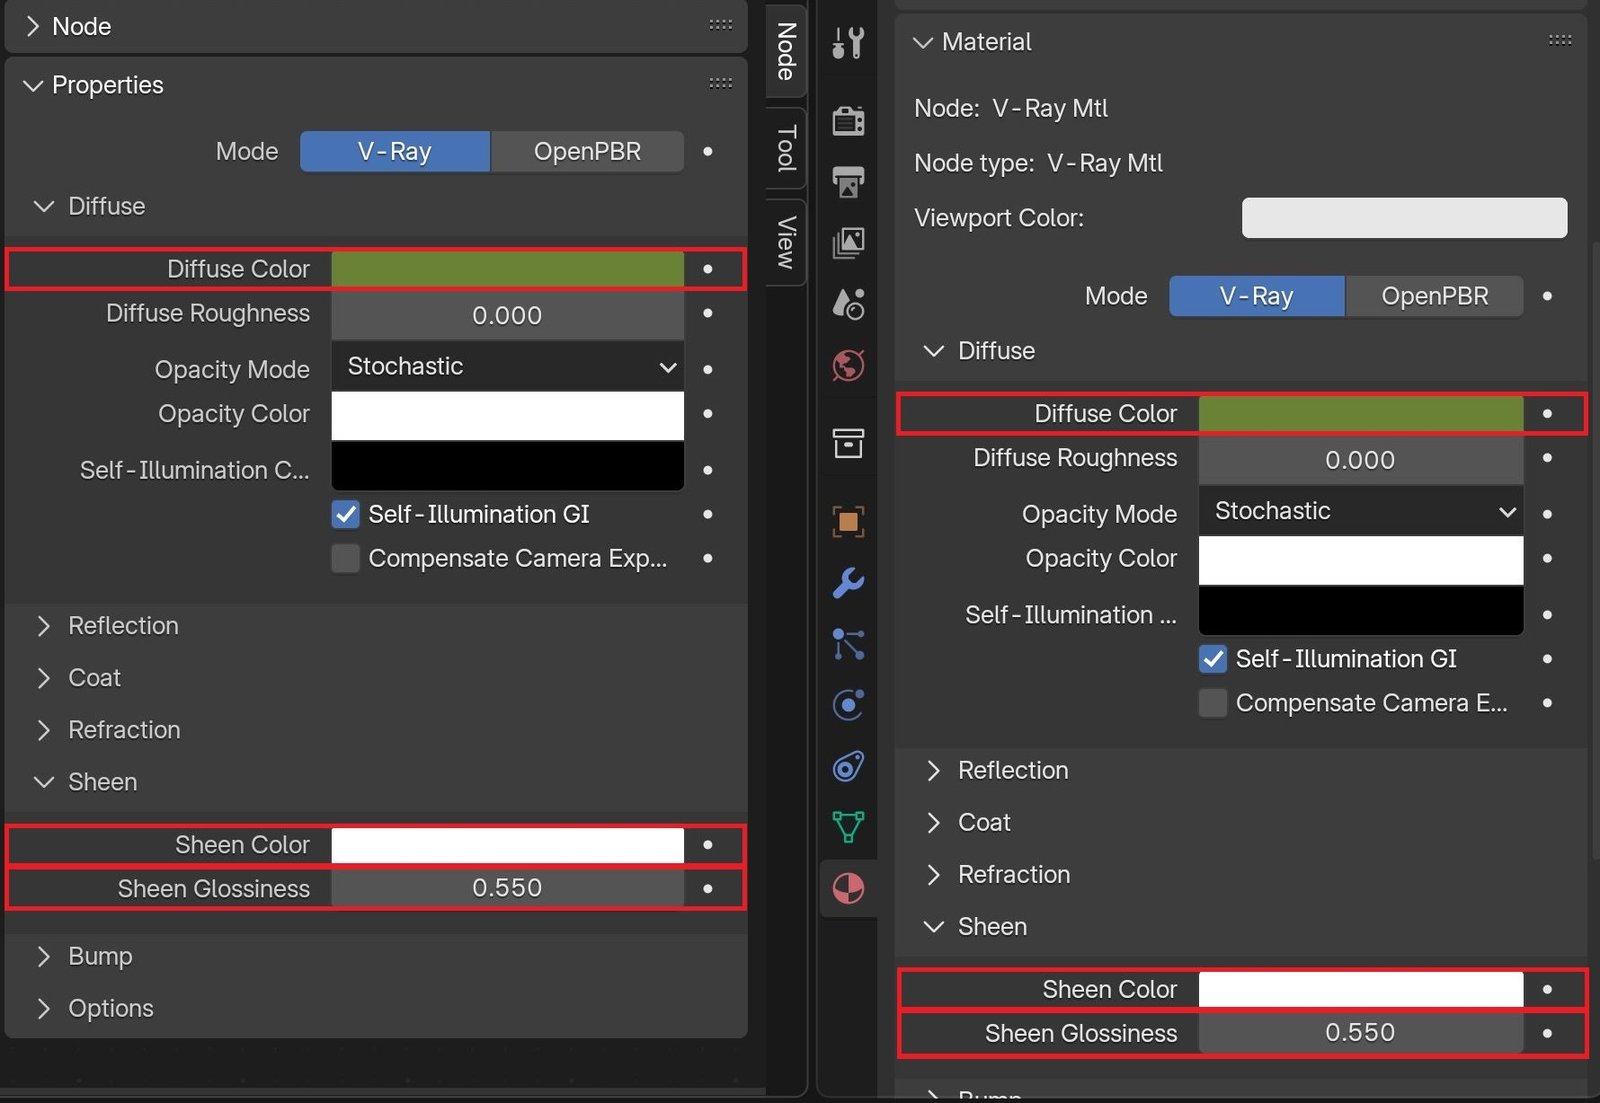
Select the end seam of the blanket to open its material setup. Select the V-Ray Mtl node and open either the Node menu or the Material Properties tab to view its properties.
Set the following settings:
- Diffuse Color = HSV ( 0.237, 0.843, 0.225 )
- Sheen Color = HSV ( 0.0, 0.0, 1.0 ), or pure white
- Sheen Glossiness = 0.550
These settings will give the same sheen reflection (because the Glossiness is the same value) to the blanket's end, but will also shade the end differently.
4 Final Render
That's all the material setup we need to do for the sheen fabric. You can now start a production render for the final result.
The render settings are preset; you can view them in the Render Properties tab. The Image Sampler is one of the most crucial factors for the noise and quality of any render, so if anything, check its settings. They are found in the Sampler rollout.

Here is the blanket before and after adjusting the material:
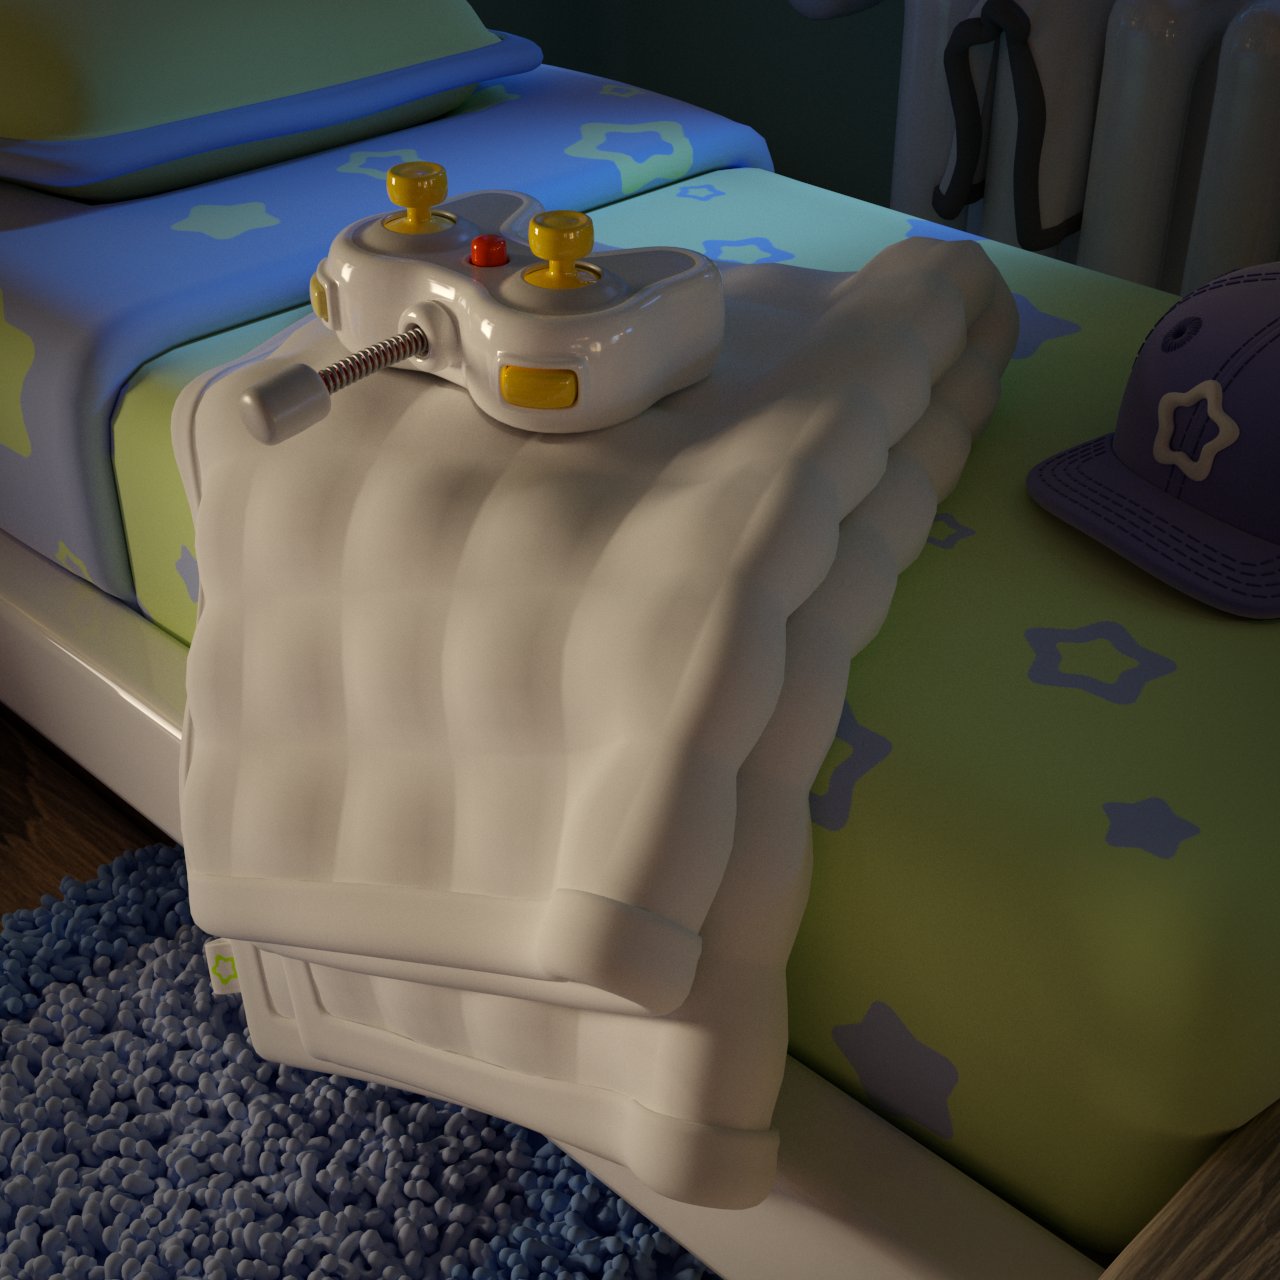
Before
After