V-Ray for Blender
Masks
This page provides information on the Masks available in the V-Ray Frame Buffer for Blender.
Last updated 18 September 2025
This page provides information on the Masks available in the V-Ray Frame Buffer for Blender.
Overview
The V-Ray Masks are used to refine only selected parts of the rendered image in the New VFB. They can be applied to Color correction layers, the Lens Effects layer, the Denoiser layer, and also to Folders in the VFB layers tree.
V-Ray Mask can be created using the Add layer button. The same option is available in the right-click context menu of the layer tree under the New layer category. There's also a quick Mask creation button in the Properties area of folders and layers.
When one or more masks are applied to the same folder or layer, a mask icon is placed in front of it in the layer tree to signify its presence. The parameters of each mask are available in their own separate tabs to the Properties of the masked layer or folder.
The masked areas are defined by selection of objects, materials, groups, layers, etc. To specify them, respective render channels must be available in the rendered image. Currently, there are three Mask types: Integer Mask, MultiMatte Mask, and Cryptomatte Mask.

UI Paths
||V-Ray Frame Buffer|| > Layers > Add button
||V-Ray Frame Buffer|| > Layers > Layer's right-click menu option
||V-Ray Frame Buffer|| > Layers > Select layer or folder > Add new mask layer button

Parameters
The following parameters are common for all masks:
Blending – Determines how multiple masks are blended together over a single correction layer:
Overwrite – Sets the current mask as it is, without blending it with the masks before it (standing on its left).
Add – Adds the current mask to the result of all masks before it. This is the default mode.
Subtract – Subtracts the mask from the result of all masks before it.
Multiply – Multiplies the mask with the result of all masks before it.
Divide – Divides the mask by the result of all masks before it.
Element – Specifies the render channel from which the mask is read. Only render channels available in the rendered image and compatible with the type of the mask are listed in the drop down.

Opacity – (Mask opacity multiplier) Determines to what degree the selected layer obscures or reveals the layer beneath it. Even if there’s only one mask child, you can modify its opacity. The opacity is multiplied with the mask color.
Show preview when selected - When enabled, shows a preview of the mask if the mask is selected.
Invert mask – When enabled, inverts the mask results.

– Allows you to add a new mask layer.

– Shows all tabs of the currently selected color correction layer.

MultiMatte Mask
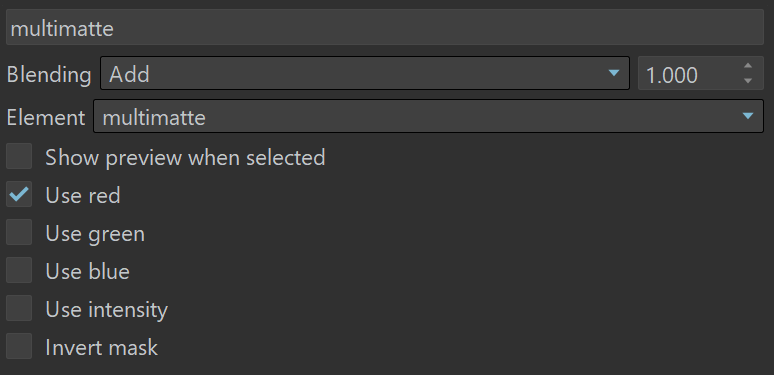
The MultiMatte Mask is based on the Multi Matte render channel.
Use red – When enabled, uses the red channel as a grayscale mask.
Use green – When enabled, uses the green channel as a grayscale mask.
Use blue – When enabled, uses the blue channel as a grayscale mask.
Use intensity – When enabled, uses the pixel intensity as a grayscale mask.
Integer Mask
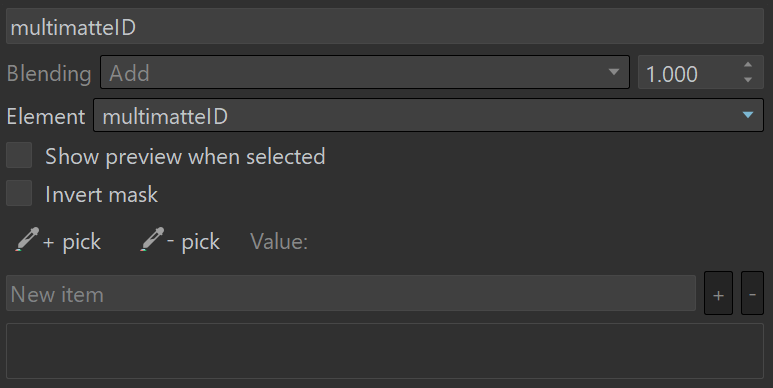
The Integer Mask is used with Render ID, Object ID, Material ID and Multi Matte ID render channels. You can choose which IDs should be in the mask.
+/- Pick – Allows you to add/remove items by picking them from the Render View. When activated and the mouse is inside the Render View, a red square indicates where the value is exactly picked.
Value – Shows the mask ID on hover over the rendered frame. If you click on a selection in the Render View, the current ID is added/removed from the list below, depending on the Pick mode.
New item – A field to type a mask ID manually and then add it to the current selection with the + button.
+ – Adds IDs to the list.
- – Removes IDs from the list.
Cryptomatte Mask
The Cryptomatte Mask is based on the Cryptomatte render channel.
+/- Pick – Allows you to add/remove items by picking them from the Render View. When activated and the mouse is inside the Render View, a red square indicates where the value is exactly picked.
Value – Shows the mask ID on hover over the rendered frame. If you click on a selection in the Render View, the current ID is added to the list below.
New item – A field to type in a mask ID and add it to the current selection with the + button. The text is case insensitive.
+ – Adds IDs to the list.
- – Removes IDs from the list.

Notes
- Currently, there are masks based only on some V-Ray render channels. The different mask types filter the list of all channels and show only the suitable ones.
- Currently, masks cannot be placed directly on a render channel layer. A color correction layer must be placed first on the render channel, and then the mask is added on top. For example, a Hue/Saturation layer is applied on the RGB color or a Light Select Render Channel layer and then a mask is added on the correction layer so that only the masked area has the correction applied.