V-Ray for Blender
Physical Camera Attributes
This page provides information about the Physical Camera Attributes in V-Ray for Blender.
Last updated 1 September 2026
This page provides information about the Physical Camera Attributes in V-Ray for Blender.
Overview
The V-Ray Physical Camera attributes apply real-world camera settings such as f-stop, focal length, and shutter speed to set up the virtual CG camera. It also makes it easier to use light sources with real-world illumination, such as V-Ray Lights with physical units or V-Ray Sun and Sky.
There is a quick setup button in the V-Ray Menu, which creates a Blender camera and adds Physical Camera attributes to it automatically. Otherwise, you can manually create a camera and enable the attributes yourself.

UI Paths
||V-Ray menu|| > Cameras > V-Ray Physical Camera
This path creates a Camera geometry and enables the V-Ray Physical Camera Attributes.

||default Camera|| > Data menu > V-Ray Physical Camera
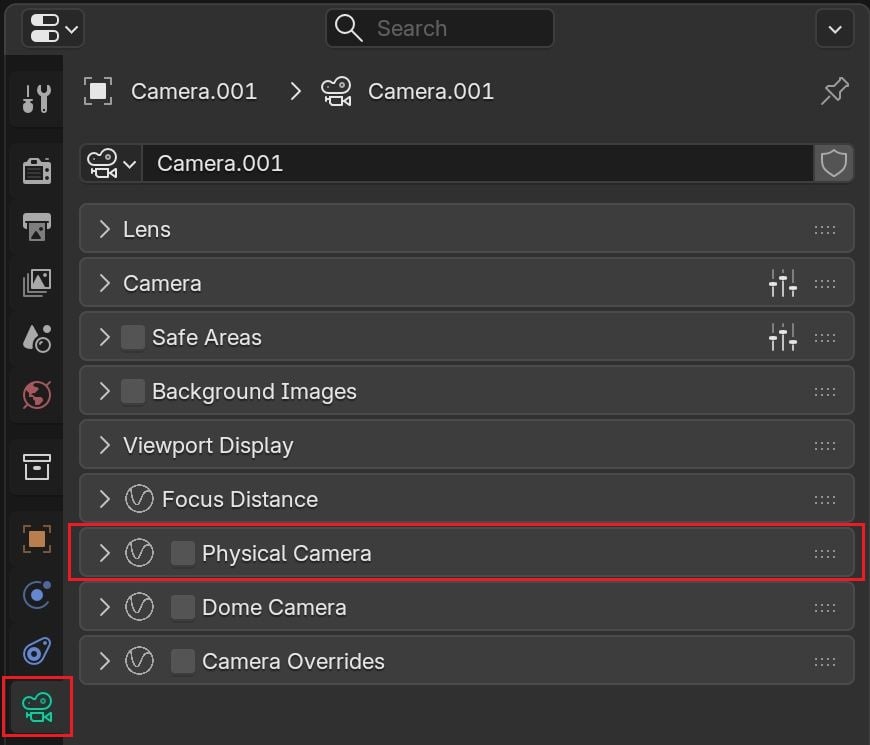
||viewport|| > N panel > V-Ray
This path allows enabling the Physical Camera Attributes and contains some quick settings to get you started.

General
Camera
Camera Type – Specifies the camera type. This mostly has an effect on the motion blur effect produced by the camera. Different options are available depending on the camera Type.
Still – Simulates a still photo camera with a regular shutter.
Movie – Simulates a motion-picture camera with a circular shutter.
Video – Simulates a shutterless video camera with a CCD matrix.

Sensor and Lens
Specify Field of View – When enabled, sets the field of view directly without having to set up the Film Gate (mm) and Focal Length (mm).
Field of View – Specifies the field of view in degrees.
Film Gate (mm) – Specifies the horizontal size of the film gate in millimeters. Note that this setting takes into account the system units configuration to produce the correct result. Vertical film gate size is calculated by accounting the image aspect ratio (vertical film size = horizontal film size/aspect ratio).
Focal Length (mm) – Specifies the equivalent focal length of the camera lens. This setting takes into account the system units configuration to produce the correct result.
Zoom Factor – Specifies a zoom factor. Values greater than 1.0 zoom into the image; values smaller than 1.0 zoom out. This is similar to a blow-up rendering of the image.

Aperture
Film Speed (ISO) – Determines the film power (i.e. sensitivity). Smaller values make the image darker, while larger values make it brighter. This option is not available for V-Ray GPU. See the Cheat Sheet for more information.
F-Number – Determines the width of the camera aperture and, indirectly, exposure. If the Exposure option is set to Physical Exposure or Exposure Value, changing the F-number affects the image brightness. See the Cheat Sheet for more information.
Shutter Speed (s^-1) – Specifies the shutter speed, in inverse seconds, for the Still Camera Type. For example, a shutter speed of 1/30 s corresponds to a value of 30 for this parameter. See the Cheat Sheet for more information.
Shutter Angle – Specifies the shutter angle (in degrees) for the Movie Camera Type. See the example.
Shutter Offset – Specifies the shutter offset (in degrees) for the Movie Camera Type. See the example.
Latency (s) – Specifies the CCD matrix latency (in seconds) when the Camera Type is set to Video. This option is not available for V-Ray GPU.

Color and Exposure
Exposure – Specifies how the F-number, Shutter Speed (s^-1), and Film Speed (ISO) settings affect the image brightness.
No exposure – Shutter Speed (s^-1), F-Number and Film Speed (ISO) settings do not affect the image brightness;
Physical Exposure – Image brightness is controlled by the Shutter speed (s^-1), F-Number, and Film Speed (ISO);
Exposure Value – Uses the Exposure Value to control image brightness. Grays out the ISO parameter and uses the Shutter speed (s^-1) and F-number values only for Motion Blur and Depth of field, respectively.
Exposure Value – Controls the exposure value when the Exposure Value option is selected.
Vignetting – When enabled, simulates the optical vignetting effect of real-world cameras. See the example.
Vignetting Strength – Specifies the vignetting strength. The strength of the vignetting effect can be specified, where 0.0 is no vignetting and 1.0 is normal vignetting.
White Balance – Allows additional modification of the image output. Objects in the scene that have the specified color appear white in the image. Note that only the color hue is taken into consideration; the brightness of the color is ignored. See the example.

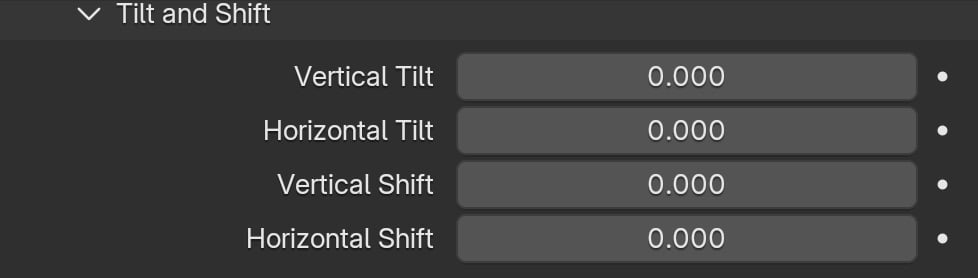
Tilt and Shift
Vertical Tilt – Vertical tilt that allows the simulation of tilt lenses for a 2-point perspective.
Horizontal Tilt – Horizontal tilt that allows the simulation of tilt lenses for a 2-point perspective. Changing these parameters is similar to applying a camera correction modifier.
Vertical Shift – Vertically offsets the camera field of view as a fraction of the current view. For example, a value of 0.5 offsets the camera by half of the current image height in an upward direction.
Horizontal Shift – Horizontally offsets the camera field of view as a fraction of the current view. For example, a value of 0.5 offsets the camera by half of the current image width to the left.
DoF and Motion Blur
Depth of Field – Enables the depth of field effect. Note that depth of field depends on the F-Number parameter. See the example.
Aperture Shape – Defines the shape of the camera aperture. When disabled, a perfectly circular aperture is simulated. When enabled, a polygonal aperture is simulated, with the specified number of blades.
Blades Number – Specifies the number of blades of the aperture.
Rotation – Rotates the blades (value in degrees).
Center Bias – Defines a bias shape for the bokeh effects. Positive values make the outer edge of the bokeh effects brighter; negative values make the center of the effect brighter.
Anisotropy – Allows stretching of the bokeh effect horizontally or vertically to simulate anamorphic lenses. If you want the ratio of height to width of the bokeh to be k:1, then the value for Anisotropy should be √(1/k)-1. For example, for anamorphic bokeh, which is 2.39:1, the Anisotropy value should be -0.353.
Optical Vignetting – Controls the strength of the optical vignetting, also known as and cat's eye vignetting. This effect is due to the fact that the shape of the bokeh highlights resembles the shape of the aperture. As the distance to the optical axis increases, the bokeh highlights are progressively narrowed and begin to resemble the shape of a cat's eye. The larger the distance from the image center, the narrower the cat's eye becomes. Optical vignetting tends to be stronger in wide-angle lenses and large aperture lenses, but the effect can be noticed with most photographic lenses.
Bitmap Aperture – Enables the use of an image (specified in the field below) to control the aperture shape, as well as any dirt or scratches that may affect the bokeh. White signifies transparent areas and black signifies opaque areas.
File – Specifies the image file.
Bitmap Resolution – Specifies the sampling texture resolution when calculating the bokeh effects.
Affect Exposure – When enabled, the bokeh effects affect the overall exposure of the image.
Motion Blur – Enables the use of the motion blur effect. Motion blur depends on the camera's Shutter Speed value and the speed of the moving object. See the cheat sheet. When the Physical Camera is enabled, the Globals Motion Blur properties (except for Geometry Samples and Camera Motion Blur) are disregarded. See the example.
Rolling Shutter Mode – Specifies whether the rolling shutter effect is enabled and the direction of the shutter.
Disabled
Top to bottom
Bottom to top
Left to right
Right to left
Duration (s∧-1) – The time for the shutter to pass through the image in 1/seconds.

Distortion
Type – Specifies how the distortion is determined.
Quadratic – The default distortion type. It uses a simplified formula that is easier to calculate than the Cubic method.
Cubic – Used in some camera tracking programs like SynthEyes, Boujou, etc. If you plan on using one of these programs, this distortion type should be used.
Lens File – Uses a .lens file, which is specified in the Lens File field.
Texture – Uses a texture file, generated in a third-party application (i.e. Nuke), and specified in the Distortion Texture field.
Amount – Specifies the distortion coefficient for the camera lens when the Distortion Type is set to either Quadratic or Cubic. A value of 0.0 means no distortion; positive values produce "barrel" distortion, while negative values produce "pillow" distortion. See the Distortion example for more information.
Distortion Texture – When the Distortion Type is set to Texture, this slot specifies the color that determines the distortion, or the map that contains the distortion data. This option is not available for V-Ray GPU.
Lens File – When the Distortion Type is set to Lens File, this slot specifies the lens file, containing the distortion data.

F-Number vs Shutter speed vs ISO Cheat Sheet
The main options that control the brightness of a V-Ray Physical camera are F-Number, Shutter speed, and ISO. They affect each other, and you need to balance them according to your scene. Keep in mind that these settings do not correspond to those of a real-life camera. They apply only to the V-Ray Physical camera.
- F-Number determines the size of the opening in the camera lens. What the number refers to is the ratio between the aperture's focal length and the actual diameter of the aperture. A smaller F-Number means a larger aperture. The larger the Aperture, the brighter the scene becomes but that also introduces more Depth of field.
- Shutter speed determines how long the lens stays open when taking the photo. The numbers refer to fractions of a second. The slower the Shutter speed, the brighter the scene becomes, but that also introduces Motion Blur.
- ISO determines the camera's sensitivity to light in the scene. Lowering the ISO means that more light is needed to achieve good lighting. Increasing the ISO means that less light is needed to achieve good lighting. A day scene, lit with a V-Ray Sun, for instance, looks best when captured with around 100 ISO.

Examples
Example: Distortion
The difference between the two types of distortion is slightly visible. The Cubic type should be used in some camera tracking programs like SynthEyes, Boujou, etc.
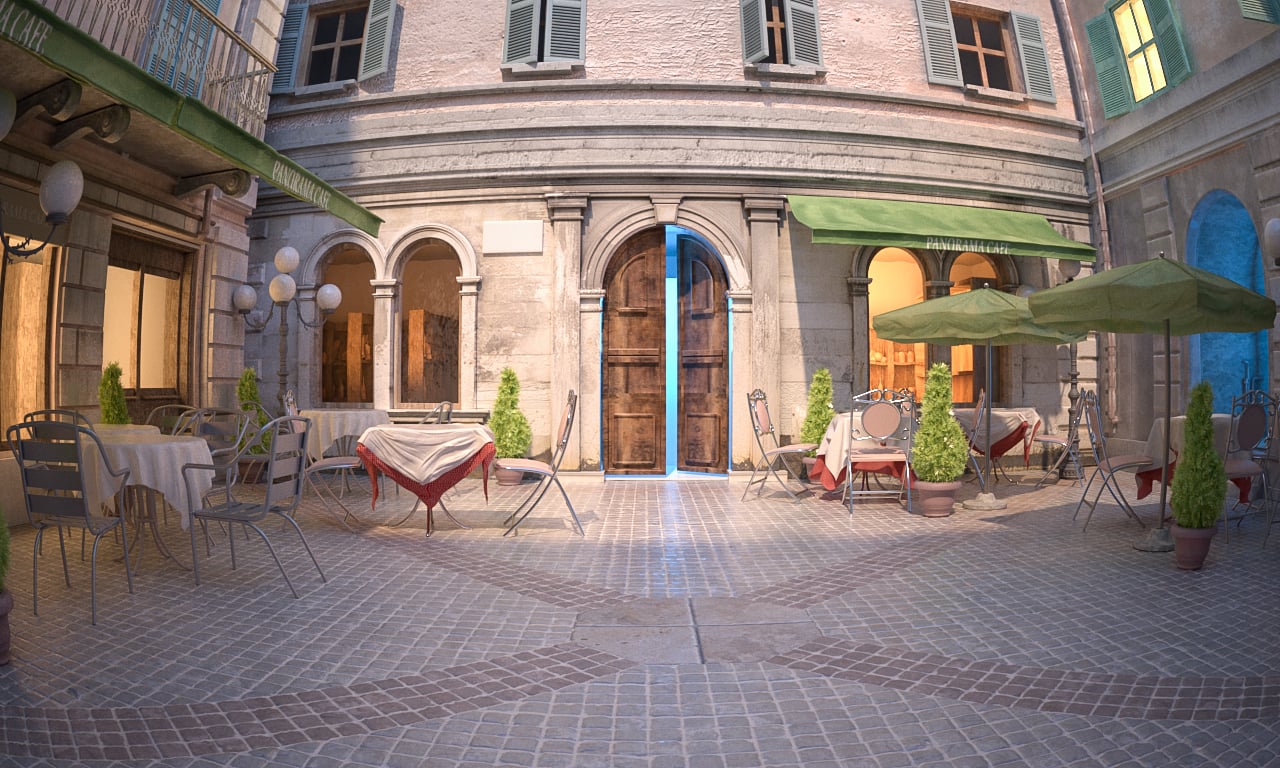
Distortion Amount is 1.0, Distortion type is Quadratic

Distortion Amount is -1.0, Distortion type is Quadratic
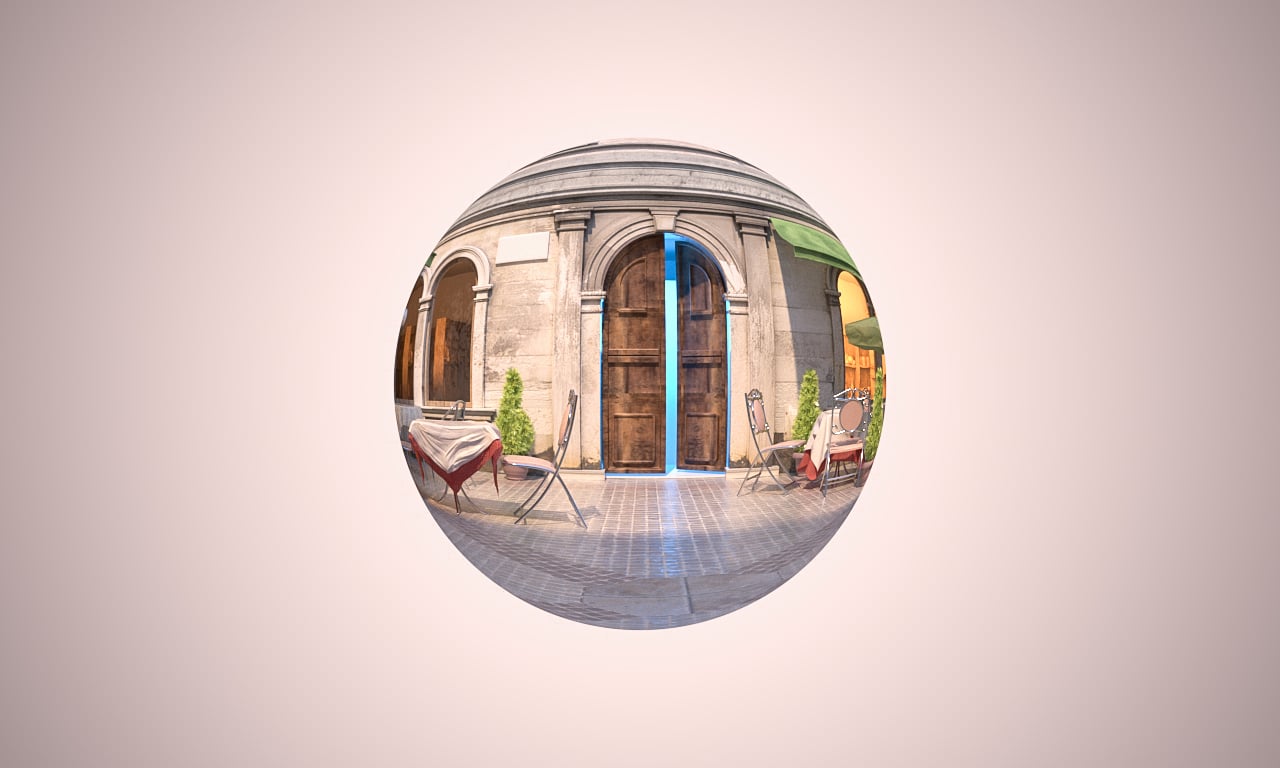
Distortion Amount is 1.0, Distortion type is Cubic

Distortion Amount is -1.0, Distortion type is Cubic
Example: Shutter angle
In this example, Motion Blur is enabled. The Shutter angle changes the duration during which the sensor is exposed to light, and each adjustment to it affects the exposure. To avoid adjusting the ISO, Shutter Speed and Aperture each time, the Exposure color correction property is set to Exposure Value (EV) and remains consistent throughout each render.

Shutter angle = 45°

Shutter angle = 180°
A 180° shutter angle is a common default, providing a balance between motion blur and sharpness.
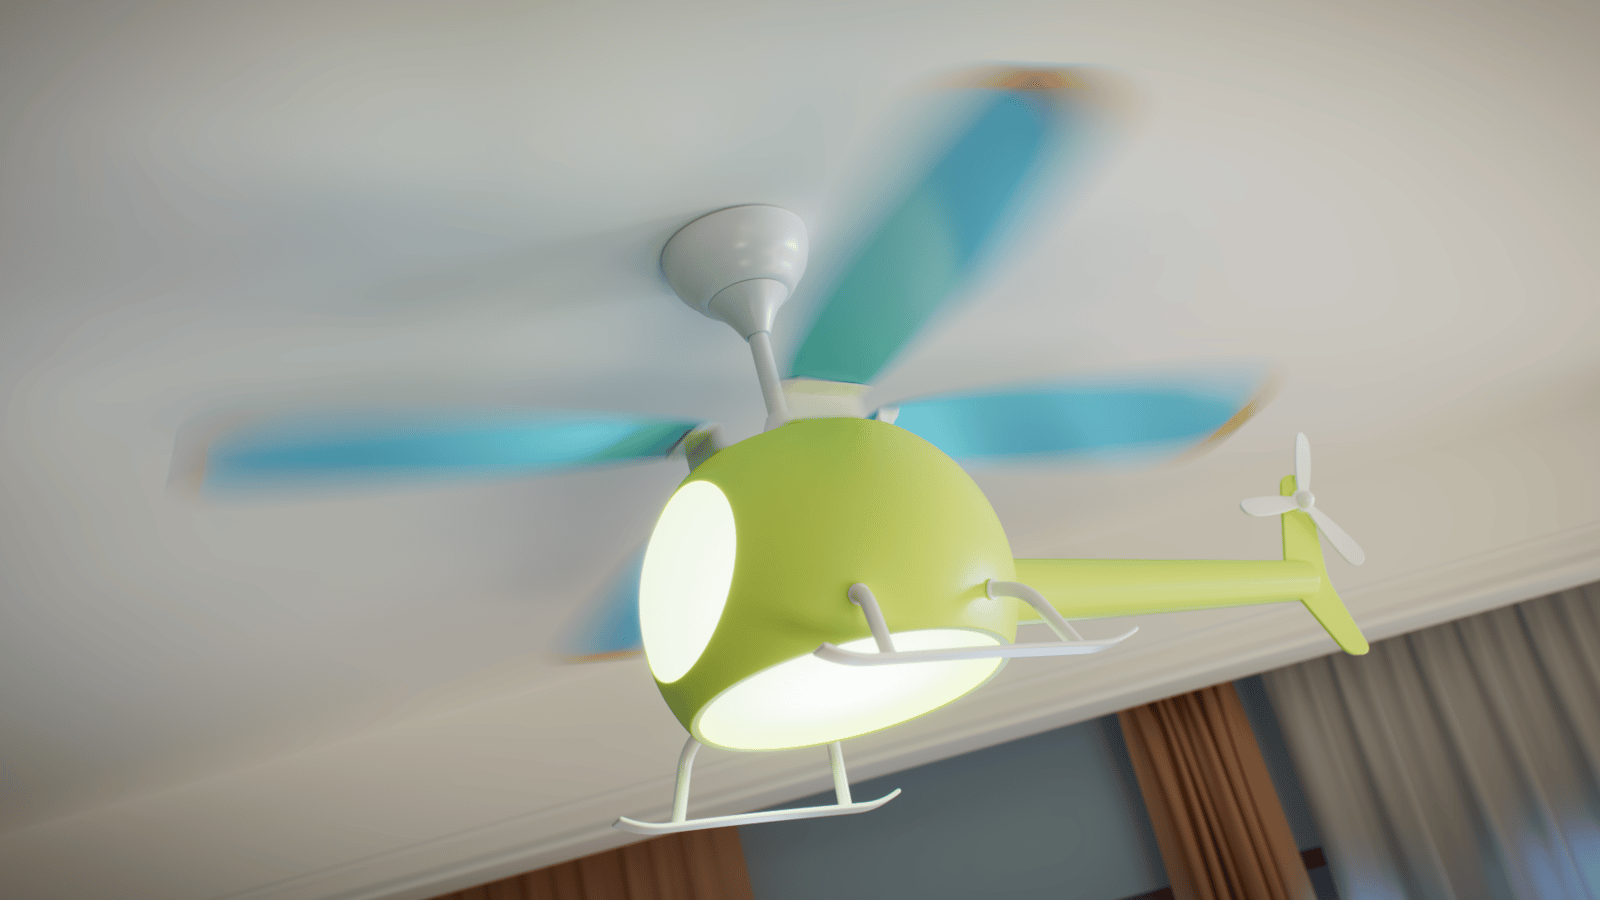
Shutter angle = 360°
In a 360° shutter angle, the sensor is exposed to light for the entire frame duration, leading to maximum motion blur. Ideal for achieving a dreamy, smeared look.
Example: Shutter offset
In this example, you can see the Shutter offset values from -360° to 360°. The propellers are animated to rotate a full 360° for every 30 frames, and the animation is set at 30 fps. For every second,, there is a full 360° rotation. Offsetting when the shutter opens determines what point in the frame cycle is captured out of the 360° rotation of the propeller.
Example: Vignetting
This parameter control the optical vignetting effect of real-world cameras.

Off

On
Example: White Balance
Using the White balance color allows additional modification of the image output. Objects in the scene that have the specified color will appear white in the image. E.g. for daylight scenes this should be peach color to compensate for the color of the sun light etc.
The images in this example show the effect of changing the White balance. The following constant settings were used for some parameters: Exposure is on, F-Number is 8.0, Shutter speed is 200.0, Film speed (ISO) is 200.0, and Vignetting is off.
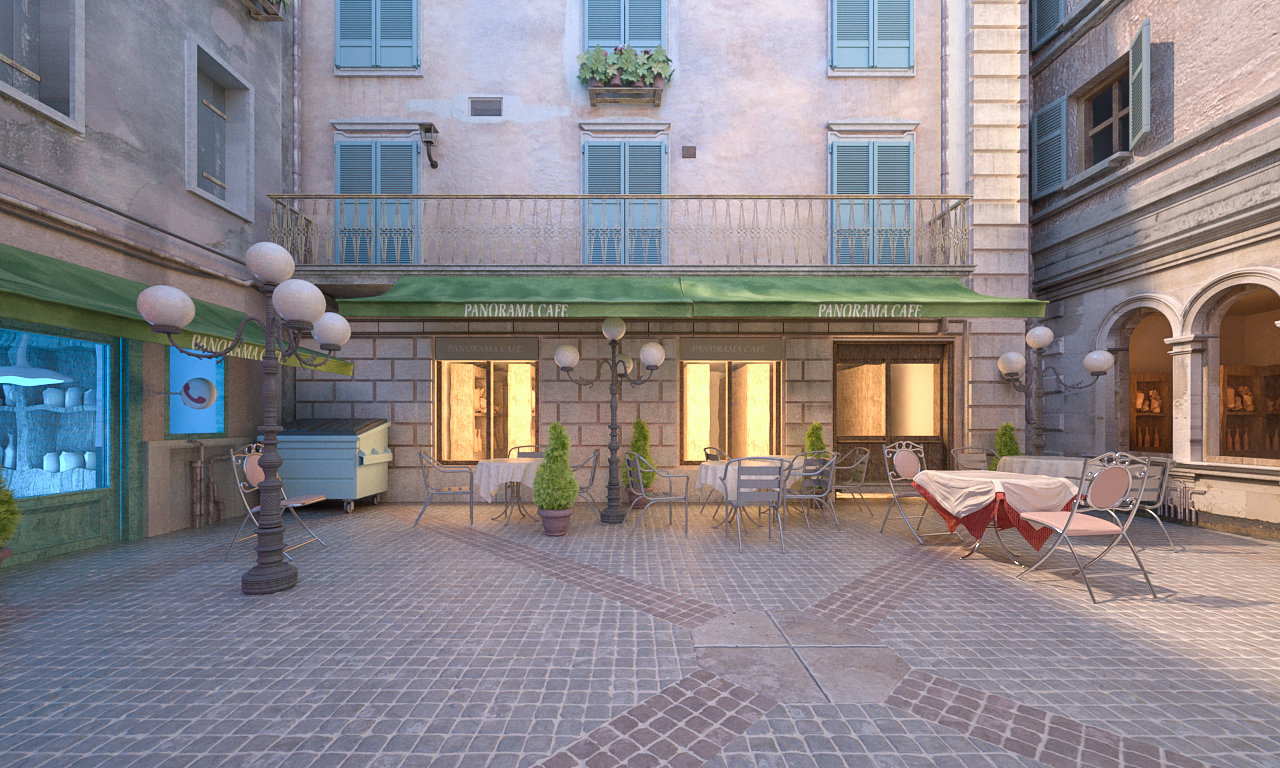
White balance is white (255, 255, 255)

White balance is blueish (196, 226, 255)

White balance is warmer (240, 200, 114)
Example: Depth Of Field (DOF)
To enable the DoF effect you need to turn on the Depth of field option DoF & Motion blur rollout of the physical camera. The effect is most strongly seen when the camera is close to an object, for example when doing a macro photo. For a strong DoF effect, the camera aperture must be open wide (i.e. small F-Number value). That may lead to a very burnt and bright image, so to preserve the same illuminosity over the whole image, the shutter speed must be shortened. And at last but not least the Focus distance determines which part of the scene will be actually on focus. To get the focus near, you would need a small value and reverse - higher value for far focus.
For the images in this example, the following constant settings were used for some parameters: Exposure is on, F-Number is 1.0, Shutter speed is 4000.0, Film speed (ISO) is 100.0, Vignetting is off.

Depth of field is off
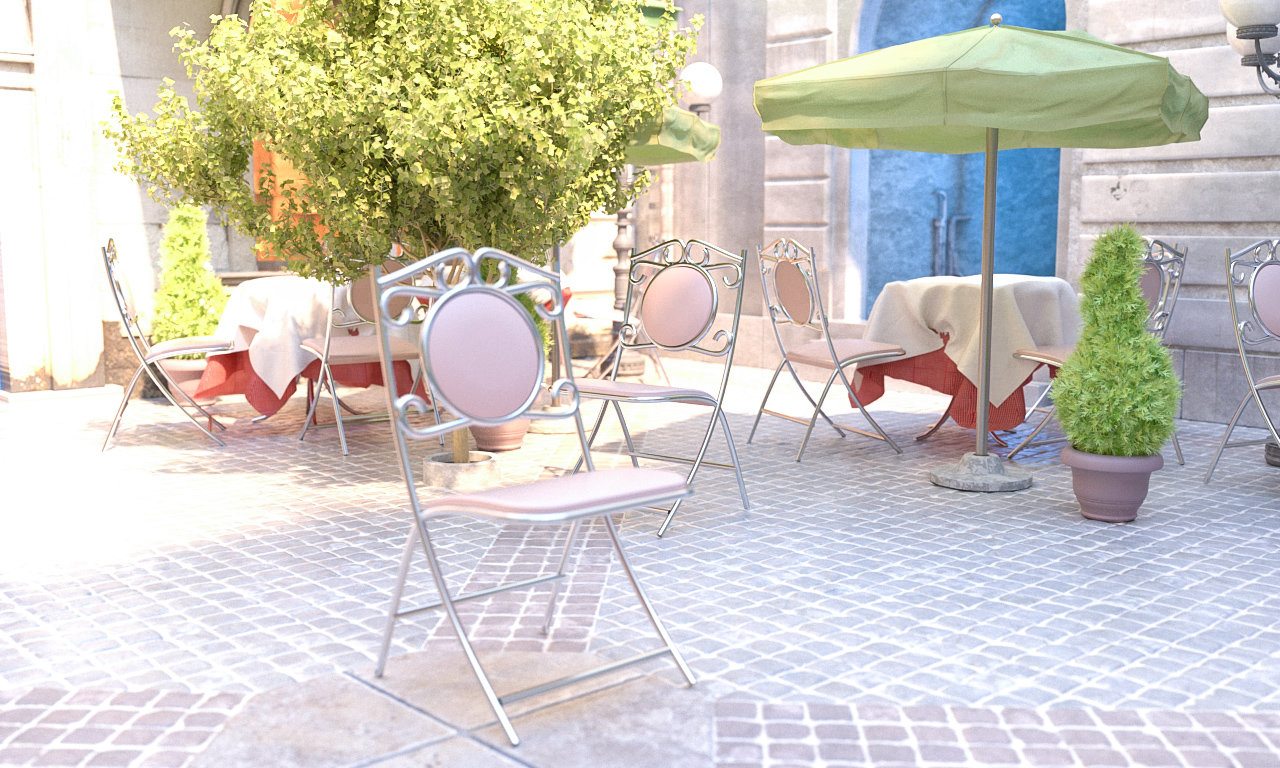
Depth of field is on, Focus distance is 7.30 m

Depth of field is on, Focus distance is 4.34 m
Example: Motion Blur (MB)
To enable the motion blur effect, you need to enable the Motion blur option in the DoF & Motion blur rollout of the physical camera. The amount of motion blur is determined by the speed of the moving object itself as well as the Shutter speed setting of the camera. Long shutter speeds will produce more motion blur, as the movement of the object is tracked over a longer time. In reverse, short shutter speeds will produce less motion blur. Keep in mind that to preserve the same brightness over the whole image, the F-Number value has to be corrected as well.
In this example, the falling roof tiles are moving faster than the flower pot, which causes the difference in the motion blur effect.
For the images in this example, the following constant settings were used for some parameters: Exposure is on, Film speed (ISO) is 200.0, and Vignetting is on.
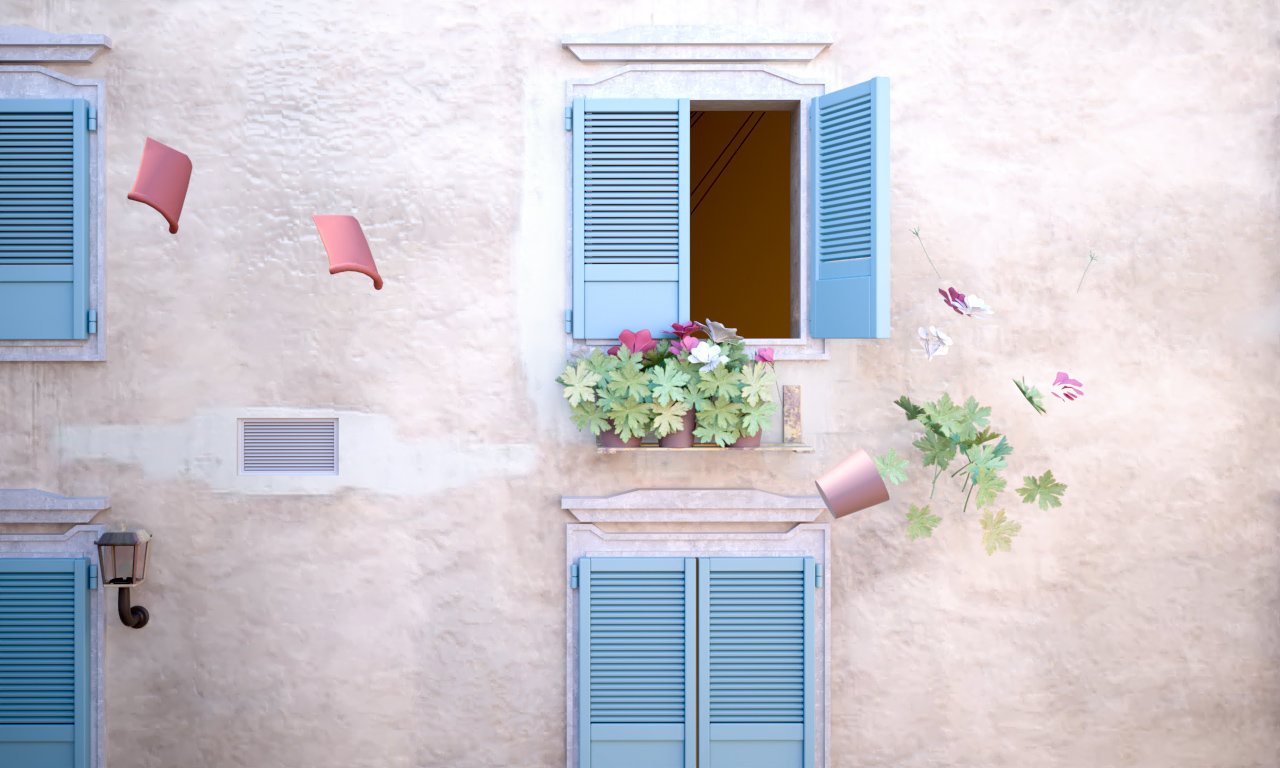
Motion blur is off

Motion blur is on, F-Number is 8.0, Shutter speed is 80.0
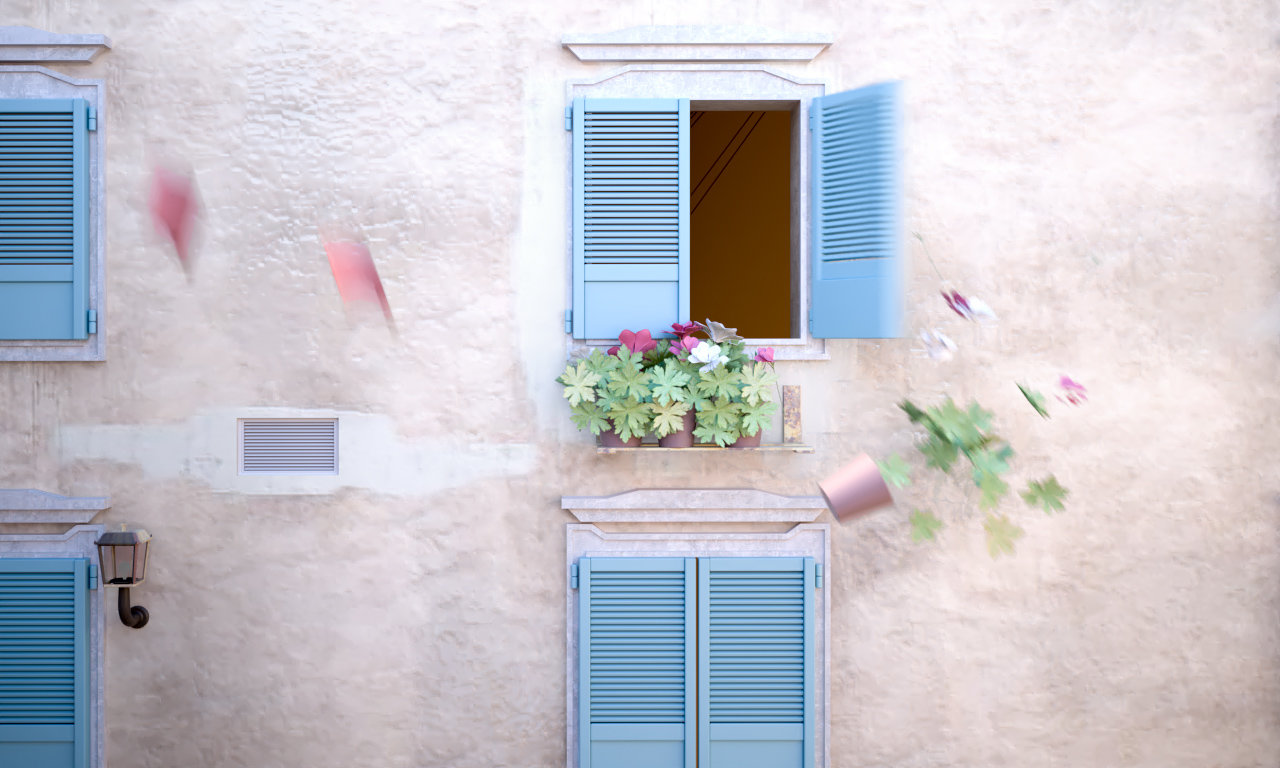
Motion blur is on, F-number is 16.0, Shutter speed is 20.0