V-Ray for Blender
V-Ray Frame Buffer
This page provides an overview of the V-Ray Frame Buffer, or the VFB.
Last updated 16 July 2026
This page provides an overview of the V-Ray Frame Buffer, or the VFB.
Overview
The V-Ray Frame Buffer (VFB) is a second-generation V-Ray virtual frame buffer.
VFB is much more than a render image holder. It provides a higher level of post-processing adjustments and the ability to modify your scene from inside the VFB. Here is a list of benefits you should know:
- Image preview:
Loads render channels via a dropdown list;
Works with display corrections;
Loads various 8-bit and 32-bit file formats, including V-Ray resumable files;
Image comparison between 2 or 4 renders; - Image management:
Keeps the rendered image in full 32-bit floating point format;
Can store history of rendered images with their post-rendering corrections;
Can save corrected output to various image formats; - Image editing and post-processing:
Set Color Corrections for rendered image and its channels;
Composite mode for Back to Beauty workflow including layers corrections;
LightMix control on lights contribution in the rendered image; - Scene editing:
Can modify actual light values by transferring updated intensity and color from LightMix mode;
IPR camera navigation and focus control from inside VFB; - Render management:
Denoiser control;
Region rendering control and test resolution;
Allows you to choose the order in which the buckets are rendered;
Automatic render resolution adjustment in IPR when the VFB window is resized;
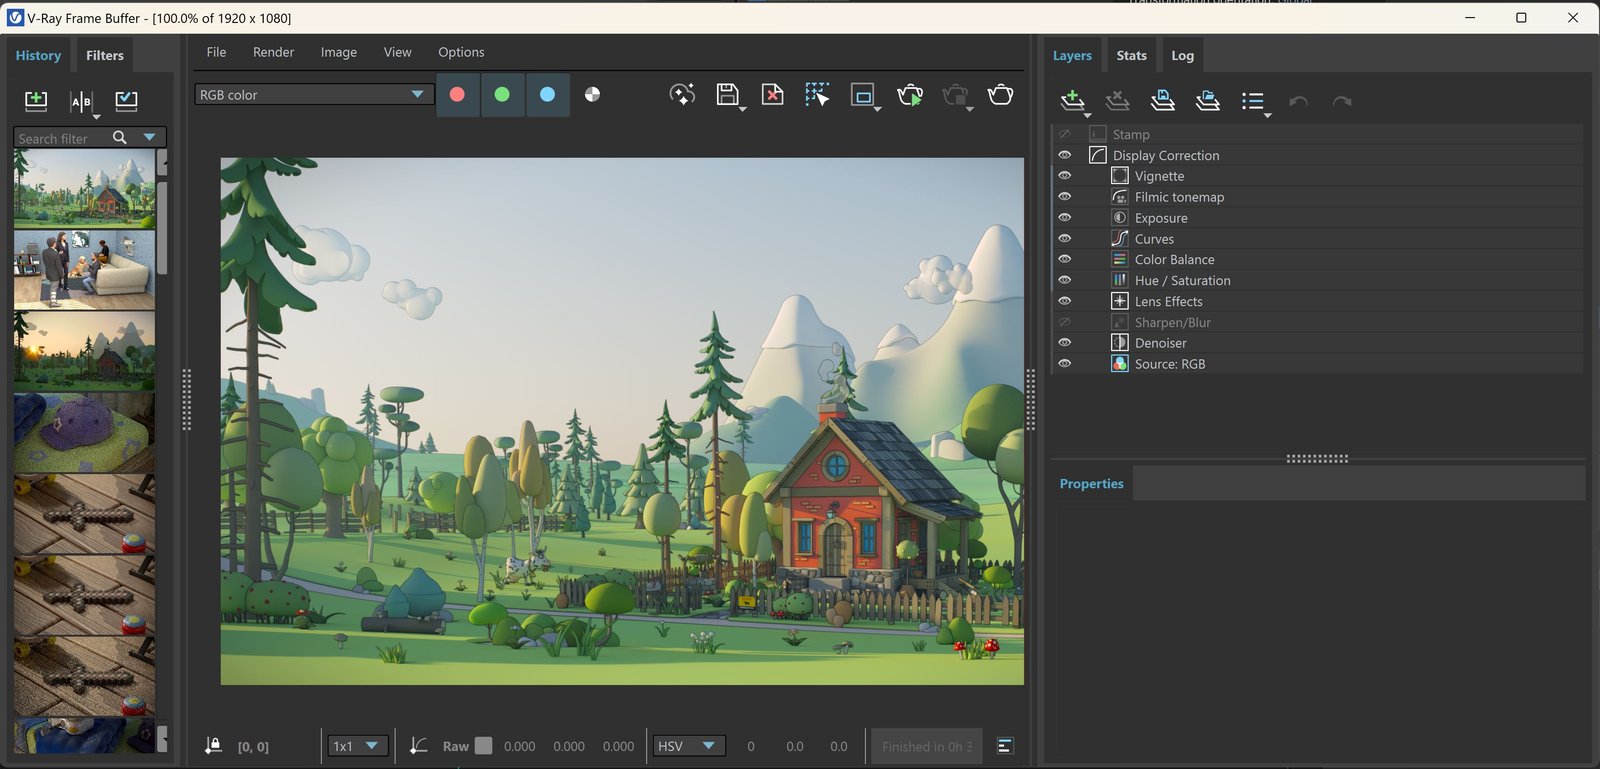
UI Paths
The Frame Buffer automatically opens when you start a render with V-Ray.
||Viewport|| > Start Interactive Render button. This starts an interactive render inside the V-Ray Frame Buffer.

Clicking on the dropdown arrow opens a sub-menu with denoising options, which are applied to the Viewport Interactive Render (IPR) and the VFB Interactive render.
For information on the different Denoiser types, see the V-Ray Denoiser page.

||V-Ray menu|| > V-Ray VFB, Start Production Render, Start Interactive Rende

VFB Menu
The V-Ray Frame Buffer menu holds the main frame buffer commands. Some of the options are also available in the VFB Toolbar for quick access.
Menu | Menu Options |
|---|
Menu | Menu Options | |
|---|---|---|
File | Save current channel – Saves the currently loaded channel to an image file format. Save all image channels to separate files – Saves all the render channels to separate files. Save all image channels to single file – Saves the image to a single multi-channel EXR or .vrimg file. Load image – Opens an image file to be previewed in the V-Ray Frame Buffer. Batch image processing – Allows processing of multiple .vrimg files with the same layer tree changes at the same time. Upload image to Chaos Collaboration – Opens the Chaos Collaboration window, allowing you to upload the selected render to Chaos Cloud Collaboration for sharing and commenting. This function is unavailable in the V-Ray for Blender Community Edition. Enhance image on Chaos Collaboration – Opens the Chaos Collaboration window, allowing you to upload the image to Chaos Cloud Collaboration to be enhanced. This function is unavailable in the V-Ray for Blender Community Edition. Upload image to Chaos Veras – Uploads the current image (rendered, loaded from the History panel, or a loaded local file) in the VFB to Chaos Veras. | Batch Image Processing Input folder – Specifies a path to load images from. Output folder – Specifies a path for the output images. Layer preset – Specifies a path to a layer tree corrections preset. Output filenames suffix – Specifies the suffix added to the output image filenames. Overwrite existing – Enables overwrite of existing files with the same name in the output folder. |
Render | Start interactive rendering – Starts IPR. Abort rendering – Stops the current rendering. Render – Starts rendering. | |
Image | Follow mouse – Renders the closest buckets found to the mouse pointer, when using the bucket image sampler. If the progressive sampler is used, V-Ray samples the closest pixels to the mouse pointer. Follow mouse – Drag the mouse over the VFB while rendering to change what part of the image is sampled first; Copy current channel to clipboard – Copies the current channel to the clipboard. It can then be pasted wherever you need. Clear image – Clears the contents of the frame buffer. This is useful when starting a new render to prevent confusion with the previous image. | |
View | Display color space –Specifies the color space, in which the image is displayed. None – Does not specify a color space; Zoom VFB – Zooms in/out the rendered image in the VFB. Zoom 50% – Zooms out to 50%; Channels – Chooses which channels to see. View red channel – Displays the red channel; Color clamping – Opens the color clamping submenu options: Force color clamping – Forces color clamping; Use pixel aspect – Enables visualization of the pixel aspect ratio. Flip – Mirrors the image in the VFB. This is a view only option, the flipped image cannot be exported. This function is only active while holding the menu button or the hotkey for the corresponding type of flip. The effect does not interrupt interactive rendering. Flip horizontally – Mirrors the image horizontally. Flip vertically – Mirrors the image vertically. Panorama View – Shows the image in 360° view. Show History – Shows the History panel. Show Layers – Shows the Layers panel. | |
Options | VFB settings – Opens the VFB Settings window where you can adjusts settings for Render View, Render Region, History and Layers. |
VFB Toolbar
This dropdown gives access to render channels rendered for the scene. The selected render channel is displayed in the VFB. By default, the RGB color and Alpha render channels are available. Any additional render channels that have been added to the scene also appear in the drop-down. |
This dropdown gives access to render channels rendered for the scene. The selected render channel is displayed in the VFB. By default, the RGB color and Alpha render channels are available. Any additional render channels that have been added to the scene also appear in the drop-down. | |
Displays the red channel. | |
Displays the green channel. | |
Displays the blue channel. | |
Displays the Alpha channel. | |
Uploads the image to be enhanced by a Chaos AI tool. These functions are unavailable in the V-Ray for Blender Community Edition. Enhance image on Chaos Collaboration – Uploads the .exr of the image to Chaos Collaboration to be enhanced. An Enhancer Data render channel needs to be present in the scene for this option to be available. Upload image to Chaos Veras – Uploads the current image in the VFB to Chaos Veras. | |
Saves the image to disk. Press and hold the icon to bring up the submenu: Save current channel – Saves the current channel to an image file format; | |
Clears the contents of the frame buffer. This is useful when starting a new render to prevent confusion with the previous image. | |
Renders the closest buckets found to the mouse pointer, when using the bucket image sampler. If the progressive sampler is used, V-Ray samples the closest pixels to the mouse pointer. With this option enabled, you can right-click on the image and select Lock bucket starting point to lock the bucket (or sampling) starting point. | |
Allows you to render regions in the VFB. See the Render Region section for more information. | |
Starts IPR. | |
Stops the current rendering. | |
Starts a production render. |
Bottom Toolbar
Locks the mouse pointer coordinates and displays information for the selected pixel. |
Locks the mouse pointer coordinates and displays information for the selected pixel. | |
Shows corrected colors. | |
Shows the V-Ray log. | |
Displays the coordinates of the mouse pointer. | |
Specifies the sampled area size. Click on the arrow to open a context menu with the available sampled area sizes: 1x1, 3x3, 5x5, and 7x7. | |
Specifies whether color and display corrections are applied (RGB) or not (Raw) when showing the sampled pixel values at the current mouse pointer position. | |
Displays the RGB pixel values at the current mouse pointer position before applying any color corrections. | |
Specifies RGB values. Click on the arrow to open a context menu with the available option. None – Does not specify the RGB value. | |
Displays the Hue, Saturation and Value of the pixel under the current mouse position when HSV is selected. | |
Displays the HEX of the pixel under the current mouse position when Web is selected. | |
Displays the 8-bit color palette of the pixel under the current mouse position when 8bit is selected. |
VFB Viewport Context Menu
While an interactive render is running, right-clicking anywhere in the VFB viewport opens a context menu. This menu allows interactive selection of objects, materials, and focus points that can be adjusted and are reflected in the render. This is very useful for interactive scene editing.
Select Object – Selects the current object. It is highlighted in the Blender viewport and in the Outliner. Any adjustments in the Editor are applied to this object and reflected in real time in the VFB.
Select Material – Selects the material of the current object. The Shader Node tree needs to be open for the material to be adjusted.
Set Focus Point – Sets the focus point for depth of field to the current object. For this function to work, Depth of Field needs to be enabled in the current camera. See the Physical Camera Attributes for more information. Depth of field can also be enabled globally from the Globals tab.

Render History
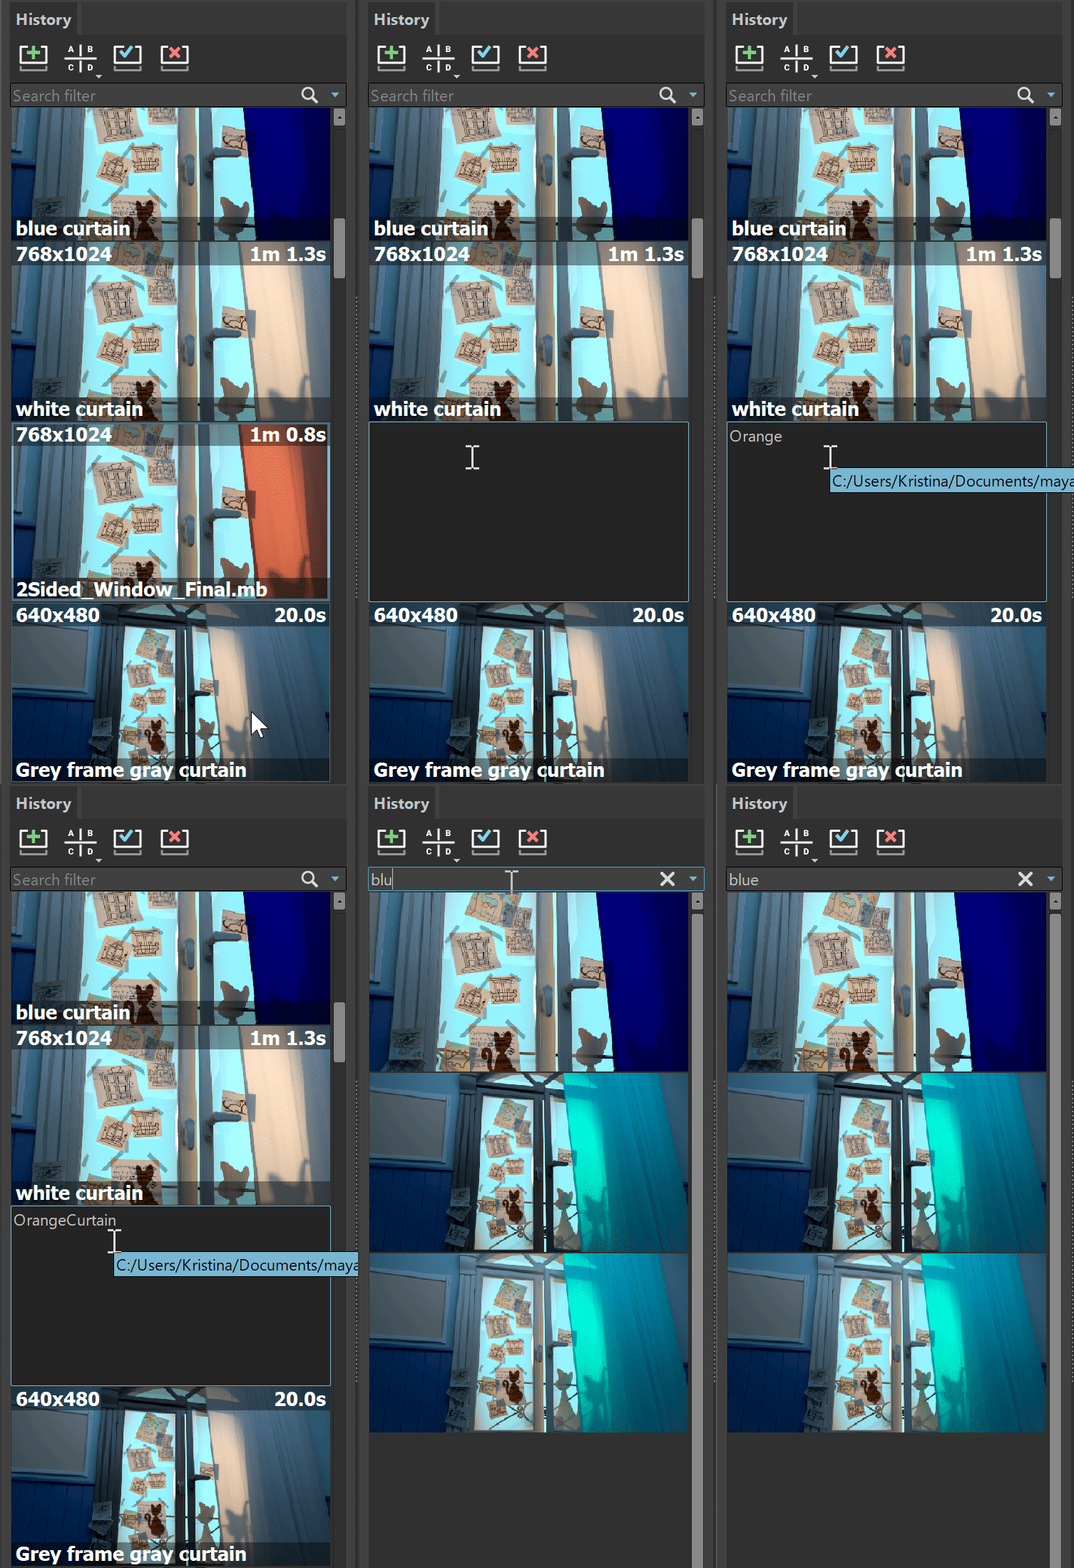
The V-Ray Frame Buffer keeps a history of previously rendered images and lists each with a number, thumbnail, and textual details in the Render history panel. Up to four images can be called from the history to be compared in the VFB (as shown in this section). History files are stored as .vrimg files in a user-specified folder. Render history settings can be configured in the VFB Settings window.

Saves the current image from the VFB to the render history. The image is placed at the top of the render history list. |
Saves the current image from the VFB to the render history. The image is placed at the top of the render history list. | |
Enables or disables image A/B vertical comparison. Select images A and B from the render history. You can switch between comparison modes by holding down on this button or by using the hotkeys. | |
Enables or disables image A/B horizontal comparison. Select images A and B from the render history. You can switch between comparison modes by holding down on this button or by using the hotkeys. | |
Enables or disables image A/B/C/D comparison. Select images A, B, C, and D from the render history. You can switch between comparison modes by holding down on this button or by using the hotkeys. | |
Loads the selected image from the render history to the VFB. | |
Removes the selected image from the render history. |
A search field where you can filter the images based on the scene paths and notes. |
A search field where you can filter the images based on the scene paths and notes. |
Edit note – Allows you to add a text comment to the image; the comment appears below the image.
Set A – Sets the render as A image for comparison.
Set B – Sets the render as B image for comparison.
Load to VFB – Loads the selected image in the VFB (same as double-clicking on the image).
Delete – Deletes the selected image from history. The image is moved to the system's Recycle Bin and can be restored from there if needed.
Load layers – Loads the layer tree preset of the selected image.
Load V-Ray settings – Loads the V-Ray settings used for the saved render.
Compare V-Ray settings – Opens the Compare V-Ray settings dialogue, where you can compare the render setups of saved renders.
Image Info – Opens a window containing detailed information about the image, including, but not limited to, Aperture, Camera Far and Near Range, File Path, V-Ray version, render time. Keep in mind that the camera values are saved in system units. Also, the vrayrevison info displayed in the list is not related to the saved .vrimg file but to the current V-Ray build installed for Blender.
Copy scene path – Copies the full path to the scene.
Copy project path – Copies the full path to the project.
Upload image to Chaos Veras – Uploads the current render in the VFB to Chaos Veras. This function is unavailable in the V-Ray in the Blender Community Edition.
Upload image(s) to Chaos Collaboration – Uploads an image to Chaos Cloud Collaboration for sharing and commenting. This function is unavailable in the V-Ray in the Blender Community Edition.
Enhance image on Chaos Collaboration – Uploads the image to Chaos Cloud Collaboration to be enhanced using the AI enhancer. See the AI Enhancer page for more information. This function is unavailable in the V-Ray in the Blender Community Edition.
Reload history – Re-reads the history image list. This may be needed if the history folder is updated outside of Blender (e.g. from another Blender session).
Layers
Creates a layer. Multiple layers of the same type can be added. Folder – Allows grouping multiple layers; For more information, see the Layers page. |
Creates a layer. Multiple layers of the same type can be added. Folder – Allows grouping multiple layers; For more information, see the Layers page. | |
Deletes the selected layer(s). | |
Saves a layer tree preset. | |
Loads a layer tree preset. | |
Quick access to custom layer presets. You must set the path to it in the VFB Settings. | |
Undo create layer. | |
Redo create layer. |
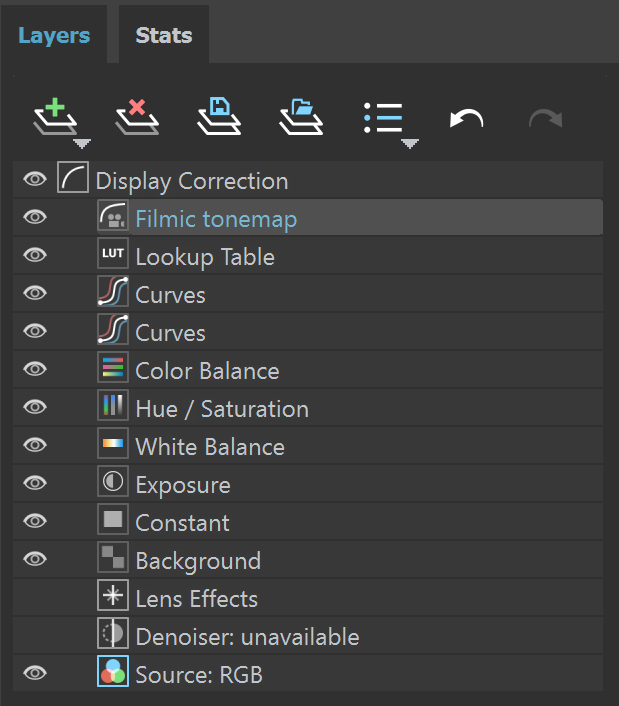
Each layer has a context menu. Right-click to display it:
Command | Description |
|---|
Command | Description |
|---|---|
Reset | Resets all changes done to the selected layer. |
Save | Saves the layer as a preset. |
Load | Loads a preset for the selected layer. |
Delete | Deletes the selected layer. |
Save all CCs as LUT | Bakes all the color corrections to a LUT file. |
New Layer | Creates a new layer. |
Duplicate | Duplicates the selected layer. |
Blend Modes | Specifies how the selected layer blends with the result from all layers below it. See the Layers page for more info on the types of Blend Modes. |

Filters
The V-Ray Frame Buffer provides a variety of filter presets.
The Filters panel provides easy access to multiple color correction scenarios. The preview thumbnails are auto-updated when the render ends. If another image from the History is loaded, manual reload is required. It can be done either from the
button or through the context menu. Applying one of the filters adds it as a folder at the top of the Layers tree. When loading a new filter, the preset folder in the Layers tree is replaced by the new corrections.
To create custom filters in the VFB Layers panel, right-click on a folder containing correction layers and save it as a .vlpdir file. Change the presets directory from V-Ray Frame Buffer > Options menu > VFB Settings > Filter/Layer presets > Path. Personal custom filters are then shown in the panel and can be loaded quickly.
Default Presets Location
Context Menu
Load Layers – Applies the currently selected filter preset to the render.
Refresh thumbnails – Manually refreshes the filter thumbnails. This is useful in case a different image is loaded from the History.

Remove and Undo Filters from the Layers menu:


You can remove filters by clicking the Undo button ( ) right after adding them, or by selecting their folder and clicking the Delete layer button ( ).
Stats
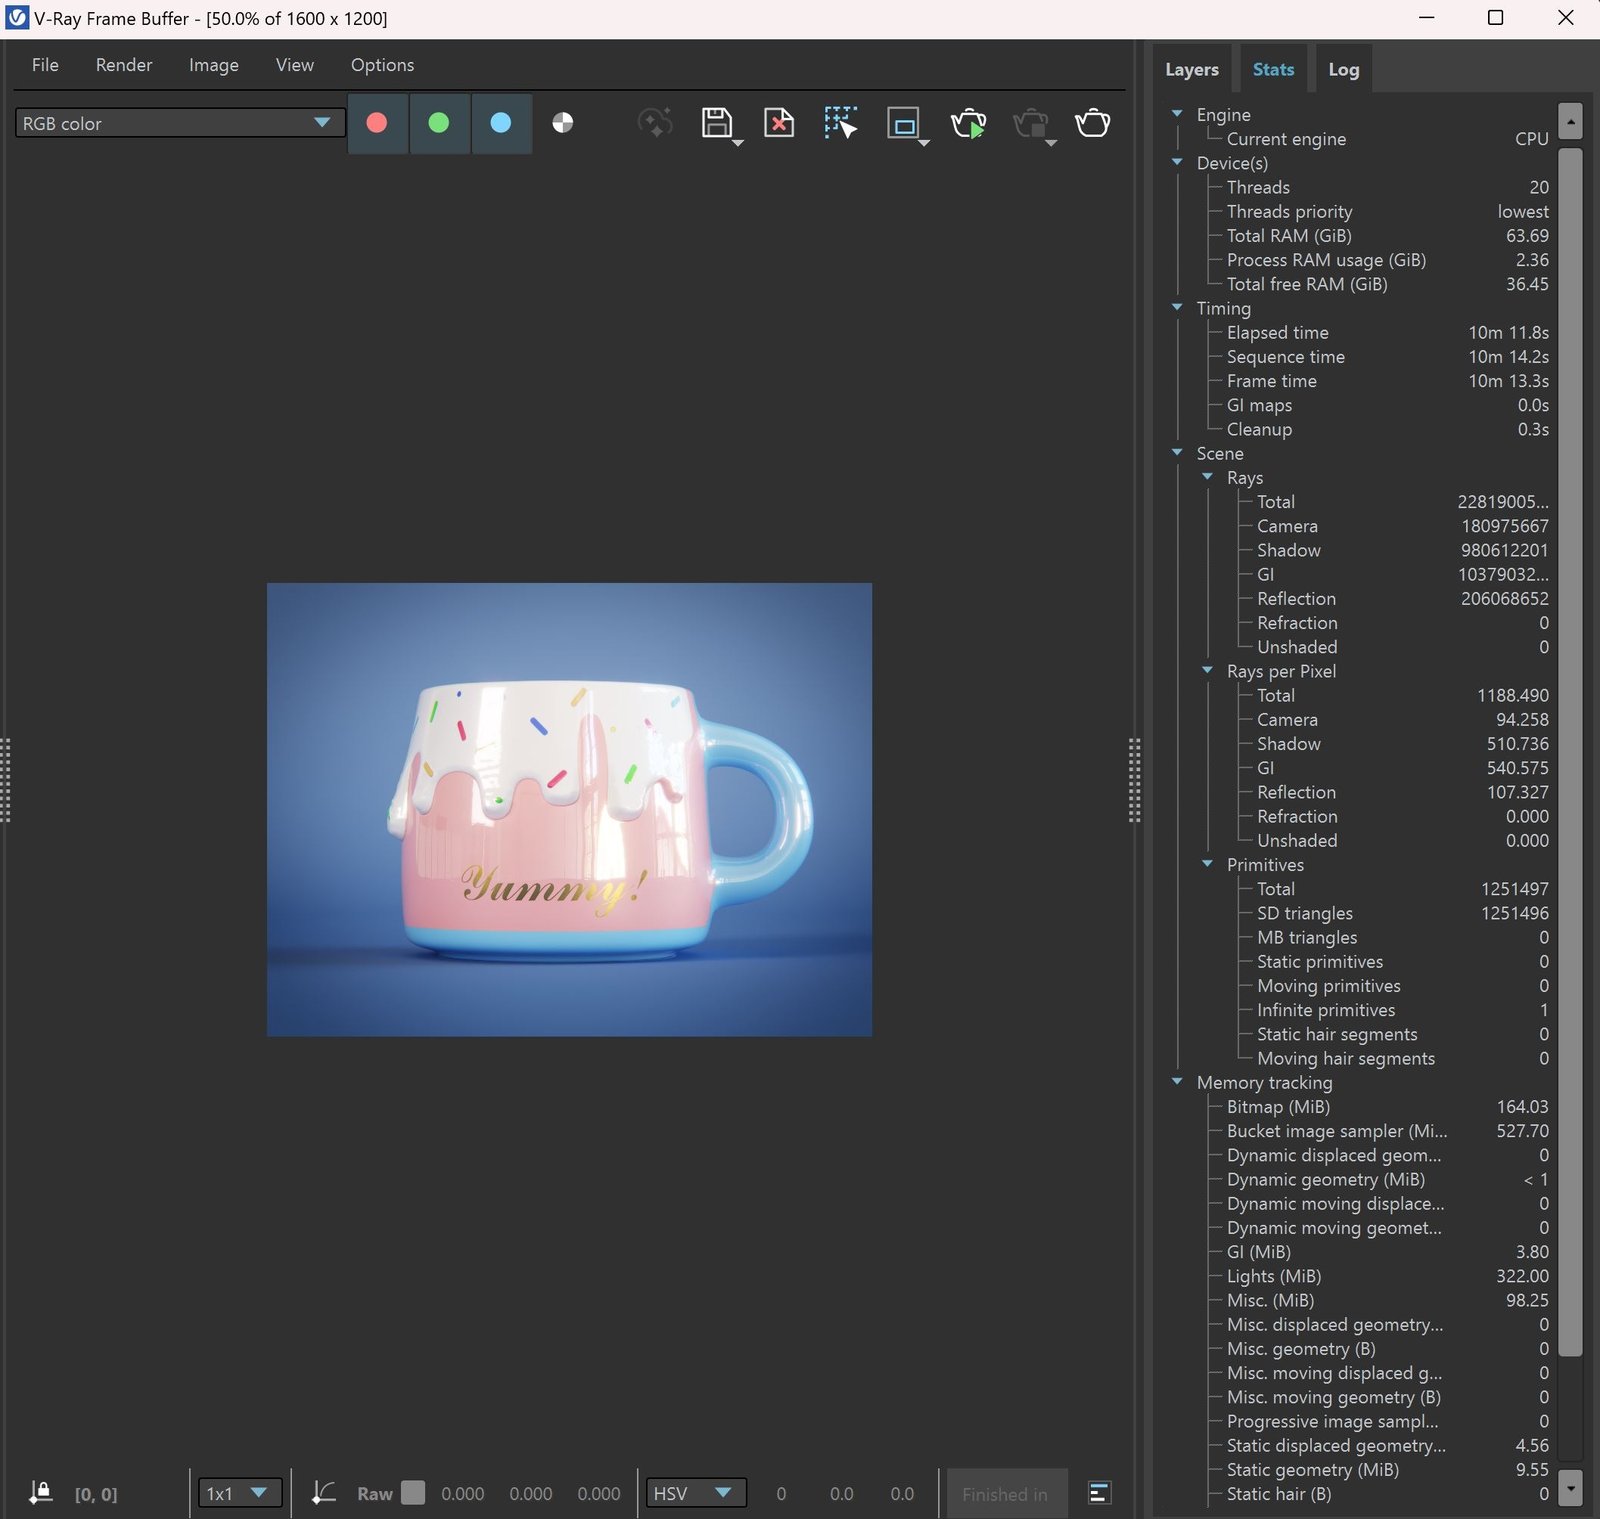
The V-Ray Frame Buffer allows monitoring of different statistics and information about your scene in the Stats panel. The exact contents of the Stats changes depending on the scene, the rendering mode (interactive vs. production, bucket vs. progressive), and others.
Render Region
Region rendering can be used in both IPR and Production modes to isolate only part of the frame for rendering.

Region render – Renders rectangular regions in the VFB.

Polygon region render – Allows creation and use of multiple custom regions in the VFB at once. The regions can be moved around, deleted, or edited by their vertices. To create a new polygon region, hold and drag the left mouse button and click again to add a vertex. Press ESC / right-mouse button to cancel the vertex creation. If you cease the region creation before closing the path, the entire render region is erased.
To hide the region render, click on the region render icon in the VFB toolbar.
To delete a render region right-click anywhere in the VFB, while the region is active, and select Delete all. This will delete all render regions in the VFB, regardless of their shape.
Saving a region to an .exr file saves only the render region and the rest of the frame is rendered black.
VFB Interactive Options
These options are available when Interactive rendering is enabled. They can be accessed by right-clicking anywhere in the render region.

Select Object – Directly select scene objects by clicking on them in the VFB rendering area.
Select Material – Pick a scene material from an object that is being rendered. You only need to click on that object in the VFB rendering area and the material editor opens with it.
Set Focus Point – Sets the target distance for the Depth of Field effect to the location clicked in the VFB rendering area.
VFB Shortcuts
These shortcuts navigate through the VFB image. You can also find them in the VFB Settings window. Please note that the VFB window must have the current focus for the shortcuts to have effect:
Mouse | Description |
|---|
Mouse | Description |
|---|---|
Mouse wheel | Zoom in/Zoom out |
Double-click left button | Zoom to 100% |
Middle button dragging | Pan (hand tool) |
Ctrl+Shift+Left click | Zoom in the rendered image |
Ctrl+Shift+Right click | Zoom out the rendered image |
Keyboard Shortcut | Description |
|---|
Keyboard Shortcut | Description |
|---|---|
Ctrl+Shift+left click, + / = | Zoom in |
Ctrl+Shift+right click, -/_ | Zoom out |
Double click, * | Zoom to 100% |
Arrow keys | Pan left, up, right, down |
F | Fit region or whole image in the VFB |
Esc | Abort render |
Q | Set history A/B vertical compare mode |
W | Set history A/B horizontal compare mode |
E | Enable history A/B/C/D compare mode |
1-9 | Load the respective image from the VFB history |
H | Show/hide history |
Ctrl+L | Show/hide the whole right panel |
P | Show/hide only layers of tree |
L | Locks the mouse pointer coordinates and displays information for the selected pixel, i.e. activates the Lock pixel info coordinates button. |
Notes
- VFB does not display the G-Buffer layers (like Coverage etc.).
- VFB does not work with strip rendering.
- VFB does not work with rendering to fields.
- The OpenEXR file format is an open file format for high dynamic range(HDR) images originally developed by Industrial Light and Magic. The official site of the OpenEXR file format is http://www.openexr.com/
- If Lens Effects or the V-Ray Denoiser render channel is enabled, then the RGB Color channel is saved with the name RGB_color and the effectsResult channel is saved as effectsResult when saving all channels from VFB.
- If an 8-bit file is saved through the VFB or the Render Output / Save image settings, the color space (for example, sRGB) is embedded and the image appears as in the frame buffer when loaded in an external image viewer. If a 32-bit (exr, hdr, tif) image is saved, it remains linear and relies on the external image viewer to handle the display color space.