V-Ray for Maya
VRayGaussianSplat
This page provides information about the V-Ray Gaussian Splat in Maya.
Last updated 1 September 2026
This page provides information about the V-Ray Gaussian Splat in Maya.
Overview
3D Gaussian Splatting is a method used to create a 3D scene from images or videos. It requires several pictures of an object, each taken from a different angle. With Gaussian Splatting, the images are blended to produce a detailed, three-dimensional representation of the object. Instead of depicting the scene as a collection of meshes, a Gaussian splat represents the scene as a type of point cloud, where each point is a 3D Gaussian.
Gaussian splats help you create a realistic environment for your scenes.
UI Paths...


Gaussian Splat Usage
Used as an Extended Environment
One use of Gaussian splats is to represent an environment, typically generated from photos or videos of the scene.
There are advantages over the traditional environment maps, including proper parallax and view-dependent effects and the ability for Gaussian splats to occlude other objects in the scene.
For Gaussian splats to work as environments in V-Ray, the Affect Matte Surfaces option should be enabled, and the Casts Shadows option should usually be disabled.
See the example below for more information.
On Other Matte Surfaces
To make the Gaussian Splats rendered as part of the background, i.e., visible on other matte objects even if they are behind them. This is achieved by enabling the Affect Matte Surfaces option from the Gaussian splats parameters.
See the example below for more information.
Used as Individual Objects
Gaussian splats can also be used to represent smaller individual objects in the scene. In that case, the Affect Matte Surfaces option typically is turned off, and the Casts Shadows option is enabled. The latter is needed so that the Gaussian splats can cast proper shadows on other objects in the scene.
Note that the lighting and reflections are baked into the Gaussian splats object; therefore, the scene lighting does not affect these objects.
See the examples below for more information.
Parameters
Disable – Turns off the Gaussian splats. This option also turns off the export of the Gaussian splats to a .vrscene.
File – Loads the Gaussian splats file. Currently, only .ply files are accepted. Gaussian splats can be loaded as a sequence. Use the <frame0n> tag in the file path to load a sequence, where n is an integer number specifying the number of digits used for the frame number, and 0 is how many zeros pad the frame number. For example, if your files are named as follows:
gaussians_0001.ply, gaussians_0002.ply, gaussians_0003.ply, …
then the correct tag to use is:
<frame04>.
Scale – Scales the Gaussian splats up and down.
Primary Visibility – Specifies whether the Gaussian splats should be visible to the camera.
Visible in Reflections – Specifies whether the Gaussian splats should be visible in reflections.

Visible in Refractions – Specifies whether the Gaussian splats should be visible in refractions.
Casts Shadows – Enable so Gaussian splats block shadows from lights. When disabled, the Gaussian splats become transparent to shadow and GI rays. It is recommended that this option be turned off when using the Gaussian splats as the environment or individual objects.
Affect Matte Surfaces – Enable so Gaussian splats appear as part of the background on matte surfaces. It is recommended to enable this for Gaussian splats used as an environment and disable it for Gaussian splats used as individual objects.
Intensity – Increases or decreases the Color multiplier for the Gaussian splat.
Color – Specifies a filter color for the splat. By default, the Color is white, which does not affect the splat.
RGB Primaries – Specifies the color space of the data in the Gaussian splats file.
Default – Takes the current color correction that is set in Maya. That means it does not change the colors.
For the Gaussian Splat to be read as it was written, select the respective input color space - sRGB, ACEScg, or Raw.
Example: Scale
This example shows Gaussian Splat used as an individual object - the pink flamingo floatable in this scene. Using the Scale parameter, it can be scaled as any other object in the scene.

Scale = 0.5

Scale = 1

Scale = 1.5
Example: Primary Visibility
The Gaussian Splat object can be hidden from the camera, like any other geometry object in the scene, by using the Primary Visibility option.

ON

OFF
Example: Visible in Reflections
The Visible in Reflections option controls whether the Gaussian Splat object is reflected in other objects in the scene.

ON

OFF
Example: Visible in Refractions
The Visible in Refractions option makes the Gaussian Splat object visible to other objects in the scene that exhibit refractive properties.

ON

OFF
Example: Casts Shadows
This example shows how the pink flamingo can produce shadows when the Casts Shadows option is enabled, and doesn't block light when it's not.

ON

OFF
Example: Affect Matte Surfaces
In this example, the Gaussian Splat is used as an environment. The left building in the rendering that casts shadows over the plane is a Cosmos asset (mesh). When the Affect Matte Surfaces option is enabled, the Gaussian Splat is considered background and receives shadows from the casting object.
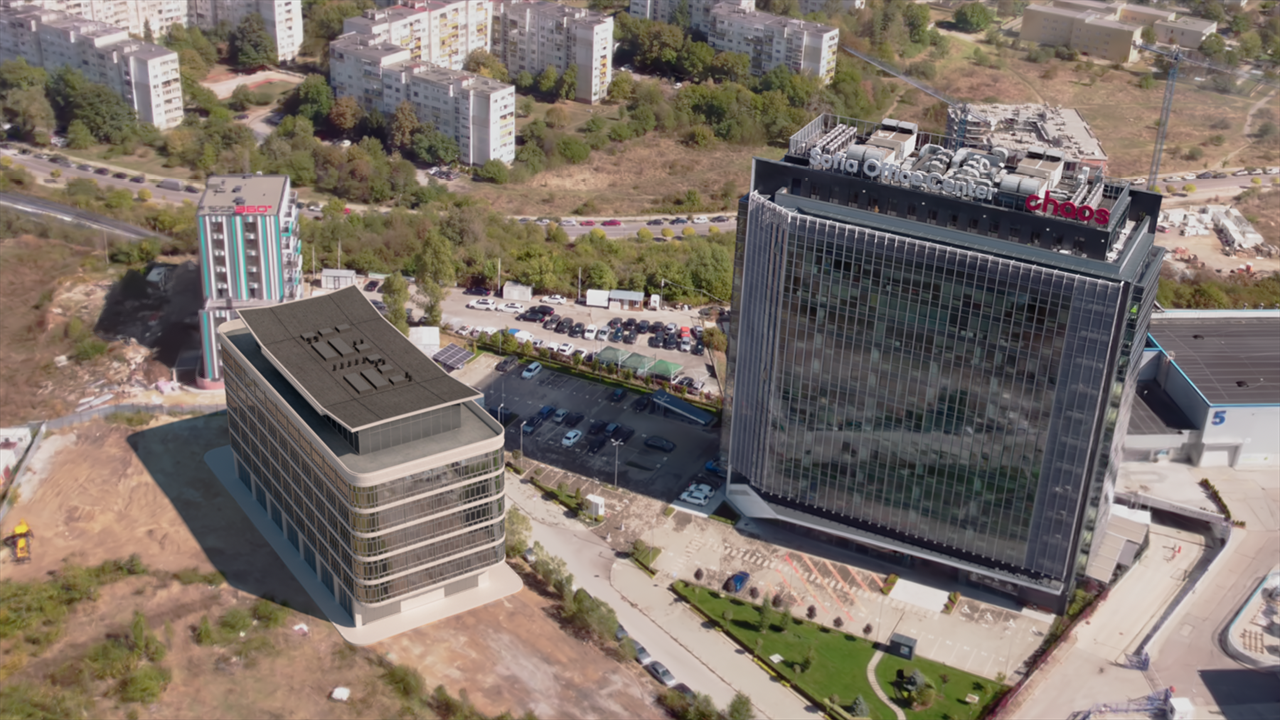
ON

OFF
Example: Color
The Color shown on each render as a box is used as a filter for the original Gaussian Splat diffuse color.
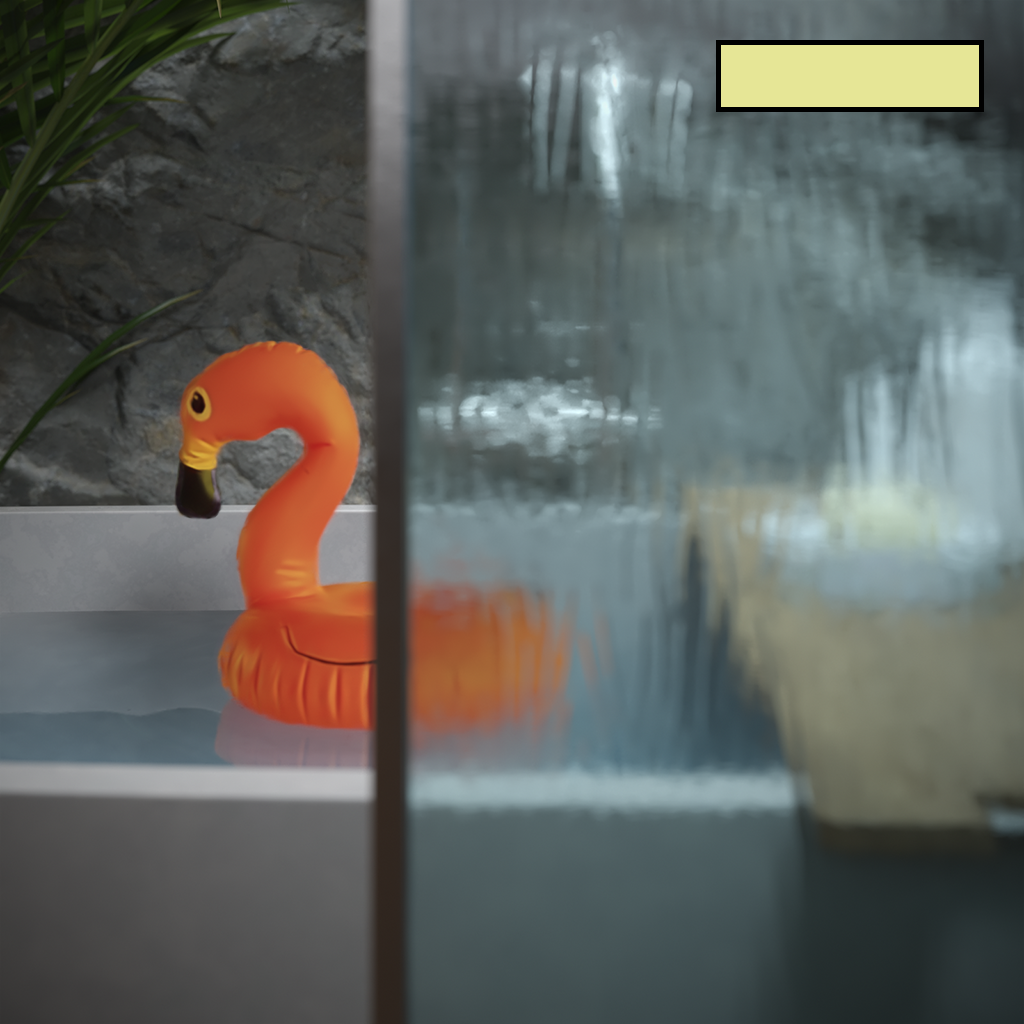


Clipping
The Clipping options includе or excludе areas of a splat. This is done with the help of objects or 3D textures.
Use Texture – Enables the use of a 3D texture for the clipping.
Mask – Specifies the texture to be used as the mask. 3D procedural textures are supported as clipping masks.
Objects – Specifies the geometry that works as a clipper.
Distance – Controls how far the splat is clipped from the edges of the selected geometry. This option is commonly used as blending control, smoothly cutting off the splat at a specified distance.

Clipping Workflow
There are two ways to make use of Gaussian Splat Clipping - one is by using a 3D texture as a mask, usually the V-Ray Distance Tex. And the other is by using an object as a clipper.
Using Objects Workflow
To use an object as a clipping actor, disable the Use Texture option.
Choose and connect the object in the Objects field.
The Distance parameter controls how the cut edges blend - smoother or sharper.

V-Ray Distance Tex Workflow
You can use a V-Ray Distance texture as a clipping mask, but any other 3D texture works as well.
Enable the Use Texture option from the Clipping rollout first.
Set the Mask to V-Ray Distance Tex.

From the VRayDistanceTex options, set the desired objects to be used as a mask in the Objects list.
The white parts of the mask are the ones that leave the splat intact, while the black parts of the mask specify the places it will be cut out.
If you want to have the parts of the splat inside the object cut out, enable Inside separate and Inside Solid options, and set the Inside Color to black.
If you want to have parts of the outside of the object cut out, enable Outside Separate and Outside Solid options, and leave the Outside Color as Black.
The Distance option can be used for blending the edges of the cut splat - 0 means straight cut line and no blur, while a higher value makes it blurrier.

Example: Clipping Masks
This example shows how to blend a Gaussian splat with a modelled scene using a clipping mask to remove some unwanted objects from the render.

This is the Gaussian splat that we want to use as a natural environment for the scene.
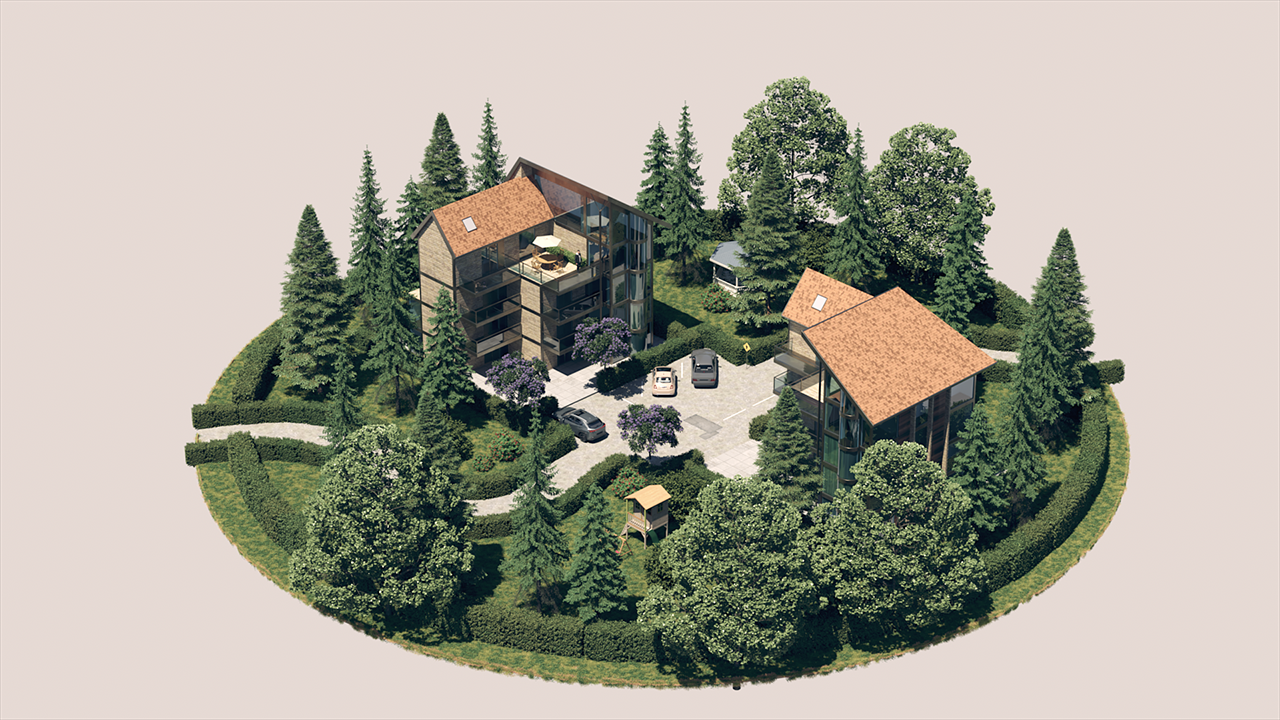
The image shows the geometry we want to blend in with the Gaussian splat.
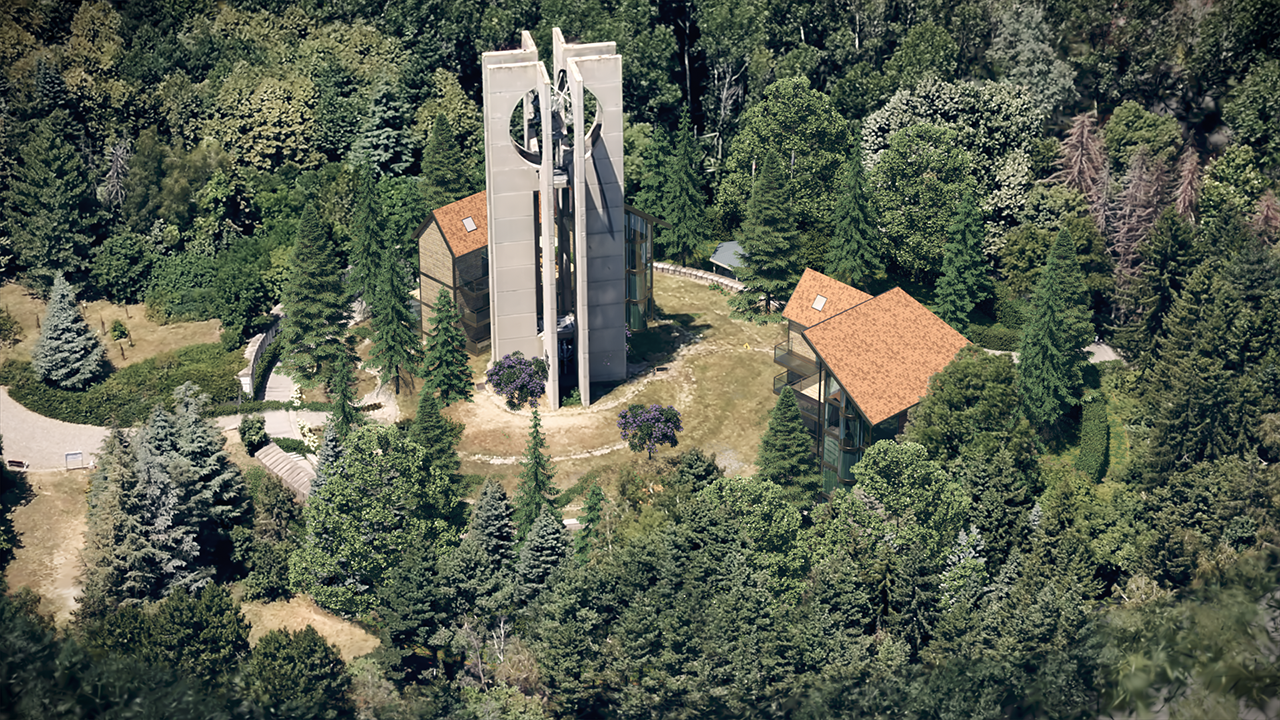
This render shows the Gaussian splat and the modelled geometry that are set to form a new scene. No further adjustment is done here.
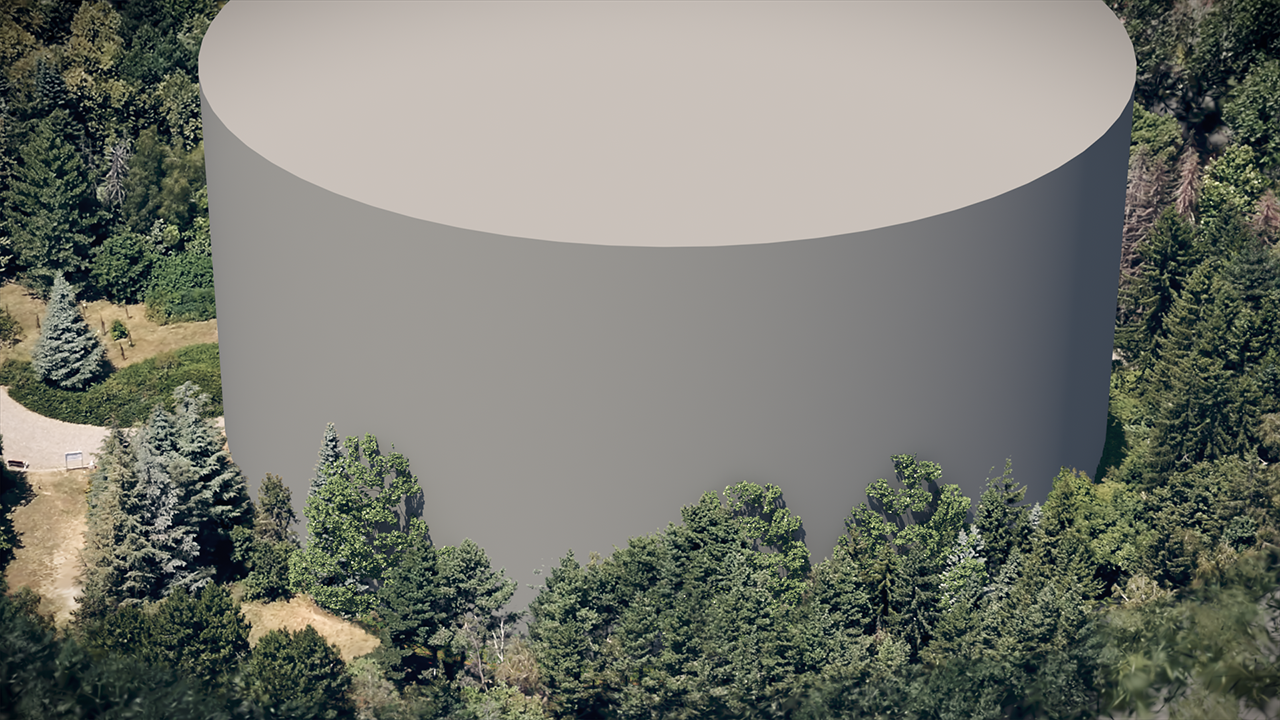
This image shows a cylinder that is used as an object in the VRayDistanceTex. The VRayDistanceTex Inside options are used to make the cylinder cut out the bell tower from the scene.

This image shows the final render with the Gaussian splat parts clipped out from the scene.
Animation Parameters
Start Offset – Offsets the beginning of the animation by the given number of frames. You can use both positive and negative values here. This parameter only works when the Gaussian splat is in a sequence.

Lighting
Lighting On – Enables the lighting for this instance. See the example.
Blend – Specifies the blending ratio between the splats' original color and the illuminated result. See the example.
Shadow Blur – Specifies the blur distance of the illumination in world units. See the example.
Shadow Offset – Offset for computing the illumination in world units. See the example.
Normals Mode – Determines how normals are treated when computing Gaussian Splats.
Disabled – Disables normals when computing the lighting.
Intrinsic (compute if needed) – Forces the usage of computed normals, ignoring any intrinsic normals.
Computed (force calculation) – Uses intrinsic normals, if they are present. Otherwise, computes normals from scratch.

Example: Lighting On
This example shows how adding light in the scene and then enabling the Lighting On property affects the render.

No Light in the scene. Splat has baked-in light, but geometry is dark.

V-Ray Sun added to the scene. The building is lit, but the Splat does not receive that light.

Lighting On enabled. Both the building and Splat are lit by the V-Ray Sun, but the light does not correspond to the baked-in light of the Splat.

The V-Ray Sun is positioned to match the lighting direction of the light in the splat.
Example: Blend
In this example, the Blend value is decreased gradually to showcase how the Splat lighting gradually dominates the scene. Notice also that the shadow cast by the building geometry gradually disappears the less we blend the lights.

Blend
= 1

Blend
= 0.5

Blend
= 0.25
Example: Shadow Blur
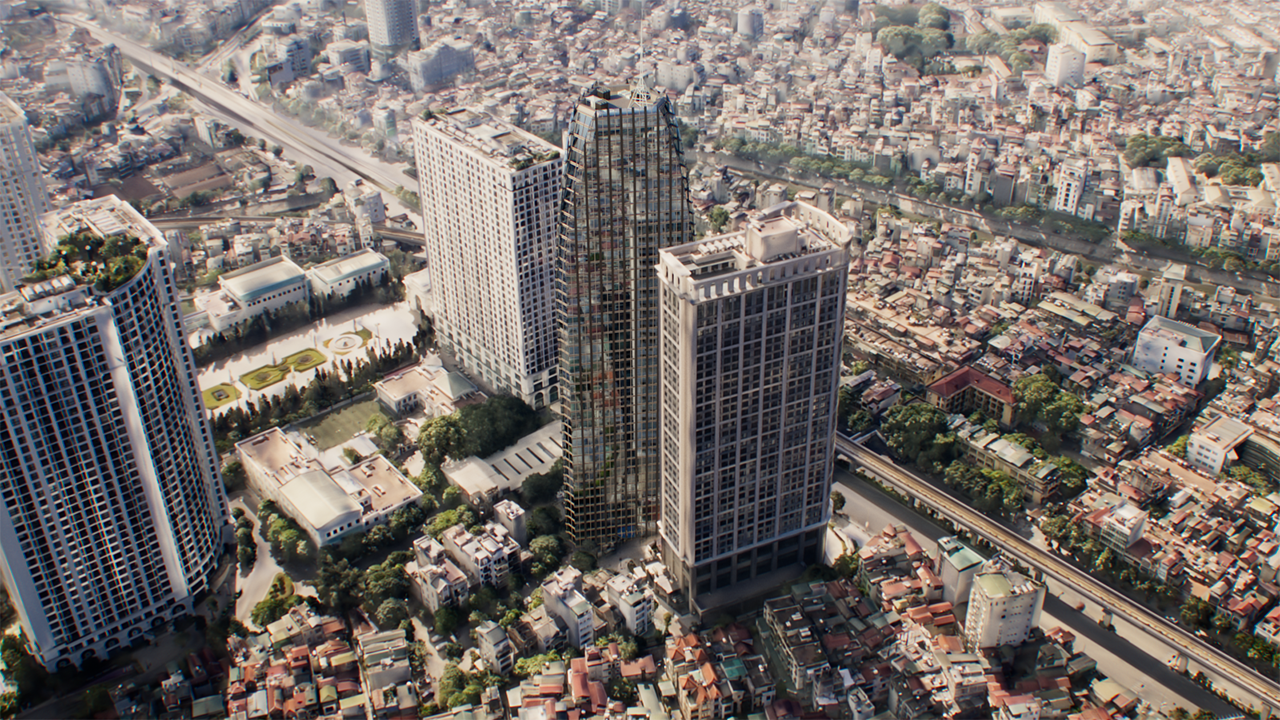
In this example, the Shadow Blur option is showcased. The higher the Shadow Blur value, the more the shadow of the building geometry blurs with the Gaussian Splat scene.

Shadow Blur
= 1

Shadow Blur
= 5
Shadow Blur
= 10
Example: Shadow Offset
In this example, the shadow is offset to the side through the Shadow Offset value. The higher the Shadow Offset value, the farther away the shadow is offset.

Shadow Offset
= 1

Shadow Offset
= 2

Shadow Offset
= 4
Viewport
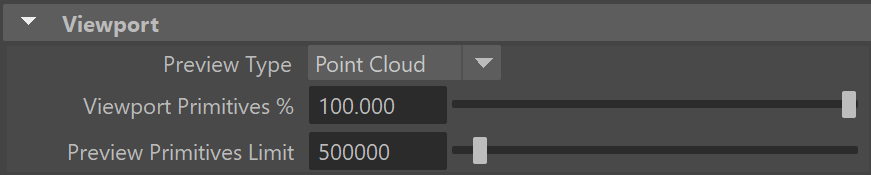
Preview Type – Specifies how the Gaussian splats are rendered in the viewport.
None – The Gaussian splats are not visible in the viewport and cannot be selected from there. You can choose them from the Outliner only.
Bounding Box – A bounding box represents the Gaussian splats.
Point Cloud – This is the default mode. Cloud points represent the Gaussian splats in a bounding box.
Viewport Primitives % – Determines what percent of the cloud points are visible in the viewport. This option works when the Preview Type is set to Point Cloud.
Preview Primitives Limit – Determines the number of points visible in the viewport. This option works when the Preview Type is set to Point Cloud.
Notes
- Gaussian splats work in V-Ray, assuming they are composed over a black background. For proper rendering, the scene background should be black, and any dome lights used for illumination should be set to invisible.
- While you can load multiple Gaussian splat files and render them correctly with respect to one another, depending on their position in space, intersecting Gaussian splats might produce undefined or wrong results. It is not recommended to intersect them, as by design, they are optimized for a single point cloud.
- Gaussian splats are not affected by the motion blur effect, yet.
- Currently, Gaussian splats can’t act as holdout (matte) objects.