V-Ray for Unreal
Animation Export
In this quickstart guide, we show how to export animation with V-Ray. In two easy steps you will learn how to set a camera actor and adjust its settings to export a sequence output.
Last updated 24 February 2026
Overview
In this quickstart guide, we show how to export animation with V-Ray. In two easy steps you will learn how to set a camera actor and adjust its settings to export a sequence output.
Want to follow along but don’t have a license?
www.youtube.com
Step 1: Setup
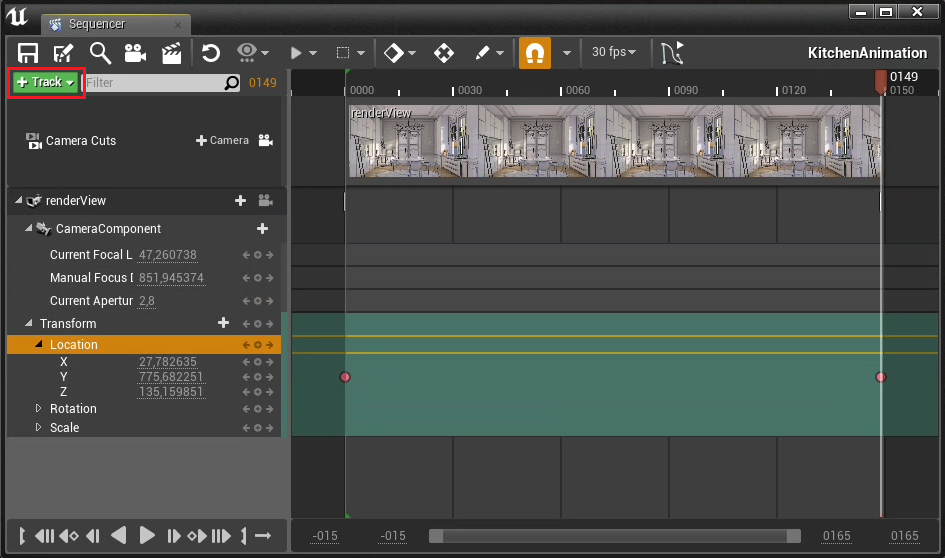
First, create a level sequence.
This could be done from Cinematics > Add Level Sequence. Select the folder where the animation sequence will be saved.
Now, you have to add a camera actor from level to the sequence.
Go to Sequencer > + Track > Actor to Sequencer and select the camera actor.
Adjust the settings of the camera to your liking.
You can add keys to store the changes in the animation dynamics.
Step 2: Export with V-Ray
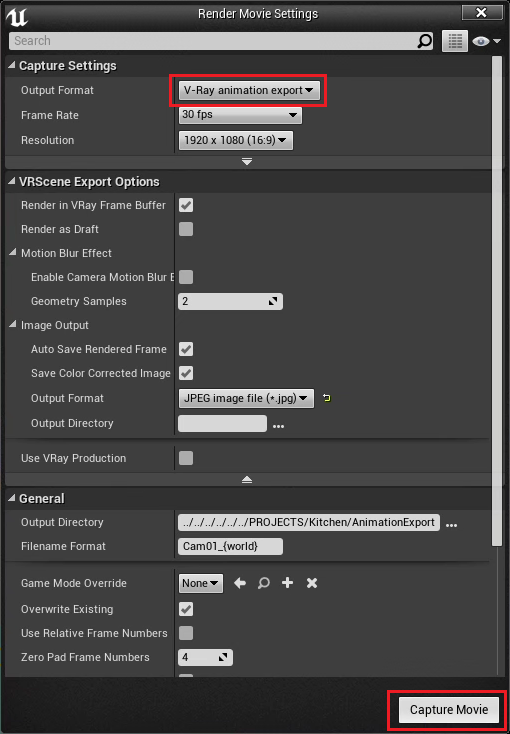
Once ready with the settings configuration, go to Render Movie Settings.
From the Capture Settings panel > Output Format select the V-Ray animation export option.
Now, set the VRScene export options. In this example, we want to autosave the rendered frame, and for the purpose of the tutorial - show it in the V-Ray Frame Buffer.
Select the appropriate image output format.
Press the Capture Movie button to begin the export.
In the final version of the animation other actors were added in the sequencer and had their transformations animated with the steps mentioned above.