Uploading Materials
If you have created a material in SketchUp and saved it as a .skm file you can upload it to 3D Warehouse.To upload a material, open 3D Warehouse in SketchUp or go to 3D Warehouse in your preferred web browser, then follow these steps:Click Upload at the top of the page.Drag and drop or browse and choose the file to
Last updated 17 July 2026
If you have created a material in SketchUp and saved it as a .skm file you can upload it to 3D Warehouse.
To upload a material, open 3D Warehouse in SketchUp or go to 3D Warehouse in your preferred web browser, then follow these steps:
- Click Upload at the top of the page.
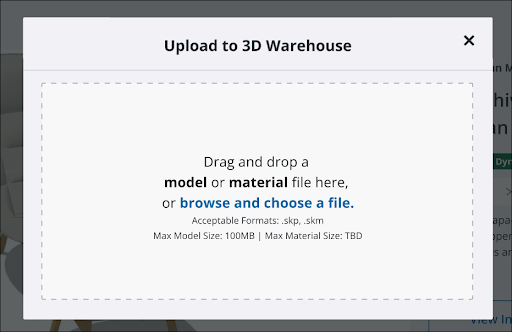
- Drag and drop or browse and choose the file to upload into the window that pops up.
- In Edit material Details, enter the Title, Description, and Category for your material.
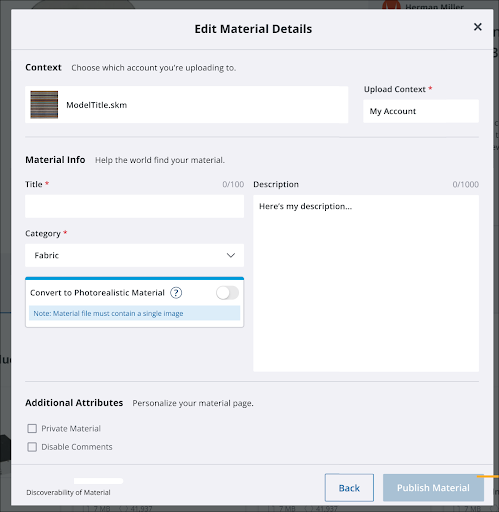
- Under Additional Attributes, select Private Material if you want the material to only be visible to you. Select Disable Comments to turn off the ability for others to comment on your material.
- If your material does not have texture maps associated with it, SketchUp will automatically create them using SketchUp’s AI Materials service. You can also choose to not generate texture maps.
- Once you are satisfied with all of the details you have entered, click Publish Material .
- If 3D Warehouse is generating texture maps for your material, it may take some time. A message will appear advising you that the material is still processing until those maps are generated.
Still need help?
Technical support from our New Zealand team is available to customers with a current Procadsys SketchUp Plus subscription: Pro Plus, Pro Scan Plus, Pro Civil Contractor Plus, Advanced Workflows Plus or Studio Plus. Self-help articles are public.
Contact SketchUp support