Navigating SketchUp for Web
SketchUp for Web looks and works a lot like SketchUp for Desktop with just a few differences. When you first open SketchUp for Web you'll see the Home screen.From the Home screen you can:
Last updated 17 July 2026
SketchUp for Web looks and works a lot like SketchUp for Desktop with just a few differences. When you first open SketchUp for Web you'll see the Home screen.
From the Home screen you can:
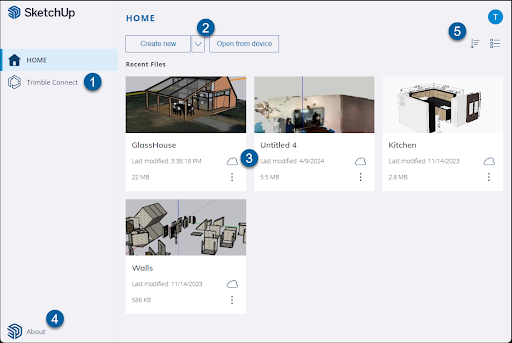
- Access Trimble Connect.
- Create a new model or import a locally saved model.
- Choose from a list of recently opened models.
- See SketchUp's About information.
- Access your Trimble account information and manage app settings.
After opening a model, SketchUp for Web's modeling interface contains all the tools and options you need to create 3D models. Let's take a tour:
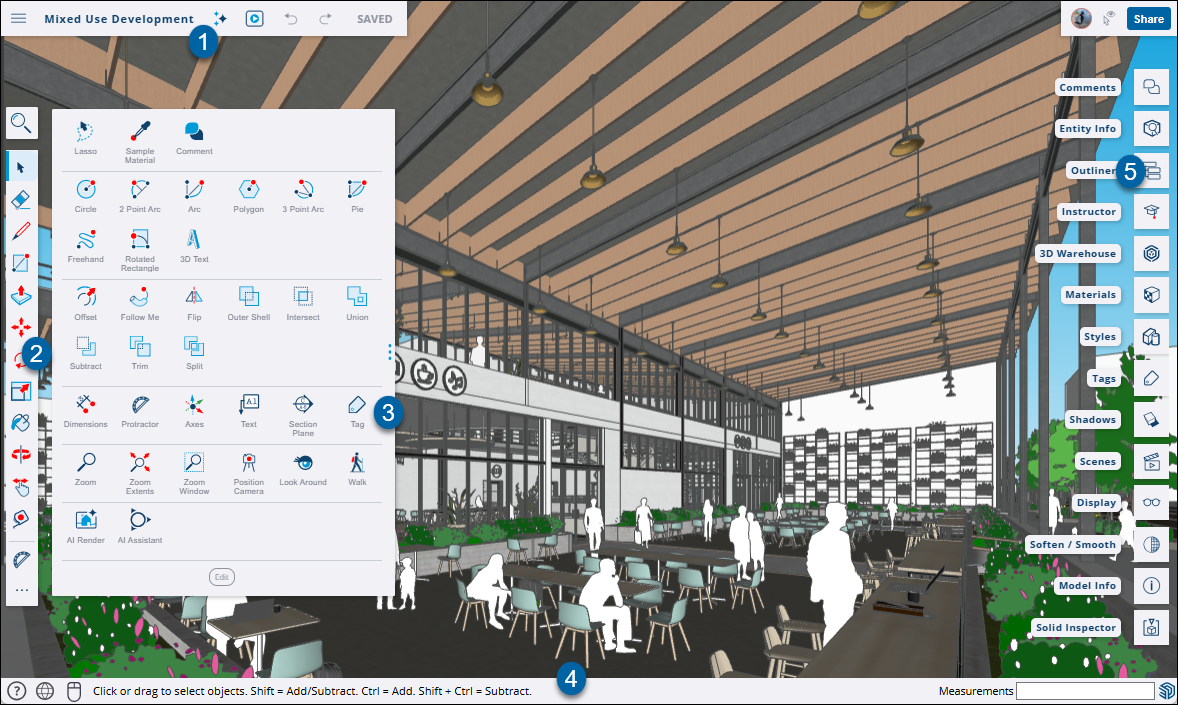
- Main Menu Bar - Includes the Main Menu (
 ), the name of your model, SketchUp AI (
 ), Undo (
 ), Redo (
 ), and the save status of your model.
 - Main Toolbar - The Main Toolbar contains the basic tools you need to get started.
- Expanded Toolset - The Expanded Toolset is home to all of your other SketchUp tools.
- Status Bar - From left to right you'll see:
 - Links to the Help Center, our forums, Technical Support, and a Search option
 - The language menu
 - The input device selector
- Tips and options for the selected tool
- The Measurements box
- Panels - Each panel represents a different group of options to help you take your model to the next level. We'll cover the panels available in SketchUp for Web in Creating and Editing Models .
The Main Menu () contains several options to help you manage your model:
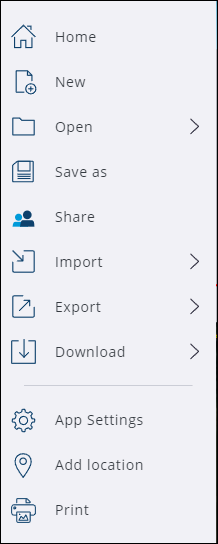
- Home - Returns you to the Home screen.
- New - Creates a new model file.
- Open - Opens an existing model file. See Opening Files for more information.
- Save As - Saves your model. See Saving Models for more information.
- Share - Creates a sharable link to your model. See Link Sharing for more information.
- Import - Imports other files or images into your model.
- Export - Exports your model to other formats.
- Download - Downloads your model to your computer using the format you designate.
- App Settings - Opens the Settings window.
- Add Location - Use the Add Location service to add geo-location data to your model. For more information see How to Use Add Location.
- Print - Print your model.
Still need help?
Technical support from our New Zealand team is available to customers with a current Procadsys SketchUp Plus subscription: Pro Plus, Pro Scan Plus, Pro Civil Contractor Plus, Advanced Workflows Plus or Studio Plus. Self-help articles are public.
Contact SketchUp support