Skip to content
07-848 2005

SketchUp, SketchUp desktop

Geolocating with Add Location

Use Add Location to geolocate your SketchUp model. It opens on the Geolocate Model page and uses your current location by default. To choose another location, enter an address, postcode or location name in the box. SketchUp suggests matches as you type.

Add Location opens on the Geolocate Model page and uses your current location by default. To choose another location, enter an address, postcode or location name in the box. SketchUp suggests matches as you type.

After you choose a location, its latitude, longitude and elevation appear on the left. A map appears on the right, with your model in the centre. An arrow on your model shows true north, with an option to adjust the true north offset.
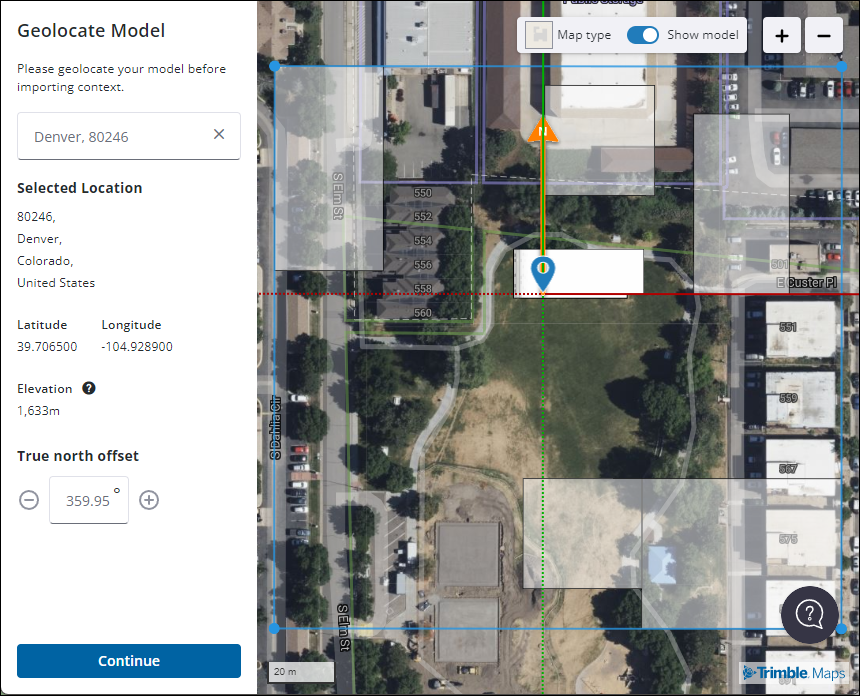
Geolocate Model dialog showing coordinates, elevation and true north offset, with the model and north arrow on a map.

Use the controls in the upper right or scroll with your mouse to zoom in and out. To move your model, drag and drop its pin. The latitude, longitude and true north offset values in the left panel update as you move the model.

When your model is in place, click Continue to go to Add Site Context. Use the options there to add site context, or click Skip Import to exit without importing terrain. Your geolocation data is retained.

Procadsys customer support

Still need help?

Licences, renewals and billing

Our New Zealand team looks after your SketchUp licences, renewals and invoices.

Monday to Friday, 9:00 am to 4:30 pm NZ time, excluding New Zealand public holidays.

Technical problems

Technical support from our New Zealand team is available with a current Procadsys SketchUp Plus subscription: Pro Plus, Pro Scan Plus, Pro Civil Contractor Plus, Pro Advanced Workflows Plus or Studio Plus.

Initial response within one business day.

On another SketchUp plan? Technical problems go to Trimble support.