Corona for Cinema 4D
Corona Interactive Rendering
This page provides information on Corona Interactive Rendering, its settings, and usage in Cinema 4D.
Last updated 25 September 2025
This page provides information on Corona Interactive Rendering, its settings, and usage in Cinema 4D.
Overview
Interactive Rendering automatically updates the rendered image in real-time as you make changes in your scene. It is a great aid in modifying and transforming objects, tweaking and creating materials, adjusting the environment, lights, cameras, and virtually any part of the rendered scene.
All of this can be done while rendering, without any kind of limitations. There is no need to manually restart or update the rendering, as it happens automatically. It runs completely on the CPU, so it has no limitations and does not require any special hardware.
Starting Corona Interactive Rendering in a Floating Window
To start Interactive Rendering in a floating window, go to the "Corona" menu at the top of the Cinema 4D interface and click "Interactive Rendering":


Corona Interactive Rendering in a floating (undocked) window.
Starting Corona Interactive Rendering in the Active Viewport
To start Interactive Rendering in the active (docked) viewport, go to the "Corona" menu at the top of the Cinema 4D Interface and click "Interactive viewport":


Corona Interactive Rendering docked in the viewport.
Interactive Rendering Performance Settings
Max Passes – Limits the maximum number of passes rendered in the interactive rendering mode.
Force Path Tracing – When on, Path tracing is always used as a primary and secondary solver in interactive rendering. This keeps the interactive rendering responsive, avoiding the cost of UHD Cache precomputation.
Enable Motion Blur - This option is on by default, if this option is disabled then you will not be able to see motion blur in Interactive Rendering.
Fast Preview Denoise During Render – When set to an option other than None, the image is iteratively denoised during the render. This replaces a noisy render preview with a noiseless, albeit low-quality image that gets progressively refined as the render converges. It can help to get a quick estimate of the overall lighting in the scene. There are two denoising modes available:
- Optix – Also known as "NVIDIA GPU AI" is a very fast denoiser that is available only on NVIDIA GPUs when the optional "NVIDIA AI Denoiser" Corona component has been installed.
- Intel – Also known as "Intel GPU AI" or "Intel Open Image Denoise" is a slower denoiser but provides a higher quality result.

Interactive Rendering Preferences
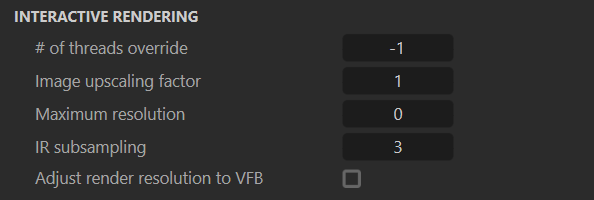
# Of Threads Override – Number of cores to use for interactive rendering.
Image Upscaling Factor – Specifies an upscaling factor for the image rendered during interactive rendering. By increasing this value, render resolution gets reduced which makes the interactive rendering more responsive. This is useful for High-DPI displays.
Maximum Resolution – This setting specifies the maximum resolution at which the interactive rendering will be displayed in the viewport.
IR Subsampling – The number of pixelated passes that are determined by the IR subsampling value.
Adjust render resolution to VFB – When enabled, the image output size is adjusted by the VFB window size. The adjustment is only available while the Interactive Rendering is running. If disabled, the VFB uses the image output size defined in the Output section from the Render Settings.
Interactive Rendering Denoising
Fast preview denoise during render: disabled (left) and enabled (right).


Render Selected
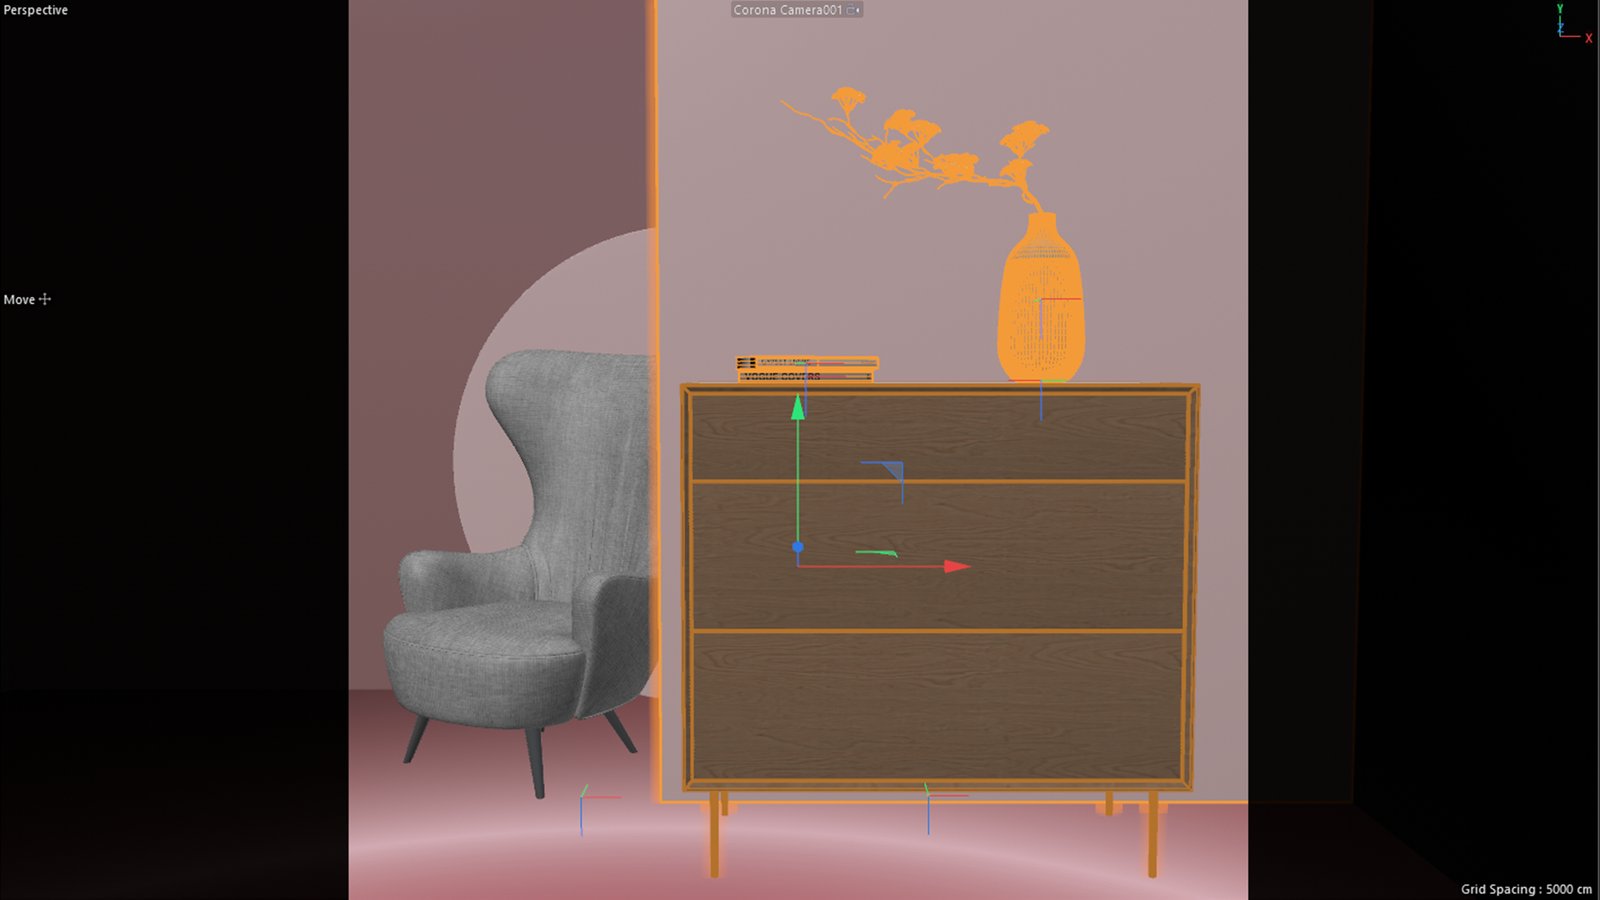
If you need to change only one or a limited number of objects in the scene, you can save some render time by using the Render Selected (Pixel Mask) option. You can choose to either render only the objects selected in the viewport, or you can create an include/exclude list.
The selected objects render, and have correct shadows, GI, and reflections from other objects in the scene, which means they can be placed into or over a previous render and look as if they had been part of the initial full render.


Click here to see the viewport selection


Click here to see the viewport selection


Click here to see the viewport selection
Render Regions
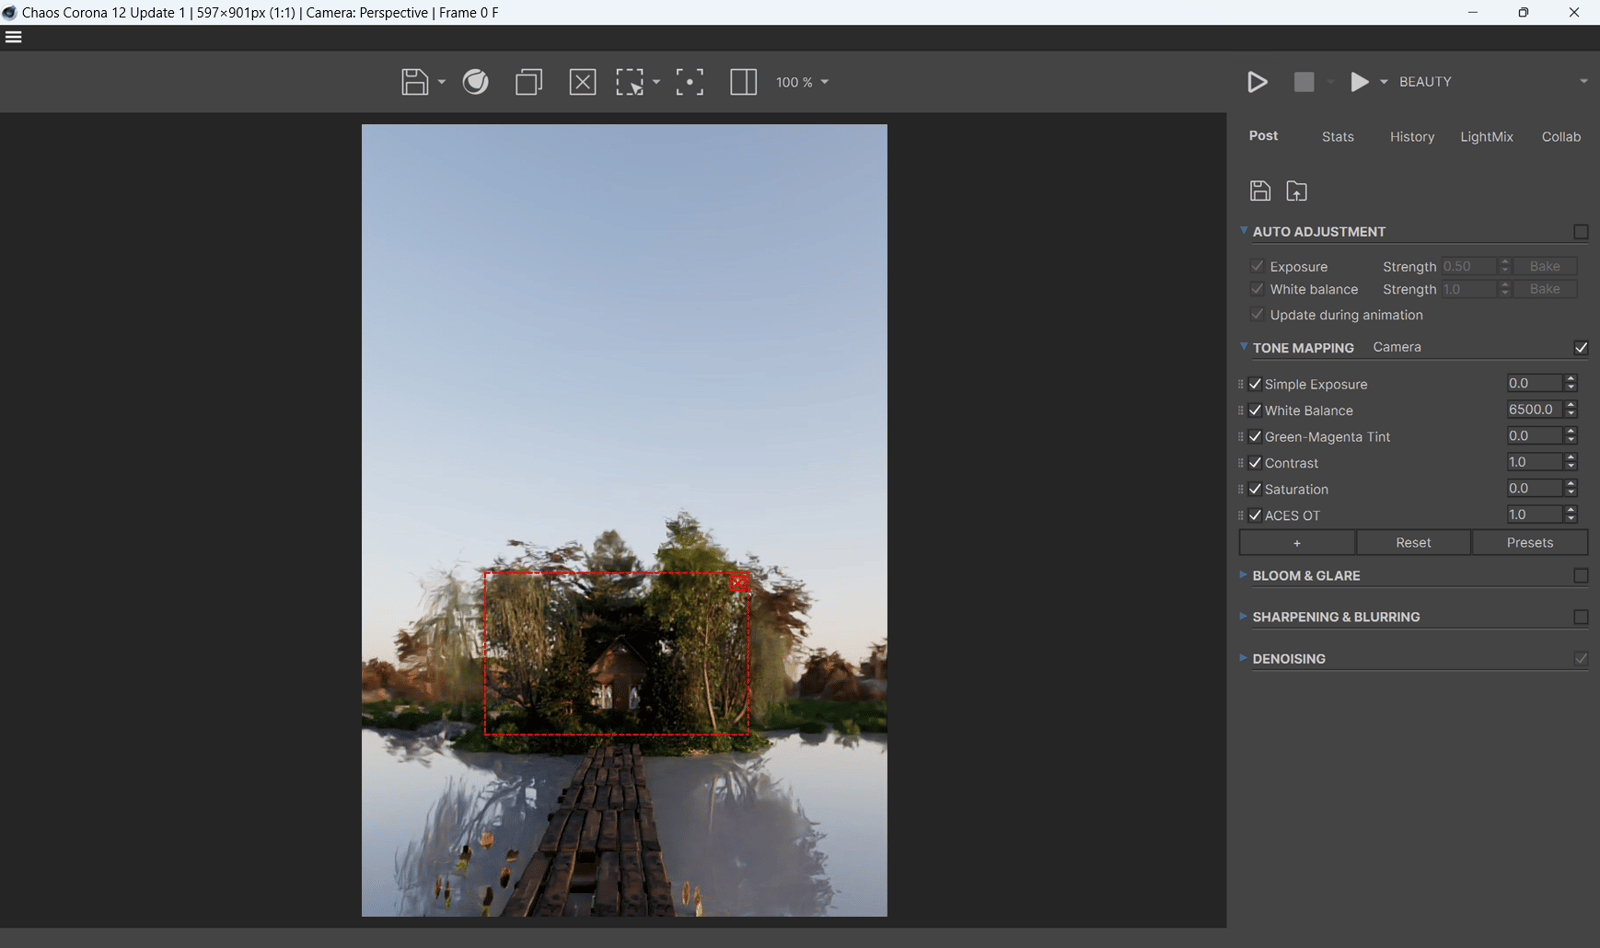
Corona offers drawing and rendering of regions in the Virtual Frame Buffer.
Select the "Region" mode and draw a region wherever you want. Click and Drag to add new regions. Ctrl + Drag on the region border enables ''Fuzzy" region mode, in which the regions are seamlessly blended into the rest of the image.
By clicking and holding over the Region button you can also toggle all regions on and off, and remove all existing regions.

Region mode

Multiple Regions mode

Fuzzy Region mode
Setting the DOF Focus Point from the VFB
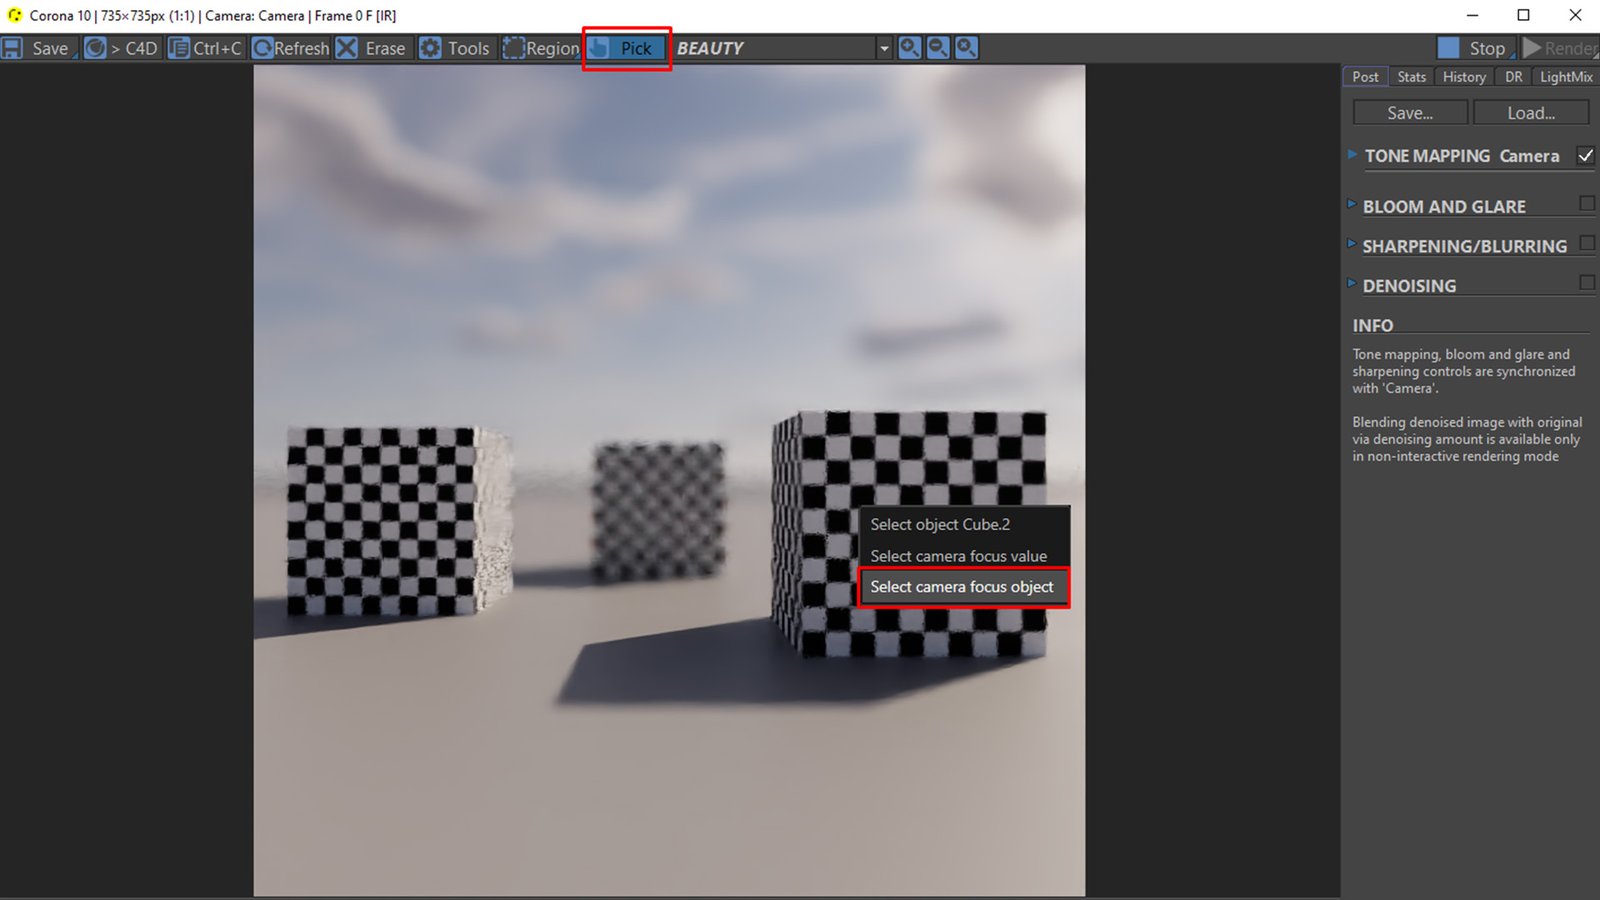
To set the Depth of Field focus point from the Virtual Frame Buffer to a specific point on any surface: enable the Pick mode in the VFB, then right-click anywhere in your rendering and select “Set camera focus value”. This snaps the current camera focus point exactly to the selected point on the surface.

To set the Depth of Field focus point from the Virtual Frame Buffer to an object center: enable the Pick mode in the VFB, then right-click on any object in your rendering and select “Set camera focus object”. This snaps the current camera focus point exactly to the selected object center.
Setting the DOF Focus Point from an Active Viewport
To set the Depth of Field focus point from the Active (docked) Viewport to a specific point on any surface: start Interactive Rendering in the Active Viewport, then click on the picker next to the Camera Focus Distance, and then left-click anywhere in your rendering. This snaps the current camera focus point exactly to the selected point on the surface.

To set the Depth of Field focus point from the Active (docked) Viewport to an object center: start Interactive Rendering in the Active Viewport, then click on the picker next to the Camera Focus Object, and then left-click on an object in your rendering. This snaps the current camera focus point exactly to the selected object center.
