Enscape Envision
Installation
This guide provides steps for installing Enscape Envision. Please check the system requirements before installation.
Last updated 3 June 2026
To run Enscape Envision, you have to:
Step 1: Install Enscape Envision
Step 2: Activate Enscape Envision
Overview
This guide provides steps for installing Enscape Envision. Please check the system requirements before installation.
Trial users should refer to the Free Trial page, as the process differs from the one shown here.
Get the latest Envision: Download Enscape Envision
youtu.be
This video guide shows you how to install Envision with the Cloud Licensing option.
youtu.be
This video guide shows you how to install Envision with the License Server option.
Running the Installer
Before running the installation, make sure your OS account has administrative privileges.
Run the installer. Windows may ask you for permission to run the installer with administrator privileges. Please confirm.
1. Welcome
Carefully read and accept the EULA and Privacy Policy and the EULA and Privacy Policy.
Then, click Continue. If you need to customize your installation, click Advanced.

2. Cloud Licensing
When installing for the first time, Envision uses Cloud Licensing by default.
Click Install to continue with Cloud Licensing. If you need to connect to a network License Server, click Use License Server.
Chaos products use two licensing models: Cloud Licensing and the License Server. Cloud Licensing offers maximum flexibility, allowing users to sign in with their Chaos Account and use products from any location with an Internet connection. The License Server allows to set up centralized network setups and requires you to be on the same local network or connect through a VPN.

3. Chaos Telemetry
Envision installation is successful.
Participate in the improvement decisions for future versions of Envision. No intellectual property is violated when agreeing to participate in the improvement program. Chaos does not gather scenes, assets, materials, etc. For more information, see the Chaos Telemetry page.
Anonymized Telemetry – Includes the most used product functionality and/or parameter values. The data is not personally identifiable and is not tied to the user's individual account.
Personalized Telemetry – Includes the most used product functionality, parameter values, but also contains personally identifiable information tied to an individual user's license. This helps Chaos tailor and optimize the product for better personal use.

Advanced Installation Settings
After reading and accepting the End User License Agreement and the Global Consumer Privacy Policy, you can customize the installation by clicking Advanced. Read this section for more details on what settings you can customize.
1. Directories
Here, you can specify the installation paths. Please check if the default folder is correct.
If you have a previous Envision installation on your computer, make a clean uninstall before installing Envision again to automatically get the correct default installation paths.
You can specify whether:
- a desktop icon should be added;
- association for .envision files should be added so that Enscape Envision can open them directly from explorer.

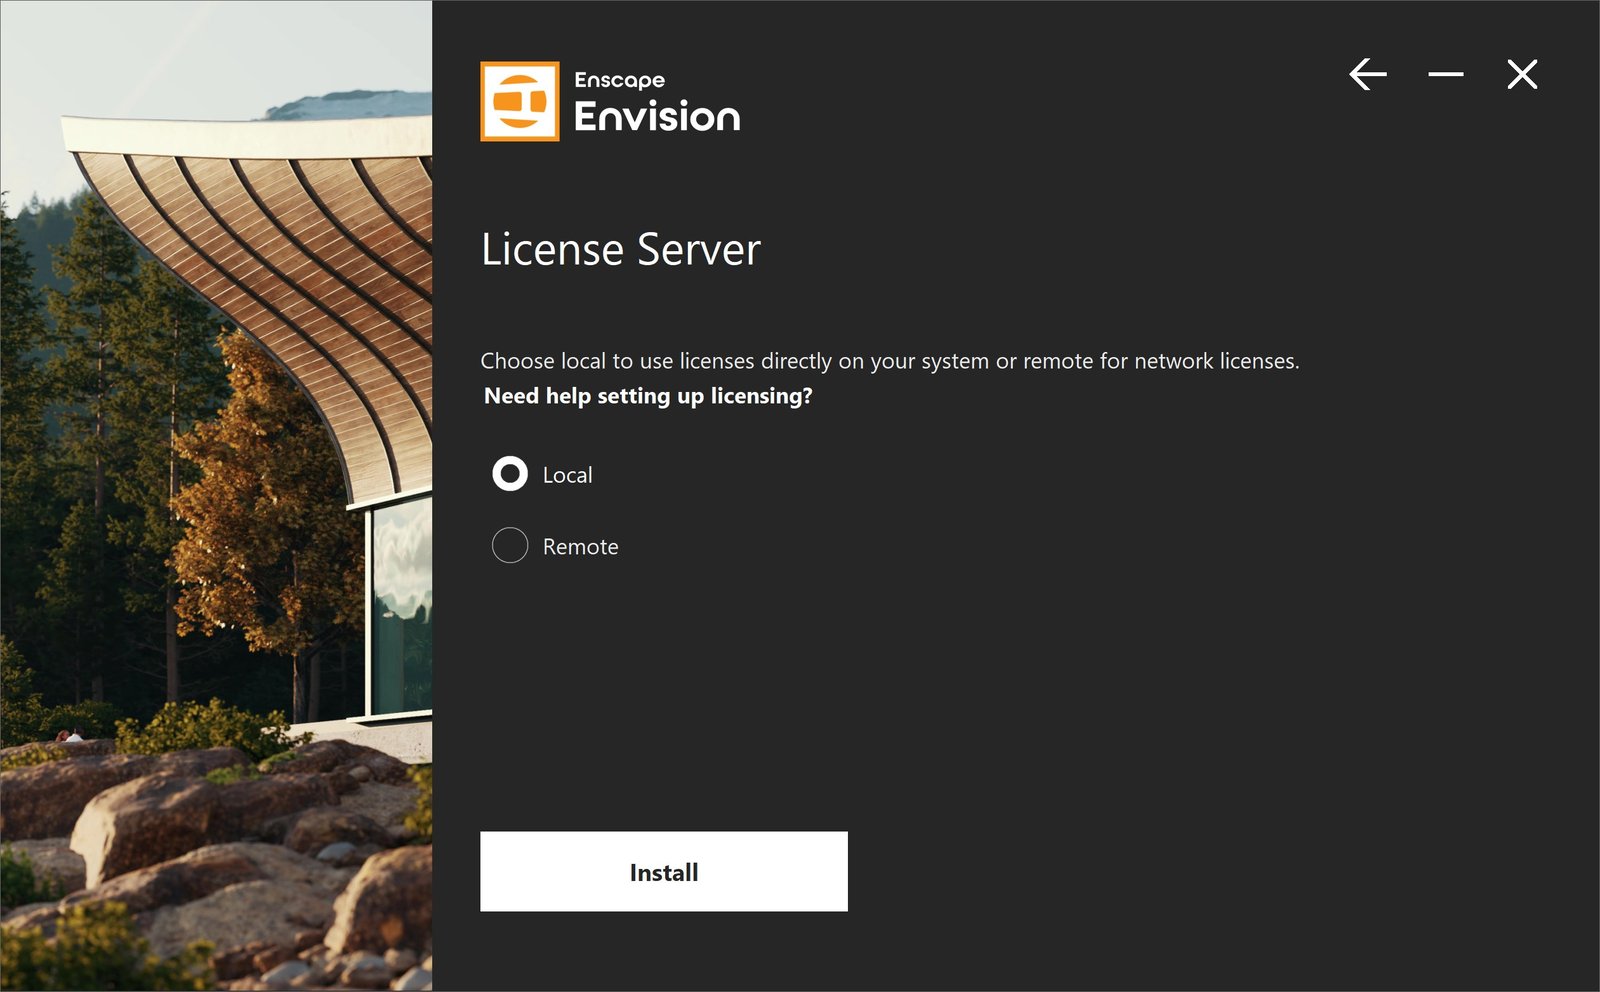
2. Licensing
In this step, you can specify whether Envision uses Cloud Licensing - a direct connection to the Chaos Licensing Service, or the Chaos License Server.
Cloud Licensing allows you to use your product from any location with an Internet connection by signing in with your Chaos Account.
The License Server is an additional application that can be used to set up centralized network licensing and / or use offline licenses. The License Server can be installed locally on the same device as the product, or remotely - on a centrally accessible network machine within your local network.

Local – This option installs the License Server on your machine. For a walkthrough, see the Product Activation page.
Remote – This option allows you to configure your Chaos product for floating licenses in a local network. Fill in the IP address of the Chaos License Server in your network in the Primary License Server field. Please leave the port 30304 unchanged. For more details on this setup, see the License Server Deployment page
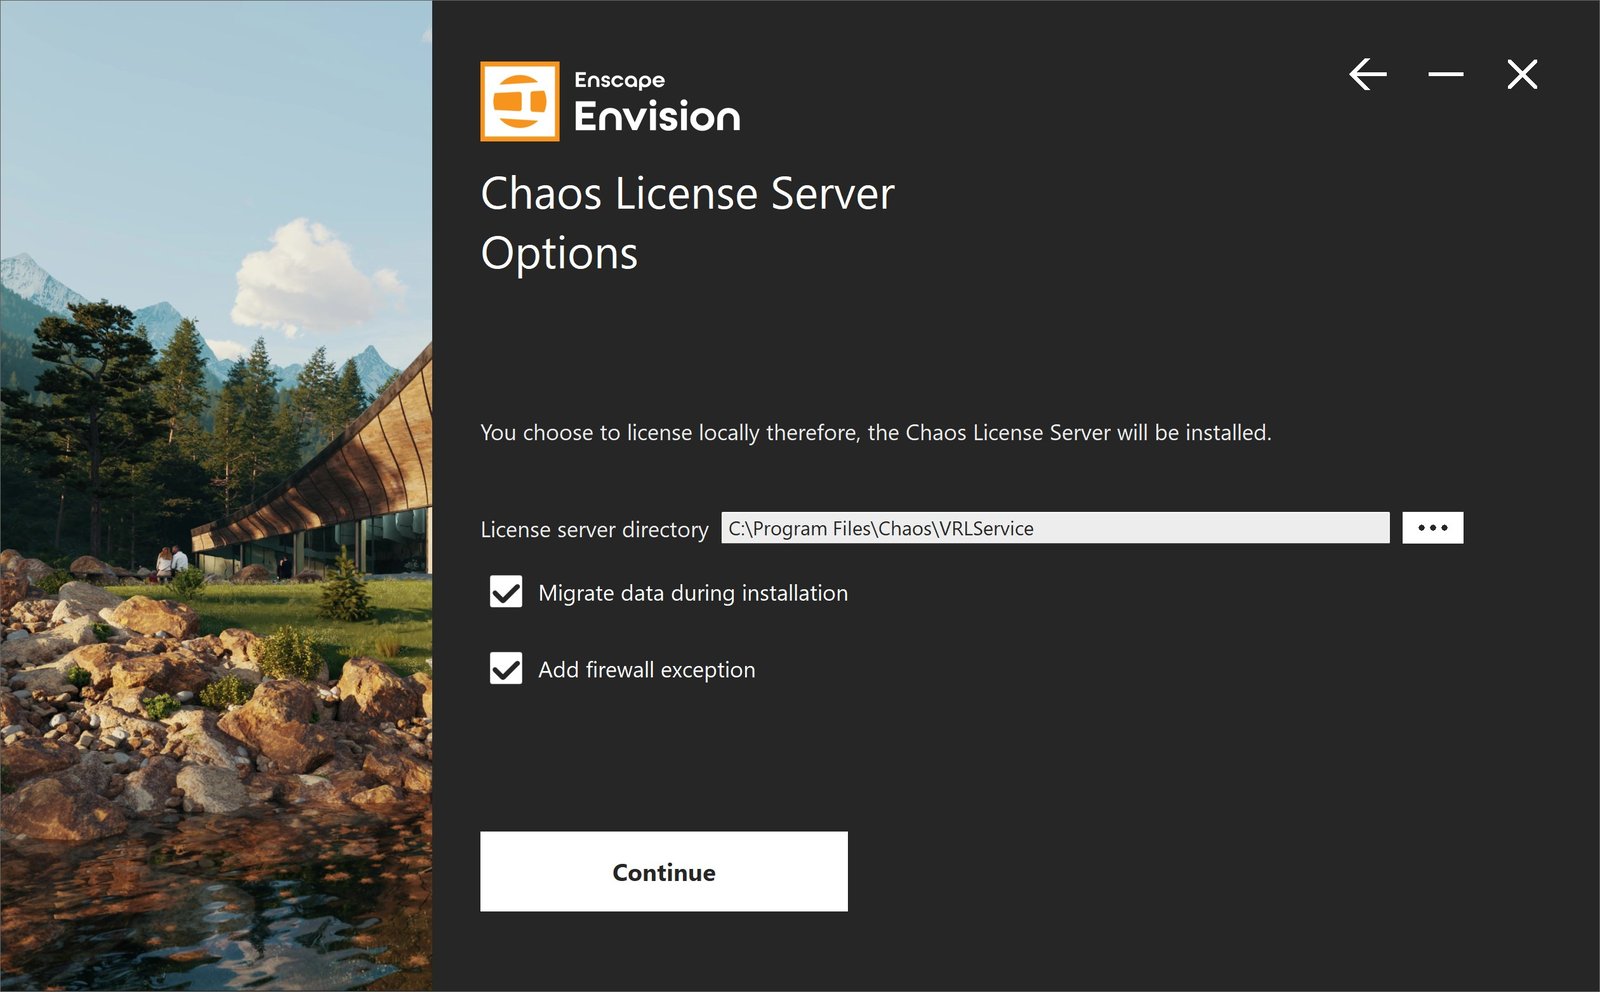
3. Chaos License Server Options
At this step, you can choose where to install the Chaos License Server.
Migrate data during installation – When enabled, it transfers all of your settings made with older versions of the License Server, such as proxy settings, etc. Disabling this option makes a clean install of License Server with any custom settings from previous installations reset to their defaults.
Add firewall exception – Allows the default licensing port (TCP 30304) in the firewall. If you disable it at this step, you must manually add firewall exceptions later.
Running the Installer Silently
A silent installation allows you to perform a complete Enscape Envision installation without any user input during the process, using either the default options (automatic installation) or, if desired, a predefined set of options (manual installation).
To use the default options, you need to run the installer file from the command prompt with the -auto argument. This option forces the installer to run without a user interface, and also automatically selects all the default options. A config file, containing the default installation options, is created at the end of the process.
To use a predefined set of options, you need to first create a configuration xml file that stores the installation parameters and then run the installer. You must use the -gui=0 argument, which indicates to the installer that no visual dialog will be shown and all interactions will occur through the console. After that, you can set each of the installation options directly in the console. Adding the -quiet=1 argument speeds this process by skipping the full output and leading you straight to the configuration options where you can set them as you prefer. When this process is finished, the config.xml file is created. The final step is to run the installer again in the command prompt with the config.xml file.
You can remove Envision from your machine similarly through a silent uninstall.
Creating the .xml file:
Run the installation file from the command prompt with the -gui=0 argument.
e.g. envision-1.4.2-win64.exe -gui=0
To suppress the full console output and speed up the generation of a config file, add the -quiet=1 argument.
e.g. envision-1.4.2-win64.exe -gui=0 -quiet=1
Follow the instructions of the installation and set it up the way you want to have it on all machines. This creates a file named config.xml in the folder of the installation file.
Running the installer:
Once a config.xml file is generated, you can use it to pass the installation parameters to the installer on any machine in an automated way:
<code data-v-c2b1f83f=""><span data-v-c2b1f83f="" class="line">envision-1.4.2-win64.exe -gui=0 -configFile="config.xml" -quiet=1</span></code>
Next Step
Go to step 2 to activate your Chaos License.