Enscape
Cosmos Asset Library
This page provides information about the Chaos Cosmos Asset Library in Enscape.
Last updated 1 September 2026
This page provides information about the Chaos Cosmos Asset Library in Enscape.
Overview
There are two variations of the Asset Library. One is accessed via the CAD toolbar and can be opened when Enscape is not running. The other variation can be accessed via the Enscape Viewport User Interface (UI) toolbar, and therefore only when the Enscape Viewport is running.
The assets selected can only be placed via the respective UI. That means, the Asset Library opened from the CAD toolbar will only allow placement of assets within the CAD UI, and the Asset Library opened via the Enscape Viewport UI will only allow placement of assets in the Enscape Viewport. Some assets require a surface to be placed in the Enscape Viewport. Whilst an asset is selected, multiple instances can be placed by clicking multiple times on any available surface.
The following features are available within the Asset Library:
- Chaos Cosmos Library
- Enscape assets
- Custom Assets
- Category and Tag filters
- Asset Placement tools
- Offline Asset Library
Open Asset Library via CAD
To open the Asset Library from the CAD UI, find the Asset Library icon in the Enscape toolbar or menu.
Assets use simplified white-textured placeholder geometries in the CAD viewport to keep project file sizes low. If you want to view the asset with textures, start up Enscape. The Asset Library dialog does not need to be closed for this.

Example from Enscape for SketchUp
Open Asset Library via Enscape
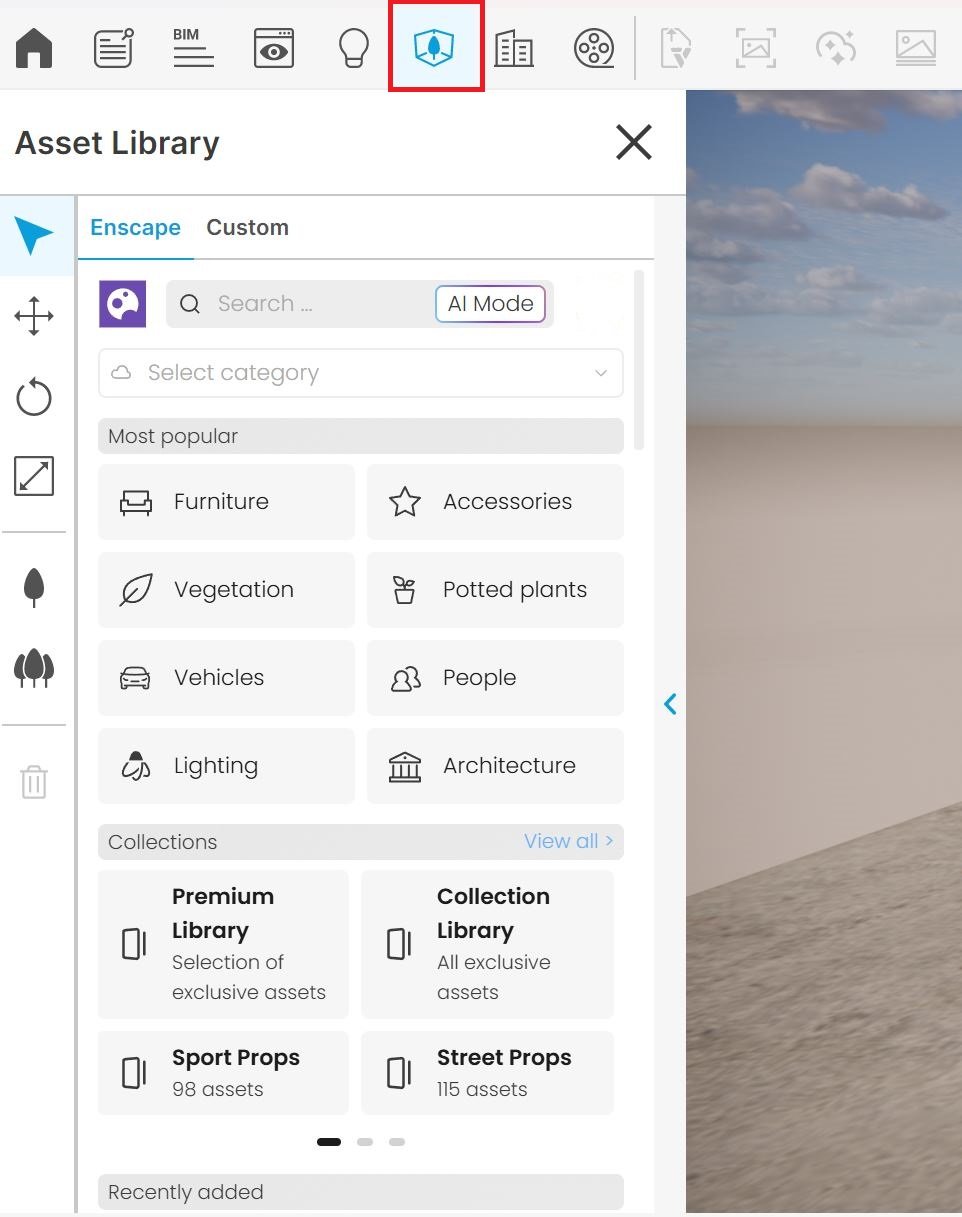
Click on the Asset Library button in the Enscape Viewport UI, or press the L key on your keyboard. The Asset Library opens as a left-side panel in the viewport.
Navigation
Use the menu categories or the filter options to refine your search.
The 3D Model dropdown menu provides quick access to different asset types. You can additionally choose between different categories and filters for date, surface, color, and space. Also, switching from Online to Downloaded lets you view the models stored locally.
Use the Search bar to quickly find the specific Cosmos asset you need - type a name or keyword to filter results.
The Asset Library, by default, showcases Enscape and Cosmos assets. To create and browse your own custom assets, go to the Custom Assets category in the toolbar.
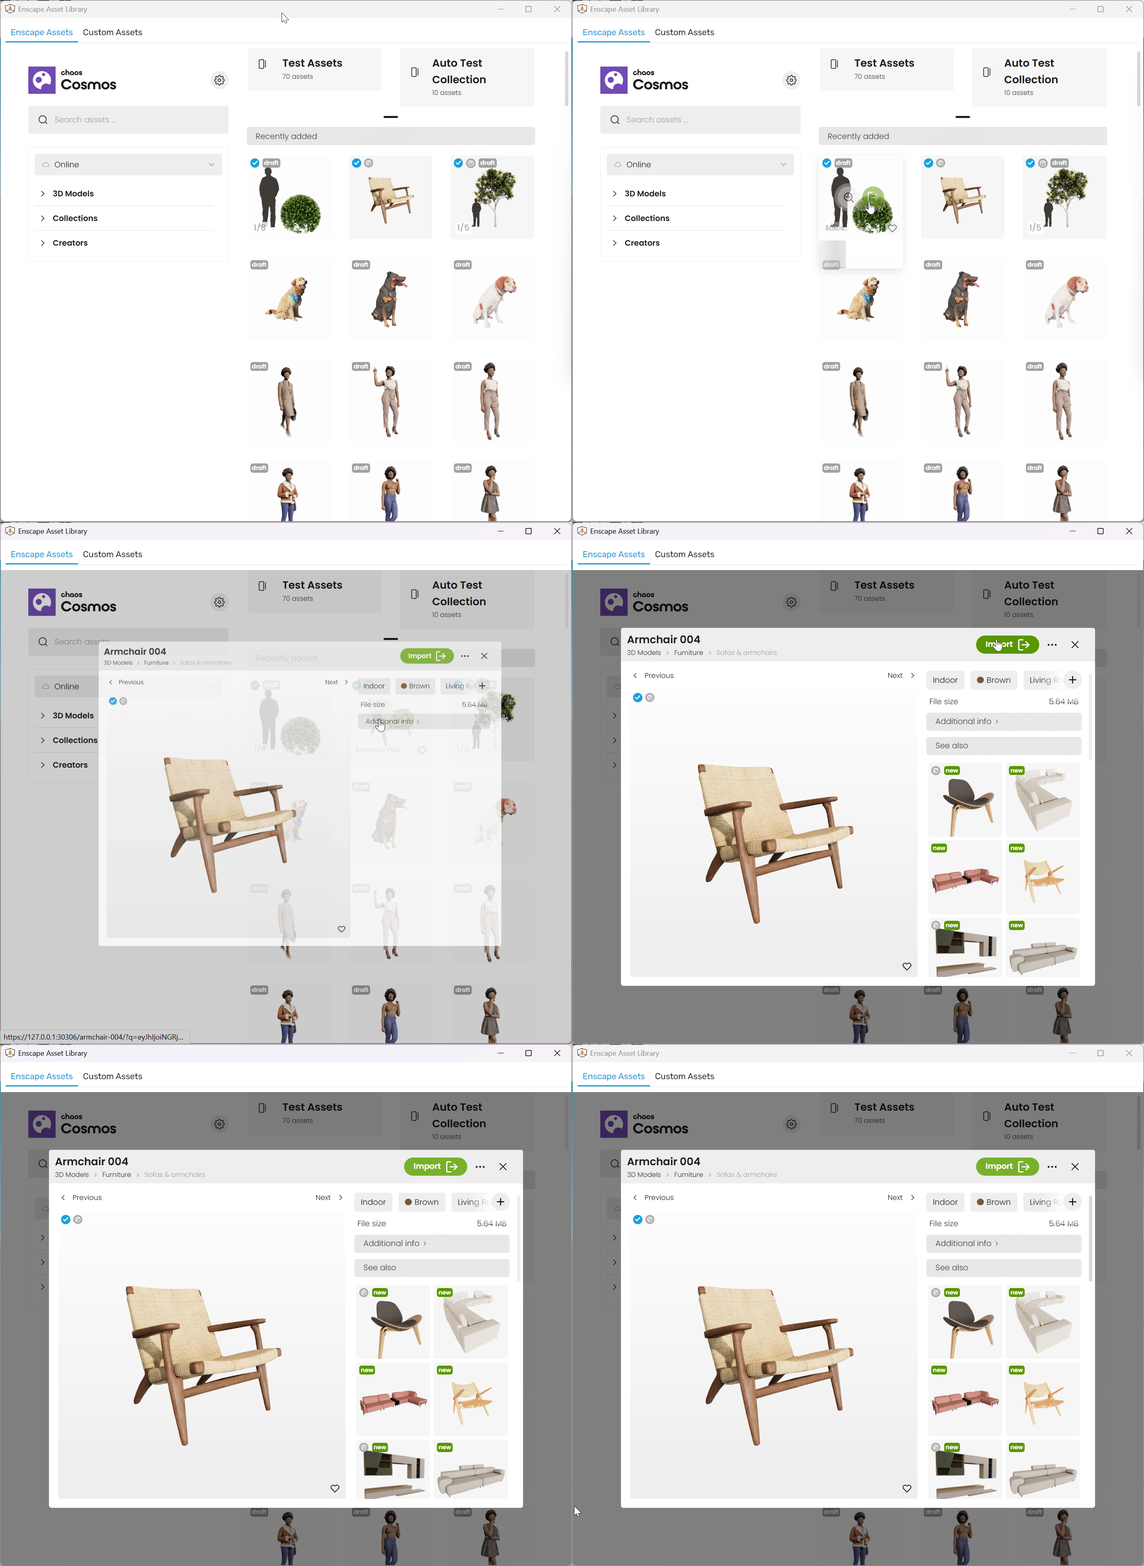
Once you find an asset you want, you can bring it directly into your project. Hover over the asset thumbnail and click the green Import button.

Click the button on the asset thumbnail to open a larger preview and see additional information, including category, space, color, and other metadata. From this panel, you can also click Import to place the asset into your scene.
Selecting Import automatically downloads the asset and prepares it for placement. After the import is complete, the asset is stored locally and appears with the Downloaded section.
Once an asset is placed in the scene, it can freely be moved, rotated, and resized.
Transformations
The available tools in the Asset Library are:
Select – Select a single asset from the scene. Hold the Shift key to select multiple assets. |
Select – Select a single asset from the scene. Hold the Shift key to select multiple assets. | |
Translate (T) – A set of control points appears around the selected asset in the Enscape Viewport, which can be used to move the object and rotate it along the Y axis. You can also use X,Y,Z coordinates for a more precise placement. To confirm the changes, click on the Apply Changes button. | |
Rotate (R) – Rotate the asset along all axes. The Rotation icon is grayed out and not available in the Enscape UI for Revit. | |
Scale (G) – Scale the asset using the viewport gizmos. Precision scaling can be achieved via the input fields located at the bottom left of the viewport. To implement changes, click the Apply Changes button. | |
Single Asset Placement – Place a single asset into the scene. | |
Multi Asset Placement – Place multiple assets into the scene. See the Multi Asset Placement section for more information. | |
Delete (Del) – Deletes the selected asset. To implement the changes, click the Apply Changes button. To cancel, click Discard All. If the changes are applied, the deleted asset cannot be recovered. |
Adjustable Assets

Not all assets are adjustable. You can quickly identify and filter Adjustable Assets under the Adjustable tag ( ) within the Enscape Asset Library.
There are two types of Adjustable Assets:
- Аssets with variants. The number of variants is displayed on the asset thumbnail ( ).
- Аssets that allow color and/or material customization. Only the Adjustable tag is visible on these assets.
- Some Adjustable Assets offer both options.
To adjust assets, open the Asset Library in Enscape (not in the CAD UI). Select the adjustable asset you want to edit. The Edit Selection menu appears with a thumbnail of the selected object. Click on the thumbnail to see the variants and adjustments available for the object.

Custom Assets
The Custom Assets Window allows you to add your own custom geometry to the Asset Library, with customization options. This can be very useful when collaborating on a project and when reusing geometry for multiple projects.
You can access the Custom Asset Editor through the Custom category in the toolbar.

Toolbar categories
For more information on creating custom assets, see the Custom Assets Library page.

Animated Assets
The degree of movement is affected by the Wind properties in the Atmosphere tab of the Visual Settings. The Intensity property determines how strongly the assets move, and the Direction Angle specifies, in degrees, the direction from which the wind is blowing.
This feature does not affect Custom Assets.


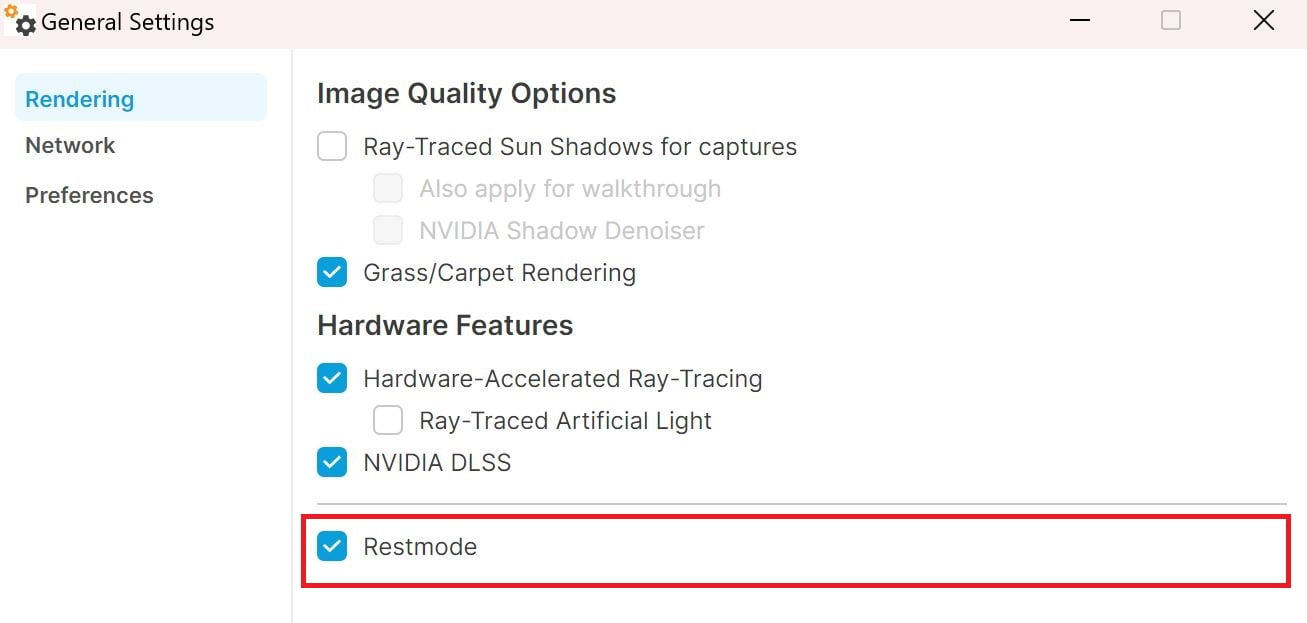
Some assets animate by default, but only when the camera is moved. You can allow the assets to animate all the time by disabling Restmode. This option can be found via the CAD toolbar >General Settings button > Rendering. Find the Restmode option and disable it.
Multi Asset Placement
Single or multiple assets can be selected, and selected assets are shown under the Selected Assets area.
Click the checkbox in the asset thumbnail either in the Asset Library panel or under the Selected Assets area to remove individual assets from the selection. To remove all assets, click on the Clear All option in the Selected Assets area.
To apply the changes, click Confirm Placement. To cancel, click Discard All.

Multi Asset Placement Menu
The Multi Asset tool provides additional options to refine the placement.

Area Selection Tools
Rectangular Selection – Select a rectangular area on a surface in the scene to place the assets. |
Rectangular Selection – Select a rectangular area on a surface in the scene to place the assets. | |
Circular Selection – Select a circular area on a surface in the scene to place the assets. | |
Bucket Selection – Select an entire surface in the scene to place the assets. | |
Brush Selection – Select a custom path on a surface in the scene to place the assets. The Radius parameter determines the width of the path. | |
Erase Selection (only available for the Brush Selection) – Select an area from the Brush Selection to erase. |
Selected Assets
The selected assets are displayed in the Selected Assets field. To remove all assets from the selection, click Deselect All.
Distribution
Asset density – Determines the total number of asset instances. This is particularly useful for populating a scene with vegetation. Using the highest density on large surfaces could potentially lead to performance issues.
Allow asset overlap – When enabled, asset instances can overlap their geometries. Useful when creating thick background forests.
Distribution – Determines how the assets are placed:
Random – no placement pattern is followed, and assets are placed randomly. This is better suited for large surfaces.
Jitter – assets are placed on a grid-based layout, but with a random offset. In large areas, the pattern may be more easily noticeable.
Uniform – assets are placed on a grid layout.

Randomisation
Randomise rotation – When enabled randomizes the selected assets on the X and Y axes. This option is enabled by default. If disabled, all assets in the current selection face the same direction. This can be useful, for example, when placing a group of spectators.
Scaling – Determines a multiplier, in percent, to scale the asset instances.
Tilting – Determines a multiplier, in degrees, to tilt the asset instances.

Placement Options
Preview Selected Area – When enabled, the complete assets geometry and textures will be loaded and shown in the Enscape Viewport.
Regenerate – When clicked, the selected assets appear in another position, specified by the currently active placement settings (Density, Distribution, and Random Rotation). After that, the Preview Selected Area option is disabled automatically.
Confirm Placement – Clicking the Confirm Placement button, the assets' positions are fixed. The asset continues to be shown as the low-poly proxy version by default. Once the placement is confirmed, assets can not be edited or deleted as a group and must be handled individually.
Apply Changes – Click the Apply Changes button to load the full asset geometry and its associated textures (if Preview Selected Area is disabled). Apply Changes will only become available after Confirm Placement has been clicked.
Discard All – The Discard All button will only become available once Confirm Placement has been clicked, and it will remove all that have not been applied by the Apply Changes button.
