Enscape
Custom Asset Library
This page provides information about the Custom Asset Library.
Last updated 4 June 2026
This page provides information about the Custom Asset Library.
Overview
The Custom Assets tab is part of the Enscape Asset Library.
To understand how to place and transform your custom assets in the CAD or in the Enscape Viewport UI, see the Cosmos Asset Library page.

Asset Library button in Enscape UI
There are two ways to open the Custom Asset Вibrary: from the Floating UI or from the Enscape built-in UI.
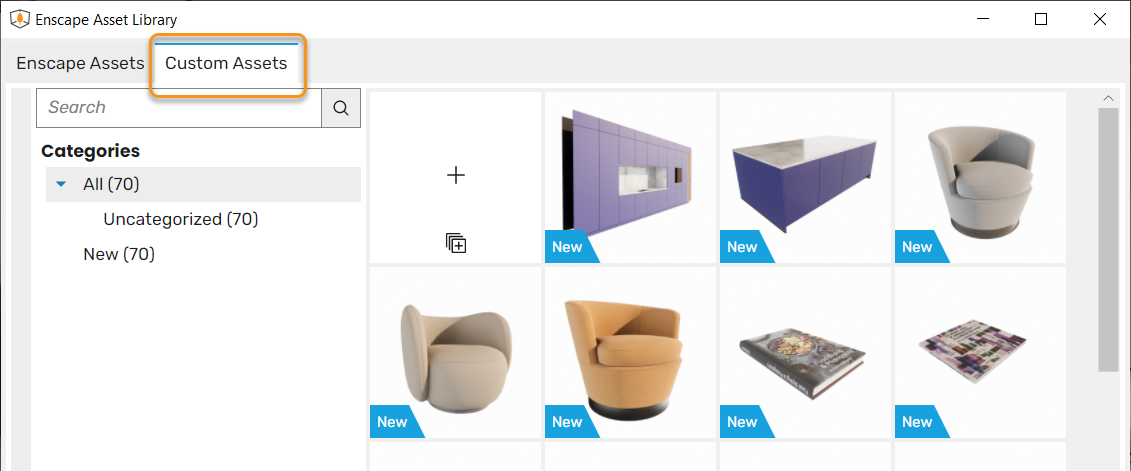
Location of the Custom Assets Library button in the floating window

Custom Assets Library button in the Enscape UI
Supported File Formats
Only the file formats that can be imported to the Custom Asset Library are *.gltf, *.obj, or *.fbx. These are the most common cross-platform industry-standard formats. A model that can be converted to one of them can be imported into the Custom Asset Library.
Import low-polygon models with fewer than 20,000 triangles (also referred to as 3-sided or 3-point polygons) for performance reasons.
Support criteria for the different model types differ, and the Custom Asset Editor relies on the paths being set correctly for the model’s textures. Complete this task in the software used to create the model. Assign materials manually in the Custom Asset Material Editor if necessary.
Import Options
Clicking on the Custom Assets tab reveals the following screen, where you can import single or multiple (batch import) models. You can also define the Source Path to the folder where Exported Assets are to be stored on creation. This location could also be a shared network drive, for example, and any valid custom assets found in a designated drive are displayed in the Custom Asset Library.

Options to Import a Custom Asset
Custom Asset Editor window
This is the initial window you see upon opening the Custom Asset Editor.

Custom Asset Editor window
Left Side | Right side |
Left Side | Right side | |||
Search – Search for keywords to find an Asset Project. | New Project – start a new blank Asset Project | Import Project – import an existing Asset Project | Configure – define the paths for Asset Project and Asset Export. | |
Add Category – Add a new category to the Asset Project Library. | Save Changes and Export – save the current project and export the asset into the library. | |||
All – Shows all Asset Projects in the Project Library. | Export All To – all assets in the output directory will be cleared and re-exported | |||
Uncategorized – Shows all Uncategorized Asset Projects. | Discard Changes – discard all the changes and close the window. |
Configuration of Custom Asset Editor
Importing models for the first time prompts you to set up the Project Directory.
- First, set up your Asset Projects location. Click on the folder icon to open the Select Folder window. Select a location for your project and click the Next button.
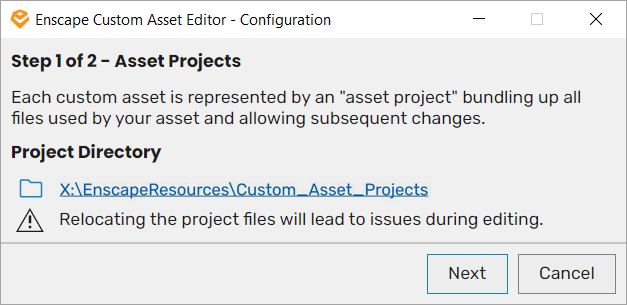
Define location for Asset Projects
- Set up the Exported Assets location (the file that appears in the Custom Asset Library). Select a location for your project and click the Save and Close button.
Once you’ve decided on where you want the Asset Projects and Exported Assets to reside, click the [Save and Close] button. This will open the Custom Asset Editor window, which is where we begin the process of importing custom assets.
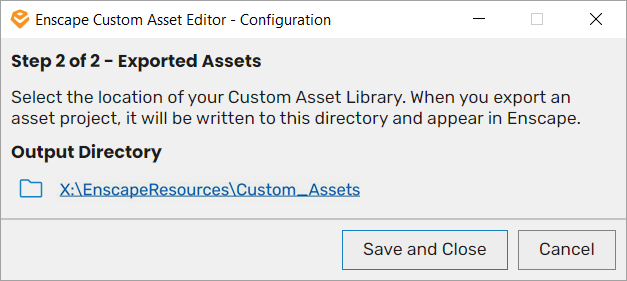
Define location for Exported Assets
Note that when the Custom Asset Library window is in focus and you open the Custom Asset Editor, a warning window is displayed.
Clicking on the Switch to the Custom Asset Editor button puts the Custom Asset Editor window into focus.

Custom Asset Editor is open
The locations for Asset Projects and Exported Assets can be changed at any point via the Configure button.
You can change the location of the Exported Assets separately from the Source Path button found at the bottom right of the Asset Editor.
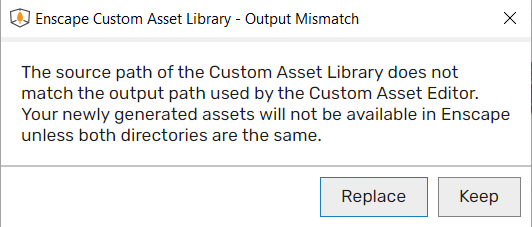
Asset Path Mismatch
In a scenario where a project containing previously exported assets is opened, but the path has since been changed, these assets may no longer render in Enscape (although their placeholder appears in the CAD). To fix that, correct the path via either the Configure button or the Source Path button.

Asset Error window
Once the path has been set correctly, a restart of the Enscape viewport is required for the assets to show.
If you want to configure the project and output directory at a later date, click the Configure button in the Enscape Custom Asset Editor. A window opens, showing the current path (blue), and any changes to that path can be made by clicking it.
- Set the Project Directory location and click Next.
- Set the Output Directory and click Save and Close.
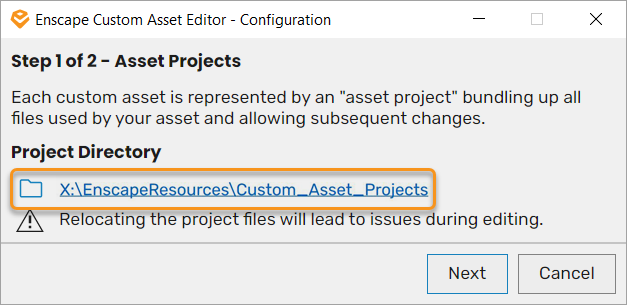
Project Directory path
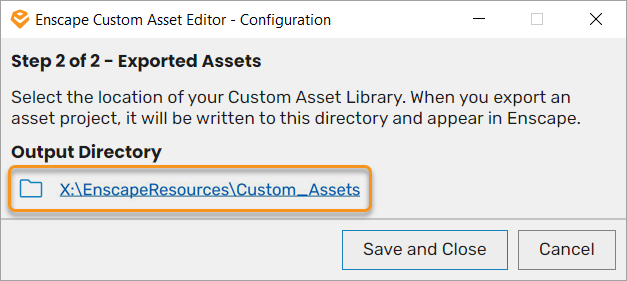
Output Directory path
Add Category
There are two ways to add a new Category.
- From within the Custom Asset Editor window.
- Or Add Category while creating or editing an Asset project.
To create a new category, simply click Add Category. Select an Icon and a Category Name in the pop-up window and click the Add button to create the category. New categories appear on the left-hand side of the Asset Editor.

Add Category to Assets
To move projects to new categories, simply drag and drop them to the desired category within the category list on the left.
Drag and Drop Assets into Categories
To save changes, click the Save Changes and Export button. Once saved, you can also see the New Category in the Enscape UI.
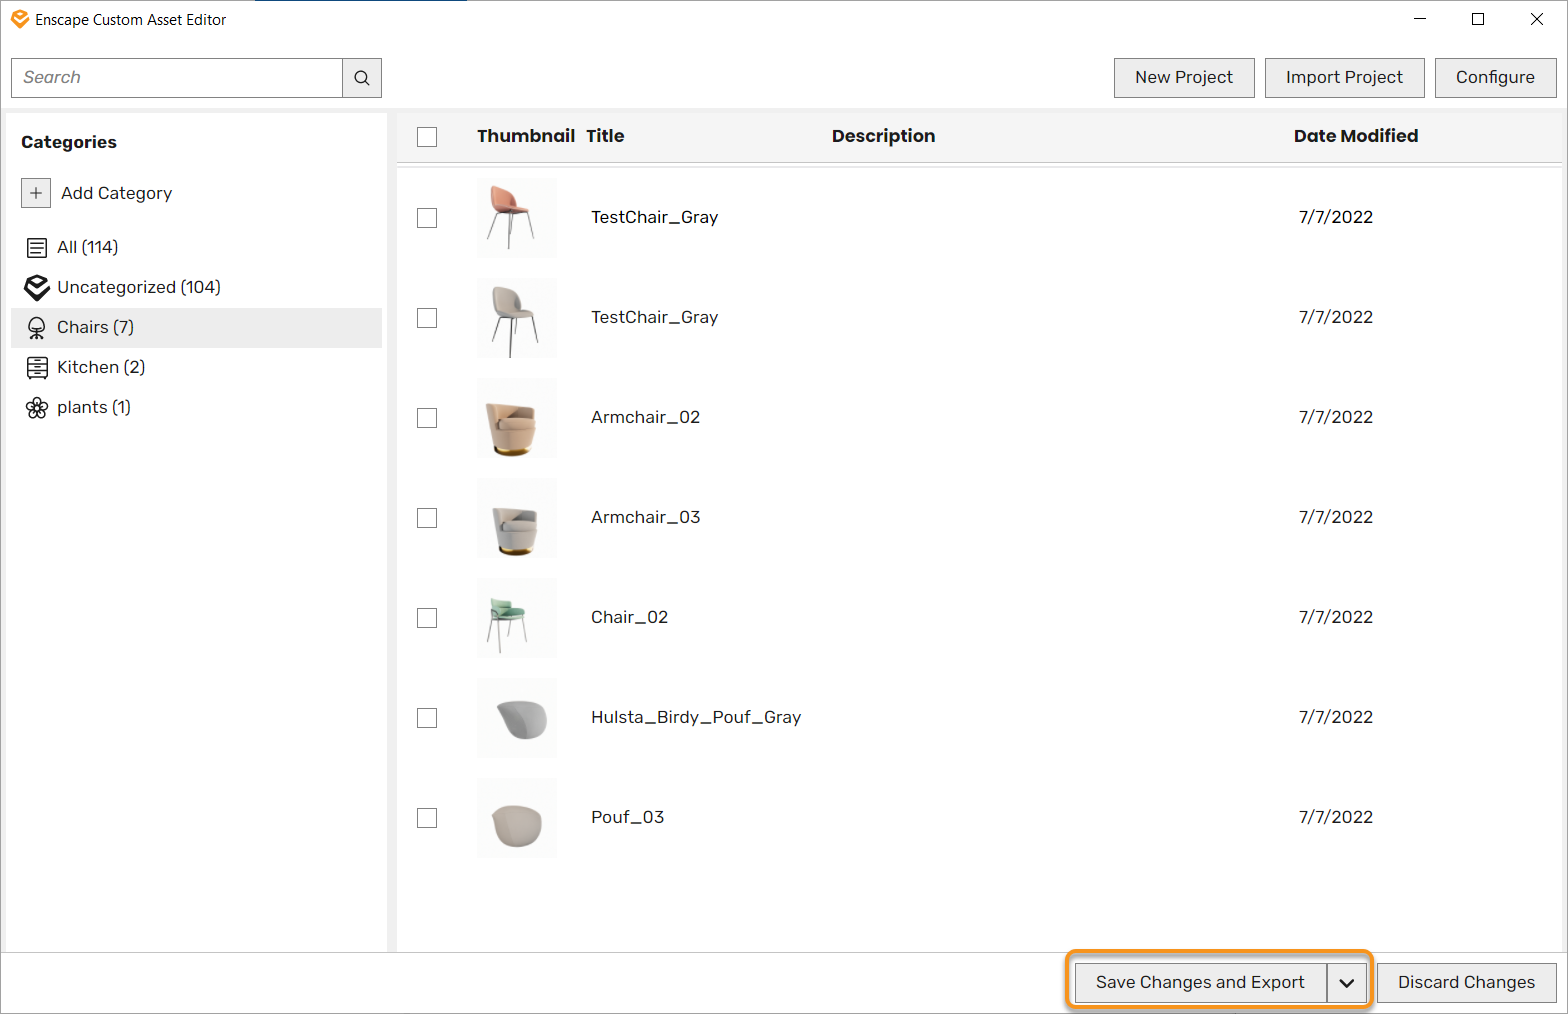
Save Changes and Export
Create a New Asset Project
This is the window you see upon creating a new Asset Project.

New Asset Project Window
Notice that any required fields are highlighted in red, as shown above, where a Title is required.
The layout of the Custom Asset Editor consists of the following:
Left Side | Right side |
Left Side | Right side |
Project Source – states the path to the project if already defined, otherwise the source is stated as a New Project up until it is saved. | Import Geometry – import a single model (Batch Import can only be done from the button in the Custom Asset Library). |
Title – this will usually take on the name of the model file by default, but this can be changed. A title is always required for an Asset Project. | Scale (XYZ) – scale adjustment of the asset. |
Category – choose Category Name and Icon for the Asset Project. You can define custom categories for your project | Up Axis (XYZ)– to choose which axis is treated as being the axis which orientation is based on (normally this is Y). |
Description – optional additional information for the Asset Project. You can insert line breaks here by using Shift + Enter key combination. | Placeholder Geometry – to swap out the placeholder that defines the asset in the CAD, by default the nearest matching primitive is used as an assets placeholder. |
Materials – this is essentially the Enscape Material Editor embedded into the Custom Asset Editor | Preview – where you can preview the model and how its thumbnail for the asset library will be displayed.. |
Thumbnail Buttons:
| |
Save Changes and Export – save the current project and export asset into the library. | |
Export – export the asset into the Custom Asset Library. | |
Discard Changes – discard all the changes and close the window. |
Importing a Model
To import a model, click on the Import Geometry button.

Your option here is to correct the file by reducing its poly count. Once you have successfully imported your model, it appears in the Preview area. The materials may not be assigned correctly at this point.

Click on the Take a Screenshot of the current preview and use it as the asset’s thumbnail button to generate a thumbnail for the asset and to allow the asset to be exported.
Generate a new Thumbnail for the asset at any time by clicking this button again.
The Title and Material Editor, Scaling, and the Up Axis are populated automatically.
All fields can be altered manually, including the Placeholder Geometry.
The Category and Description are optional fields that can be filled up to better organize your Asset Library.

Create Thumbnail of the asset for the Asset Library
Assigning Materials
If the materials are not automatically assigned upon import, manually match them to those provided with the model. Use the built-in Enscape Material Editor to adjust the materials as needed.
A project needs to have the surfaces defined in the 3D software in which the model was made before importing it; otherwise, you cannot choose your surfaces in the Enscape Material Editor, even if the paths are incorrect.
Right-click on a material to Import / Export Material packages. Select the file you want to import or the location you want to export to in the pop-up window.

Import / Export Material Package
Assign materials to both sides of a surface by checking the Double-sided checkbox.
Double-sided Material
Scale and Up Axis
Once you have set the materials, you can update the Thumbnail. Set up your model in the Preview viewport. This shows how your Thumbnail appears in the Custom Asset Library.
Position the asset as you want to see it in the Custom Asset Library using the same navigation controls that are available in the Enscape Viewport (ie. W,S;A;D;Q;E to Move, right click to Orbit, mouse wheel to Move in /out and numpad for Standard Views ie. 2,8;6;4;5).
You can also Scale or change the Up Axis of the asset.
Navigating the Preview Viewport
Once you are happy with the materials, Scaling, Up Axis and Thumbnail of the custom asset, click the Save Changes and Export button or click the Export Asset button. A green message appears at the bottom of the Enscape Custom Asset Editor window, indicating that the Export has been completed successfully.
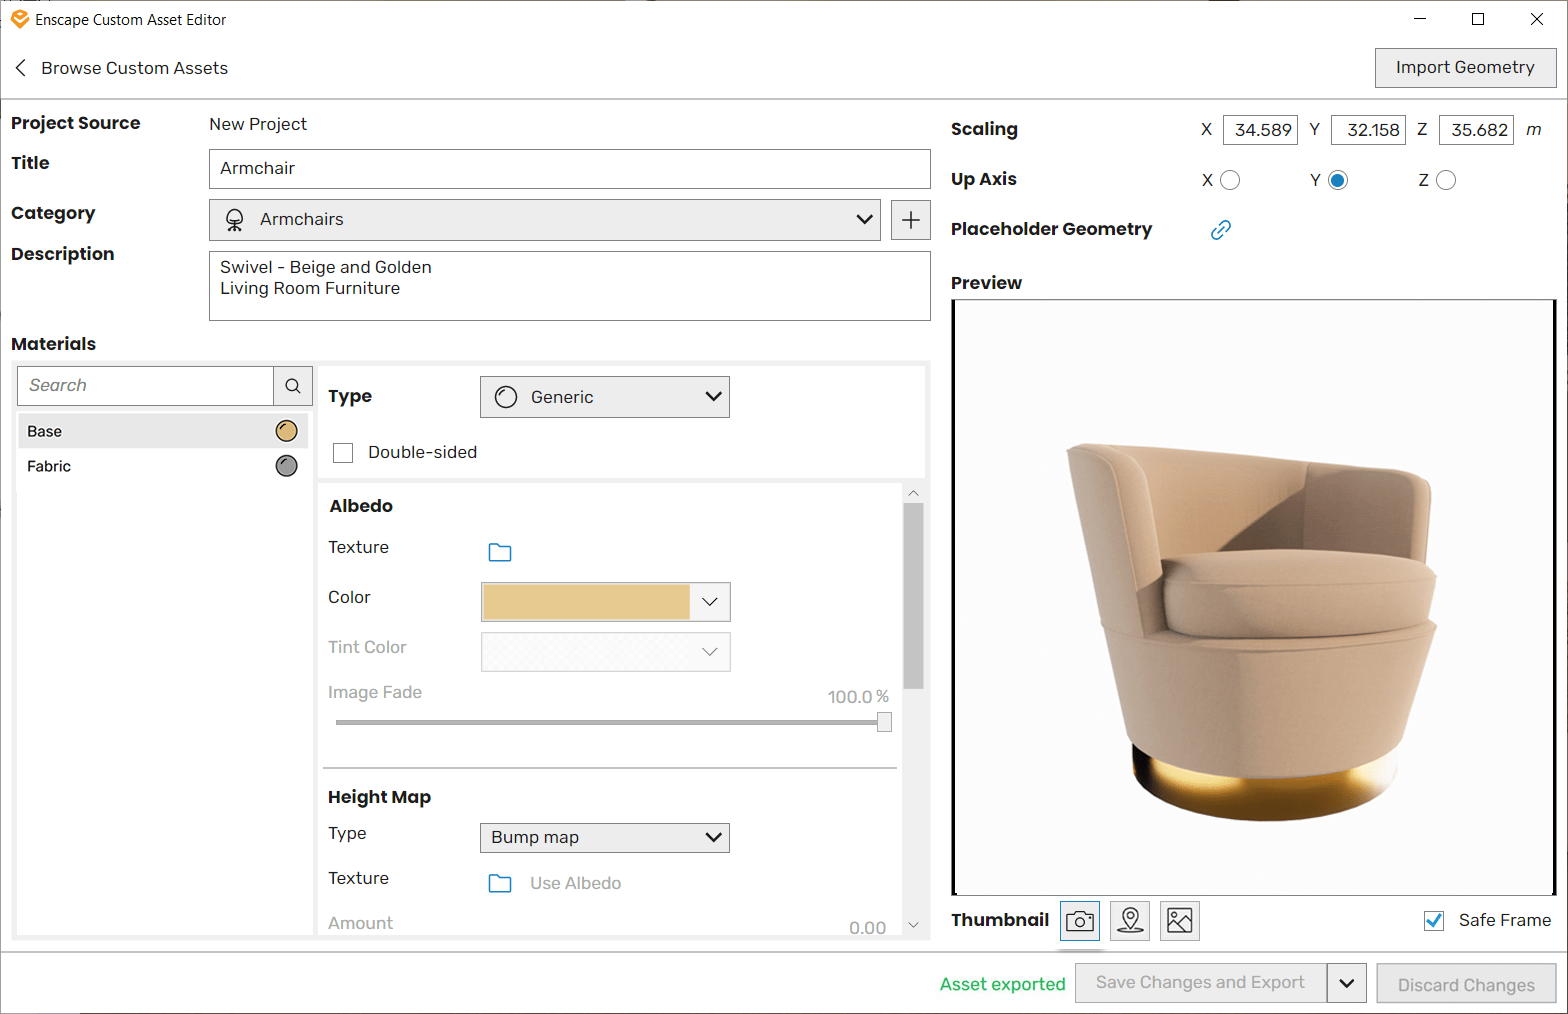
Asset Exported
Close the Custom Asset Editor window.
Your custom asset is now listed in the Custom Asset Library.
If new assets do not appear immediately, wait a few seconds or restart the Custom Asset Library.
New Categories created in the Custom Asset Library are now also visible.
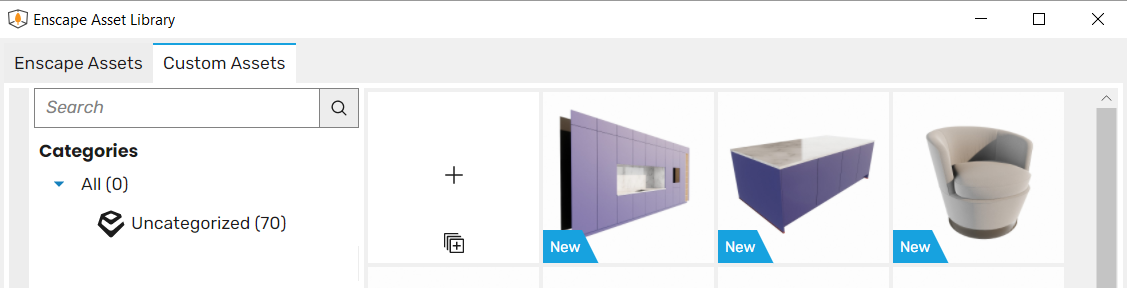
Newly Created Custom Assets
You can always edit the newly created asset further by clicking on the Edit Asset button.
Replacing the Placeholder
Change the default model placeholder via the Placeholder Geometry option.
The placeholder also acts as the collision box for the asset.

Default Placeholder and Associated Asset
Click on the chain icon associated with the Placeholder Geometry option and navigate to the location of the placeholder you want to use.
Once imported, it is not initially visible in the Custom Asset Editor window.
To show the new placeholder in the Custom Asset Editor Preview window, check the Show in preview checkbox.

Unchecked Show in preview checkbox
The new placeholder becomes visible in the Preview viewport.

New Placeholder Loaded
The following shows the new placeholder alongside the default placeholder.
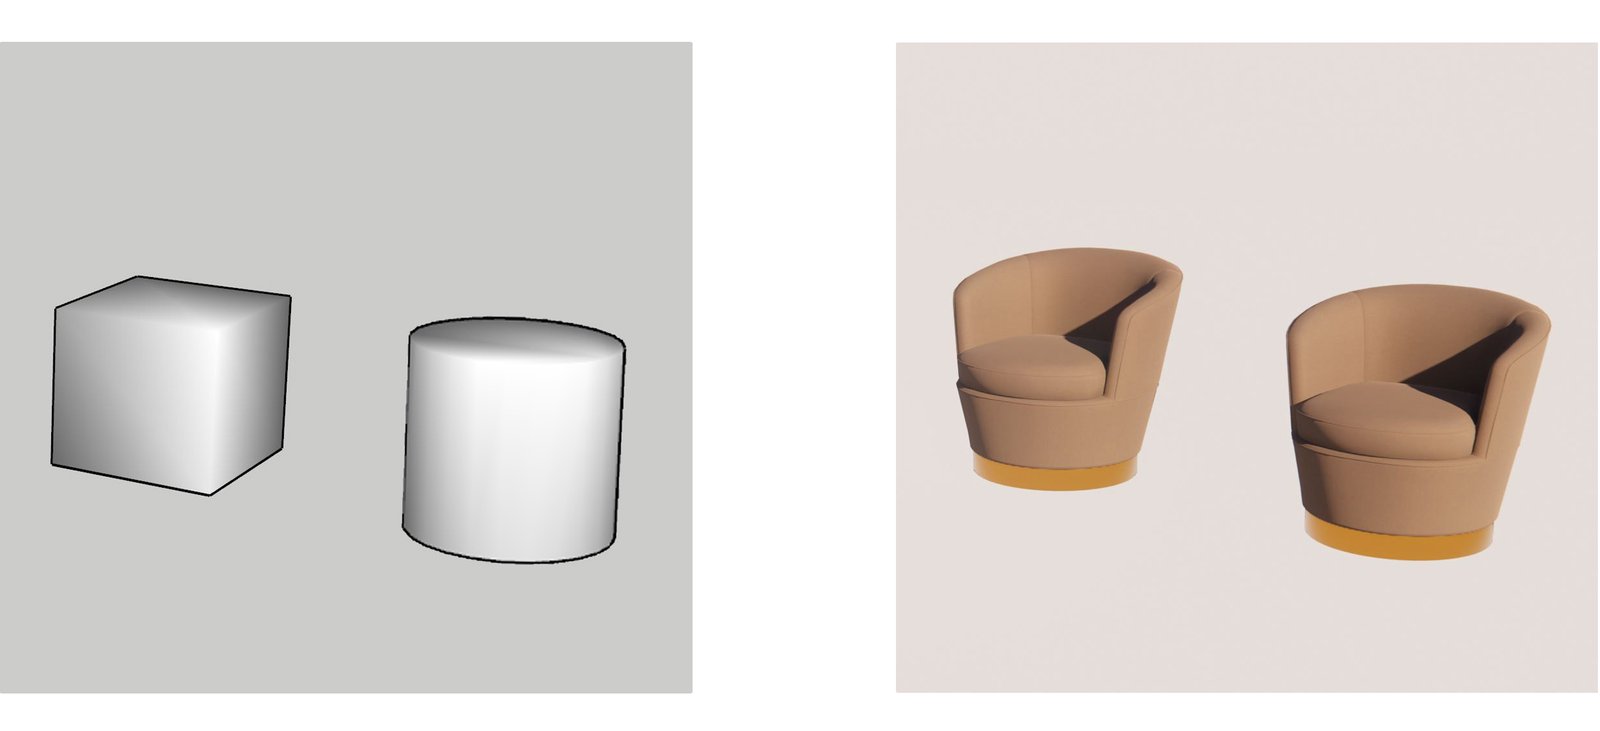
Replaced Placeholder
Thumbnail Buttons
These buttons have the following functions:
Takes a screenshot of the current preview for use as the asset’s thumbnail.

Take a Screenshot of the Current Preview and use as the Asset's Thumbnail
Makes the Preview window revert to the camera position that was set when the thumbnail was created.

Set the preview to the camera position of the thumbnail
Saves the thumbnail out to a temp file.
This opens the operating system’s default image viewer with the thumbnail loaded.

Save the thumbnail out to a temp file and open in default image viewer
Export Custom Asset Library
After creating Custom Assets in the Enscape Asset Editor, click the arrow next to the Save Changes and Export and locate the Export All To option.

Export All To option
Clicking this option displays a message stating that all assets in the output directory will be removed and all assets in the Custom Assets Library will be exported to the directory. Make sure to choose a dedicated folder that only contains these downloaded Custom Assets, otherwise you may lose valuable files. Change the output path by clicking the folder icon.
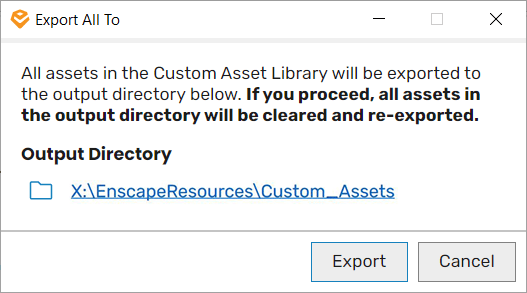
Export All To warning window
Batch Import Several Models as Assets
Click the Batch Import button, as shown in the animated screenshot earlier, to import several assets at once.
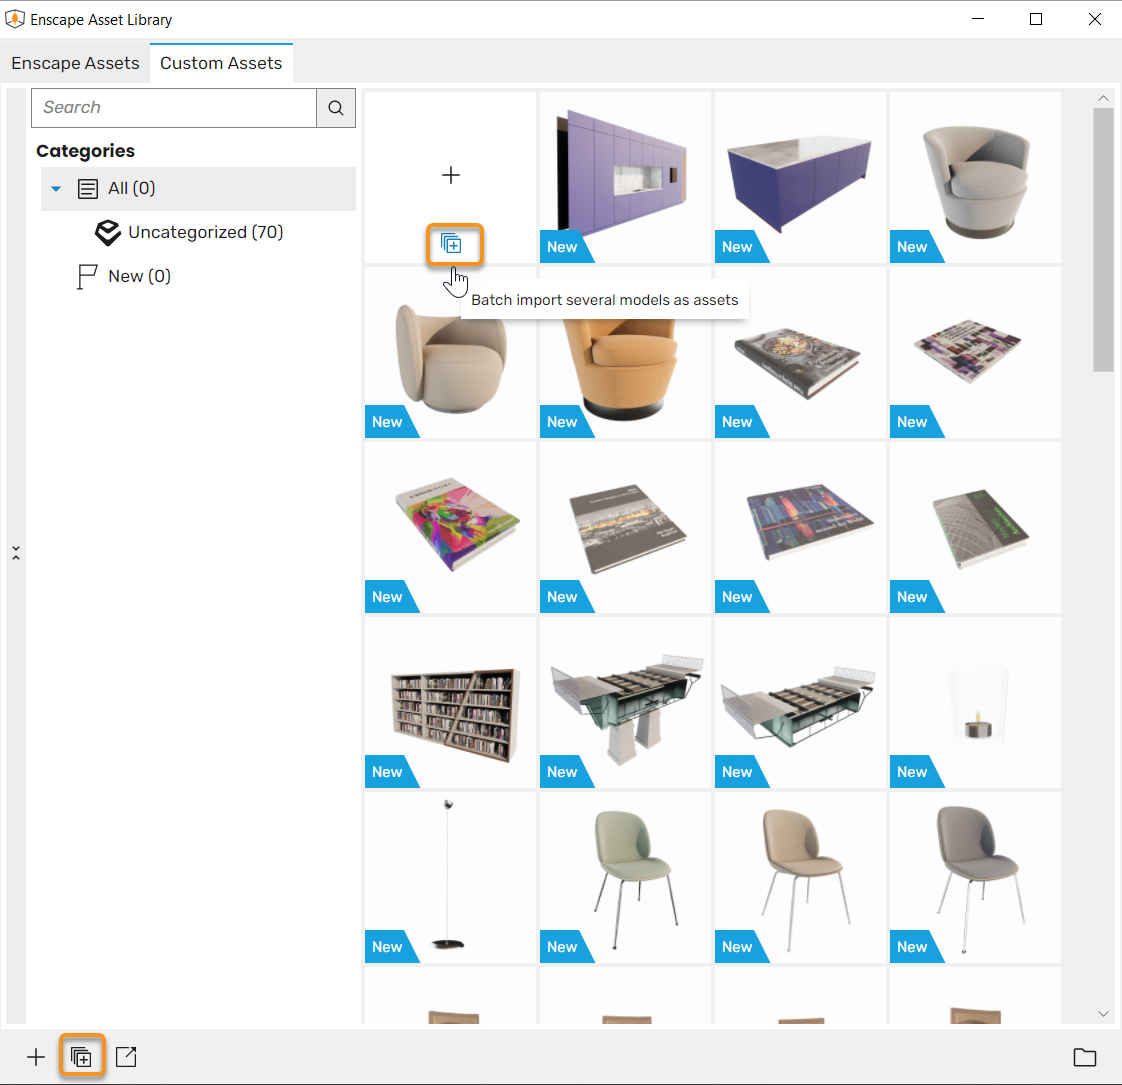
Batch Import button

Batch Import window
After you select the files and click Open, a progress bar is displayed.

Batch Import Progress Bar
Once that is complete, the models are displayed in the Custom Asset Editor, labelled as New, with a thumbnail automatically generated from a front view that can be adjusted later.
We can place these assets directly into our CAD project, but it is advised to review and edit them first. The process is same if you want to import a single model file instead of a Batch Import.
To edit the asset, hover the mouse over it in the Custom Assets Library window and click on the Edit Asset button.

Batch Import Success
Conflict Resolution
When working on a shared Project, if two collaborators are editing the same assets simultaneously, the changes are applied by the first to save the file. The other receives a message stating that the assets have been moved by another user, and the changes they were working on have been overwritten due to Simultaneous Editing.
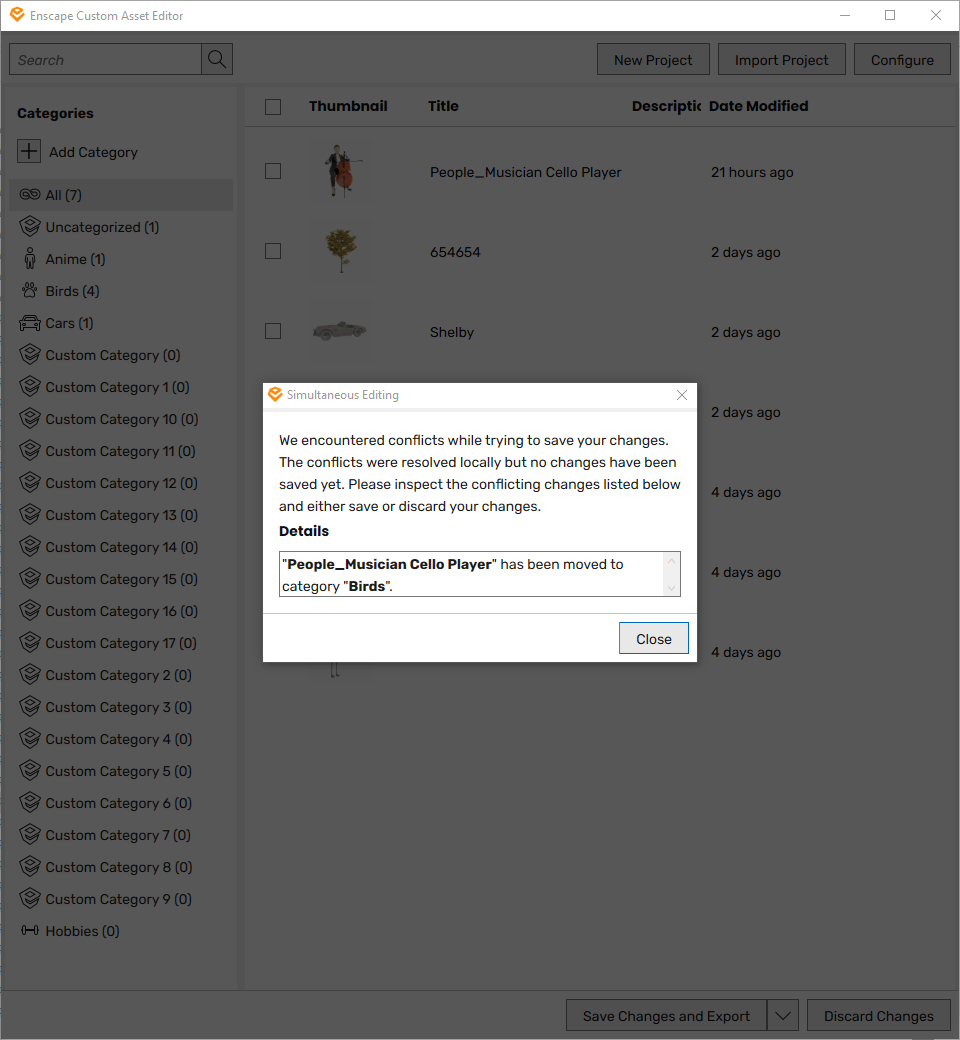
Simultaneous Editing window
Deleting Custom Assets
To delete custom assets, remove them from the folders where the Asset Project and Exported Asset reside.
It is possible to delete the Asset Project and keep the Exported Asset, but you will no longer be able to edit the asset once the associated Asset Project is deleted.