This page provides information on enabling Enscape for each CAD version.
Overview After completing the Enscape installer, open the CAD/BIM app and locate the Enscape tools. If they don’t appear automatically, enable them manually via the CAD toolbar and menu options. This article provides instructions for enabling Enscape in each CAD.
If there are no Enscape references in the menu or toolbar, the installation was not unsuccessful. Perform a fresh reinstall of Enscape. Uninstall Enscape, reboot your machine, then run the Enscape installer again. Refer back to the installation steps for guidance.
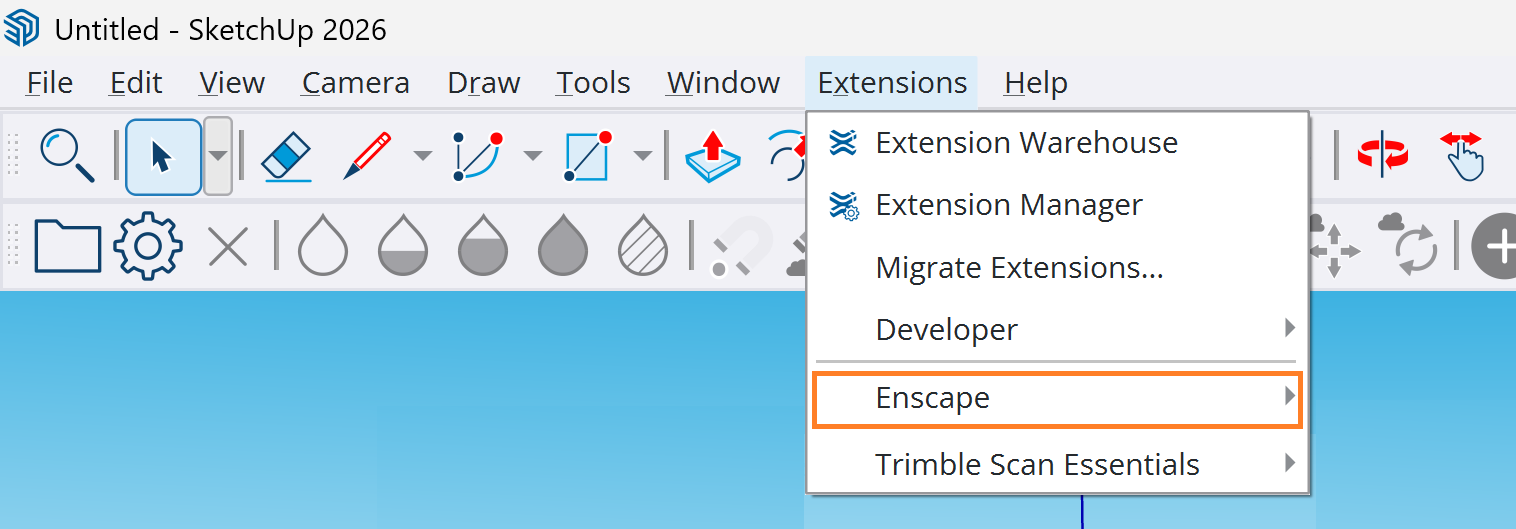
Enable and start Enscape in each CAD Enscape in SketchUp Locate the Enscape menu option under SketchUp’s Extensions menu.
There are two ways to enable the Escape toolbar in SketchUp:
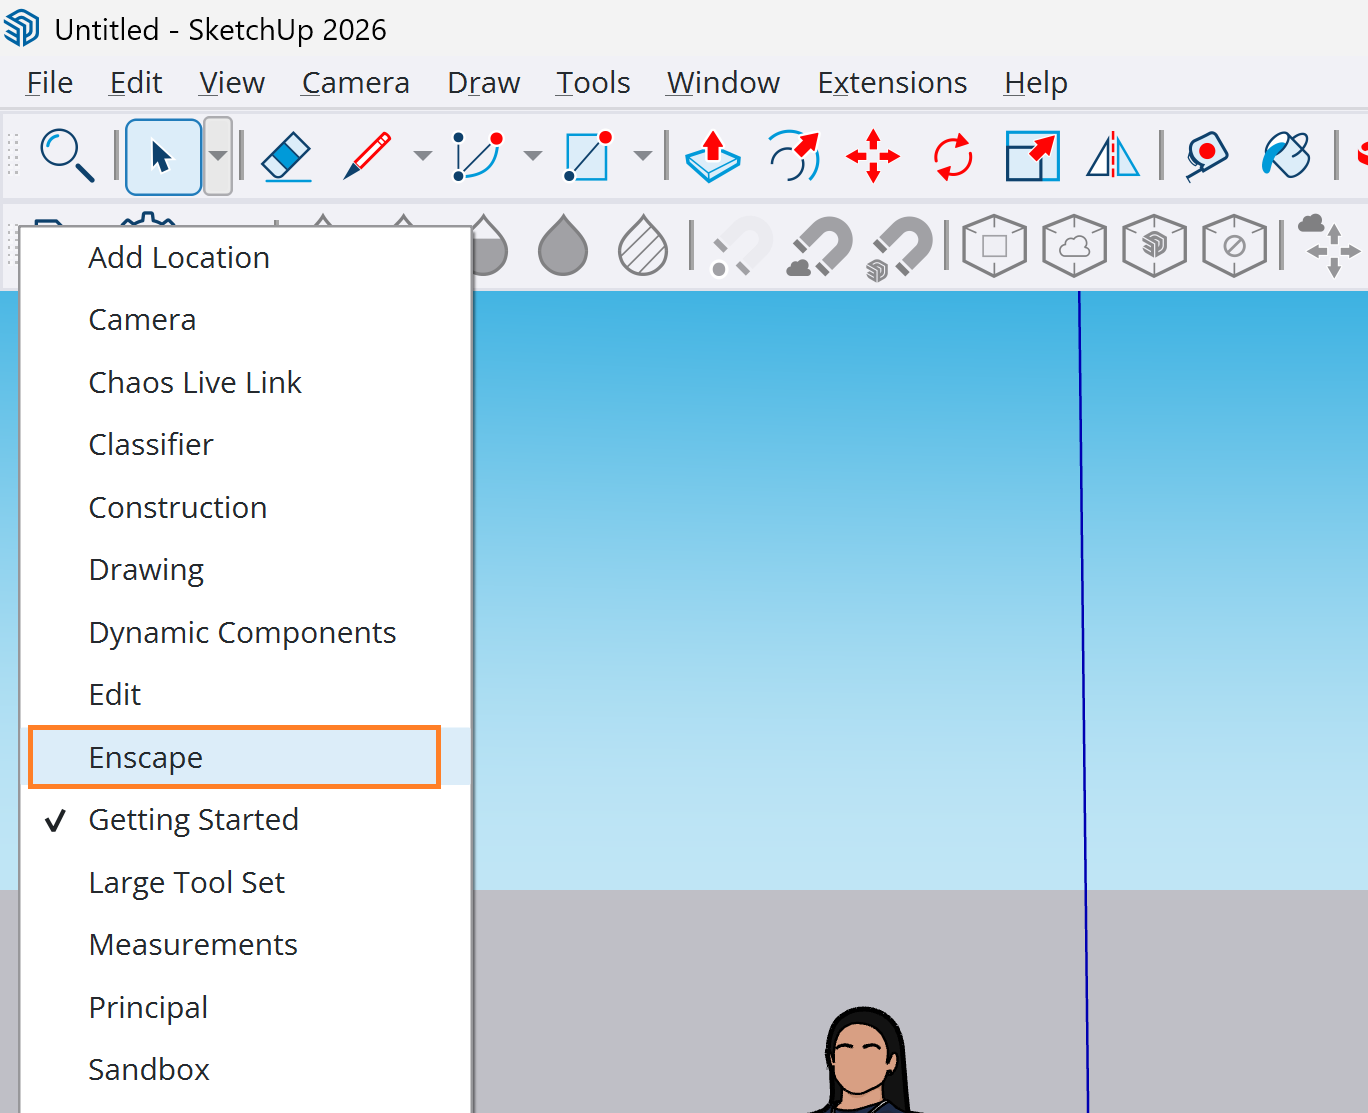
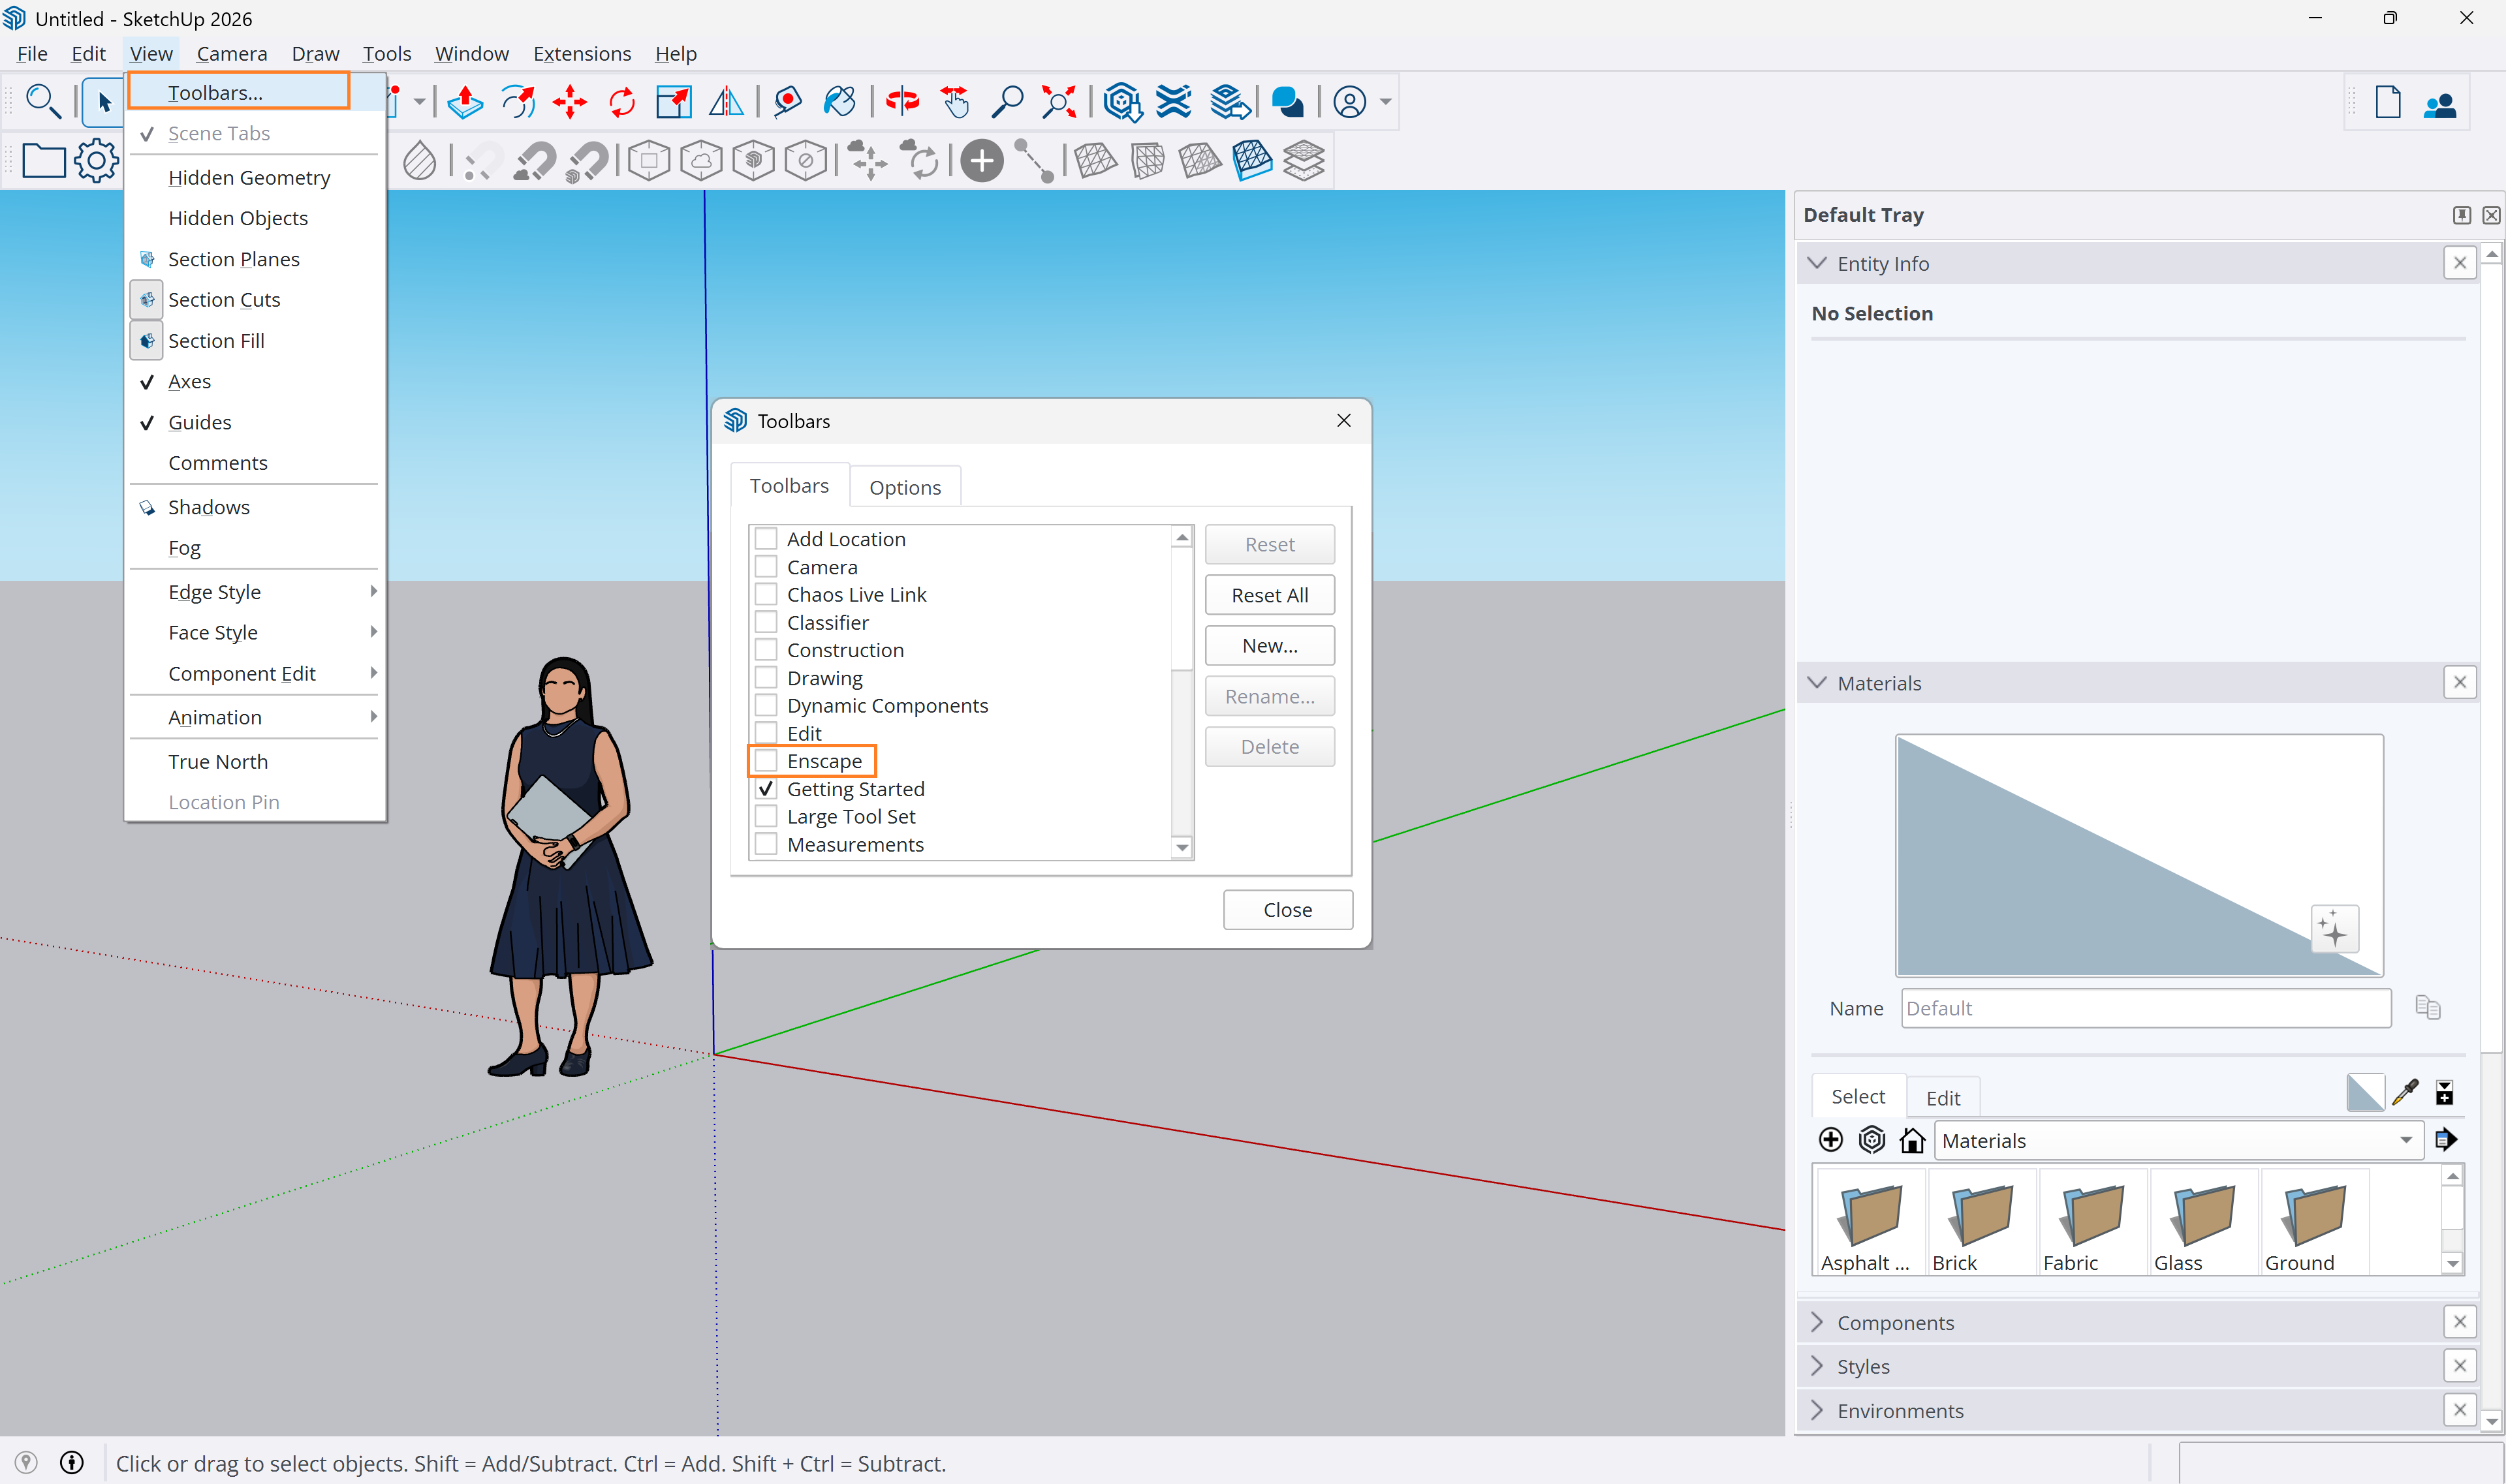
Right-click in the toolbar area and select Enscape. From SketchUp’s menu, go to View > Toolbars. Enable Enscape in the Toolbars window list. Loading the toolbar for the first time opens it as a floating toolbar. Left-click and drag it to the toolbar area to dock it next to the rest of the toolbars.
1. Right-click the toolbar area.
2. Go to View > Toolbars and select Enscape in the Toolbars window.
Enscape Toolbar
Once Enscape is installed, follow these steps to view your SketchUp project in Enscape:
Open your SketchUp project file. Click on the Start Enscape button in the Enscape ribbon. The Enscape window opens in the perspective view. You can leave Enscape open while you make any desired changes in SketchUp (e.g. cross sections, materials or geometric changes in the model). Your changes show instantly as long as you have Live Updates
activated in Enscape. Activate the
Synchronize Views
(
), to synchronize the SketchUp view to Enscape.
Starting Enscape in SketchUp Enscape in Revit Go to Revit’s Menu ribbon and click on Enscape to open the Enscape toolbar.
Location of the Enscape menu in Revit
Follow the steps below to activate all buttons in the Enscape toolbar.
Make sure you have at least one 3D view available in your project. Create and select a valid 3D View in Revit so that the Start button in the Enscape ribbon bar is no longer grayed out. Press the Start button in the Enscape ribbon. The view’s associated phasing and design option is used for Enscape’s view.
Starting Enscape in Revit Enscape in Rhino There are several ways to enable the Escapade toolbar depending on your operating system.
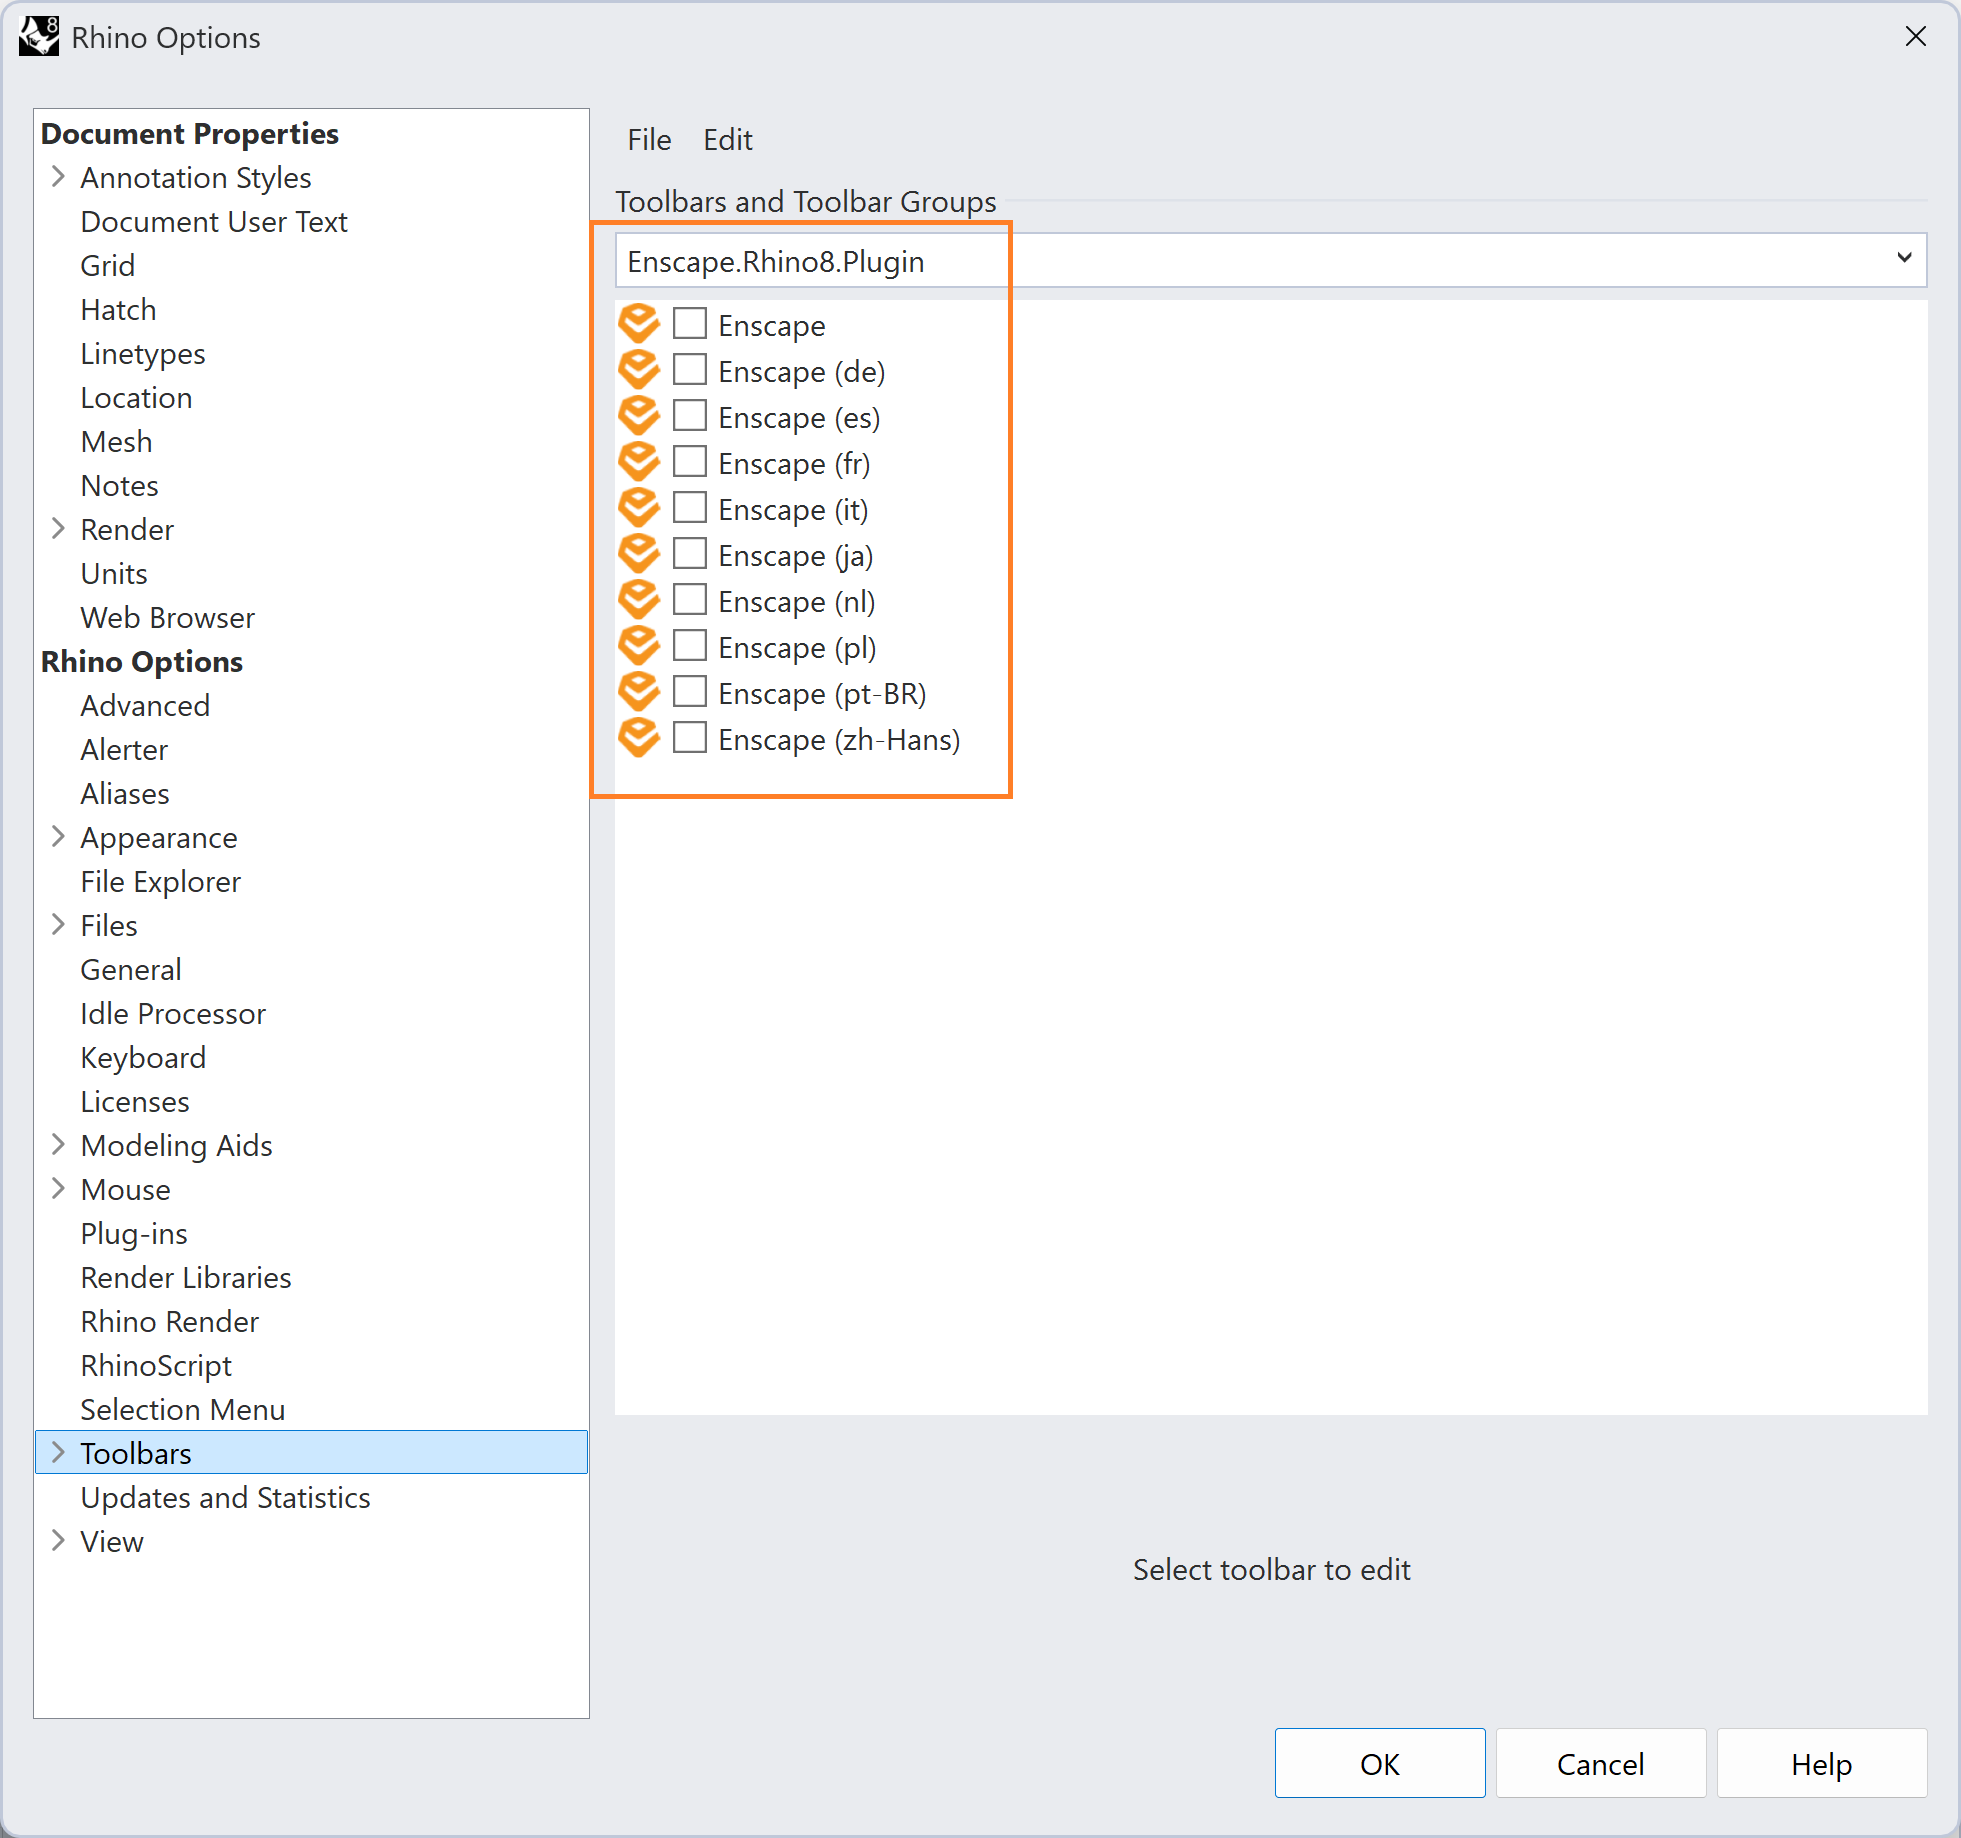
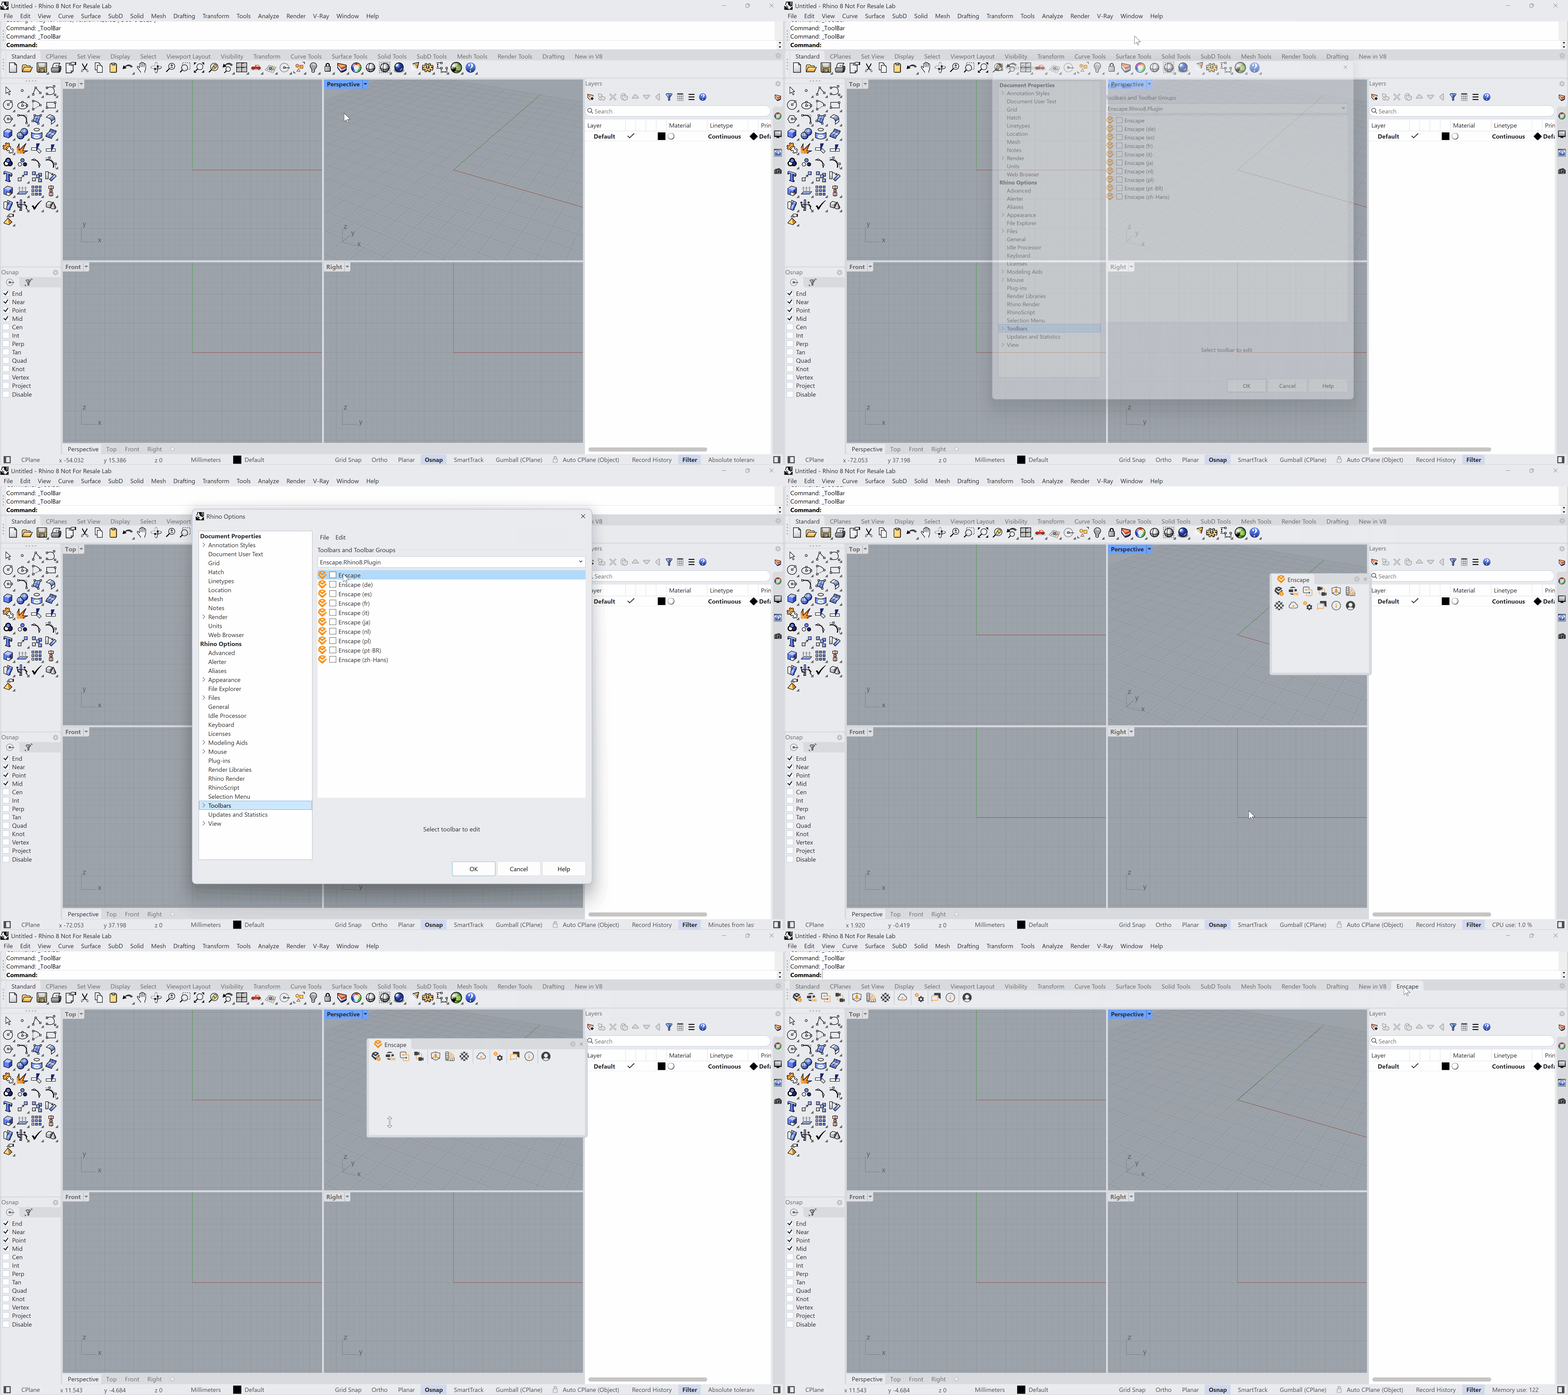
In Rhino, go to Window > Toolbars… menu. In the Rhino Options window, select Toolsbars on the left-hand side and enable the desired Enscape toolbars from the provided list. The Rhino Options window
If you do not see the Enscape menus in the Rhino Options window, make sure you have selected the right category from the Toolbar and Toolbar Groups dropdown menu.
Docking the Enscape toolbars in Rhino
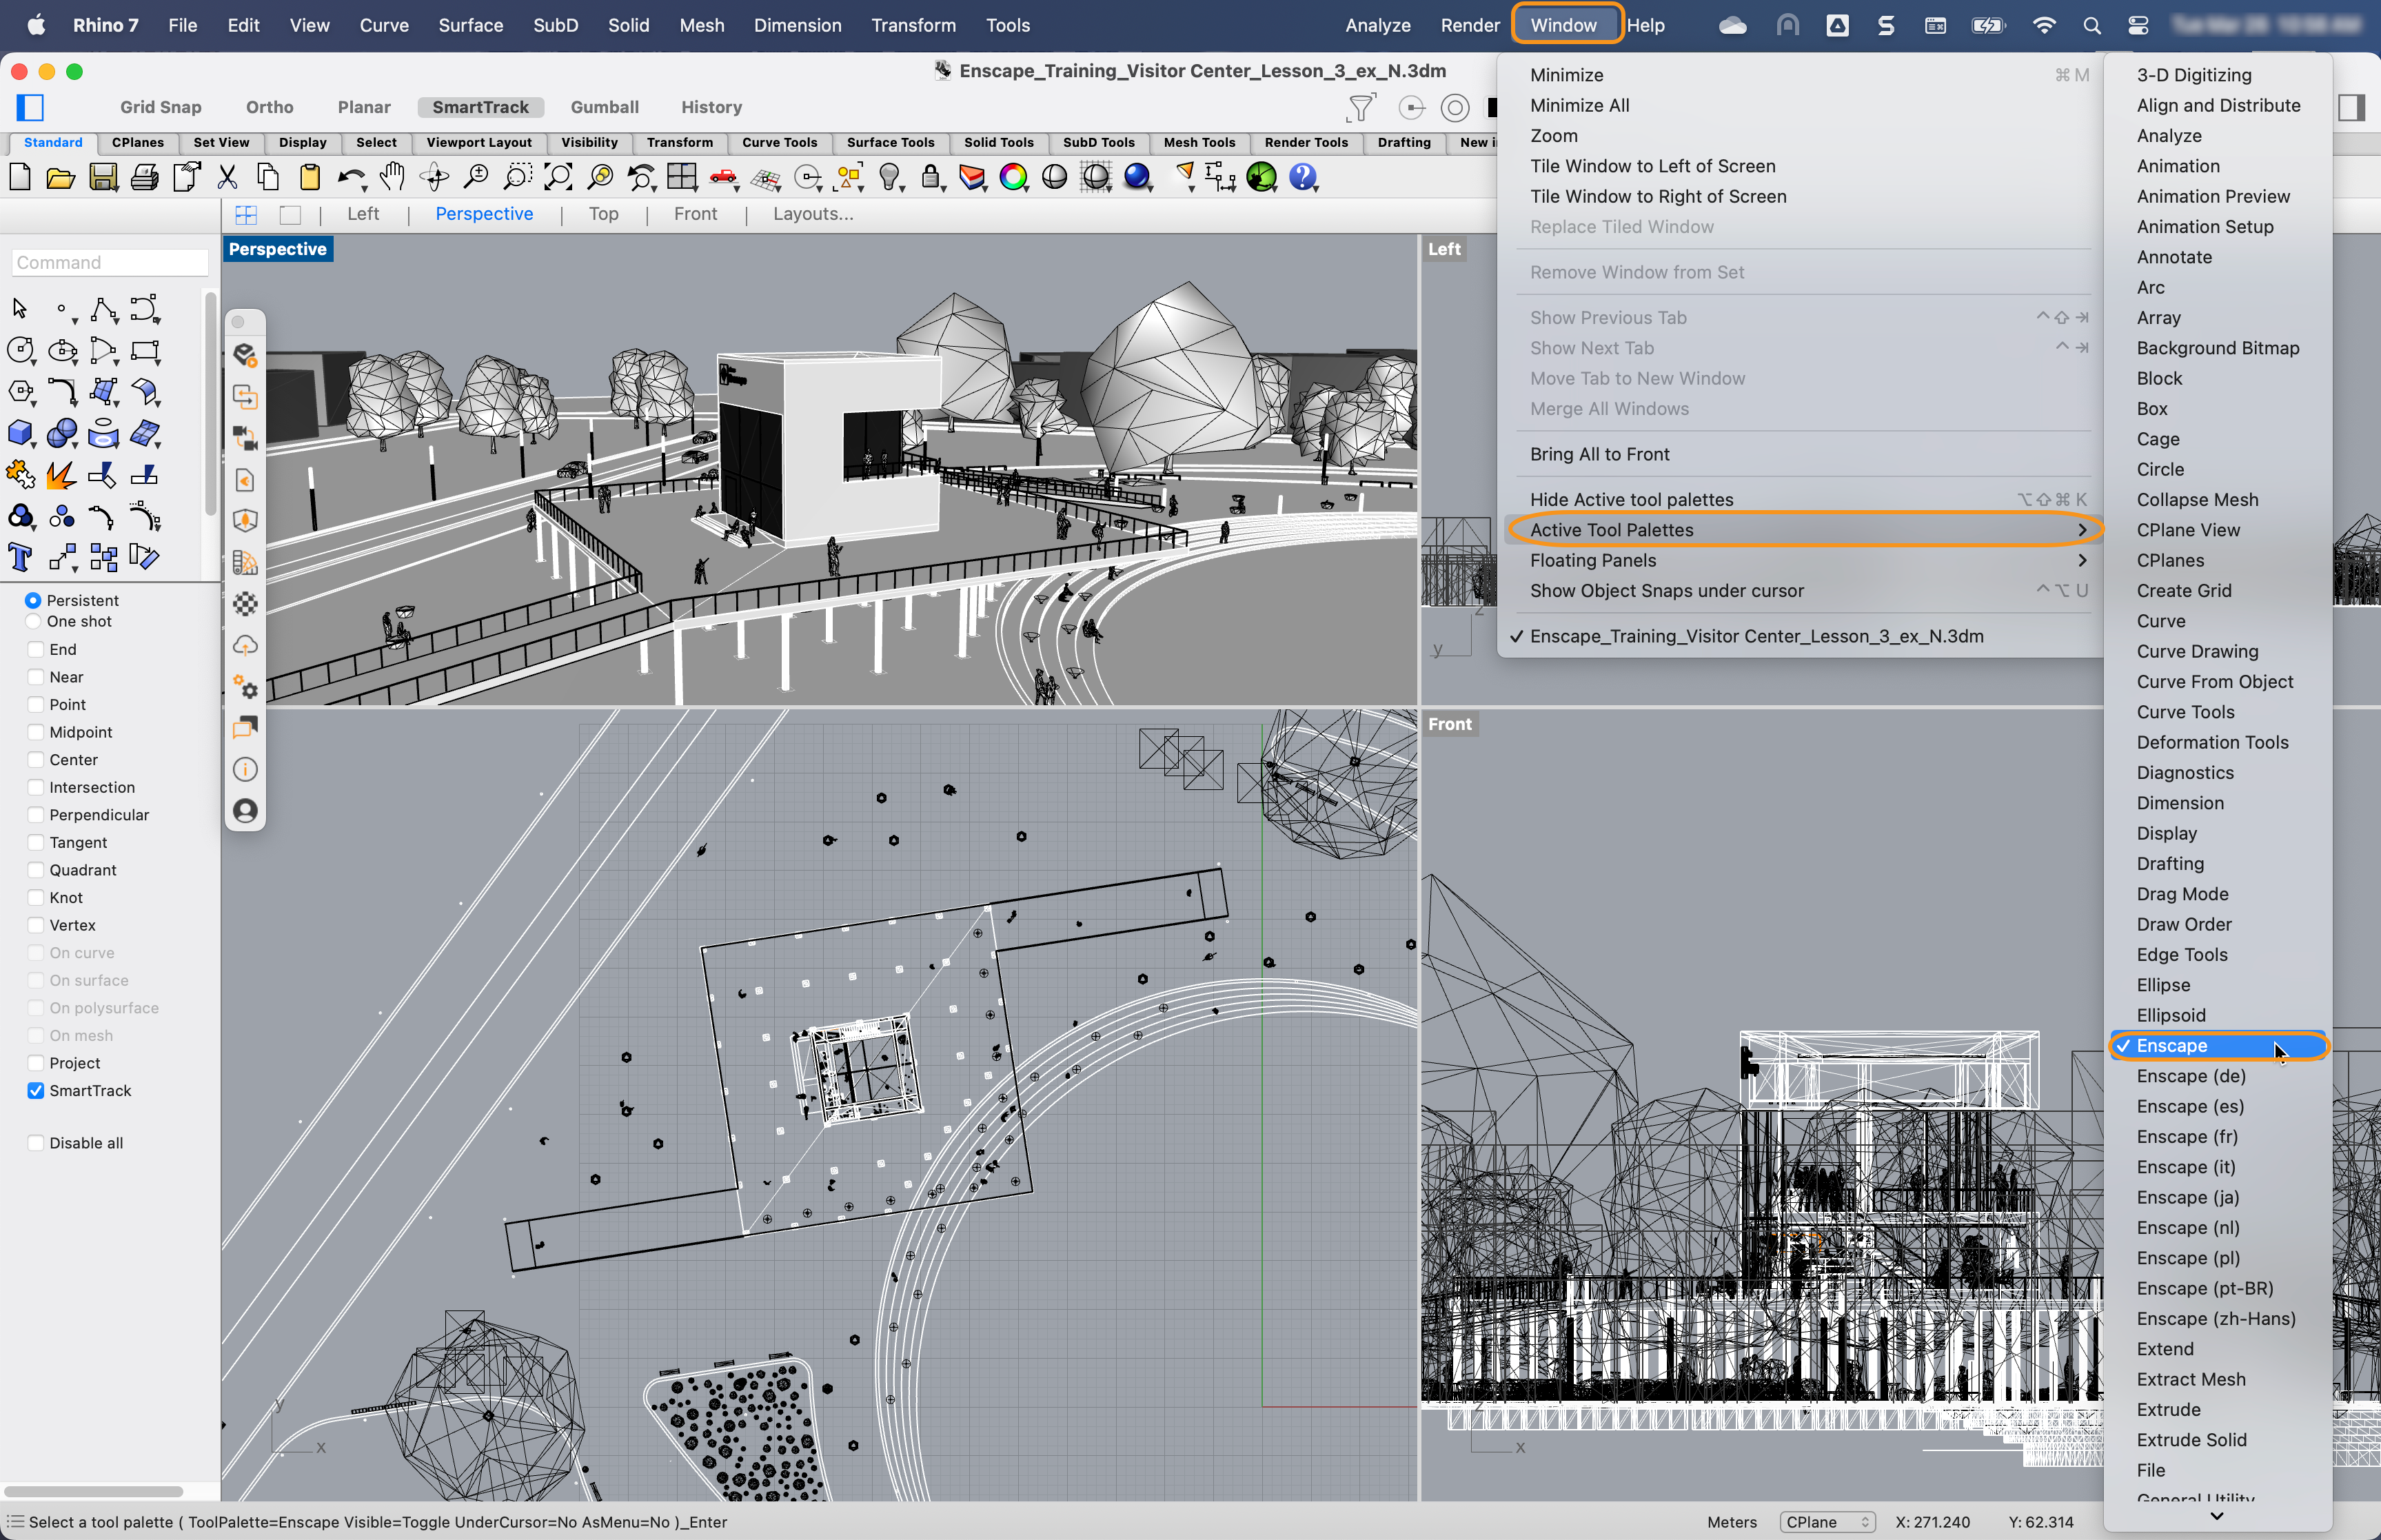
For macOS, go to Window > Active Tool Palettes > Enscape option.
Once clicked, a floating Enscape window appears.
Active Tool Palettes
Follow these steps to view your Rhino project in 3D:
Open your Rhino project file. Click on the “Start Enscape” button in the Enscape ribbon. The Enscape window will open separately. Leave Enscape open while you make any desired changes in Rhino (e.g., cross sections, materials, or geometric changes in the model). Your changes appear instantly as long as you have enabled Live Updates for Enscape. Activating the Synchronize Views syncs the perspective view from Rhino to the Enscape window.
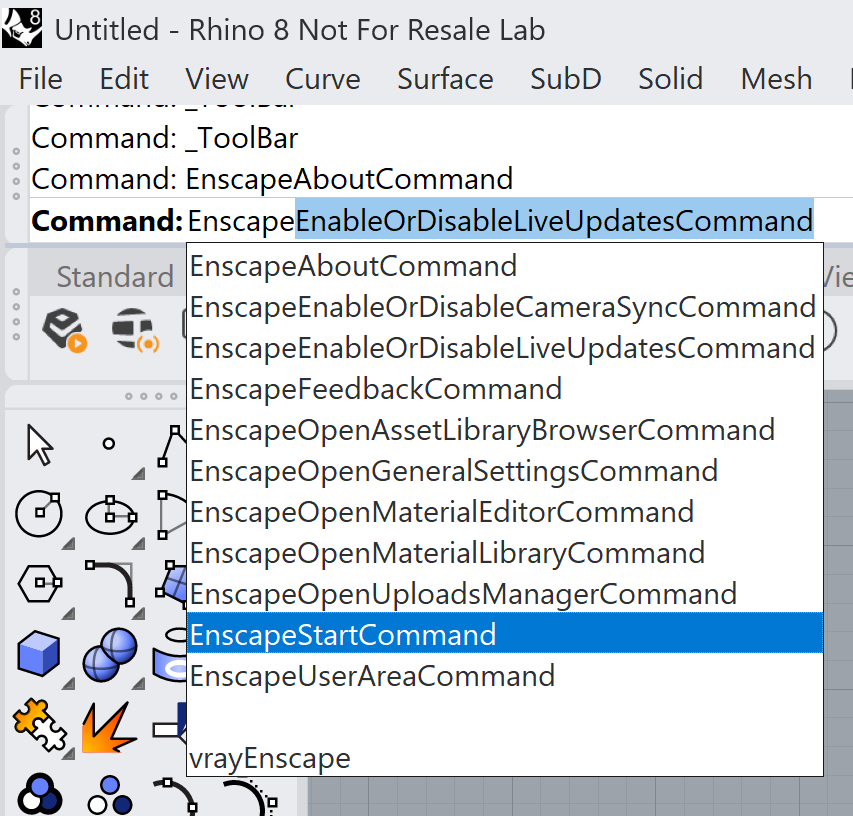
Use the Rhino Command line for quick access to most of Enscape commands. Type Enscape in the Command line to see a list of all available Enscape commands.
Access Enscape via the Rhino Command function
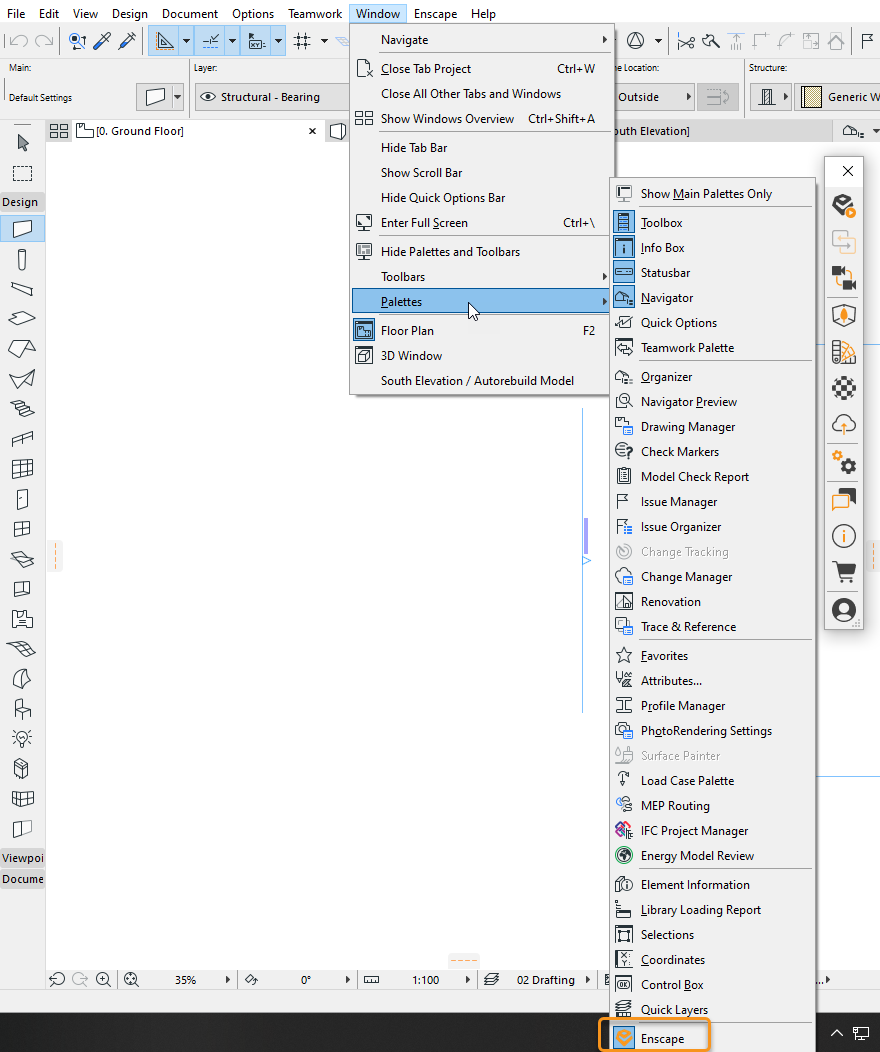
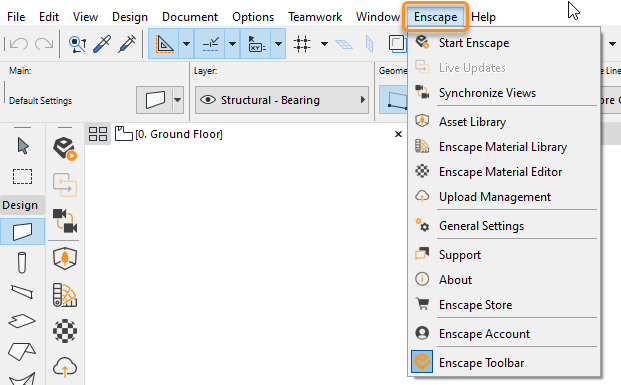
Starting Enscape in Rhino Enscape in Archicad Go to Window > Palettes menu and select Enscape from the displayed list.
Open the Enscape Palette
There is also an Enscape menu in the Rachicad’s menu ribbon. The Enscape menu provides access to all Enscape functionalities.
Enscape in the top-level Archicad menu
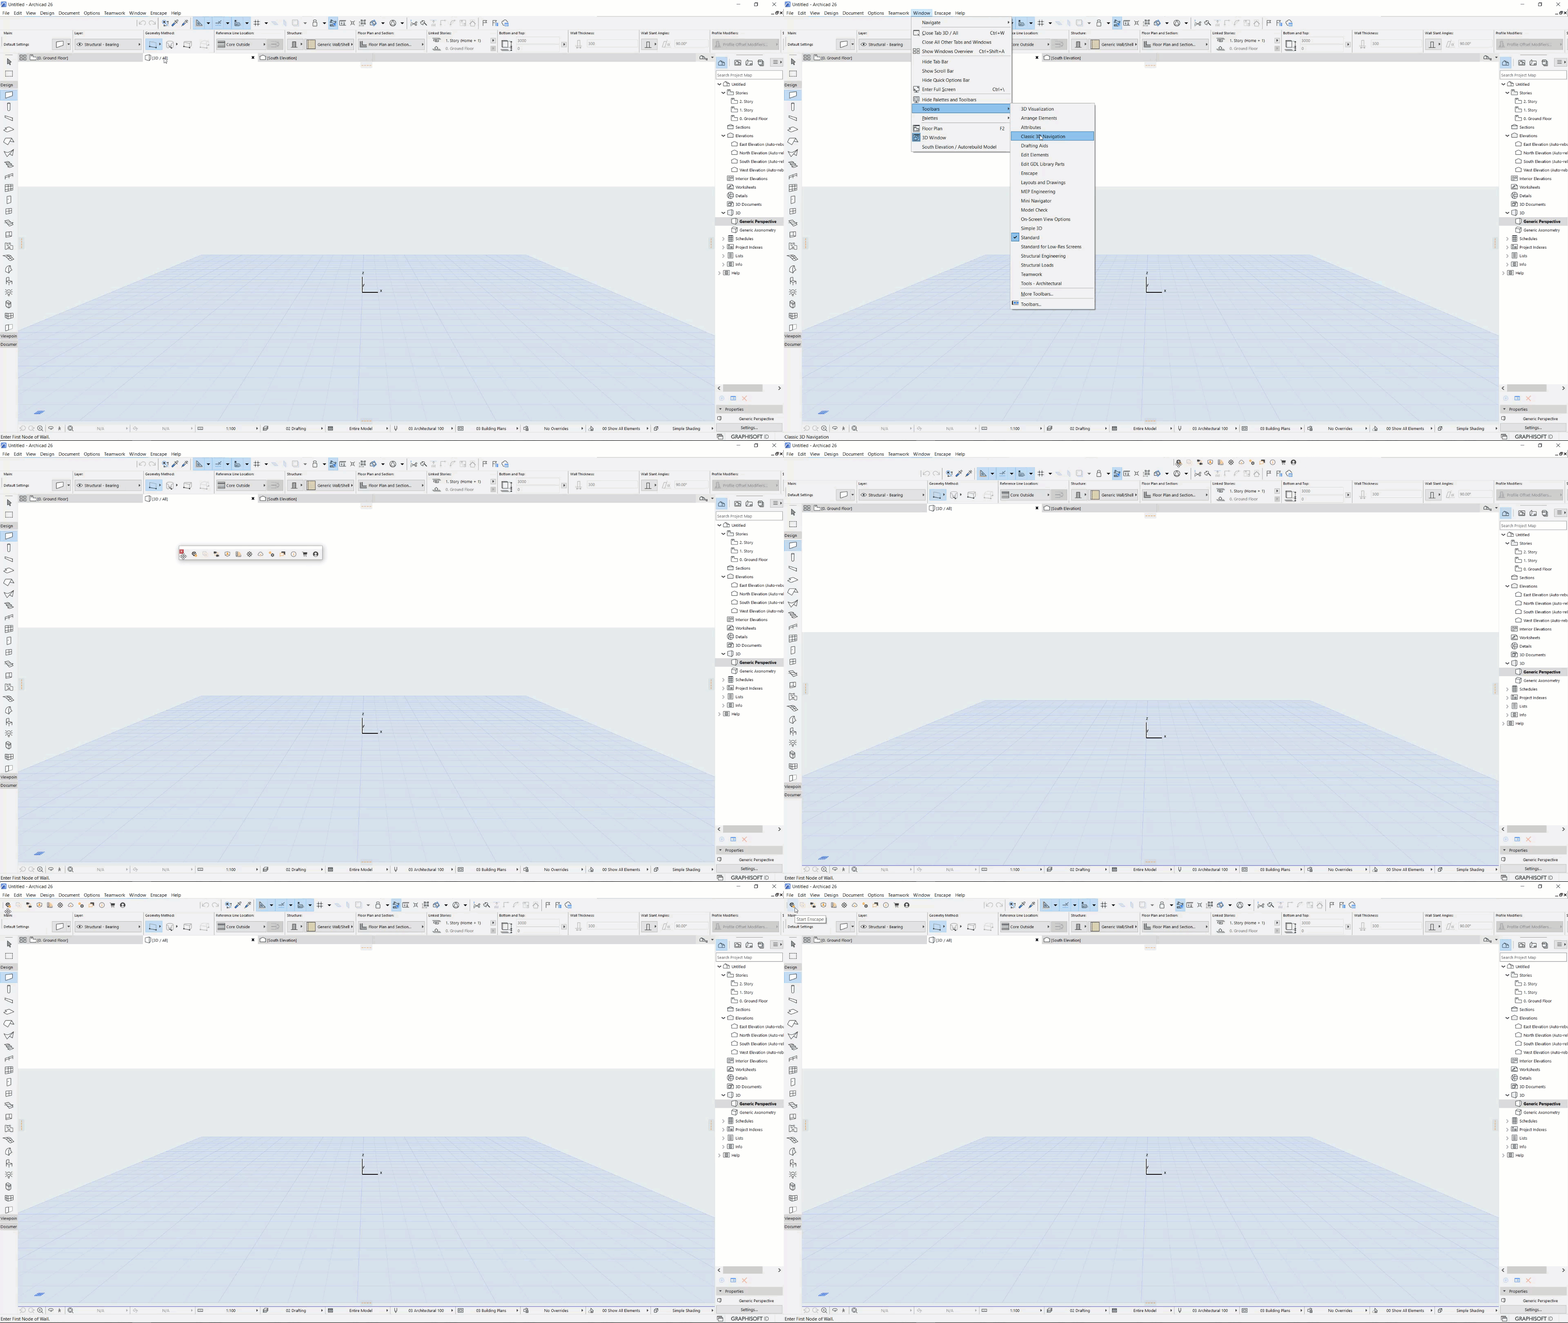
Select the Archicad Toolbars option to create an Enscape Toolbar, which you can then dock horizontally or vertically in the Archicad workspace.
The Enscape Toolbar opened through the Palette option is vertical by default. To create a horizontal Enscape Toolbar, follow the steps below:
Click on Window > Toolbars > Toolbars.. option. This opens the Archicad Work Environment window, and the Toolbars section is highlighted. Click on Toolbar Options and then New Toolbar… Name it Enscape. From the List drop-down menu options, select All new commands in alphabetical order. From the list, highlight all options that have (Enscape) after the name, apart from Enscape (Enscape), Enscape Toolbar (Enscape), and then click on Add selected. This adds these buttons to the Enscape Toolbar you created previously. Then re-order the options to suit your needs. Keeping the Enscape Palette open and visible whilst you do this, so you can mirror the order for consistency. Once done, click OK to close the Work Environment window. Then, got to Window > Toolbars again to see Enscape listed as a Toolbar option. Click on it, and the horizontal Enscape Toolbar that you created in the previous steps becomes visible, either floating or docked. It can be left floating or dragged and docked vertically or horizontally to the Archicad workspace. Follow these steps to view your Archicad project in 3D:
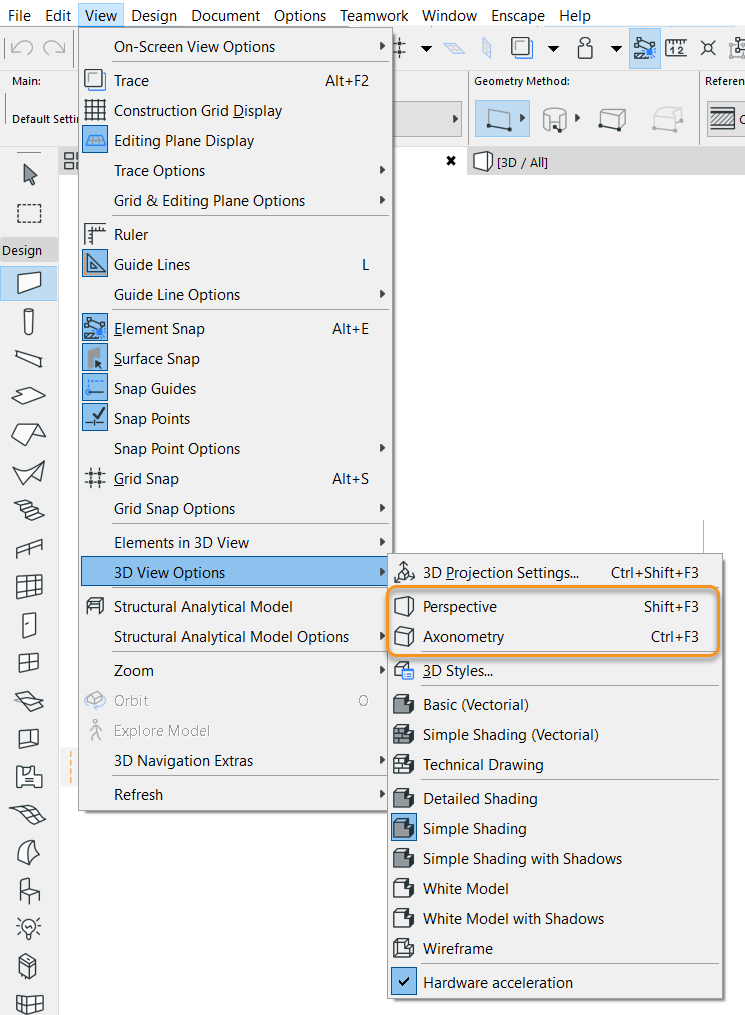
Open your Archicad project file and make sure you have either a Perspective or Axonometry view open. Click on the Start Enscape button in the Enscape menu, palette, or toolbar. The Enscape window opens separately. Leave Enscape open while you make any desired changes in Archicad (e.g., cross-sections, materials, or geometric changes to the model). Your changes show up instantly, as long as you have activated the Live Update
in Enscape. Activating the Synchronize Views syncs the perspective view from Archicad to the Enscape window.
Open the required view in ArchiCAD
Starting Enscape in Archicad Enscape in Vectorworks After the Enscape installation is complete, the Enscape toolbar is displayed in Vectorworks.
If the toolset is missing, uninstall Enscape and reinstall it following the workflow in the First Steps article.
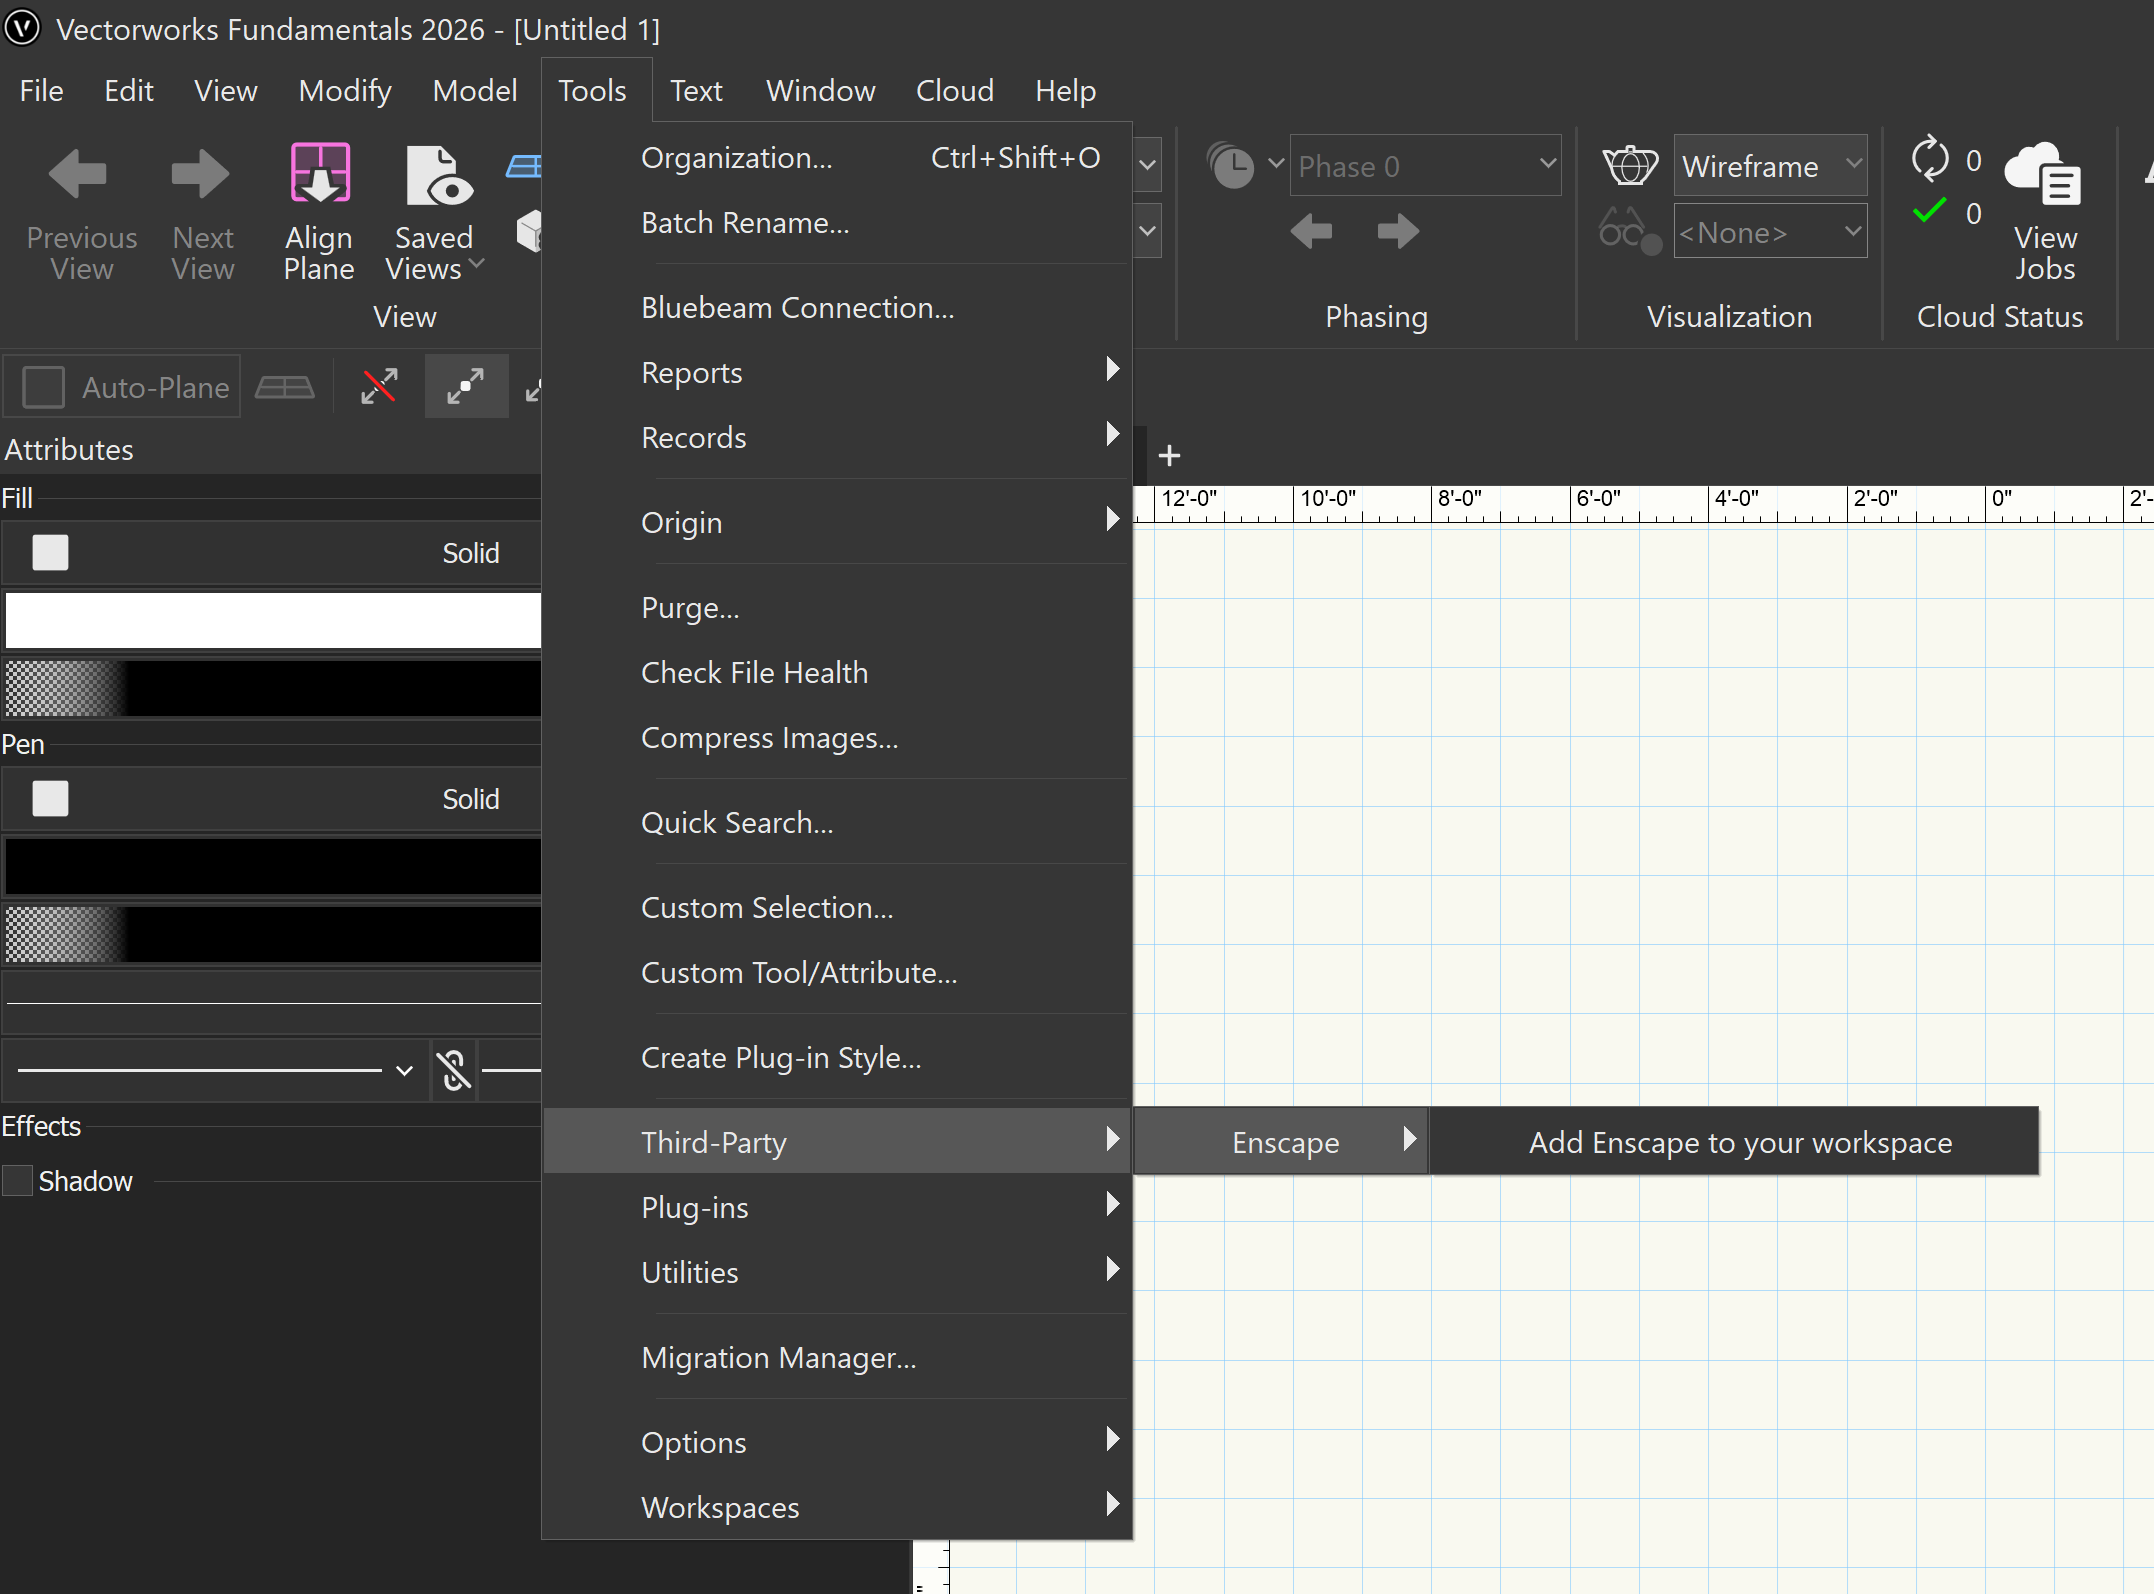
If the toolset is still missing, go to Tools > Third-Party > Enscape > Add Enscape to your workspace to load it manually.
If the tool set is not immediately visible on your macOS machine, add it manually to your Vectorworks workspace via the Vectorworks menu: Tools > Third-party > Enscape > Add Enscape to workspace.
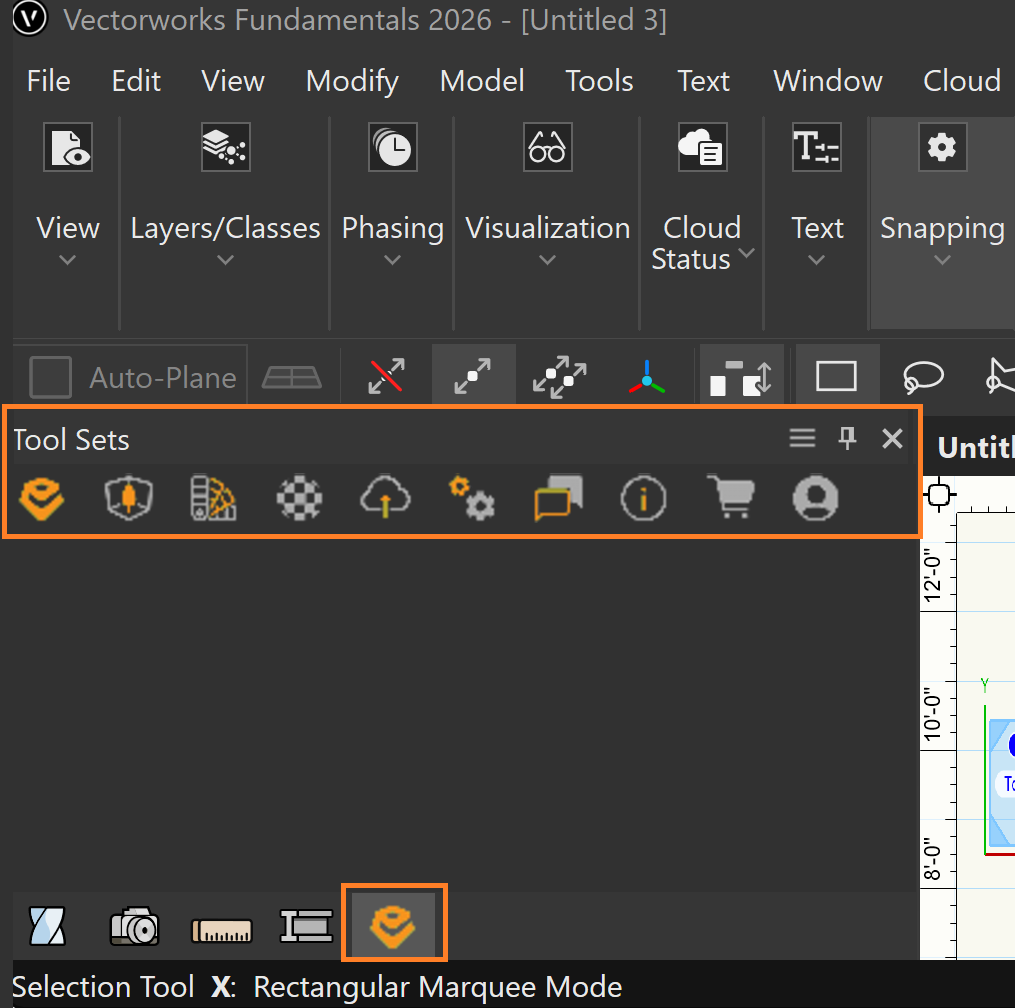
Open the Enscape tool set by clicking on the Enscape tab.
Location of Enscape Tool Set in Vectorworks
Follow these steps to view your Vectorworks project in 3D:
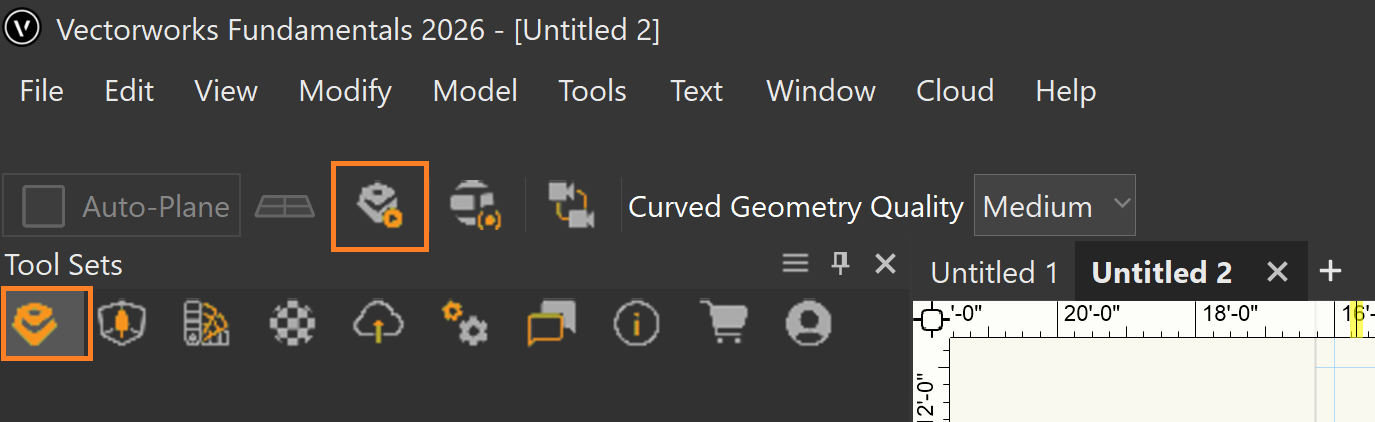
Open a Vectorworks project file. Click on the Enscape logo in the tool set. This triggers the Enscape toolbar at the top of the screen. Clicking the Start button in the Enscape toolbar opens the Enscape window. Start Enscape via the toolbar
Starting Enscape in Vectorworks