V-Ray for Blender
How to Create a Water Material
This page guides you through the process of making a water-like material using the V-Ray Material.
Last updated 21 October 2025
This page guides you through the process of making a water-like material using the V-Ray Material.
Overview
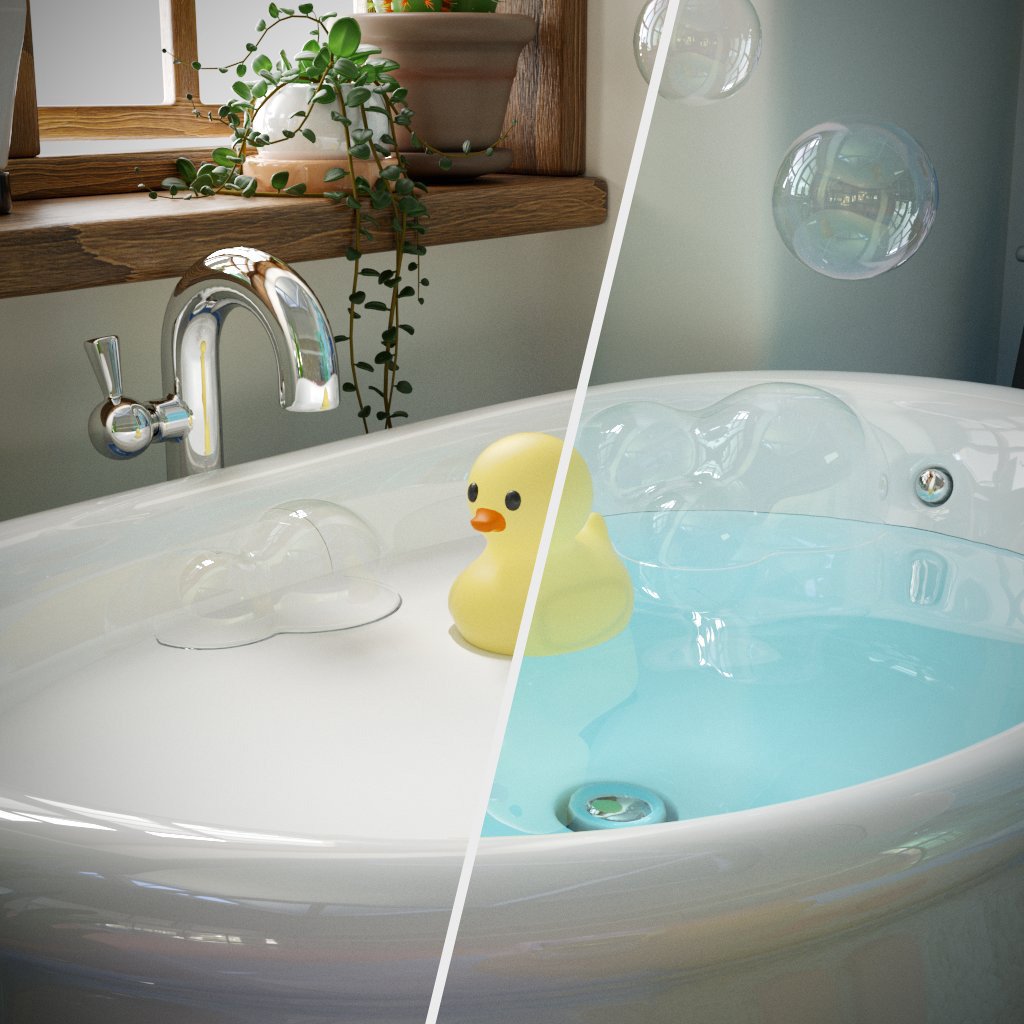
Before we start, note that purified water in the physical world is colorless and almost completely reflective and refractive. As a general guideline, water and any water-based materials, such as milk, juice, skin, etc., need to have an index of refraction (or IOR) of 1.33.
Download the scene to follow along
This scene is made with V-Ray 7 hotfix 2, on Blender 4.3.
Steps
1 Choose Camera

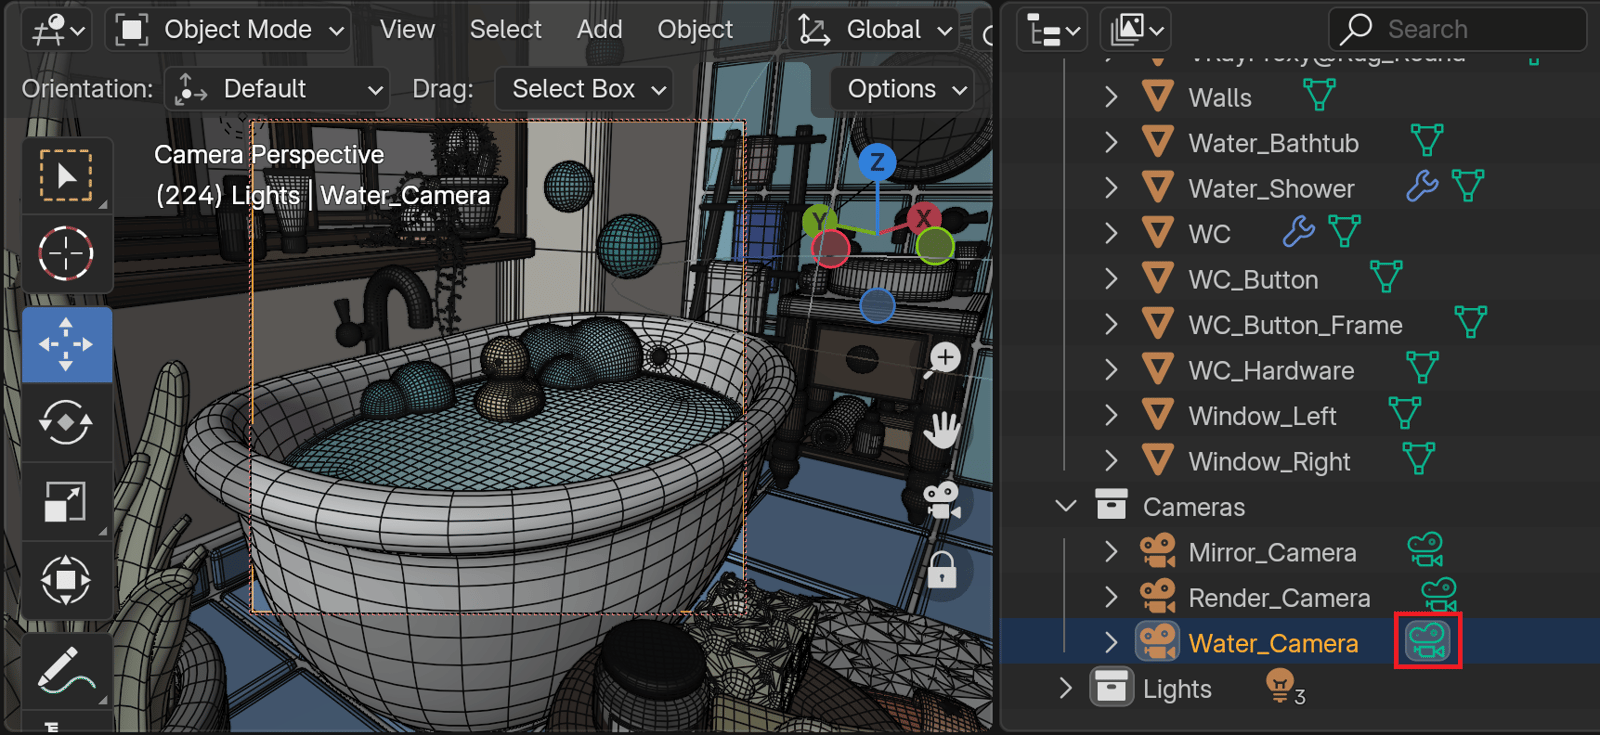
First, let's set the camera. Go to the Outliner and find the Cameras collection. There, you can find the Water_Camera. Click on the green Camera icon next to its name ( ) to set it as the render camera. You should also see the bathtub come into focus in the viewport. The camera has its properties preset for the scene. You can go into its properties and explore them in the Camera Properties tab.

2 V-Ray Material
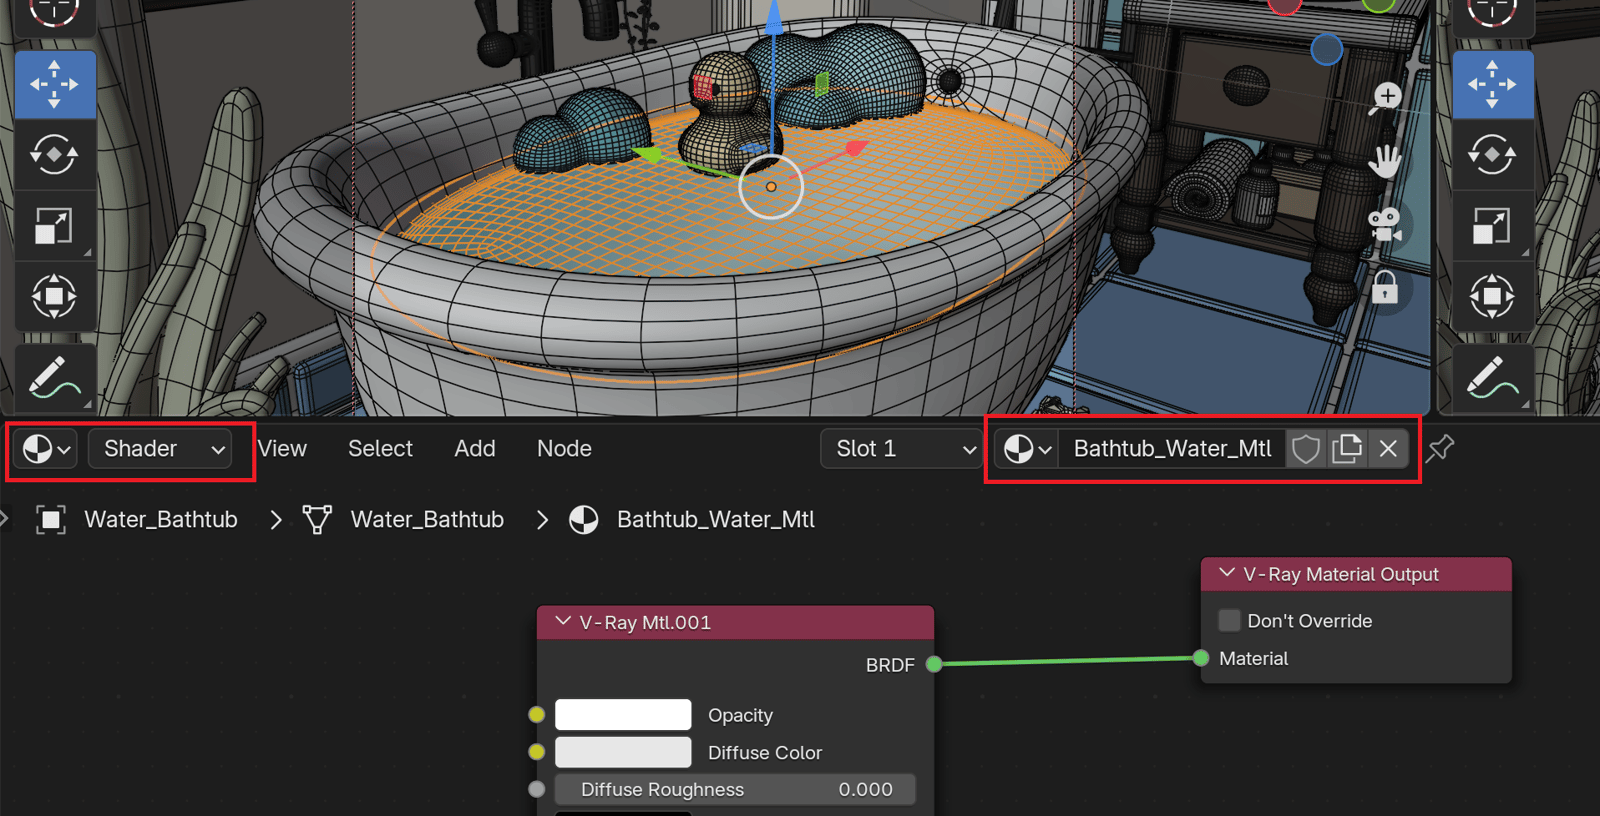
Select the Water_Bathtub geometry either from the viewport or from the Outliner. Open the V-Ray Node Editor and set it to the Shader Node Tree. You will see that the Bathtub_Water_Mtl is already assigned. It is a blank V-Ray Material. Let's edit its properties to simulate water.
Let's go through the settings in order.
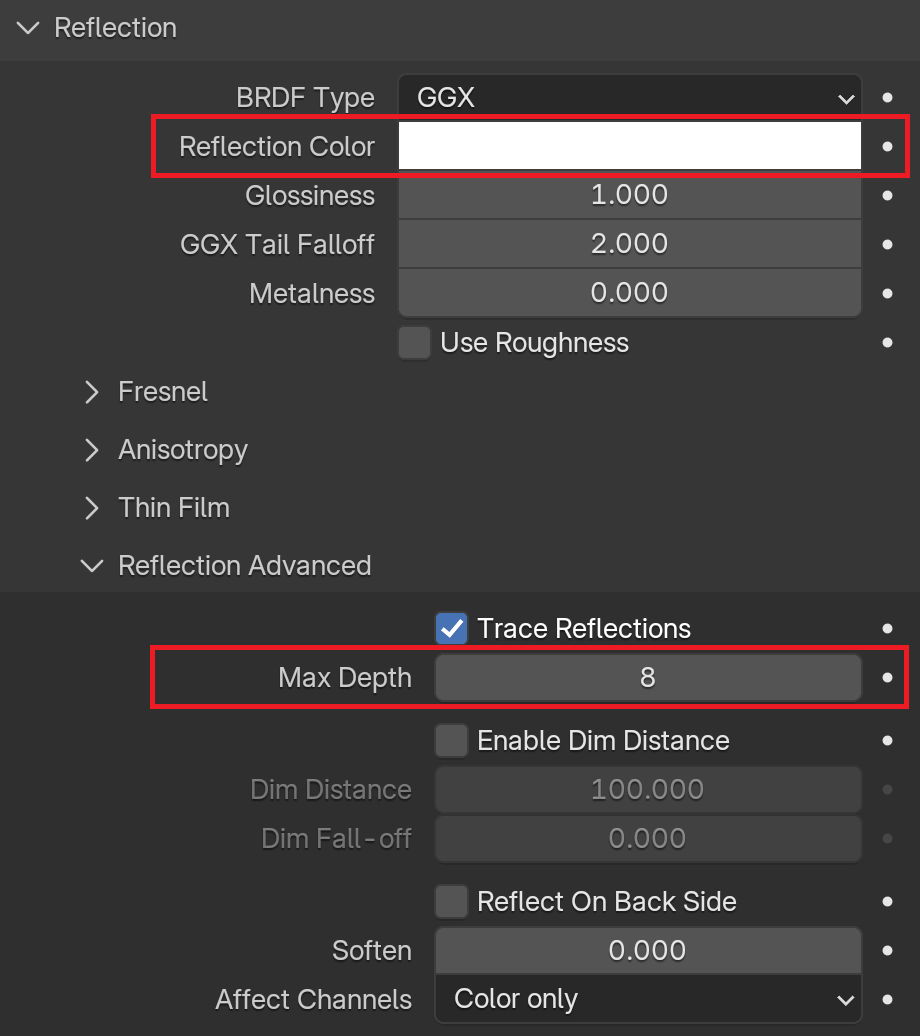
- Firstly, in the Reflection rollout, set the Reflection Color to pure white. This makes the material completely reflective.
- You can leave the Max Depth parameter from the Reflection-Advanced rollout at its default value of 8 or switch it to a higher value. The reflection max depth specifies the number of times a ray can be reflected. Since water is highly reflective, it requires values between 7 and 10 to look right. Note that if the water is inside a clear glass, the glass itself requires the same reflection max depth parameter as the one set for the water material.
In the Refraction rollout, set the following options.
- Set Refraction Color to pure white. Since the Reflection Color is also pure white, this causes the material to be fully refractive.
- Refraction IOR =1.330, which is an appropriate IOR for water.
- Since the tub is deeper and holds more water, we've added a slight color to the water by setting the Fog Color to a bright blue (Hex #C3F6FF).
- Depth (cm) = 10.000. This makes the fog effect stronger, emphasizing the tub's depth.

3 Add Noise
Since water is rarely completely still, let's add some slight noise to the bathtub water. It will be visible only in the reflections, which should not be mirror-like.
In the V-Ray Node Editor, add a Noise node. You can click Shift + A to open the Add menu and look for V-Ray Noise. Set these properties:
- Size = 0.200
- Iterations = 2.000. This property can only be set from the node itself.
These options create very subtle noise.
Then, connect the Noise node to the V-Ray Material's Bump Map input socket.
To make the bump even more subtle, set the V-Ray Material's Bump Amount to 0.005.

4 Render Final Result
This scene has preset render and camera settings. You can explore them if you like. You can start a render from a number of places, mainly in the Render Properties tab, or from the V-Ray Menu. You need to start a Production Render to get the best result.

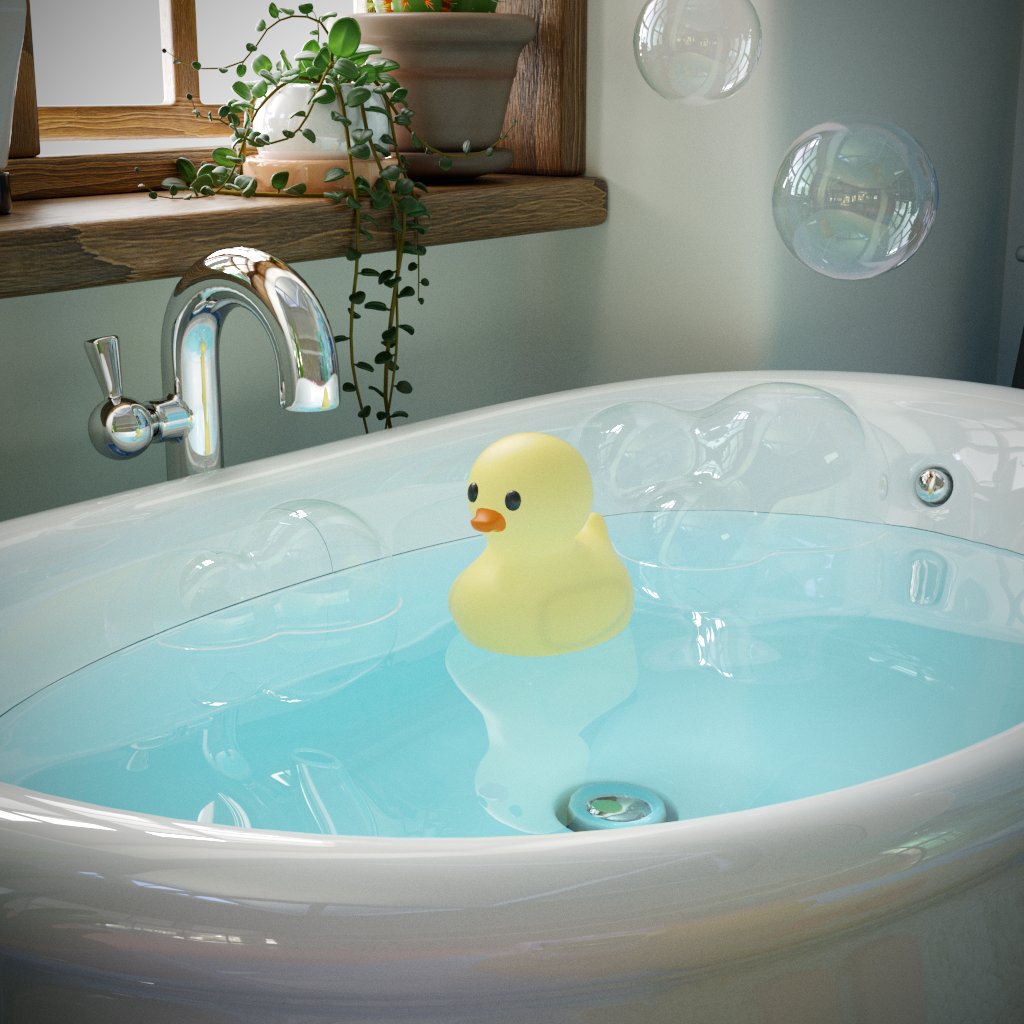
Here is the final result. You can see the transparency of the water, its refractiveness, its slight bump on the surface, and the reflections it produces.