V-Ray for Maya
VRayCurvature
This page provides information on the V-Ray Curvature Map.
Last updated 19 September 2025
This page provides information on the V-Ray Curvature Map.
Overview
VRayCurvature is a texture that will effectively sample the underlying mesh for curves. A region around each shaded point gets sampled with additional rays (similar to VRayDirt) and all additional normals are averaged to get a smooth normal at the original point. This normal is used to compute the color, which depends on the Mode of the map. The parameters should be adjusted by trial and error since they generally depend on the scale used, hence the defaults might not be appropriate at all in some cases.
UI Path: ||Hypershade|| > Create panel > VRay section > Utilities > VRay Curvature


Parameters
Mode – Switch between respective modes.
Legacy – Does not distinguish if the mesh is curving outward (convex) or inward (concave) but instead takes into account only the amount of overall curvature.
Convex – Generates a grayscale based on the mesh's outward curve.
Concave – Generates a grayscale based on the mesh's inward curve.
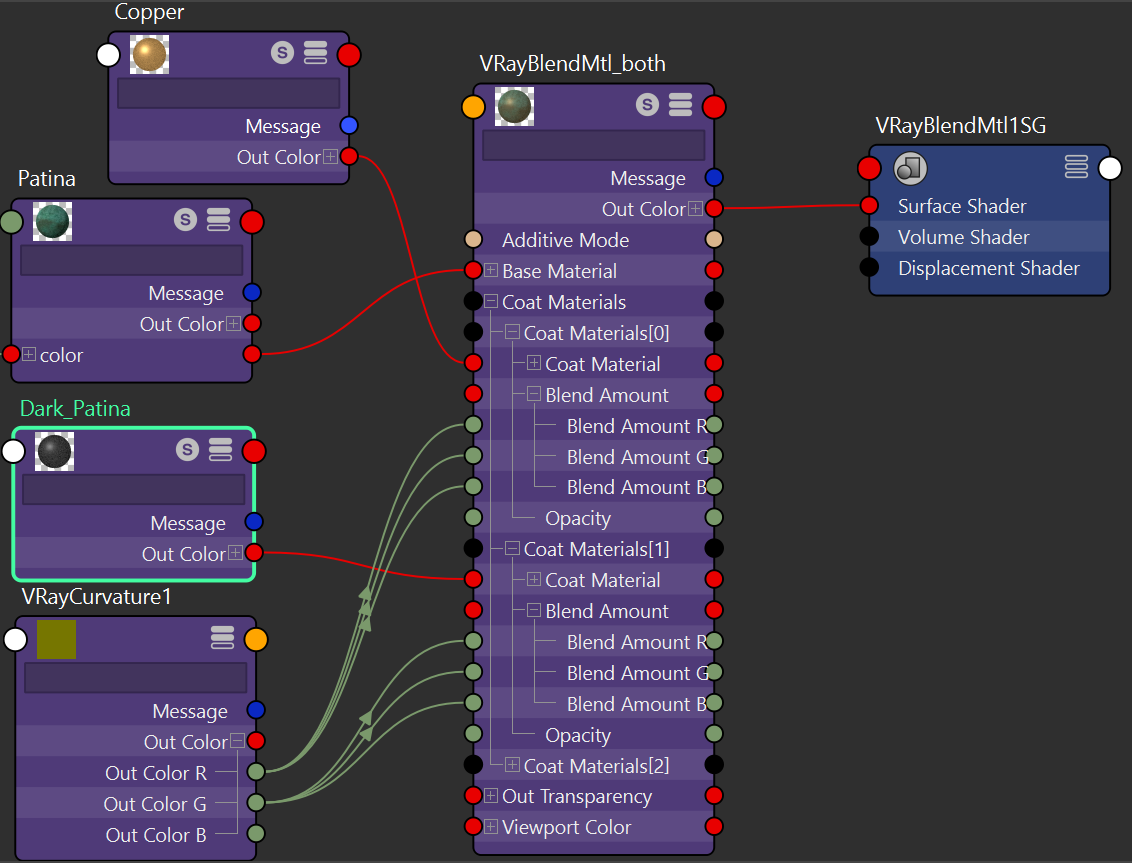
Both – Generates a red-green gradient based on both the mesh's convex and concave. Red corresponds to the mesh's convex and green corresponds to the mesh's concave.
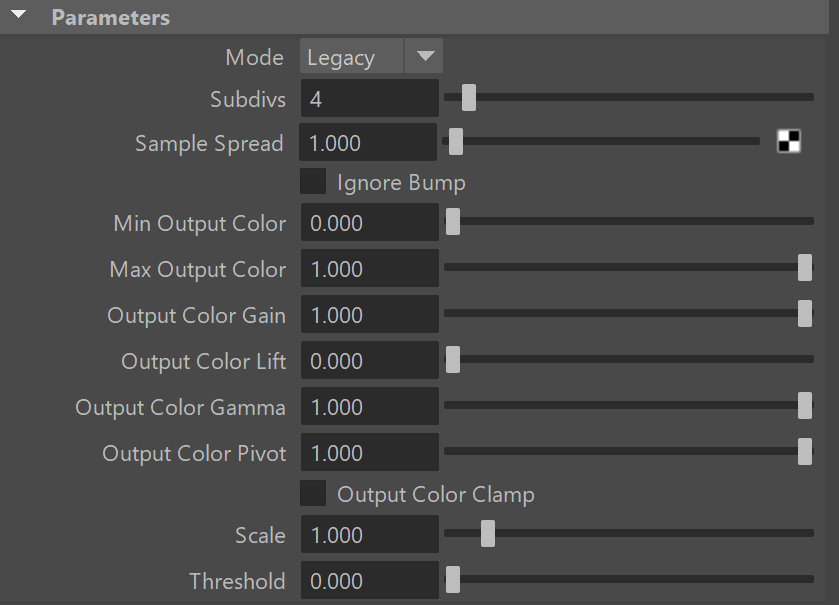
Subdivs – Controls the number of samples around each shaded point.
Sample Spread – Controls the radius of the sampled region.
Ignore Bump – When enabled, excludes Bump maps from VRayCurvature computations.
Min Output Color – Specifies the minimum output color value for the most concave area (the dents in the mesh). Default value is 0 - completely black.
Max Output Color – Specifies the maximum output color value for the most convex area (the peaks in the mesh). Default value is 1 - white.
Output Color Gain – Multiplies the output values.
Output Color Lift – Uniformly lightens the output values.
Output Color Gamma – Applies gamma correction to the output values.
Output Color Pivot – Pivots the value to the gamma correction (output values equal to the pivot value are left unchanged).
Output Color Clamp – When enabled clamps the Min Output color and Max Output color values in [0,1] range (negative values are output as 0 and values above 1 are being output as 1)
Scale – Factor determining the scale that the curvature traces. Can be used to match curvature between big and small objects.
Threshold – Controls the amount of the sampled area.
Example: Curvature Modes
V-Ray Blend material (with mixed Copper and Patina materials) is applied to the geometry. V-Ray Curvature map is used as the blend amount for the Coat material. In the Convex and Concave examples, the Threshold is set to 0.300. All other parameters are left at their default values. In the Legacy example, as well as the Threshold adjustment, the Output Color Lift is set to 0.100 and the Sample Spread is assigned a value of 1.500. All other parameters are left at their default states. See the Both Mode note for information on how to set up that mode.


Hypershade setup for Both mode
Example: Ignore Bump
In this example, we've used a V-Ray Curvature map to darken the most protruded areas and simulate a burnished leather effect. To do so, a darker version of the original leather material is created using a color correction map and both nodes are linked to a V-Ray Layered Texture as separate layers. V-ray Curvature serves as the mask of the color-corrected layer. Here the V-Ray Curvature map uses 6 Subdivs, a Sample Spread of 0.4. The Max Output Color is set to 5 and the Threshold is set to 0.05. All other parameters are left at their default state.

Ignore Bump OFF
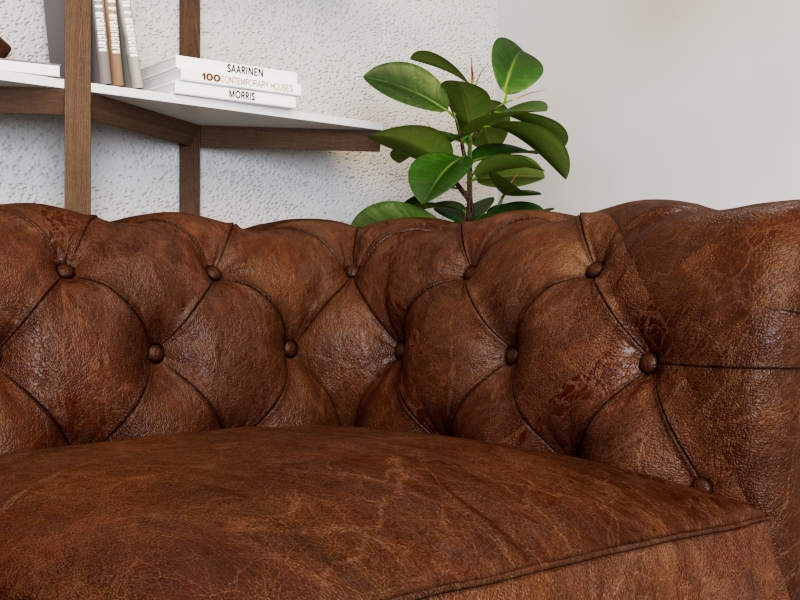
Ignore Bump ON
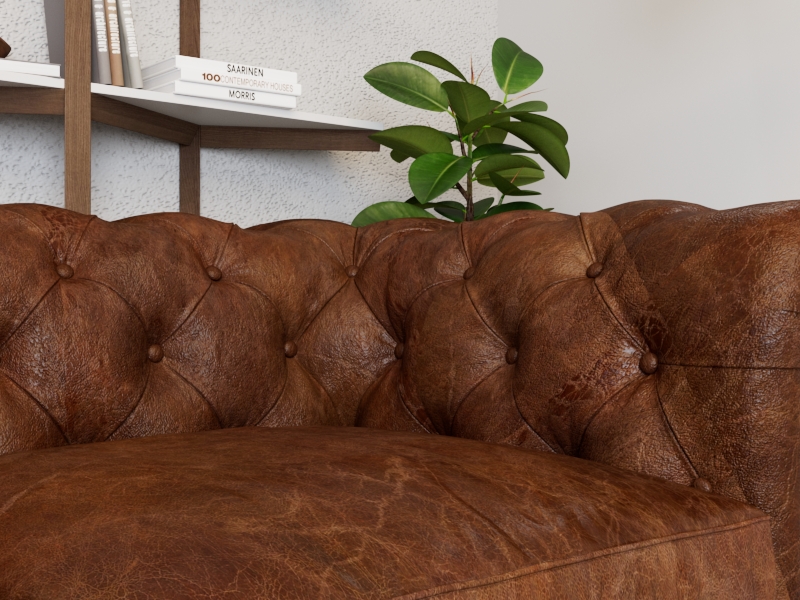
Original