V-Ray for SketchUp
Rock
This page provides information on the V-Ray Rock Texture.
Last updated 1 September 2026
This page provides information on the V-Ray Rock Texture.
Overview
The Rock texture map can be used to generate a procedural rock texture. It uses two colors that can have texture maps assigned to them.


UI Paths
||V-Ray Asset Editor|| > Textures (right-click) > Rock
||V-Ray Asset Editor|| > Create Asset (left-click) > Textures > Rock
Maps
Color A – Controls the first color used by the Rock procedural. You can assign a texture map to this channel, which overrides the color if the checkbox is enabled.
Color B – Controls the second color used by the Rock procedural. You can assign a texture map to this channel, which overrides the color if the checkbox is enabled.
Grain Size – Controls the size of the fine grain features.
Diffusion – Lower values make the resulting texture sharper, while higher values blur the texture details more.
Mix Ratio – Controls the mix between Source A and Source B.
Color Manipulation
Invert Texture – Inverts the RGB texture values.
Alpha from Intensity – Uses the texture RGB intensity/luminance as alpha channel.
Color Gain – Corrects the color of the texture by multiplying the the RGB color values in the texture with the RGB color values specified here. When a texture is selected, it overrides the color as long as the texture checkbox is enabled.
Color Offset – Corrects the color of the texture by adding the RGB color values specified here to the RGB color values in the texture. When a texture is selected, it overrides the color as long as the texture checkbox is enabled.
Default Color – Specifies a default color used for polygons with no valid UVs. In case the map is not tiled, specifies a default color that is used outside the texture square. When a texture is selected, it overrides the color as long as the texture checkbox is enabled.

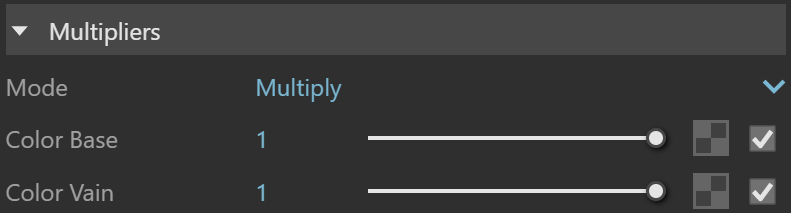
Multipliers
Mode – Specifies the multiplication mode of the colors.
Multiply – The color used for blending is black.
Blend Amount– The color used for blending is the one specified in the color slot.
Color A – Blends between a color and a texture, if specified.
Color B – Blends between a color and a texture, if specified.
Texture Placement
Type – Controls how the texture is positioned on the geometry.
2D (UV Channel) – The texture uses the object UV coordinates.
3D (Object Space) – Places the texture based on the local object coordinates independent of the object UVs.
3D (World Space) – Places the texture based on the world coordinates independent of the object UVs
Environment – This mode is applicable if the map is connected to an Environment slot or a Dome light.
Texture Remapping – Uses UVW values from a color texture or separate grayscale textures.
Mapping Source – The texture uses an external UV placement source.
2D (UV Channel)
UV Channel/Set – Specifies the index of the mapping channel data to use. A value of 1 takes the first available channel.
Repeat U/V – Determines how many times the texture is repeated in the 0 to 1 UV square.
Lock U/V Repeat – Locks the U/V Repeat.
Offset U/V – Controls the texture offset in the U and V direction.
Rotate – Rotates the texture (in degrees).
Tile U/V – Tiles the texture in the U and V direction. If the option is disabled, the Default texture color is used outside the 0 to 1 UV square. Default color is found in Parameters > Color Manipulation.
Mirror U/V – Mirrors the texture in the U and V direction separately. The option cuts the texture in the half flipping one side vertically or horizontally. This can be used to avoid seams in-between non-tileable repeated textures.

2D (UV Channel) Parameters
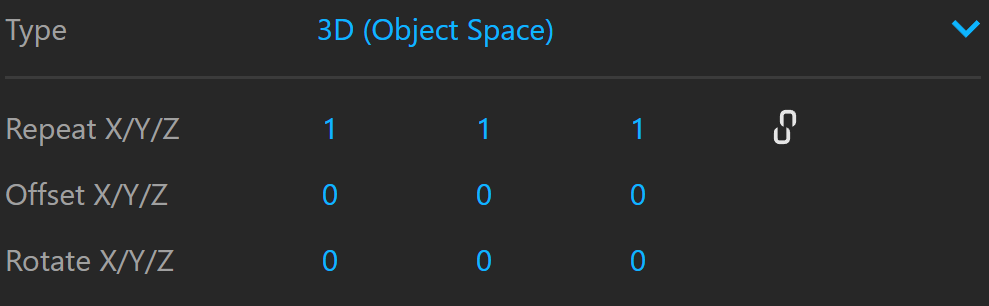
3D (Object Space)
Repeat X/Y/Z – Determines how many times the texture is repeated along the X/Y/Z axis.
Lock U/V Repeat – Locks the X/Y/Z repeat.
Offset X/Y/Z – Controls the texture offset in the X/Y/Z direction.
Rotate X/Y/Z – Rotates the texture around the X/Y/Z axis.
3D (Object Space) Parameters
3D (World Space)
Repeat X/Y/Z – Determines how many times the texture is repeated along the X/Y/Z axis.
Lock U/V Repeat – Locks the X/Y/Z repeat.
Offset X/Y/Z – Controls the texture offset in the X/Y/Z direction.
Rotate X/Y/Z – Rotates the texture around the X/Y/Z axis.

3D (World Space) Parameters
Environment
Mapping – Specifies the type and shape of the texture.
Angular
Cubic
Spherical
Spherical Inverted
Mirror Ball
Screen
Rotate H – Rotates the environment sphere horizontally.
Flip H – Flips the environment sphere horizontally.
Rotate V – Rotates the environment sphere vertically.
Flip V – Flips the environment sphere vertically. This option is active only in Spherical Mapping.
Ground – Enables ground projection of the texture.
Position X/Y/Z – Offsets the ground projection along the X/Y/Z axis.
Radius – Specifies a projection radius. Can be used to control the scale of the projection.
2d Transformation – see 2D (UV channel) parameters.

Environment Parameters
Texture Remapping
Mode – Determines whether a single or multiple textures should be used for U and V texture coordinates remapping.
UV – The Red input texture channel determines the U sampling coordinate. The Green input texture channel determines the V coordinate.
U – The value of this texture determines the U sampling coordinate.
V – The value of this texture determines the V sampling coordinate.

Texture Remapping Parameters
Mapping Source
UV Placement Source – External UV placement source to be used for the texture placement.

Mapping Placement Parameters
Notes
- If Rock textures are combined, diffusion can be used to provide a large detail coloring in one instance of a Rock texture and finer details provided with another. Realistic bump maps can be generated if black and white values are used.