V-Ray for SketchUp
V-Ray Frame Buffer
The V-Ray Frame Buffer (VFB 2) is a second-generation V-Ray virtual frame buffer.
Last updated 8 June 2026
Overview
The V-Ray Frame Buffer (VFB 2) is a second-generation V-Ray virtual frame buffer.
The VFB is much more than a render image holder window, with Light Mix capabilities for modifying the scene lighting after rendering and Layer Compositing for a higher level of post-processing adjustments.
- Image preview:
Loads render elements channels via a dropdown list;
Works with display corrections;
Loads various 8bit and 32bit file formats, including V-Ray resumable files;
Image comparison between 2 or 4 renders; - Image management:
Keeps the rendered image in full 32-bit floating-point format;
Can store history of rendered images with their post rendering corrections;
Can save corrected output to various image formats; - Image editing and post-processing:
Add Color Corrections to rendered image and its elements;
Layer Compositing for anything from a simple Back to Beauty workflow or advanced compositing;
LightMix adjustment of the scene lighting after rendering the image; - Scene editing:
Can modify actual lights values by transferring updated intensity and color from LightMix mode; - Denoiser control;
Region rendering control and test resolution;
Allows you to choose the order in which the buckets are rendered.
www.youtube.com
UI Paths
||V-Ray for SketchUp Toolbar|| > Frame Buffer

SketchUp Menus Ribbon
||Extensions|| > V-Ray > Frame Buffer
||V-Ray Asset Editor|| > Shortcuts menu > Open V-Ray Frame Buffer

VFB Menu
The V-Ray Frame Buffer menu holds the main frame buffer commands. Some of the options are also available in the VFB toolbar for quick access.
Menu | Menu Options |
|---|
Menu | Menu Options | |
|---|---|---|
File | Save current channel – Saves the currently loaded channel to an image file format. Save all image channels to separate files – Saves all the render elements to separate files. Use to save the VFB color corrections to render elements. Save all image channels to a single file – Saves the image to a multi-channel EXR or .vrimg file. Load image – Opens an image file from disk to be previewed in the V-Ray Frame Buffer. Batch image processing – Opens the Batch Image Processing menu. Upload image to Chaos Collaboration – Opens the Chaos Cloud Collaboration window. Enhance image on Chaos Collaboration – Automatically exports the image to an EXR file in the Chaos Collaboration tab and from there you can send it for enhancement to Chaos Cloud Collaboration. Note that an Enhancer Data render element must be added beforehand. To hide this function, you can use the CHAOS_DISABLE_GEN_AI=1 Environment Variable. Upload image to Chaos Veras – Uploads an image to Chaos Veras for AI editing. | Save all image channels to separate files options Save VFB color corrections to render elements – When enabled, all color corrections are saved to the render channels (as opposed to only the RGB and effectsResult channels). Batch Image Processing Input folder – Specifies a path to start images. Output folder – Specifies a path for the output images. Layer preset – Specifies a layer tree corrections preset. Output filenames suffix – Specifies a suffix added to the output image filenames. Overwrite existing – Enables overwrite of existing files with the same name in the output folder. |
Render | Start interactive rendering – Starts Interactive Rendering. Stop rendering – Stops the ongoing rendering at its current state. It takes the render's current state as valid to perform all post-rendering tasks such as post-effects, denoising or image output saving. Abort rendering – Cancels the current render. When the render is canceled, the output image is not saved. Render – Starts Production Rendering. | |
Image | Follow mouse – Renders the closest bucket found to the mouse pointer, when using the bucket image sampler. If the progressive sampler is used, V-Ray samples the closest pixels to the mouse pointer. Follow mouse – Drag the mouse over the VFB while rendering to change what part of the image is sampled first. Copy current channel to clipboard – Copies the current channel to the clipboard. Clear image – Clears the contents of the frame buffer. This is useful when starting a new render to prevent confusion with the previous image. | |
View | Display color space –Specifies the color space, in which the image is displayed. None – Does not specify a color space; Zoom VFB – Zooms in/out the rendered image in the VFB. Zoom 50% – Zooms out to 50%; Channels – Chooses which channels to display. View red channel – Displays the red channel; Color clamping – Opens the color clamping submenu options: Force color clamping – Forces color clamping; Use pixel aspect – Enables visualization of the pixel aspect ratio. Flip – Mirrors the image in the VFB. This is a view only option, the flipped image cannot be exported. This function is only active while holding the menu button or the hotkey for the corresponding type of flip. The effect does not interrupt interactive rendering. Flip horizontally – Mirrors the image horizontally. Flip vertically – Mirrors the image vertically. Panorama View – Shows the image in 360° view. Show History – Shows the History panel. Show Layers – Shows the Layers panel. | |
Options | VFB settings – Opens the VFB Settings window which gives you access to the Render View, Render Region Controls, History, Layers and Shortcuts. |
VFB Toolbar
This dropdown gives access to render elements rendered for the scene. The selected render element is displayed in the VFB. By default, the RGB color and Alpha render elements are available. Any additional render elements that have been added to the scene also appear in the drop-down. |
This dropdown gives access to render elements rendered for the scene. The selected render element is displayed in the VFB. By default, the RGB color and Alpha render elements are available. Any additional render elements that have been added to the scene also appear in the drop-down. | |
Displays the coordinates of the mouse pointer. | |
Specifies the sampled area size. Click on the arrow to open a context menu with the available sampled area sizes: 1x1, 3x3, 5x5, and 7x7. | |
Specifies whether color and display corrections are applied (RGB) or not (Raw) when showing the sampled pixel values at the current mouse pointer position. | |
Displays the RGB pixel values at the current mouse pointer position before applying any color corrections. | |
Specifies RGB values. Click on the arrow to open a context menu with the available option. None – Does not specify the RGB value. | |
Displays the Hue, Saturation, and Value of the pixel under the current mouse position when HSV is selected. | |
Displays the HEX of the pixel under the current mouse position when Web is selected. | |
Displays the 8bit color palette of the pixel under the current mouse position when 8bit is selected. |
Locks the mouse pointer coordinates and displays information for the selected pixel. |
Locks the mouse pointer coordinates and displays information for the selected pixel. | ||
Shows corrected colors. | ||
Shows the V-Ray log. | ||
Displays the Red channel. | ||
Displays the Green channel. | ||
Displays the Blue channel. | ||
Displays the Alpha channel. | ||
Uploads an image to Chaos Veras. | ||
Automatically exports the image to an EXR file in the Chaos Collaboration tab and from there you can send it for enhancement to Chaos Cloud Collaboration. Note that a VRayEnhancerData render element must be added beforehand. To hide this function, you can use the CHAOS_DISABLE_GEN_AI=1 Environment Variable. | ||
Saves the image to disk. Press and hold the icon to bring up the submenu: Save current channel – Saves the current channel to an image file format; Save all image channels to separate files – Saves all the render elements into separate files; Use to save the VFB color corrections to render elements. Save all image channels to single file – Saves the image into a single multi-channel EXR or .vrimg file. Upload image to Chaos Collaboration – Opens Chaos Cloud Collaboration. | ||
Clears the contents of the frame buffer. This is useful when starting a new render to prevent confusion with the previous image. | ||
Renders the closest bucket found to the mouse pointer, when using the bucket image sampler. If the progressive sampler is used, V-Ray samples the closest pixels to the mouse pointer. With this option enabled, you can right-click on the image and select Lock bucket starting point to lock the bucket (or sampling) starting point. | ||
Allows you to render regions in the VFB. See the Render Region section for more information. | ||
Starts Interactive Rendering. | ||
Stops the current rendering. Right-click and hold to open the drop-down menu. Abort rendering – Cancels the current render. When the render is cancelled, the output image is not saved. | ||
Starts Production Rendering. |
Render History
The V-Ray VFB keeps a history of previously rendered images, and lists each with a number, thumbnail, and textual details in the Render history panel. Up to four images can be called from the history to be compared in the VFB (as shown below). History files are stored as .vrimg files in a user-specified folder. Render history settings can be configured in the VFB Settings window.
Enables or disables image A/B vertical comparison. Select images A and B from the render history. |
|---|
Enables or disables image A/B vertical comparison. Select images A and B from the render history. | |
|---|---|
Enables or disables image A/B horizontal comparison. Select images A and B from the render history. | |
Enables or disables image A/B/C/D comparison. Select images A, B, C and D from the render history. | |
Saves the current image from the VFB to the render history. The image is placed at the top of the render history list. | |
Loads the selected image from the render history to the VFB. | |
Removes the selected image from the render history. |
A search field where you can filter the images based on the scene paths and notes. The filter text is selected when pressing Enter from the keyboard. |
A search field where you can filter the images based on the scene paths and notes. The filter text is selected when pressing Enter from the keyboard. |
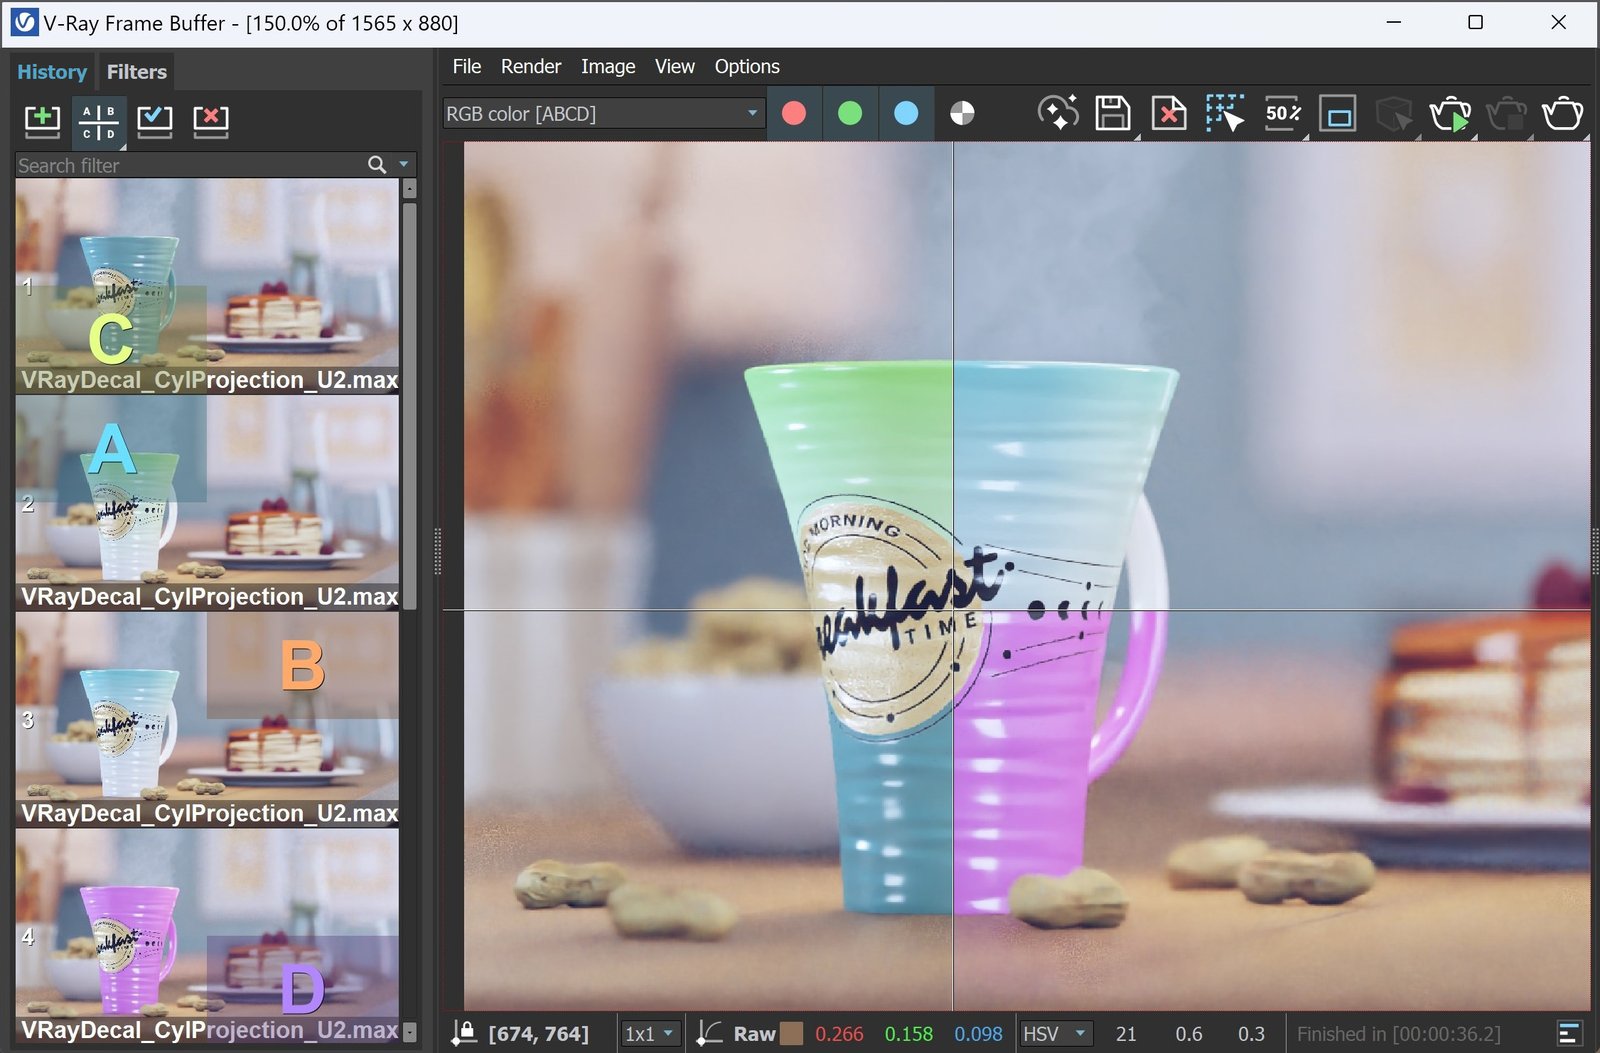
Use the button on the left side of the VFB to set up the History.

Right-Click Menu
Right-click on the History field to open the History dropdown menu.
Edit note – Allows you to add a text comment to the image; the comment appears below the image.
Set A – Sets the render as A image for A/B comparison.
Set B – Sets the render as B image for A/B comparison.
Load to VFB – Loads the selected image in the VFB (same as double-clicking on the image).
Delete – Deletes the selected image from history. The image is moved to the system's Recycle Bin and can be restored from there if needed.
Load layers – Loads the layer tree preset of the selected image.
Load V-Ray settings – Loads the V-Ray settings used for the saved render.
Compare V-Ray settings – Opens the Compare V-Ray settings dialogue, where you can compare the render setups of saved renders.
Image Info – Opens a window containing detailed information about the image, including Aperture, FOV, Target Distance, etc.
Copy scene path – Copies the full path to the scene.
Copy project path – Copies the full path to the project.
Upload the image to Chaos Veras – Uploads an image to Chaos Veras for AI editing.
Upload image to Chaos Collaboration – Uploads selected images to Chaos Cloud Collaboration.
Enhance image to Chaos Collaboration – Sends your render to Chaos Collaboration for AI enhancement.
Reload history – Re-reads the history image list. This may be needed if the history folder is updated outside of 3ds Max (e.g. from another 3ds Max session).
Save images as – Opens the Save history images to files window, that provides a single-point multi-save of History files. Save options can be set - file type, image format options, destination path, custom naming.
Select all – Selects all History images.
Select none – Deselects the selected History images.
Select invert – Inverts the current selection of History images. Images that were previously selected are deselected, while those that were not selected are now marked as selected.

The History panel with notes/name, resolution/time, and shortcut key info is displayed.
Right-clicking on an image in the VFB history brings up a pop-up menu with some useful options.

Save History Images To Files
File types – Defines the file type of the saved images.
Image format options – Provides additional control settings for each file type.
Destination folder – Specifies a path for the saved images.
Use custom filename prefix – Enables custom naming use. Custom tags can be used, when setting the custom filenames - typing '<' shows a list of available tags, including all Image Info fields. Example: Custom filename - <project file name>_<note>_<engine> → Resulting filename - simple-scene_001.max_noted-info_CPU.vrimg.
File overwrite strategy – Defines how to manage files that share the same names. Select between Replace files, Skip existing and Ask confirmation.
Show in explorer on completion - When enabled, opens a file explorer to the saved images directory on process end.
Select all – Selects all History images.
Select none – Deselects the selected History images.
Select invert – Inverts the current selection of History images. Images that were previously selected are deselected, while those that were not selected are now marked as selected.
Save items – Starts the save images process. The save process can be cancelled.
Cancel – Closes the Save history images window

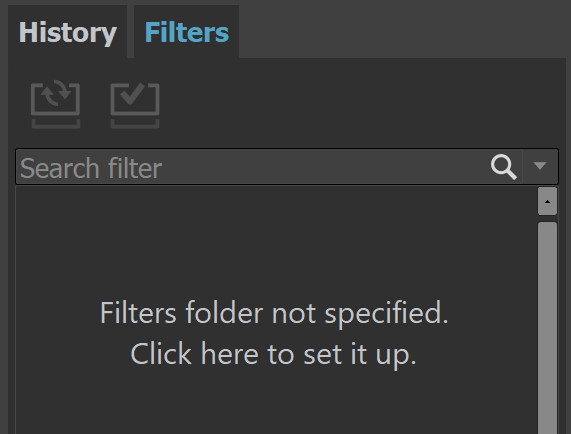
Filters
The V-Ray VFB provides a variety of filter presets in the Filter panel. The presets previews in the Filter panel allow for quick and easy comparison of multiple color correction scenarios.

– Opens the Filter/Layer preset dropdown menu. Once applied, the filter preset folder is added as a folder at the top of the Layer tree in the Layers right tab. Additional custom modifications can be made on the layers and the compiled setup can be saved as a Layer tree preset by right-clicking on the top preset folder and selecting Save. The preset is saved as a .vlpdir file.
Change presets directory from V-Ray Frame Buffer > Options menu > VFB Settings > Filter/Layer presets > Path.
Filters are applied by one of the following actions:
- double-click on the preview
- click the Load to VFB button
- right-click > Load layers option
Preview thumbnails update automatically on render end. The Reload thumbnails button refreshes the thumbnails, alternatively you can right-click on a thumbnail and select Refresh thumbnail.
Applying a new default filter overrides the current top preset folder in the Layer tree with the new corrections, so it is not possible to keep multiple default filters active at the same time. However, imported Layer preset with a different name can be stacked with one default filter.
Refreshes the preview thumbnails. |
Refreshes the preview thumbnails. | |
Applies the selected thumbnail preset folder to the layer tree. | |
A text search field which provides fast location of the desired filters. The filter text is selected when pressing Enter from the keyboard. |
Histogram
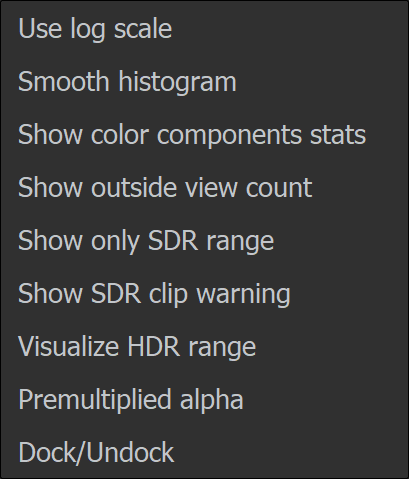
The Histogram provides a visual representation of the distribution of the RGB, Luminance, and Intensity channels across the image.
Histogram Properties


See a Show color components stats example.



Layers

The V-Ray Frame Buffer includes a suite of color corrections and tools for adjusting the image. The tools are added as layers and displayed in a layer tree. You can enable or disable a particular tool using the visibility icon () to the left of its name.
For more information on using the Layers, see the Layers page.
Creates a layer or folder. Multiple layers of the same type can be added. Folder – Allows grouping multiple layers in folders and folders in sub-folders. |
Creates a layer or folder. Multiple layers of the same type can be added. Folder – Allows grouping multiple layers in folders and folders in sub-folders. | |
Deletes the selected layer(s). | |
Saves a layer tree preset. The following presets are available: vfbl, vlpdir, vlpct, vlpexp, vlpwb, vlphsl, vlpcl, vlpcrv, vlplut, vlptm, vlpicc, vlpvgnt, vlpsrc, vlpdzr, vlpshb, vlplfx). For more information, refer to the Save and Load Layer Presets section. | |
Loads a layer tree preset. The following presets are available: vfbl, vlpdir, vlpct, vlpexp, vlpwb, vlphsl, vlpcl, vlpcrv, vlplut, vlptm, vlpicc, vlpvgnt, vlpsrc, vlpdzr, vlpshb, vlplfx, vccglb). For more information, refer to the Save and Load Layer Presets section. | |
Quick access to the Layer/Filter Presets. | |
Undo create layer. | |
Redo create layer. |

Save and Load Layer Presets
There are several types of layer presets: presets for a single layer, presets for a folder of one or more layers, and presets for a full layer tree. You can also load a legacy preset for global color corrections (vccglb) saved with the previous VFB 1 available in earlier V-Ray versions.


The preset for a full layer tree (vfbl) can be saved or loaded from the respective Save layer tree preset () and Load layer tree preset () buttons in the Layers tab.
The presets for a folder (vlpdir) can be saved and loaded from the context menu of a folder. Such presets can also be loaded or previewed from the Layer/Filter presets menu if it points at its location or through the Load layer tree preset () button.
The presets for a single layer (vlpct, vlpexp, vlpwb, vlphsl, vlpcl, vlpcrv, vlplut, vlptm, vlpicc, vlpvgnt, vlpsrc, vlpdzr, vlpshb, vlplfx) can be saved or loaded from the context menu of an existing layer: right-click on the layer and select Save or Load.
The following presets for single layers are available:
vfbl – A preset for a full layer tree.
vlpdir – A preset for a folder of one or more layers. The vlpdir presets are saved from the context menu of a folder.
vlpct – A preset for a single Constant layer. Can be saved from the context menu of the Constant layer.
vlpexp – A preset for a single Exposure layer. Can be saved from the context menu of the Exposure layer.
vlpwb – A preset for a single White Balance layer. Can be saved from the context menu of the White Balance layer.
vlphsl – A preset for a single Hue/Saturation layer. Can be saved from the context menu of the Hue/Saturation layer.
vlpcl – A preset for a single Color Balance layer. Can be saved from the context menu of the Color Balance layer.
vlpcrv – A preset for a single Curves layer. Can be saved from the context menu of the Curves layer.
vlplut – A preset for a single Lookup Table layer. Can be saved from the context menu of the Lookup Table layer.
vlptm – A preset for a single Filmic tonemap layer. Can be saved from the context menu of the Filmic tonemap layer.
vlpicc – A preset for a single ICC profile layer. Can be saved from the context menu of the ICC profile layer.
vlpvgnt – A preset for a single Vignette layer. Can be saved from the context menu of the Vignette layer.
vlpsrc – A preset for a single Source layer. Can be saved from the context menu of the Source layer.
vlpdzr – A preset for a single Denoiser layer. Can be saved from the context menu of the Denoiser layer.
vlpshb – A preset for a single Sharpen/Blur layer. Can be saved from the context menu of the Sharpen/Blur layer.
vlplfx – A preset for a single Lens Effects layer. Can be saved from the context menu of the Lens Effects layer.
Stats
The Stats section provides track reports about the scene, the engine, the devices, the performance, and the memory.
Memory tracking is always enabled and there is no need for configuration.

Log
This tab shows the Log report.
There are several view options to select from in the dropdown menu.

VFB Shortcuts
These shortcuts navigate through the VFB image. Please note that the VFB window must have the current focus for the shortcuts to have effect:
Mouse | Description |
|---|
Mouse | Description |
|---|---|
Mouse wheel | Zoom in/Zoom out |
Double-click left button | Zoom to 100% |
Page Up/Page Down | Switch between render elements |
Middle button dragging | Pan (hand tool) |
Keyboard | Description |
+ / = | Zoom in |
-/_ | Zoom out |
* | Zoom to 100% |
Arrow keys | Pan left, up, right, down |
F | Fit the region or the whole image. Available only if the render region option is used. |
Esc | Abort render |
Q | Enable history A/B vertical compare mode. |
W | Enable history A/B horizontal compare mode. |
E | Enable history A/B/C/D compare mode. |
1-9 | Load the respective image from the VFB2 history |
H; Ctrl+[ | Show/hide history |
L | Lock pixel info coordinates |
P | Show/hide layers tree |
S | Show/hide settings |
F11 | Toggle fullscreen |
Ctrl+C | Copy the VFB image to the Windows clipboard; the image is copied exactly as it appears on the screen (meaning sRGB/LUT/OCIO etc corrections are applied). The full resolution image is copied to the clipboard, even if the VFB view is zoomed in/out. |
Del | Delete Layer |
Ctrl+Y | Redo |
Ctrl+L; Ctrl+] | Show/hide right panels |
Ctrl+Z | Undo |
A | View Alpha |
B | View Blue |
G | View Green |
R | View Red |
PgDown | View Next Channel |
PgUp | View Previous Channel |
Render Region
Region rendering can be used in both Interactive and Production modes to isolate only part of the frame for rendering. Usually, when a render region is used, you would like to save the whole frame instead of the region only.
When saving single-channel .exr files, the render region is ignored and a full frame is always saved. This applies when saving the .exr through VFB.
Saving .exr files, using the Render Output option of the Asset Editor, writes just the render region data in the file by default. The rest of the frame is rendered black.
Saving .exr files from VFB > Save all image channels to single file saves the render region on top of the previously rendered frame.
Notes
- VFB does not display the G-Buffer layers (like Coverage, etc.).
- VFB does not work with strip rendering.
- VFB does not work with rendering to fields.
- The OpenEXR file format is an open file format for high dynamic range images originally developed by Industrial Light and Magic. The official site of the OpenEXR file format is http://www.openexr.com/
- If Lens Effects or the VRayDenoiser render element are enabled, then the RGB Color channel is saved with the name RGB_color and the effectsResult channel is saved as effectsResult when saving all channels from VFB.
- If an 8-bit file is saved through the VFB or the Render Output / Save image settings, the color space (for example sRGB) is embedded and the image appears as in the frame buffer when loaded in an external image viewer. If a 32-bit (exr, hdr, tif) image is saved, it remains linear and relies on the external image viewer to handle the display color space.
- Global Color Correction files (*.vccglb) from the old VFB cannot be loaded in the V-Ray Frame Buffer.
- The Log tab at the right panel of the V-Ray Frame Buffer tracks the render process only. The Log Window includes the same information about the render process in combination with messages from the rest of V-Ray (host-app communication, UI, etc.)
- In case Filters are unavailable due to an incorrect or invalid path, reset the VFB by navigating to the V-Ray menu: Preferences > Reset VFB State.