Enscape
Multi GPU
This page provides information on multi GPU issues.
Last updated 4 June 2026
This page provides information on multi GPU issues.
Overview
When Enscape is launched from the CAD, Enscape runs in the same process as the CAD. This currently limits your options for setting specific driver profiles. The GPU driver is unable to distinguish between the two.
If you have two GPUs in your system, make sure that Enscape uses the dedicated NVIDIA or AMD graphics card and not the onboard Intel integrated GPU.
If your system has two dedicated GPUs installed using SLI, Enscape will function, but it will utilize only one of the GPUs.
If you are using Intel Arc A310, download the Intel Arc Control to customize performance settings.
NVIDIA Graphics Cards
- Right-click your Desktop.
- Select NVIDIA Control Panel.

Open NVIDIA Control Panel from your Desktop
This opens the NVIDIA Control Panel. Set the Preferred graphics processor to the High-performance NVIDIA processor.

NVIDIA GPU Control Panel
In some cases, you do not have the option to change the Preferred graphics processor.
- One such case is when using a laptop with a docking station. In such cases, scroll down in the list until you find Power management mode, and set that option to Prefer maximum performance.
- When using Quadro cards, you also do not have the option to select the Preferred graphics processor. In which case:
- Click on the Program Settings tab
- Select your CAD from the Select a program to customize drop-down
- Set Power management mode to NVIDIA driver-controlled.
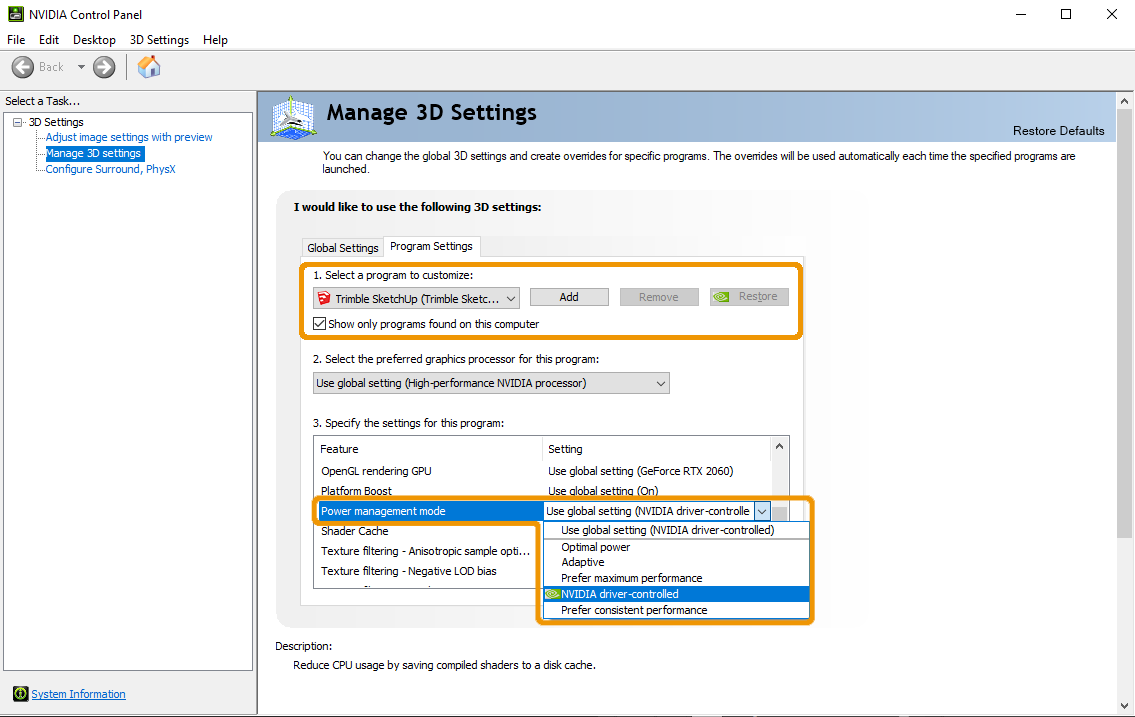
NVIDIA Program Settings options
Go to the Global Settings section and set the Global Preset option to Workstation App – Dynamic Streaming.
This provides better all-around performance when using Quadro cards.

NVIDIA Quadro GPU Control Panel options
AMD Graphics Cards
AMD users can use one of two Control Centers provided by AMD. These are the Catalyst Control Center and the newer Adrenalin Control Center.
AMD Catalyst Control Center
If you have the AMD Catalyst Center installed, then follow these instructions to switch from your onboard graphics to AMD:
- Right-click your Desktop icon
- Select AMD Radeon Settings
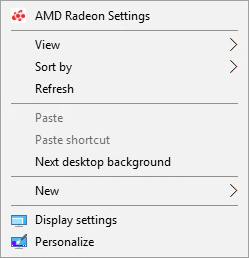
Configuring an AMD GPU
You can also access the AMD Catalyst Control Center from the Windows Taskbar.

Open AMD Catalyst Center from Taskbar
In the AMD Catalyst Control Center, select Gaming.

Select Gaming
- Select Add Game

Add Game
- In the Open dialog, navigate to the EnscapeClient.exe which is found in
C:\Program Files\Enscape\RendererHost\Renderer\Bin64
If the file is not found in this location, Enscape is installed / deployed to a custom location. Please refer to whoever installed Enscape on your machine (your IT department for example) to check the validity of the install location of Enscape.
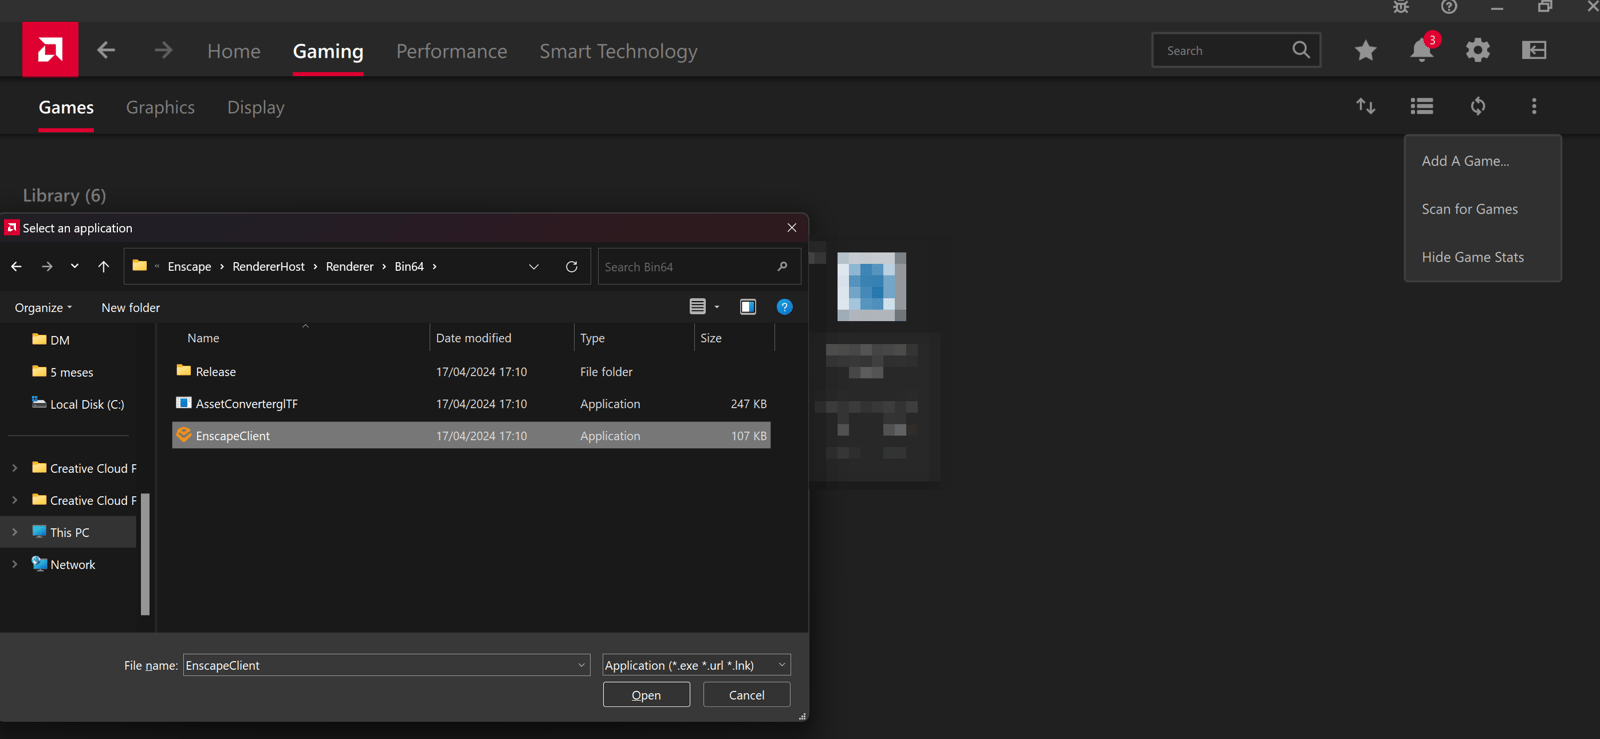
Locate the EnscapeClient.exe
- You should then see Enscape listed under Installed within Gaming in the AMD Catalyst Control Center. Click on it.

Enscape is listed
- Click the drop down menu next to Graphics Profile and select High Performance.

Select the Graphics Profile
AMD Adrenalin Control Center
The newer AMD Adrenalin Control Center no longer allows you to select the GPU. Instead, you have to make the selection via the Windows Graphics Settings dialog.
Open the Windows Graphics Settings dialog via Settings > System > Display > Graphics Settings.
Under the Choose an app to set preference, choose Classic app / Desktop app, depending on which of the two options you are provided.
Click Options, and then a Graphics preference dialog should appear with three options. One option being High performance, which is the one you should select. Then click Save.
Click Browse, locate your CAD executable in your C:/ drive. Click Add when ready.
Close the Graphics Settings window.
General Solution for Intel HD (Desktop + Mobile + Docking Station)
If the solutions above do not work for you, or you are working on a desktop machine, or you have issues when using a docking station, then follow these instructions to disable the Intel graphics (integrated) chip via the Windows Device Manager:
- Pressing Windows + S opens the native Windows search function and performs a search for Device Manager.
- Expand the Display adapters from the displayed list .
- If you see an Intel HD Graphics card listed, right-click on it and choose Disable.
Your system then automatically uses the second GPU available to the system. This solution works for desktop and can resolve issues when using a docking station. However, if you are using a notebook, disabling your Intel HD graphics card can increase your power consumption and therefore reduce your battery time.
mmc_w46lbvlgss
mp4
107 KB
Further Troubleshooting
If you find options missing from the NVIDIA or AMD Control Panels, this indicates that the main display may not be plugged into the DisplayPort of the NVIDIA / AMD GPU. The main display is plugged into the port connected to the integrated GPU.
Make sure your main display is plugged into the DisplayPort of the dedicated GPU, and then reboot the machine. Then, all the options should become available in the Device Manager.