V-Ray for 3ds Max
Basic Texture Baking with V-Ray
This page provides a tutorial for texture baking with V-Ray.
Last updated 1 September 2026
This page provides a tutorial for texture baking with V-Ray.
Overview
Rendering to texture, or "texture baking,” creates texture maps based on an object's appearance in the rendered scene. The advantage of using baked textures is that real-time display is much faster. These textures are ideal for displaying the textured object rapidly on Direct3D devices such as graphics display cards or game engines.
For the purpose of this tutorial, we use a simple scene with a volleyball geometry.
Want to follow along but don’t have a license?

Part I: Set Scene for Baking
In the first section, we set up and adjust the scene settings.
- Set up materials
Check if the current materials are assigned accordingly and the object’s UVs are neatly unwrapped.
- Set up object
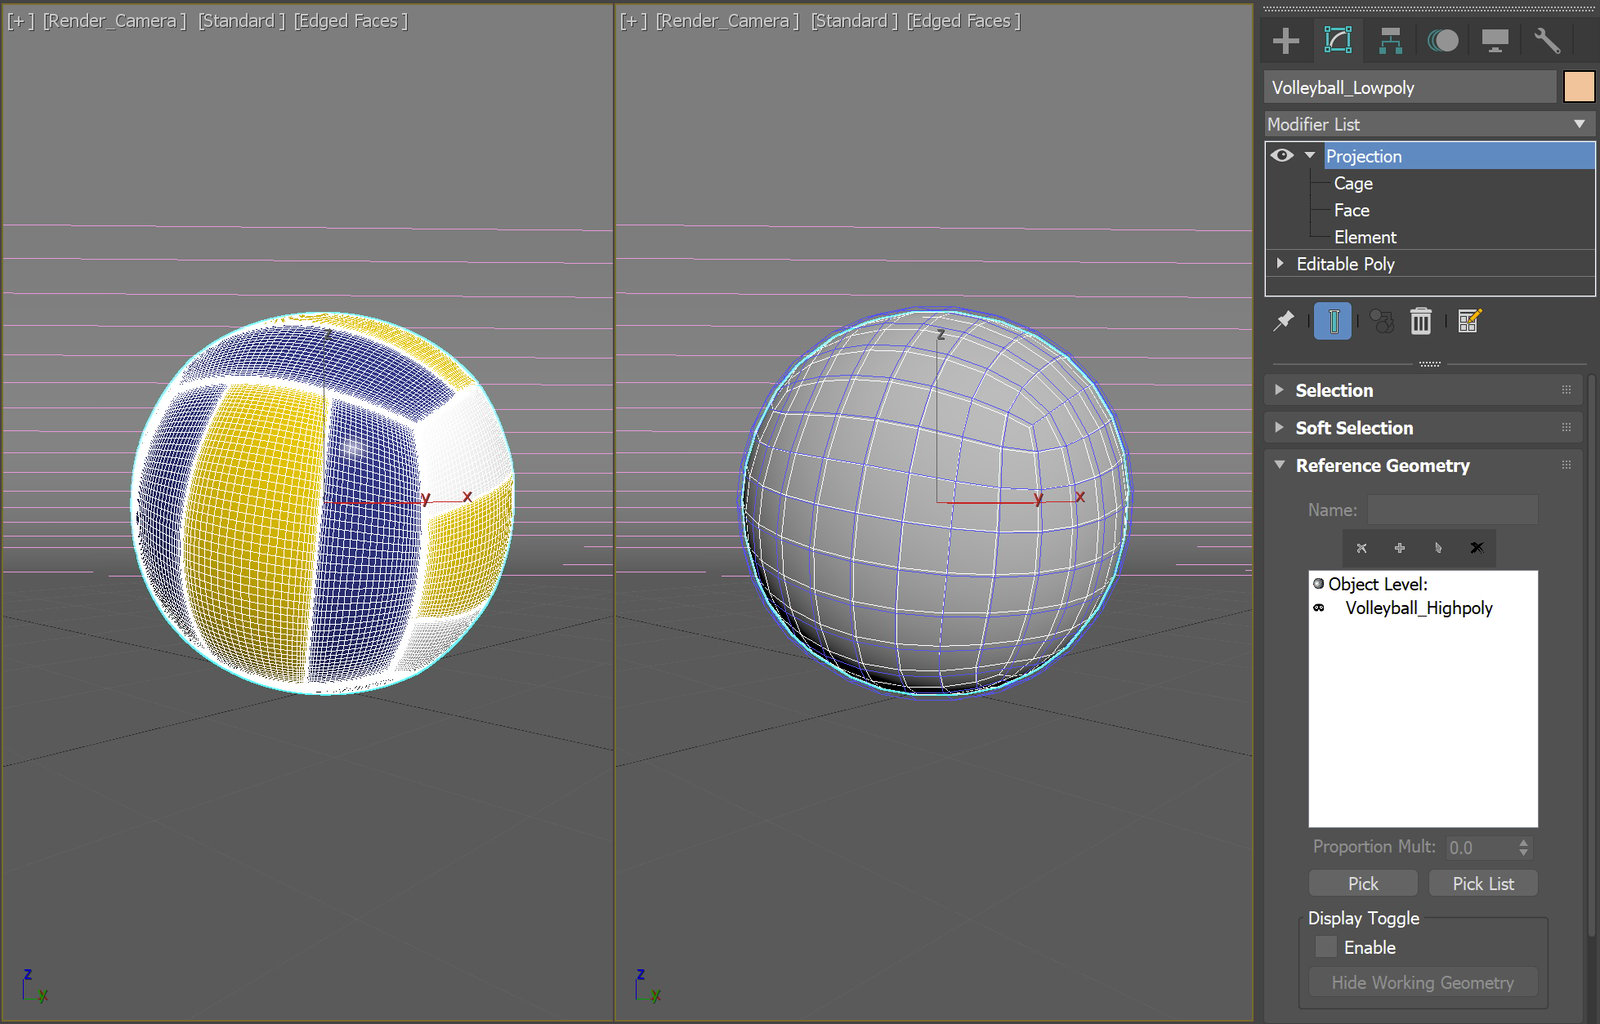
In our case we have 2 volleyball meshes - one high poly mesh and one low poly mesh.
The low poly mesh has a Projection modifier added in advance from the Command panel > Modify panel. The high poly mesh is selected as a Reference Geometry for the Projection.
- Render Settings
To speed up rendering, optimize the scene by lowering Noise threshold and Max. subdivs to acceptable values that don’t significantly lower the final render quality.
Render the scene.
Part II: Texture Bake
In this section, we adjust the settings for texture baking.
Select the low-poly mesh. Then use either Bake to Texture tool or the Render to Texture tool.
Bake to Texture
This tool is available for 3ds Max 2021 and newer. It is interchangeable with the Render to Texture tool.
- Select maps for baking
Open the Bake to Texture menu from Rendering > Bake to Texture, or by clicking 0 > Bake to Texture.
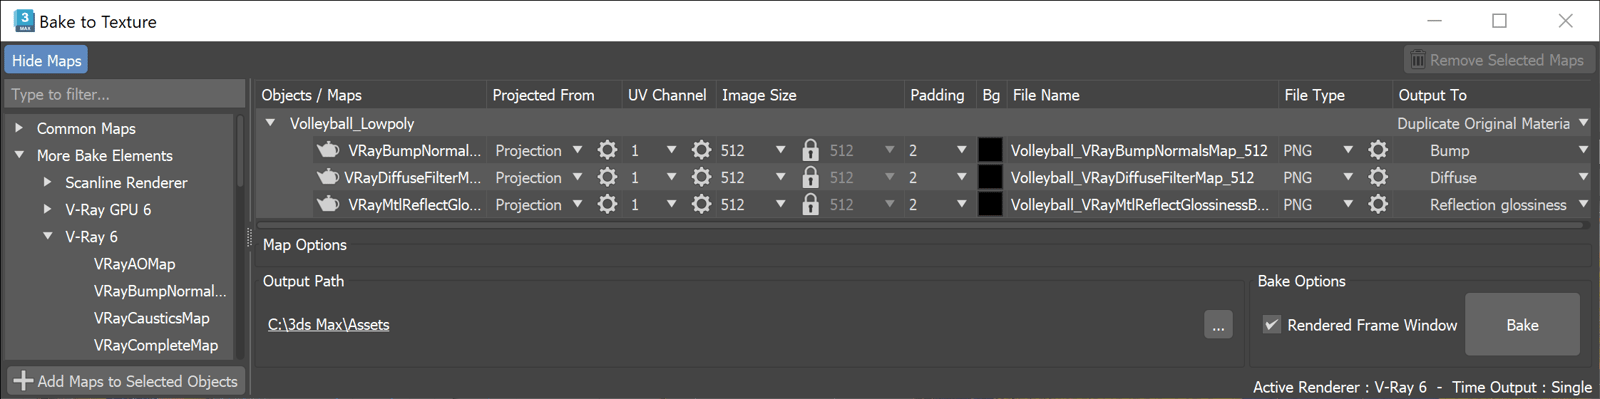
Select the needed maps, in our case: VRayBumpNormalMap, VRayDiffuseFilterMap, and VRayMtlReflectGlossinessBake.
There are other maps that could be used as well, depending on the case, e.g., VRayNormalMap or VRaySSSMap. In our particular case, we prefer using the VRayBumpNormalMap to VRayNormalMap because there is finer detail. Note that it also requires higher render settings to produce better results.
Click the Add Maps to Selected Objects button to add the maps.

Click on the image to view it in full size
- Change settings
The menu detects if the selected mesh already has a Projection modifier set. If none is detected, the Projected From setting might need to be adjusted based on whether or not another mesh is going to be used for the texture bake.
In general, it’s better to start with lowered settings to get quicker results. Tweak where necessary and once the desired results are achieved, change back to the desired final map settings - texture size, padding, etc.
Select all maps and start tweaking.
Use 512 from the Image Size drop-down menu for now.
Keep the Padding and Bg as they are, although they can be adjusted if needed.
In some specific cases, the UV Channel may need to be specified. However, here let’s keep its default values.
Also add the currently used image size as a suffix to the File Name to keep things organized, e.g. Volleyball_VRayDiffuseFilterMap_512.
Choose a File Type from the drop-down menu. For this tutorial, we choose PNG.
In our case, set the Output To option to Duplicate Original Material and set the maps accordingly: VRayDiffuseFilterMap - Diffuse, VRayMtlReflectGlossinessBake - Reflection Glossiness, VRayBumpNormalsMap - Bump.
Create New Material option can be used if we want a different material, and Files Only - if used straight into a different software.
Also set an Output Path where the baked textures are going to be saved.
Click on the image to view it in full size
- Bake
Then click Bake.
Once satisfied with the bake result, boost the settings and render again.
Increase the map resolution to something like 2048x2048. Also raise the Noise threshold to 0.05. Increase the Max. subdivs, especially if rendering textures only (without lights). Here, a value of 4 for the Max. subdivs is enough to produce clean anti-aliased edges and details.
Then bake again.
Example Results:


VRayBumpNormalsMap

VRayDiffuseFilterMap
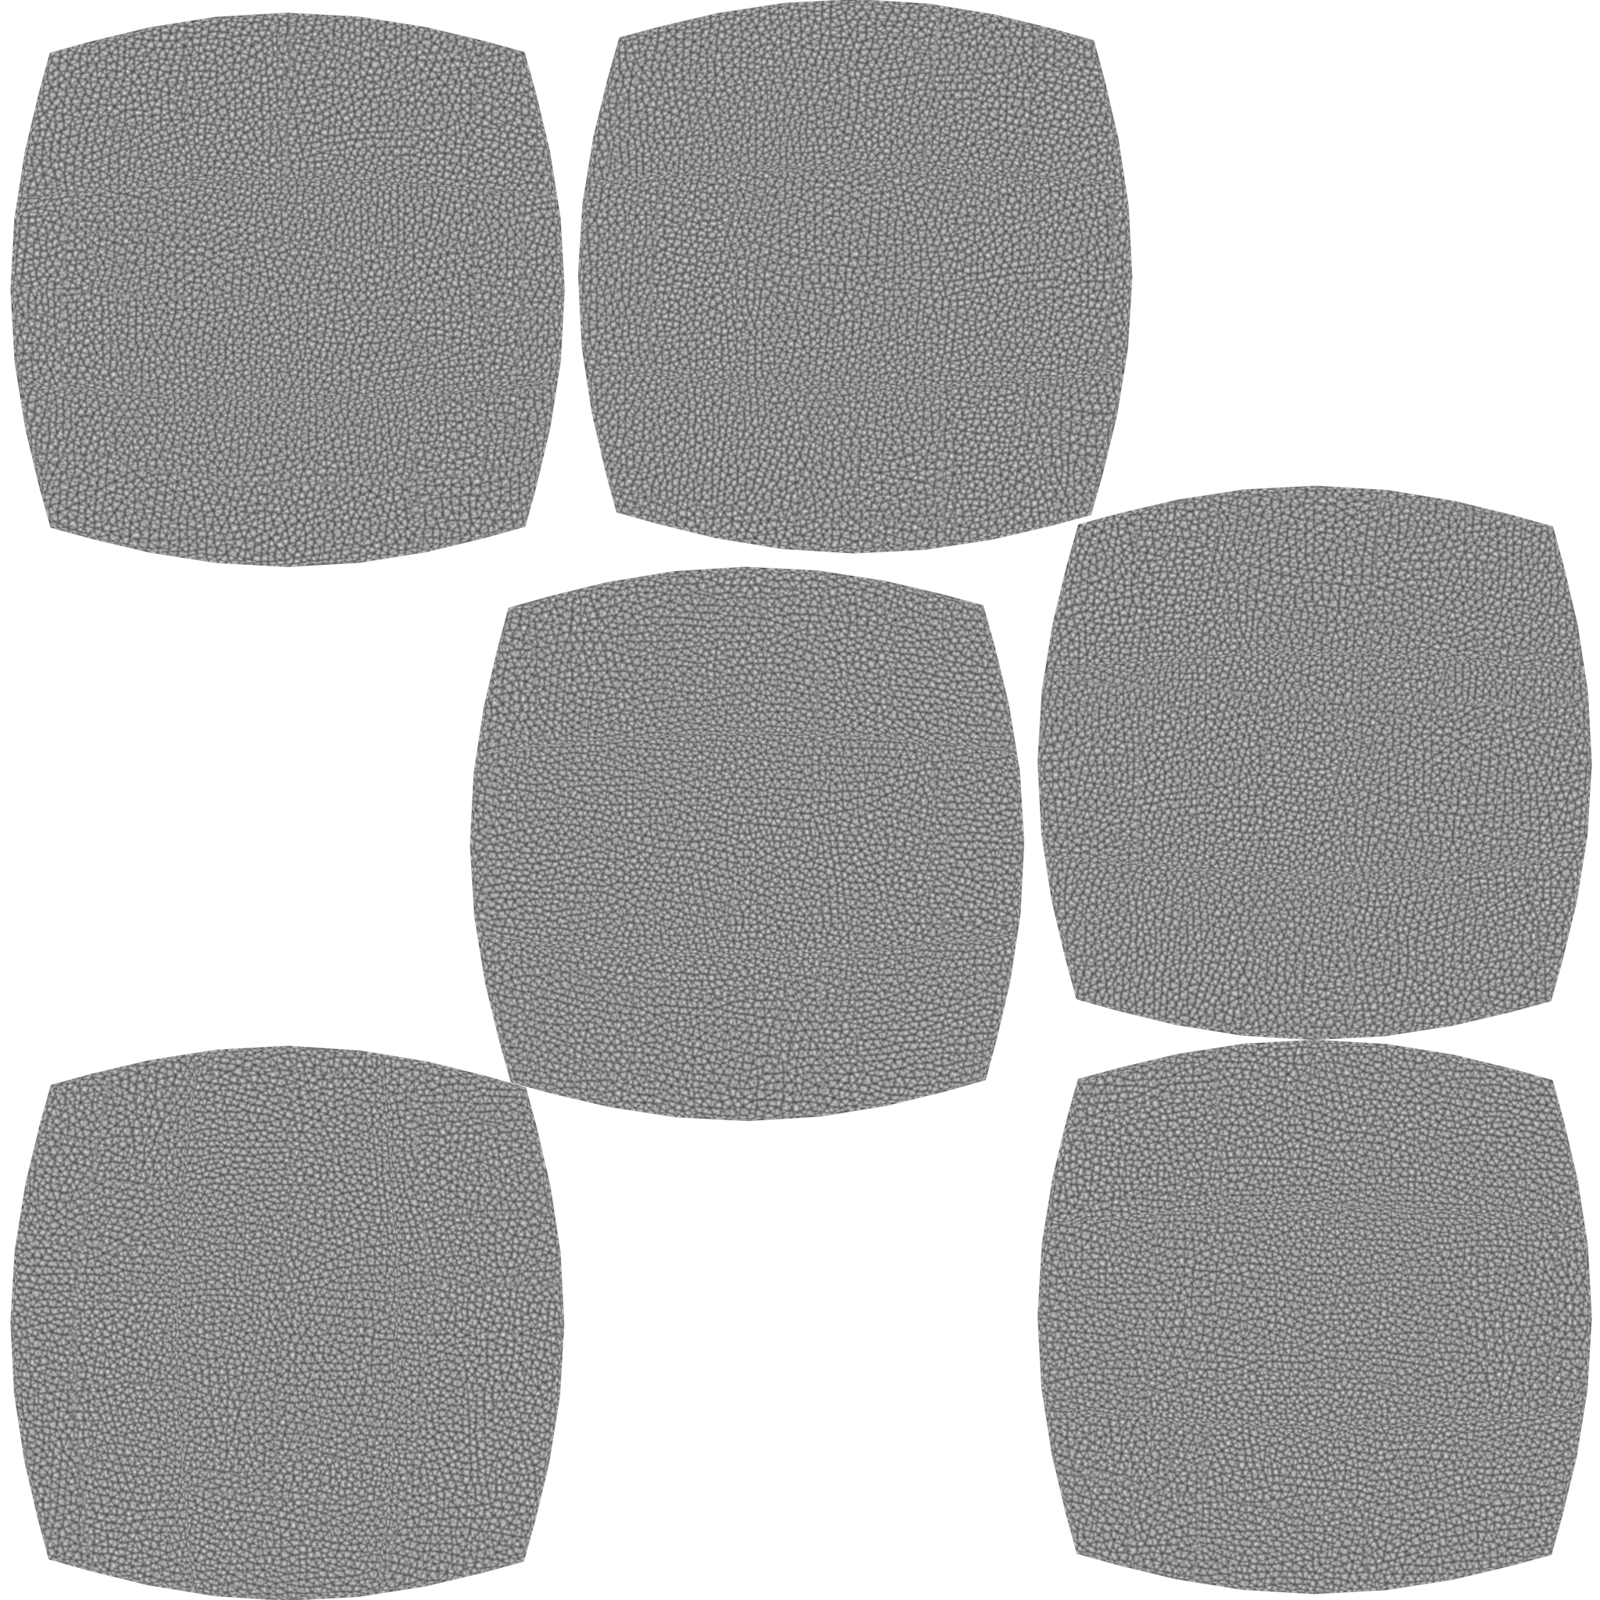
VRayMtlReflectGlossinessBake
Bake to Texture
This tool is available for all 3ds Max versions. For 3ds Max 2021 and newer it is interchangeable with Bake to Texture.
After selecting the mesh, open the Render to Texture menu from Rendering > Render to Texture or by clicking 0.
- Set Output Path
Choose an Output folder, where the new baked textures are going to be saved (Render To Texture window > General Settings rollout > Path).

- Specify the UV used
Notice that the selected mesh is already loaded in the Objects to Bake table.
In the Mapping Coordinates section, select Use Existing Channel so the mesh uses its own UVs.
The UV layouts of the high poly and low poly meshes differ. To bake the textures based on the UV layout of the low poly mesh, check if Raytraced method is selected from the Options... menu > Projection Options dialog > Method.

- Add maps for baking
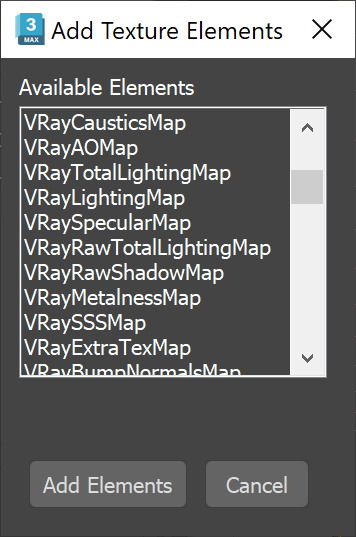
In the Output rollout, click the Add button to open the Add Texture Elements dialog. Select the maps for baking. In our case we select VRayBumpNormalMap, VRayDiffuseFilterMap, and VRayMtlReflectGlossinessBake. There are other maps that could be used as well depending on the case, e.g. VRayNormalMap or VRaySSSMap.
Click the Add Elements button to add the selected elements to the Output table.
- Adjust map settings
For each map from the table: select it and then specify its name and type from the respective File Name and Type option. Here, we also add the currently used image size as a suffix to the name to keep things organized, i.e. object_map_resolution.png.
Then also set the output resolution. We use lower values for quicker results - 512x512. Once the desired effect is achieved, change them back to the boosted final map settings.
Set a Target Map Slot for each texture. In our case: VRayDiffuseFilterMap - Diffuse, VRayMtlReflectGlossinessBake - Reflection Glossiness, VRayBumpNormalsMap - Bump.

- Baked Material Settings
In the Baked Material rollout, choose Save Source (Create Shell).
Select the Create New Baked option and choose VRayMtl from the drop-down menu.
Select Keep Source Materials.

- Render
Click the Render button at the bottom of the Render to Texture window. The baking process proceeds in a row, object by object, in the order set in the table.
Once satisfied with the bake results, boost their settings and render again.
Increase the map resolution to something like 2048x2048. Also, raise the Noise threshold to 0.05. Increase the Max. subdivs, especially if rendering textures only (without lights). Here, a value of 4 for the Max. subdivs is enough to produce clean anti-aliased edges and details.
Then render again.
In the Output folder, there are three PNG files for each baked texture:

VRayBumpNormalsMap

VRayDiffuseFilterMap

VRayMtlReflectGlossinessBake
Part III: Setting Scene with Baked Textures
Now we add the baked textures back into the scene.
- Load Shell Material
Open the Material Editor (M) and choose an empty slot.
Click on the Get Material icon to open the Material/Map Browser.
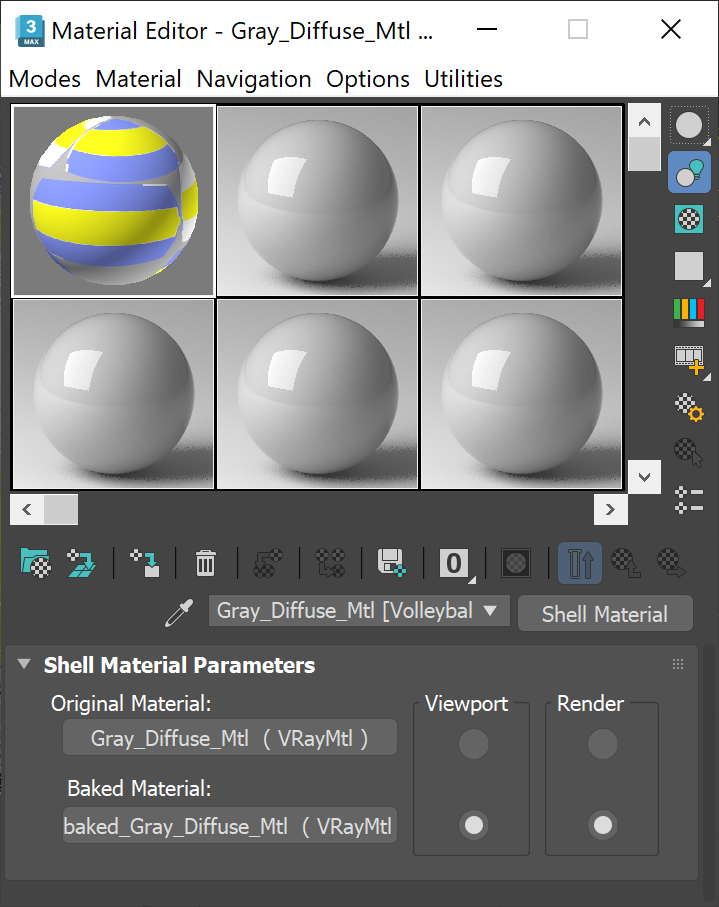
Select Browse From:Scene. Notice that there is new material. It is a Shell Material and contains both the original V-Ray Material and the new Baked Material with the baked maps in it, as we specified in the earlier steps.
Drag the new materials into the Material Editor.
- Edit Shell Material Parameters
In the new Shell Material Parameters, choose the Baked Material for both Viewport and Render. This simply means that if we do a fresh render (F9), the objects use their baked material (VRayMtl). In addition, the objects use the baked material in all the viewports, too.
Also plug the Normal map to a V-Ray Normal Map node and set the Bump of the baked material to 100 from the default 30 to match the strength of the original material.
- Render with Baked Materials
Render in the VFB.
If rendering in Viewport, don’t forget to enable Show Realistic Material in Viewport option from the Material Editor. Otherwise, the mesh renders white.
Click here to expand the image

Result Render

Notes
- Please note that it is not recommended to bake camera dependent textures such as Falloff.
- If multiple objects share the same material and UV space without overlapping, these may be composited together in an image editing program.