Enscape Envision
Environment Tab
This page provides information about the Environment tab in Enscape Envision.
Last updated 15 June 2026
This page provides information about the Environment tab in Enscape Envision.
Overview
The Environment tab is located on the right-hand side panel and offers properties for configuring the environment. It contains two main subtabs - Sun and HDRI (Sky) - that control environment lighting in the project as well as several subtabs for applying weather effects.
Cloud – Contains properties for adding and controlling clouds. |
Cloud – Contains properties for adding and controlling clouds. | |
Wind – Contains properties for adding wind animation. Helpful if you add Cosmos animated assets to your project. | |
Haze – Contains properties for adding fog. | |
Sun – Contains properties for controlling the Sunlight in the project. | |
HDRI – Contains properties for adding environment texture. |
You can set numerous environment setups and save them as variations in the Environment left-hand side panel tab. Then the environment variations can be used in animations.
youtu.be
Actions with Environment Variations
You can perform the following actions in the Environment tab:
Duplicate environment variation – Duplicates the selected environment variation. |
Duplicate environment variation – Duplicates the selected environment variation. | |
Copy environment preferences – Copies all settings of the selected environment variation. | |
Paste environment preferences – Pastes already copied environment preferences to the selected environment variation. |
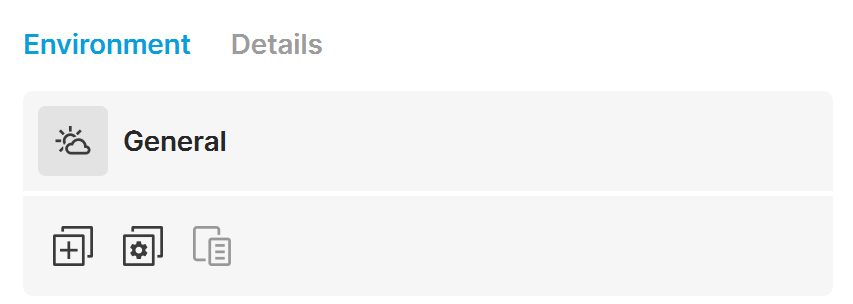
Cloud
Clouds – Enables the cloud system. It is enabled by default.
Density – Specifies the density of the cumulus and stratus types of clouds. A value of 100% fills up the sky with clouds. Density is available only when the Clouds option is enabled. See the Cloud Density example below.
Variety – Specifies the variety of the cumulus and stratus types of clouds. Variety is available only when the Clouds option is enabled. See the Cloud Variety example below.
Cirrus amount – Specifies the amount of cirrus clouds in the sky. The maximum value of 1 fills the sky with cirrus clouds. When set to 0, the cirrus clouds are completely gone. Cirrus amount is available only when the Clouds option is enabled. See the Cirrus Amount example below.
Longitude offset – Moves the cloud system along the longitude.
Latitude offset – Moves the cloud system along the latitude.
Altitude – Specifies the clouds position in height. Altitude is available only when the Clouds option is enabled.
Thickness – Lower values make the cumulus and stratus types of clouds thin and sheer/lucent, while higher values make them full and heavy. Thickness is available only when the Clouds option is enabled. See the Cloud Thickness example below.
Cast shadows on the ground – Enables the shadows casted by the clouds on the ground.
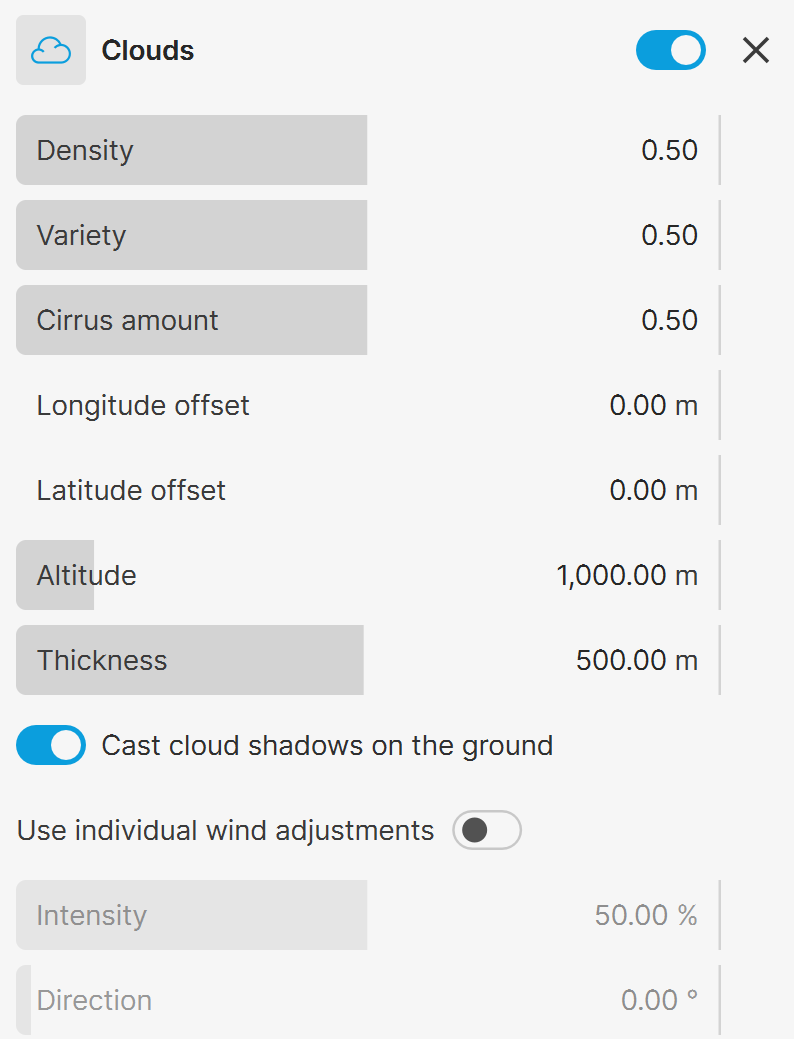
Wind
Wind – If the project includes compatible assets like animated trees, they swing with the wind. See the Wind Weather Effect example below.
Direction – Sets the direction from which the wind is blowing. A North wind blows from North (0°) to South (180°) and pushes animated vegetation, clouds and water waves to the South. See the Wind Intensity & Direction example below.
Intensity – Specifies the wind strength. When set to 0, the vegetation seems static. See the Wind Intensity & Direction example below.
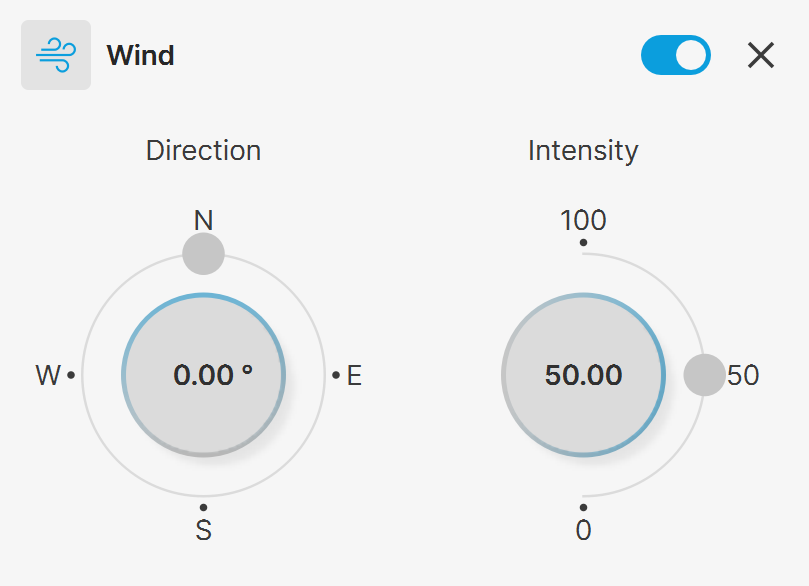
Haze
Visibility range – Specifies the distance in km at which the fog has absorbed 90% of the light coming from objects behind it. Lower values make the fog appear denser, while larger values reduce the effect.
Height – Specifies the height of the fog layer in meters.
Start distance – Specifies the distance from the camera at which the fog starts.
Opacity – Specifies the maximum opacity of the fog. A value of 1 means the fog is completely opaque, while 0 means the fog is invisible.
Haze color – Specifies the color of the fog layer.
Sun
Sunlight – Turns on and off the sun light.
General Properties
Sunlight intensity – Controls the intensity of the sun and can be used to reduce the default brightness. See the Sunlight Intensity example below.
Color – Changes the color of the sun.
Sun disk size – Controls the visible size of the sun disk. This value can be used to control shadow softness cast from objects. Lower values produce sharp shadows, while large values produce softer shadows. See the Sun Disk Size example below.
Sun Positioning
Positioning mode – Specifies the control mode for the sun's position in the sky.
Altitude/Azimuth – Specifies the use of Altitude and Azimuth values to control the sun's position.
Geolocation – Specifies the use of location coordinates, date and time of day to control the sun position.
The following parameters are available when Azimuth/Altitude is enabled.
Altitude – Sets the altitude position (in degrees) of the sun in the sky.
Azimuth – Sets the azimuth position (in degrees) of the sun in the sky.
The following parameters are available when Geolocation is enabled.
Latitude – Sets the latitude position of the scene over the Earth globe.
Longitude – Sets the longitude position of the scene over the Earth globe.
Day / Month / Year – Sets the day/month/year for which to compute the sun position.
Time – Sets the hours/minutes for which to compute the sun position.
Time zone – Sets the current time zone of the scene. The Time Zone is not set automatically based on Latitude/Longitude values.
Daylight saving time – When enabled, compensates for Daylight Saving Time(DST).
Ground & Horizon
Ground color – Specifies the color of the ground.
Blend angle – Specifies the angle in degrees where blending occurs between the horizon line and sky. Values close to 0.0 produce a sharper horizon line, while larger values produce a softer horizon line.
Horizon offset – Allows you to manually lower the horizon line.
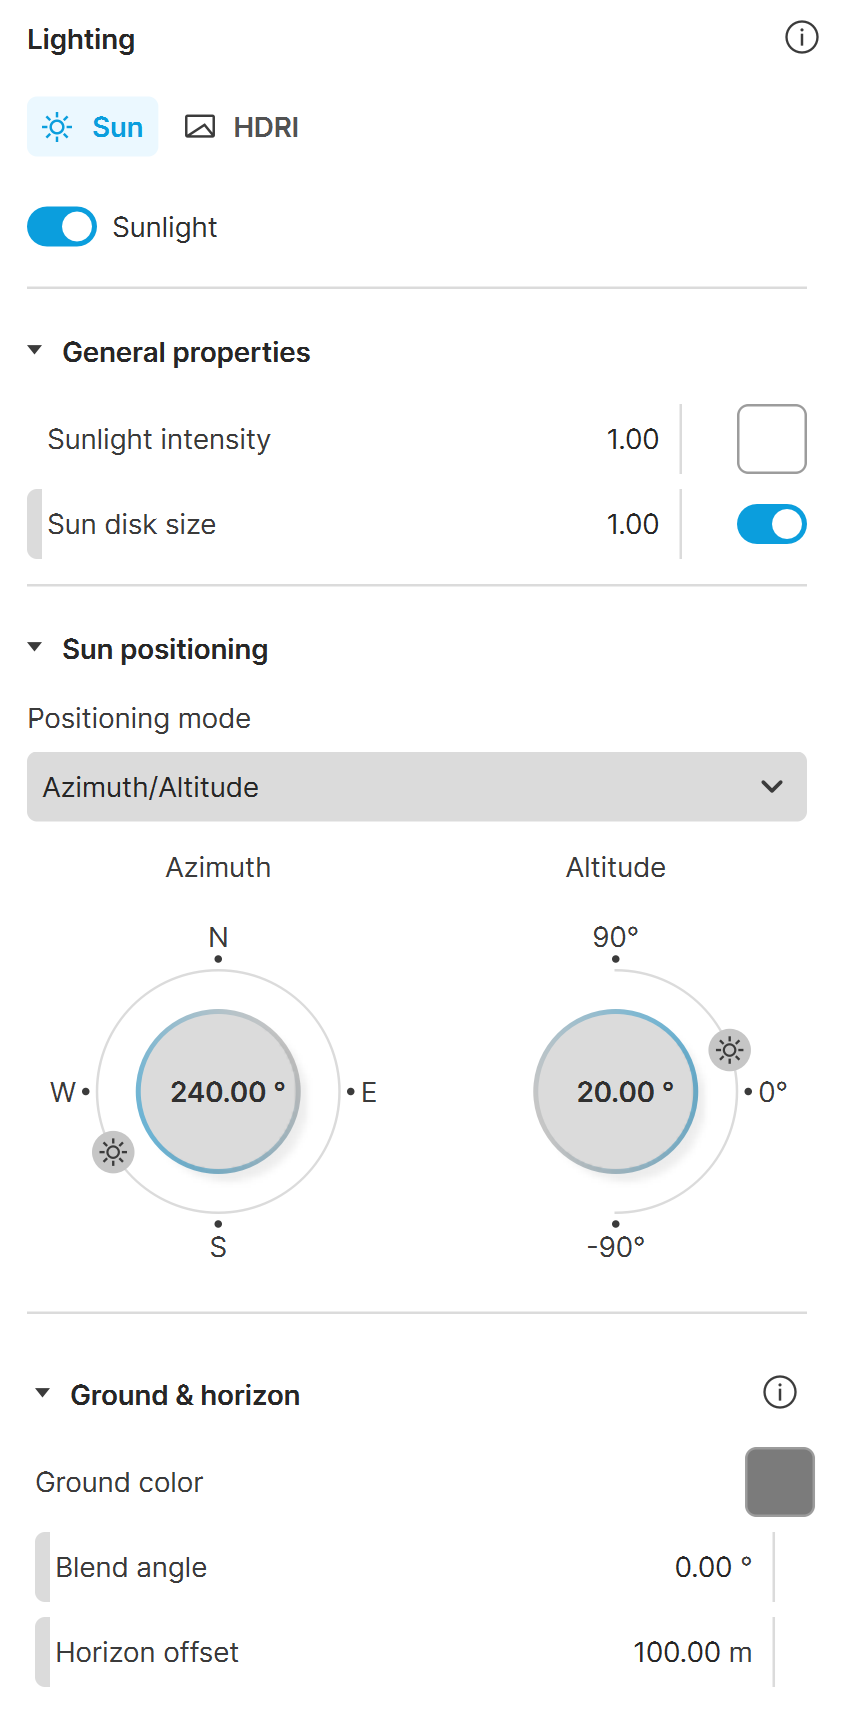
Azimuth/Altitude is selected
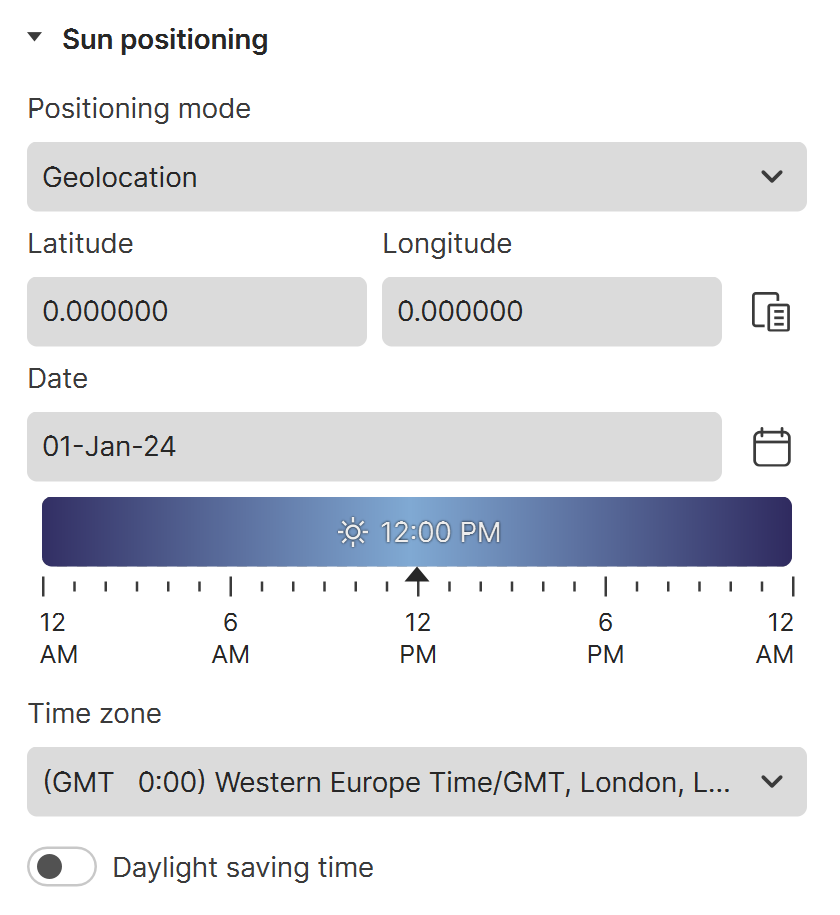
Geolocation is selected.
HDRI
HDRI – Enables the use of an environment texture for lighting. You can either load a custom texture or select a premade HDRI texture from the Chaos Cosmos library. Both .exr and .hdr texture files are supported. When disabled, clouds are automatically generated on the sky.
Use as light source –
Select Environment Map – Loads an image for Environment. The image can be an .exr file or an .hdr file.

Open Cosmos browser () – Opens the Cosmos Asset Library in the left panel, where you can select an environment map and load it.

Open file () – Opens a browser window where you can load a custom environment map.

Flip the HRDI horizontally () – Flips the loaded texture horizontally.
Preview Exposure – Controls the brightness of the HDRI preview. It does not affect the camera exposure.
Intensity – Specifies the intensity of the Environment lighting.
Rotation – Specifies a rotation angle in degrees for the Environment texture.
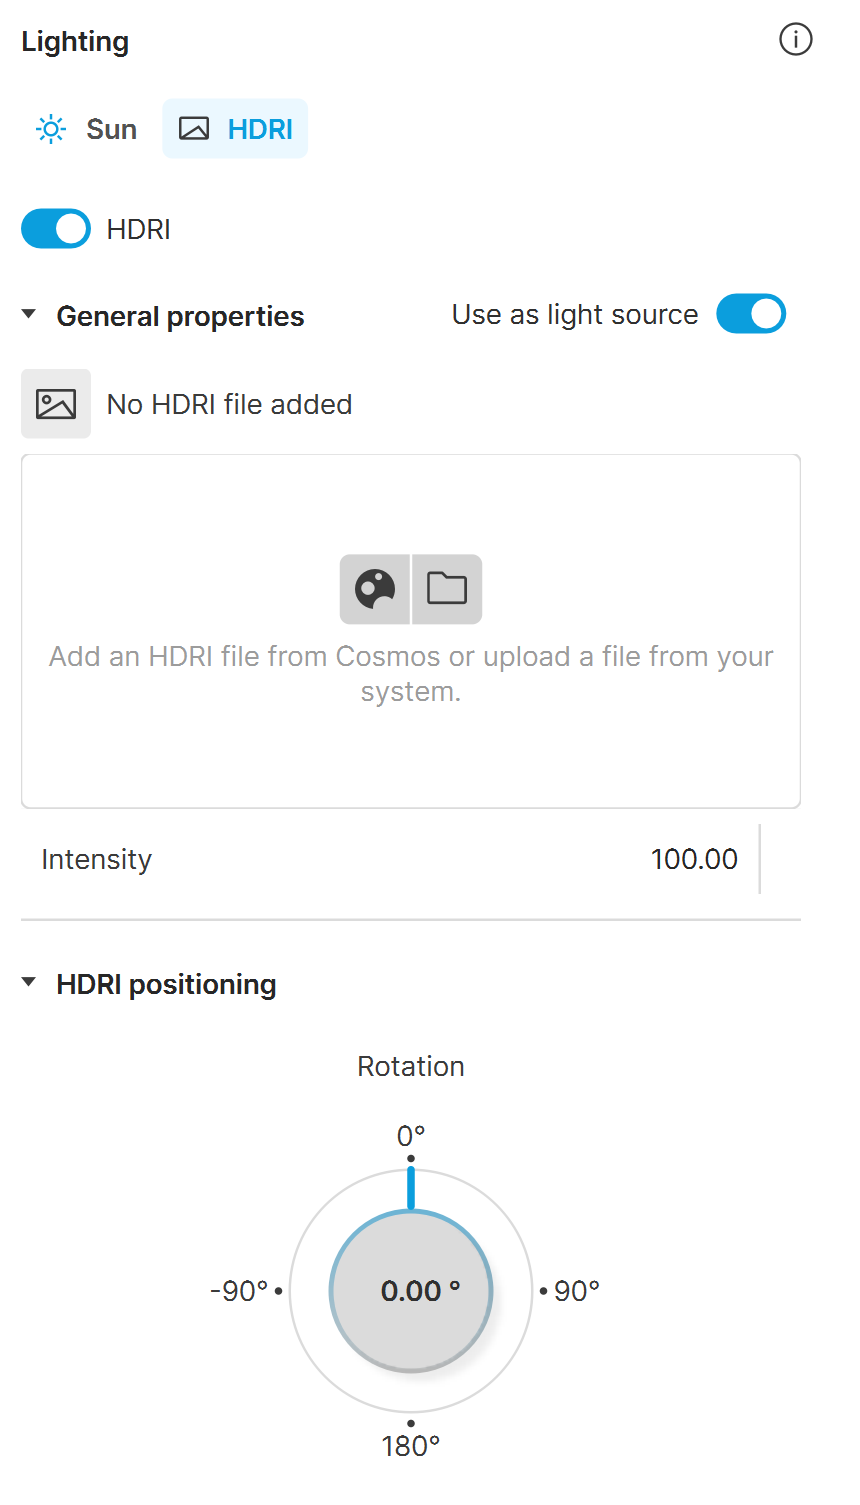
Examples
The following examples demonstrate the effect that individual Environment parameters have. Click on any image to view it at a higher resolution.
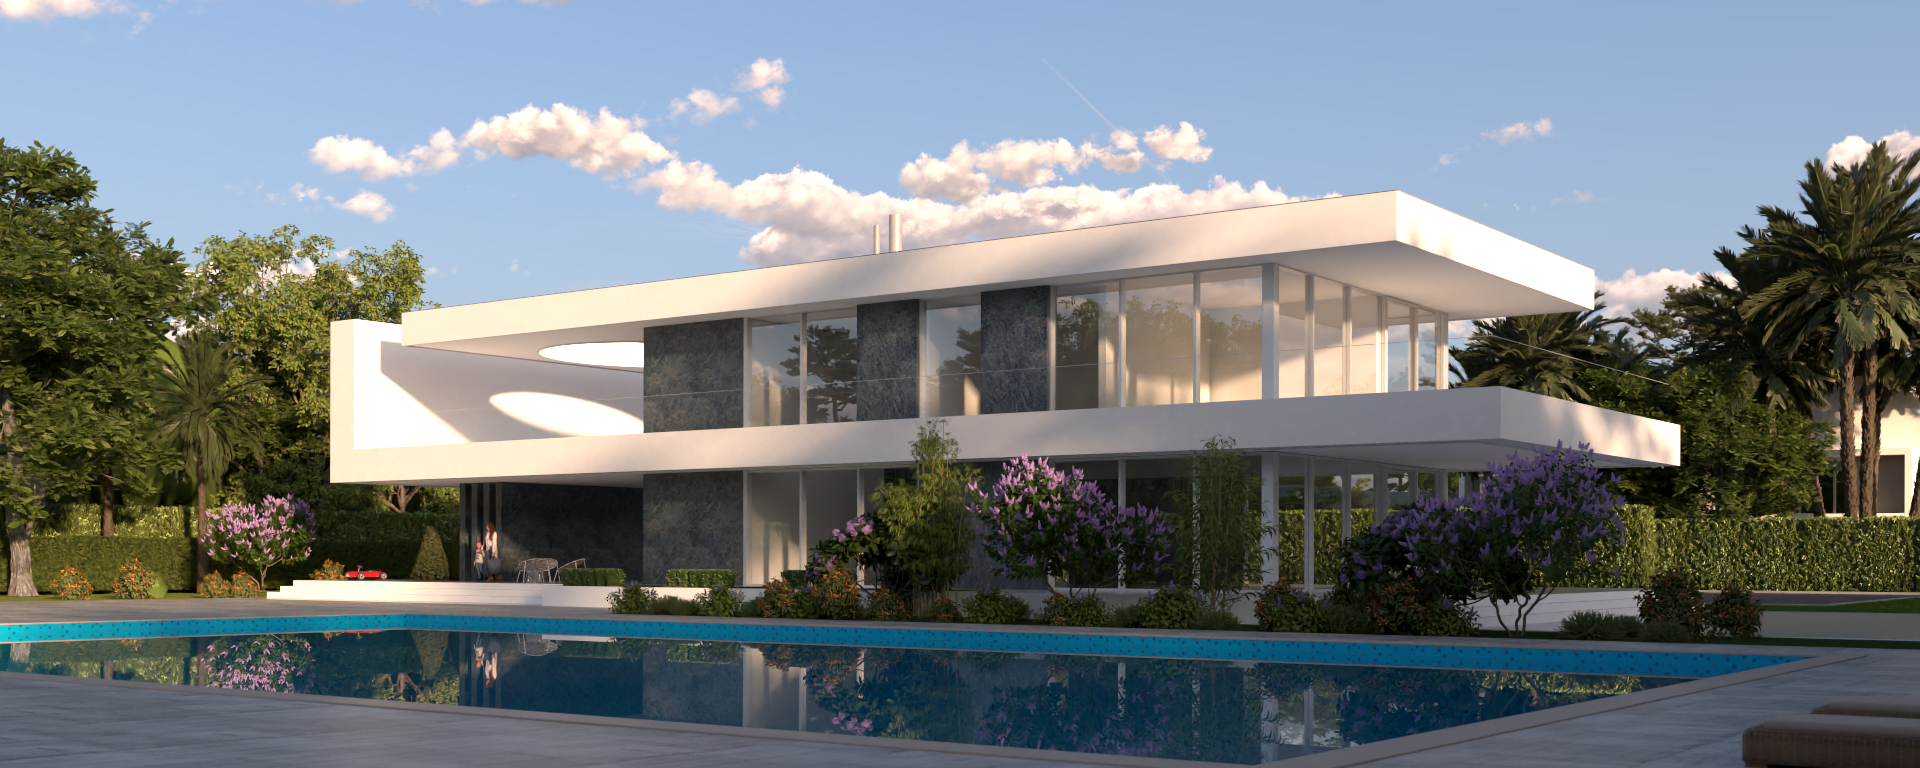
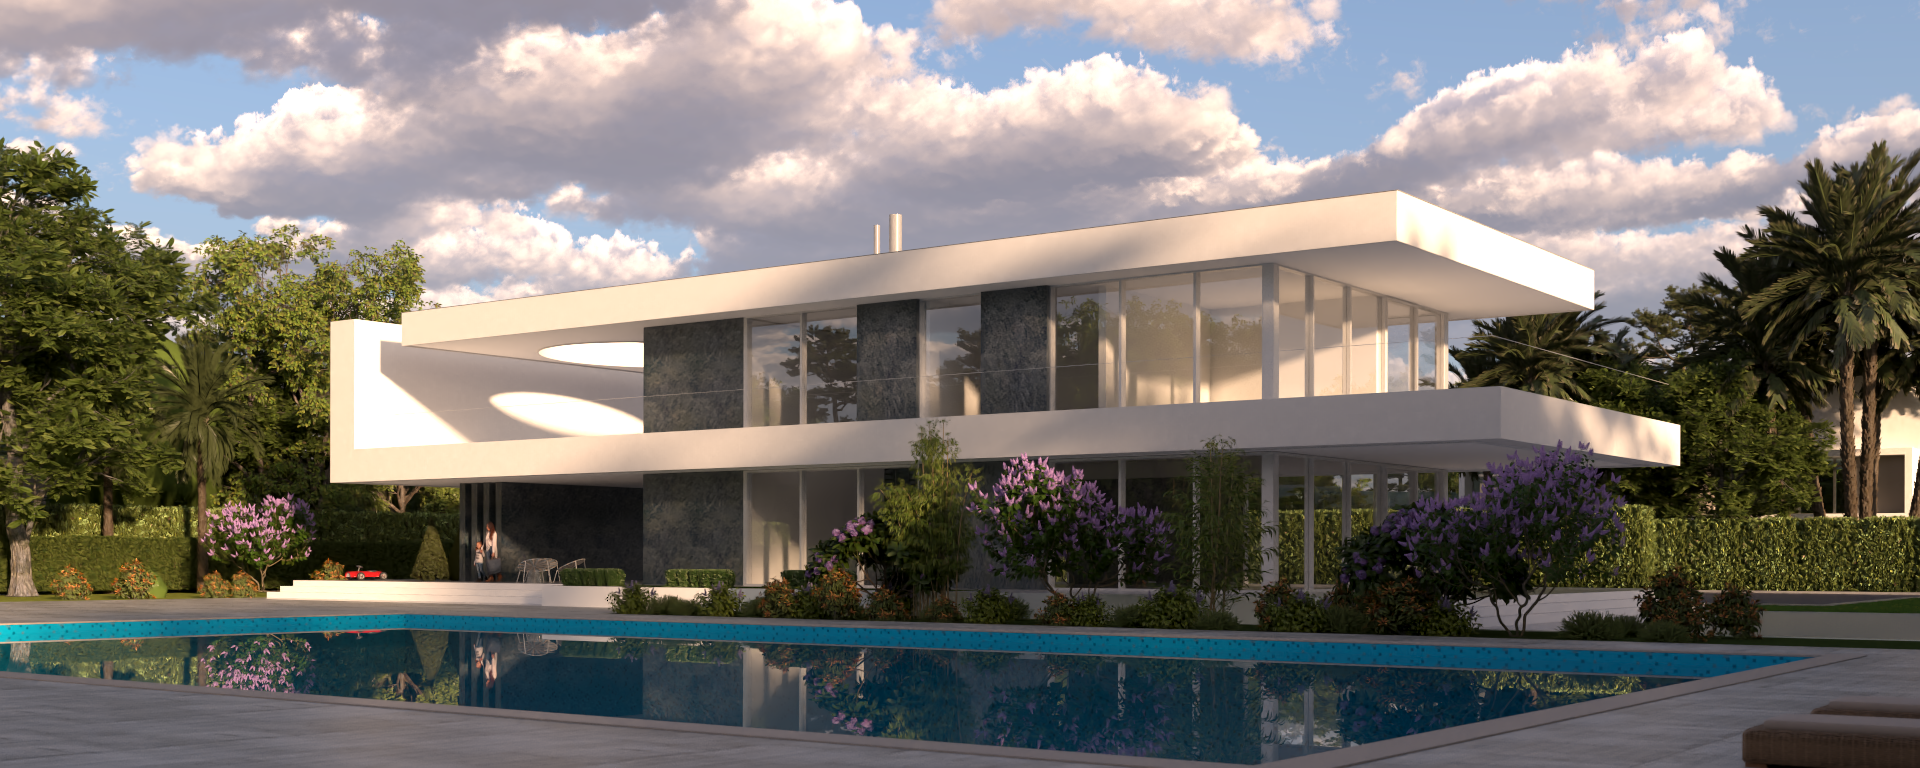
Example: Cloud Density
This example shows the effect of the cloud's Density parameter. As the value of the Density parameter increases, the clouds become denser and more numerous.
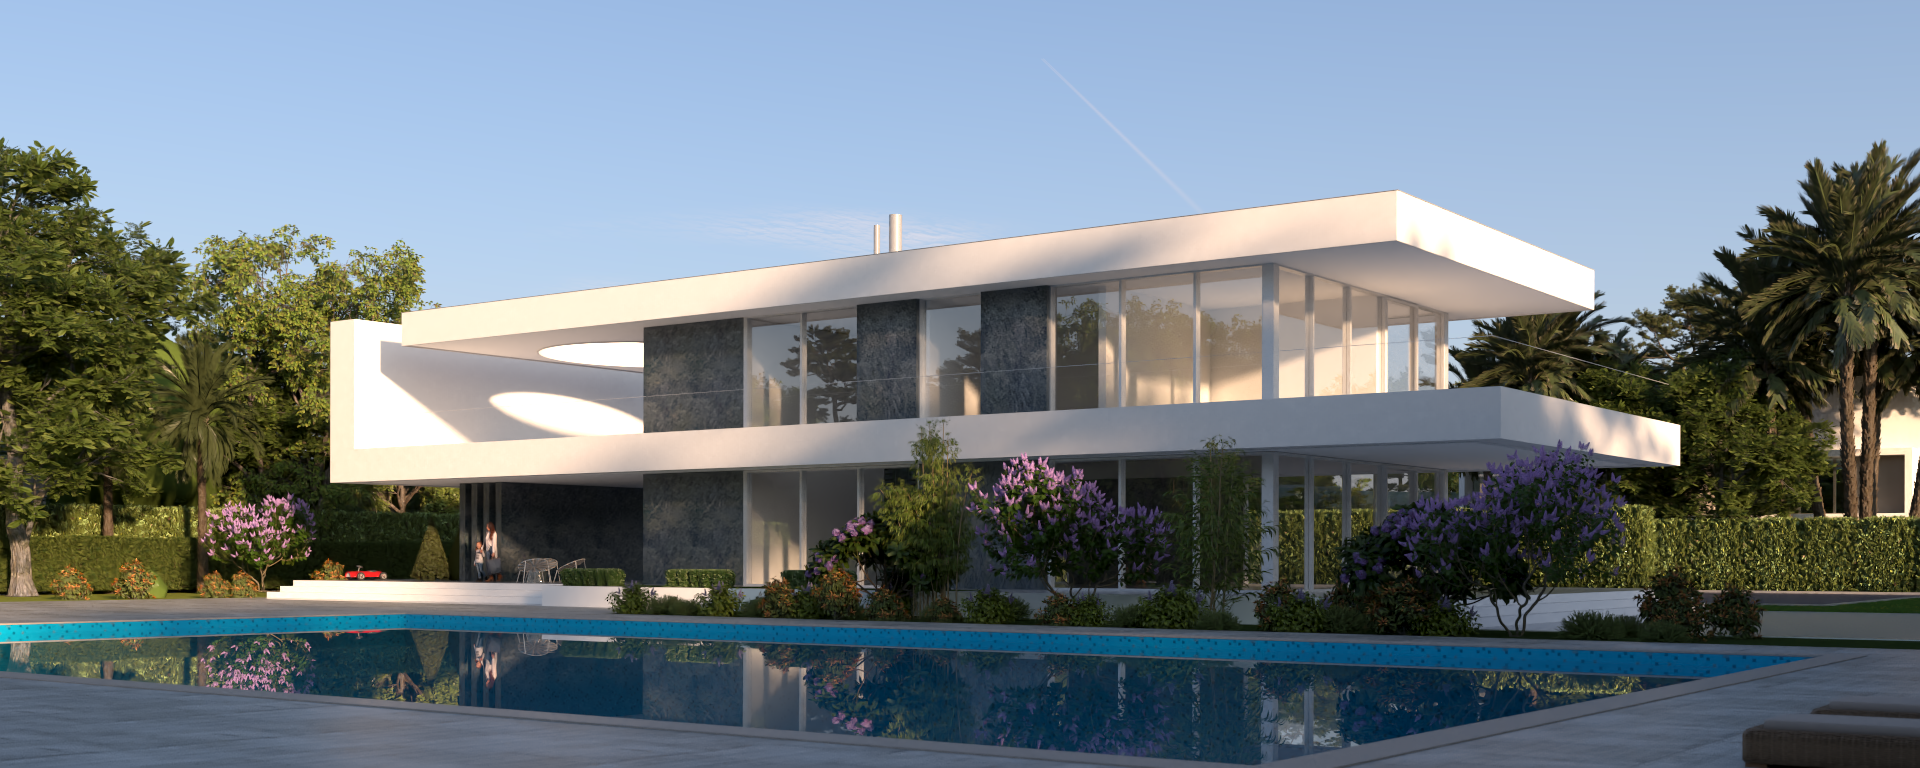
Density = 0
Density = 0.5
Density = 0.8
Example: Cloud Variety
This example shows how the Variety parameter affects the distribution and look of the clouds. The Density is set to 0.4 for all images.
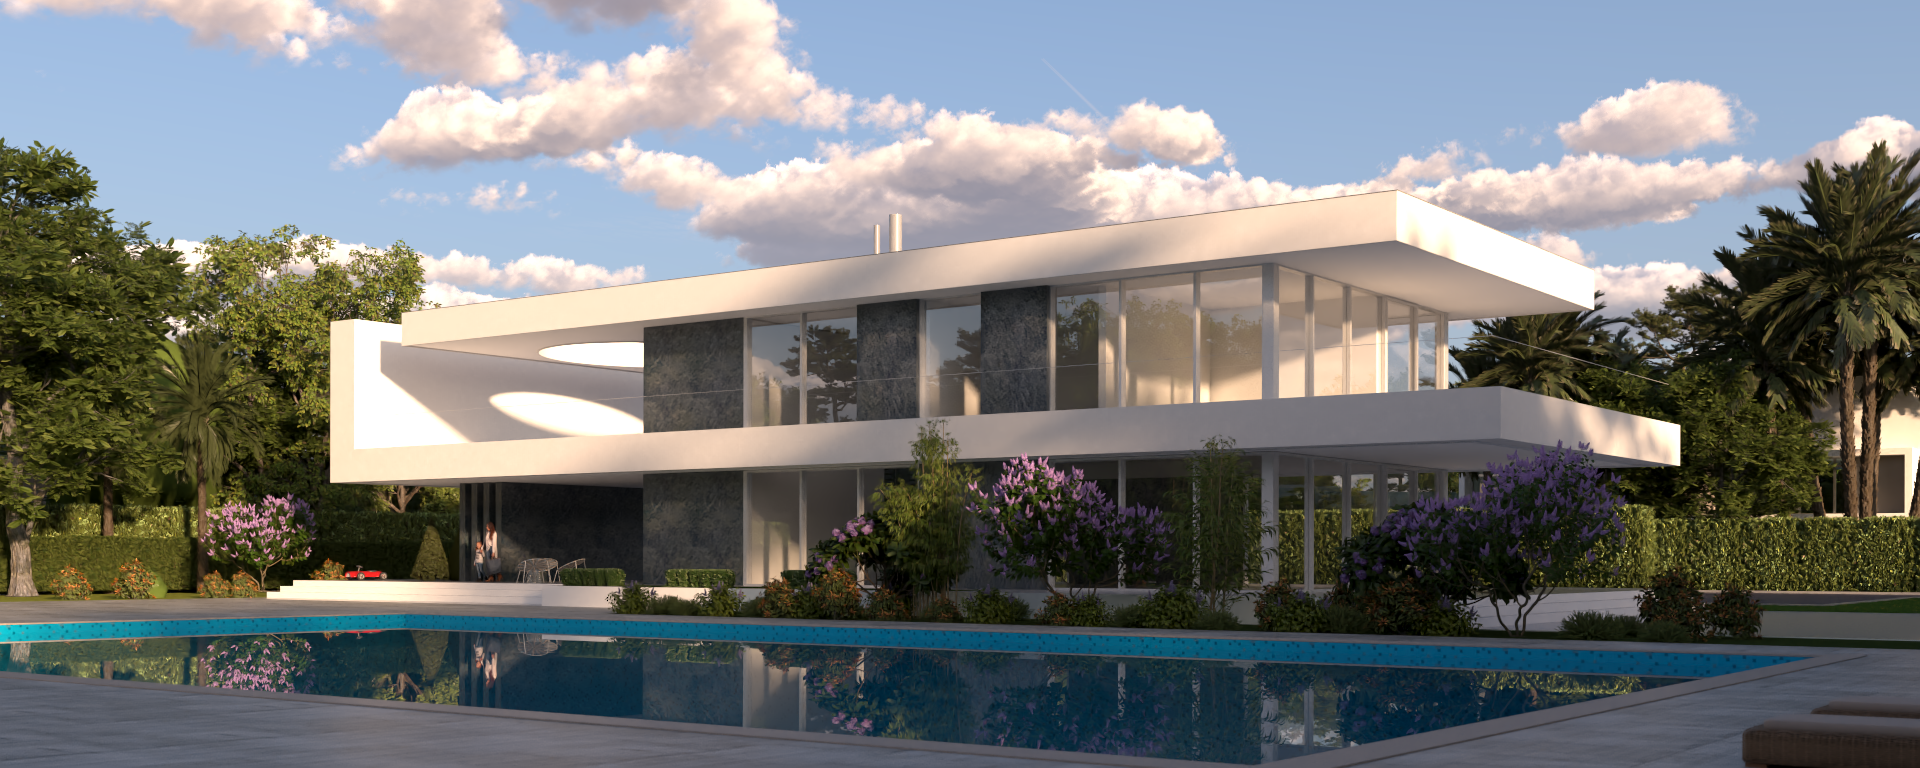
Variety = 0
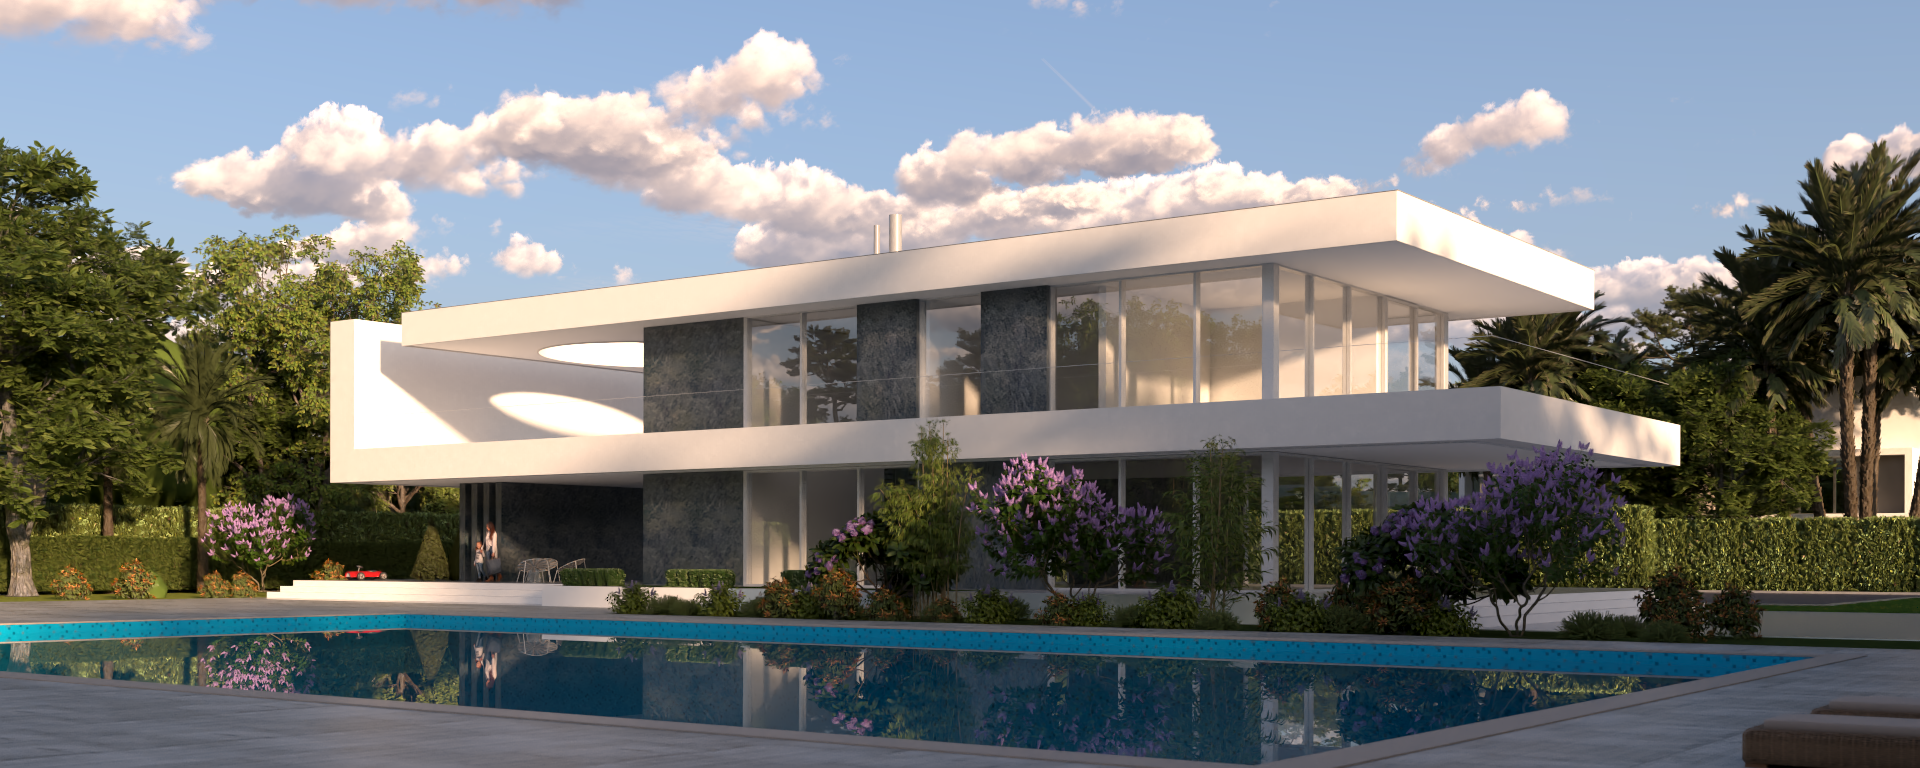
Variety = 0.5
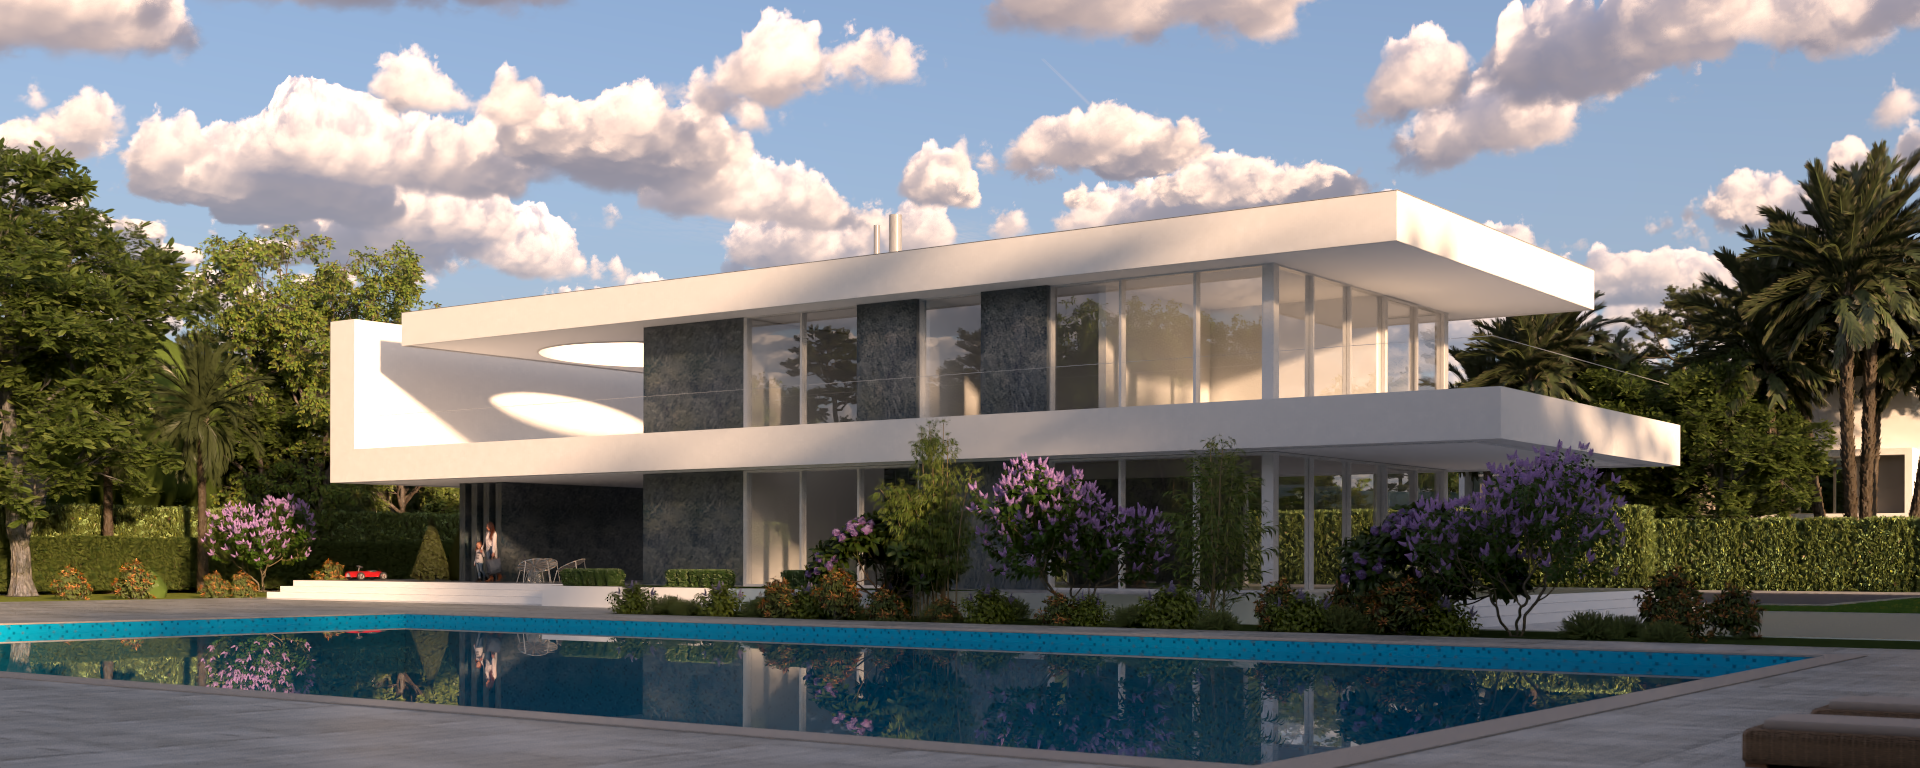
Variety = 1
Example: Cirrus Amount
This example shows how increasing the Cirrus amount increases the appearance of the cirrus (high altitude, wispy) clouds in the render.
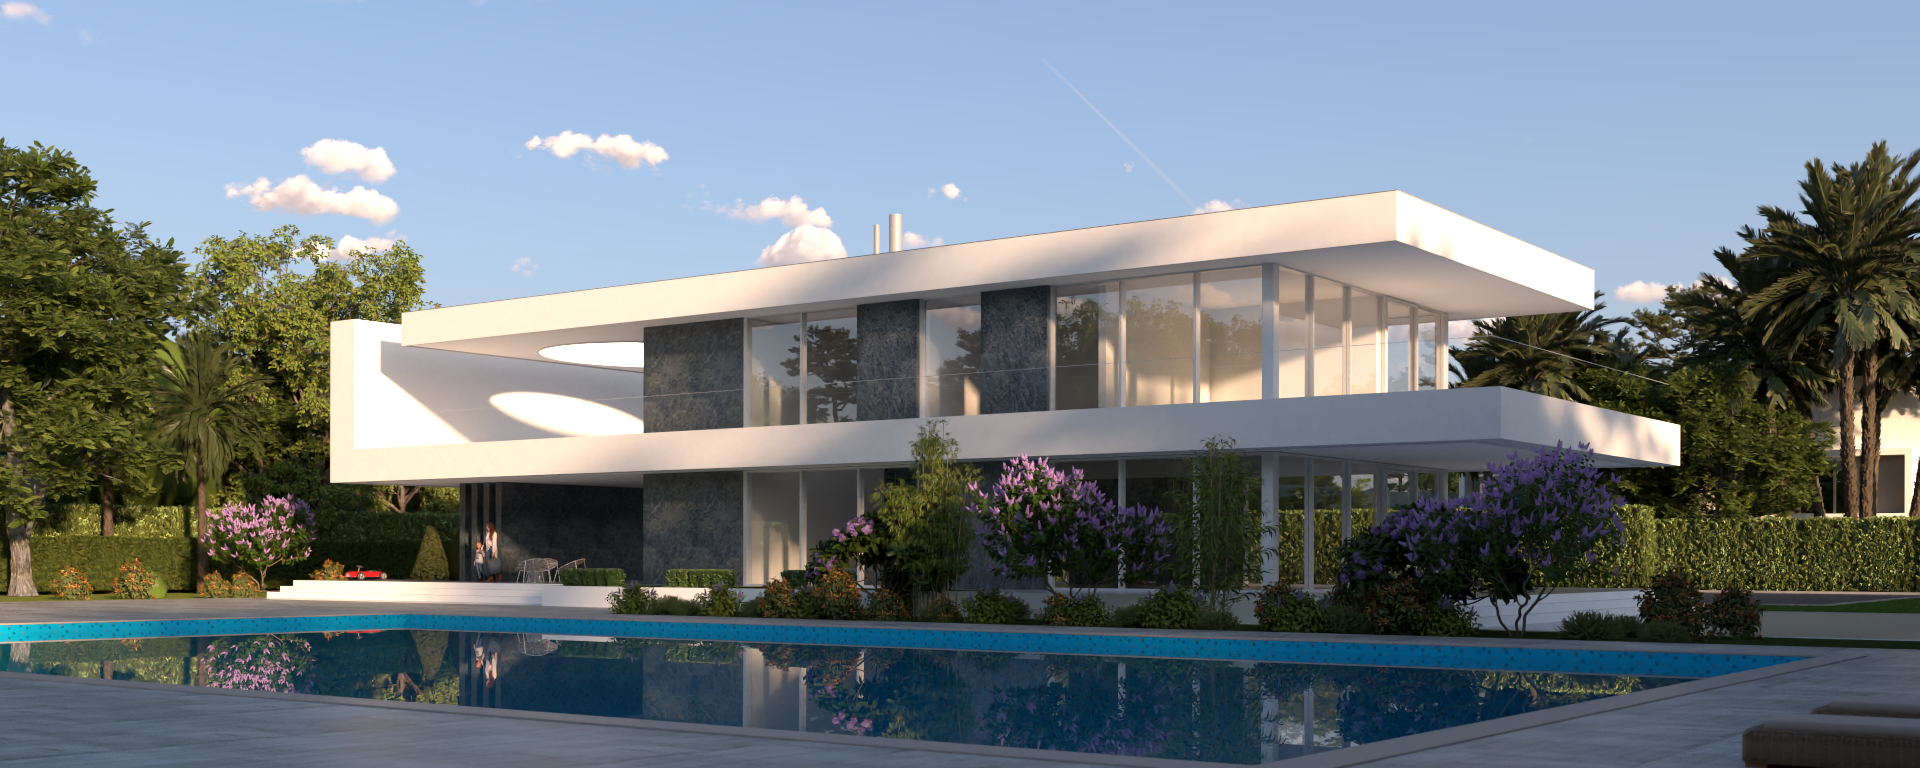
Cirrus amount = 0
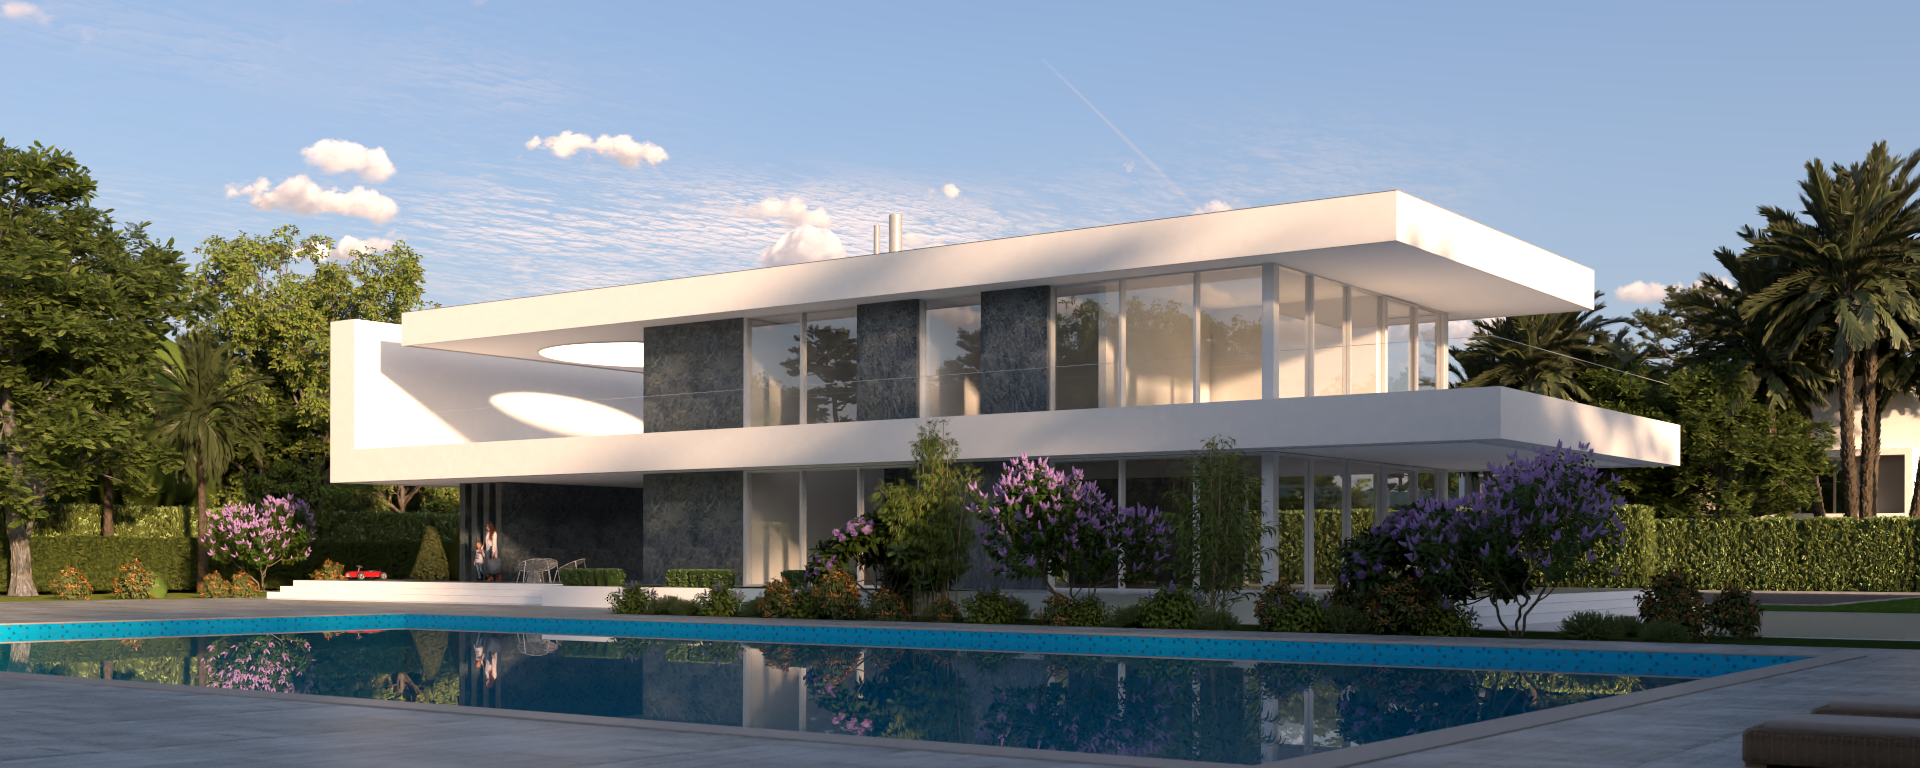
Cirrus amount = 0.5
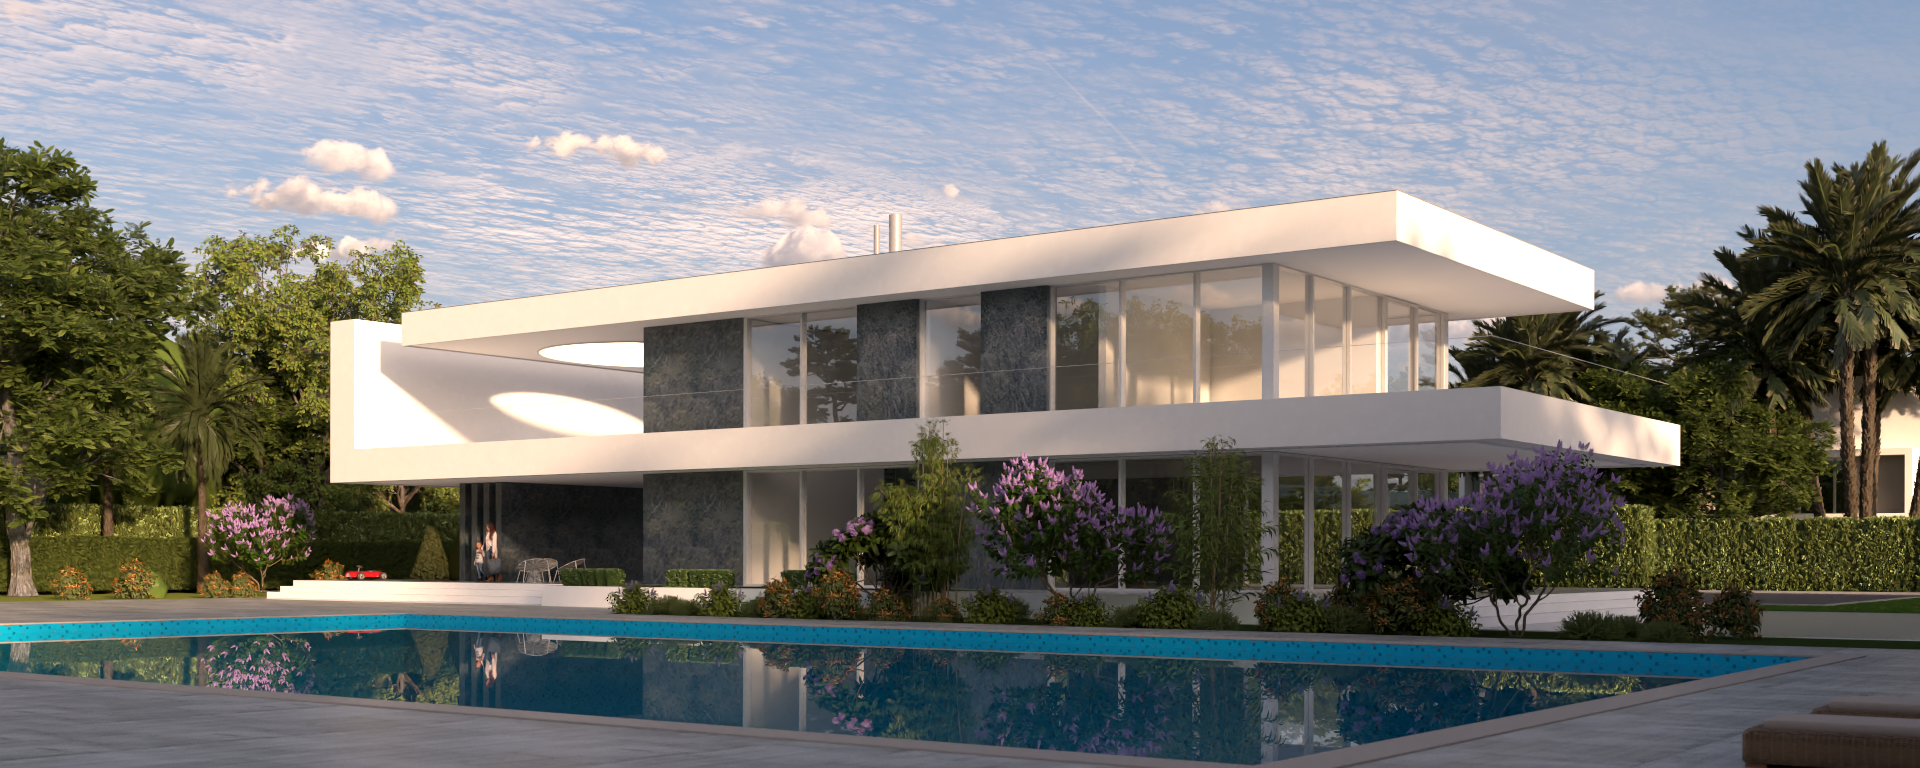
Cirrus amount = 1
Example: Cloud Thickness
The thickness parameter specifies how full the clouds are. Smaller values make them more thin and sheer, while higher values make them look heavy.
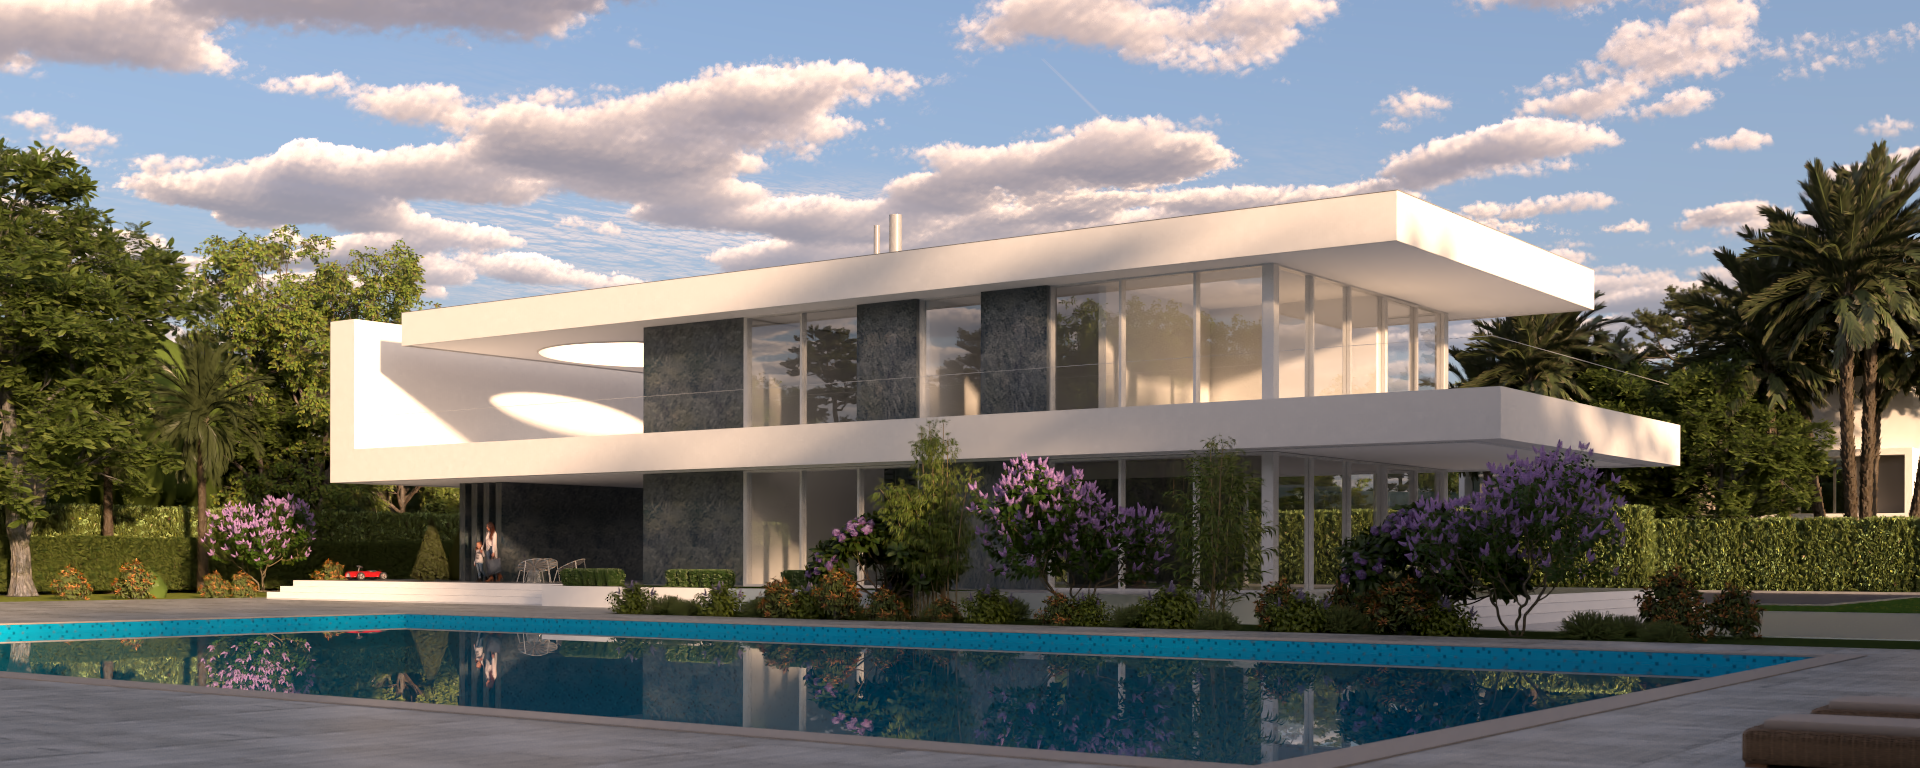
Thickness = 200
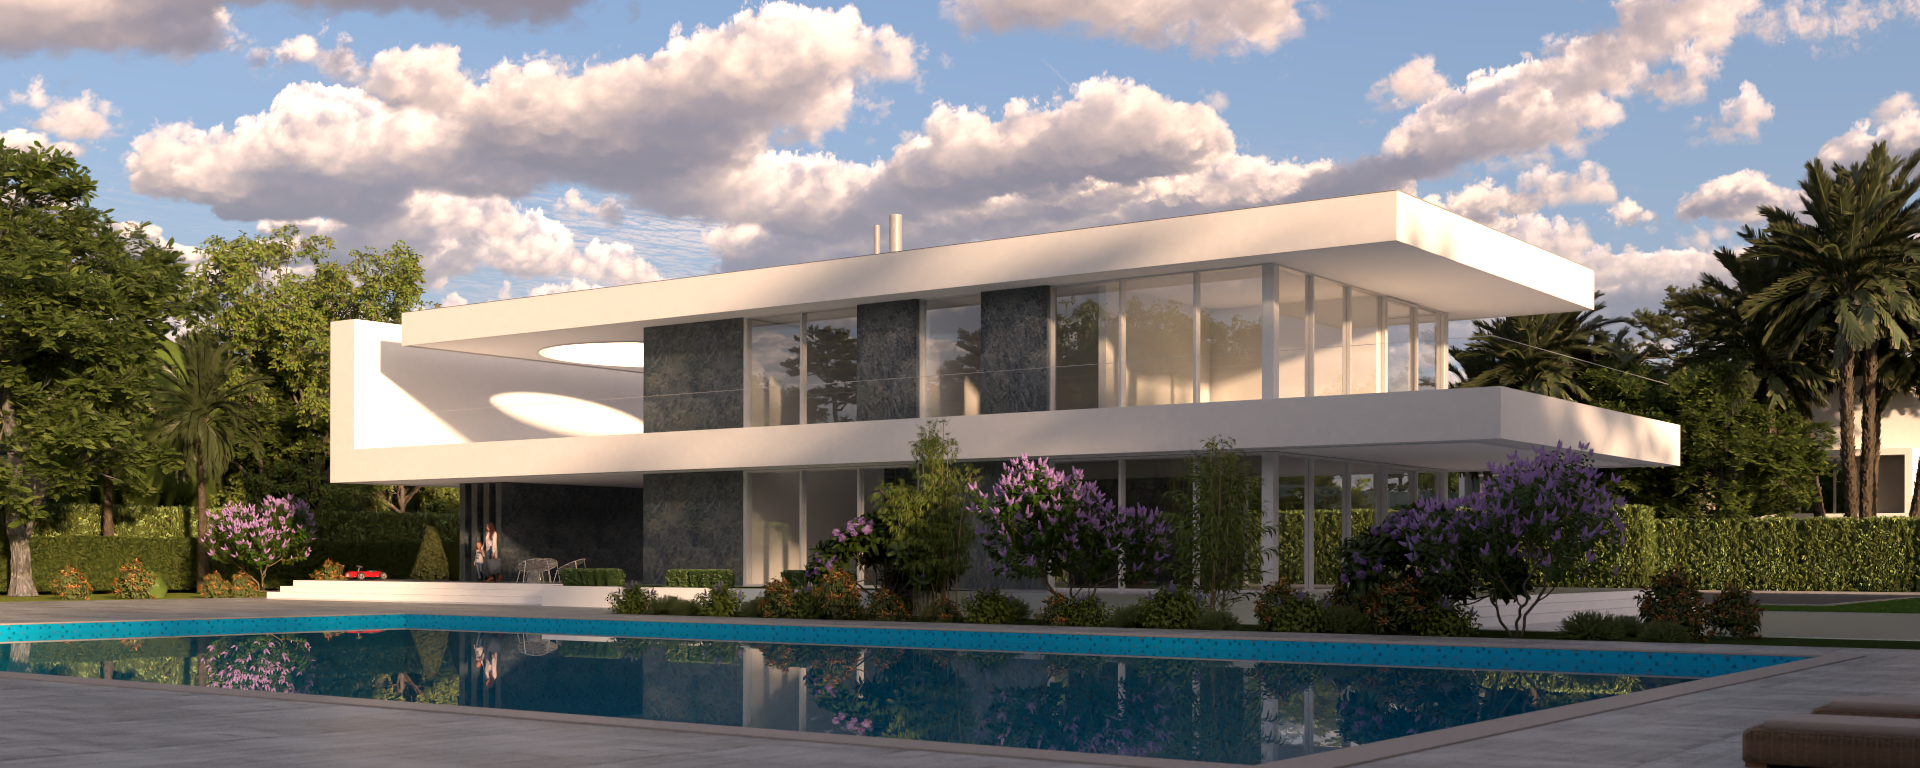
Thickness = 500
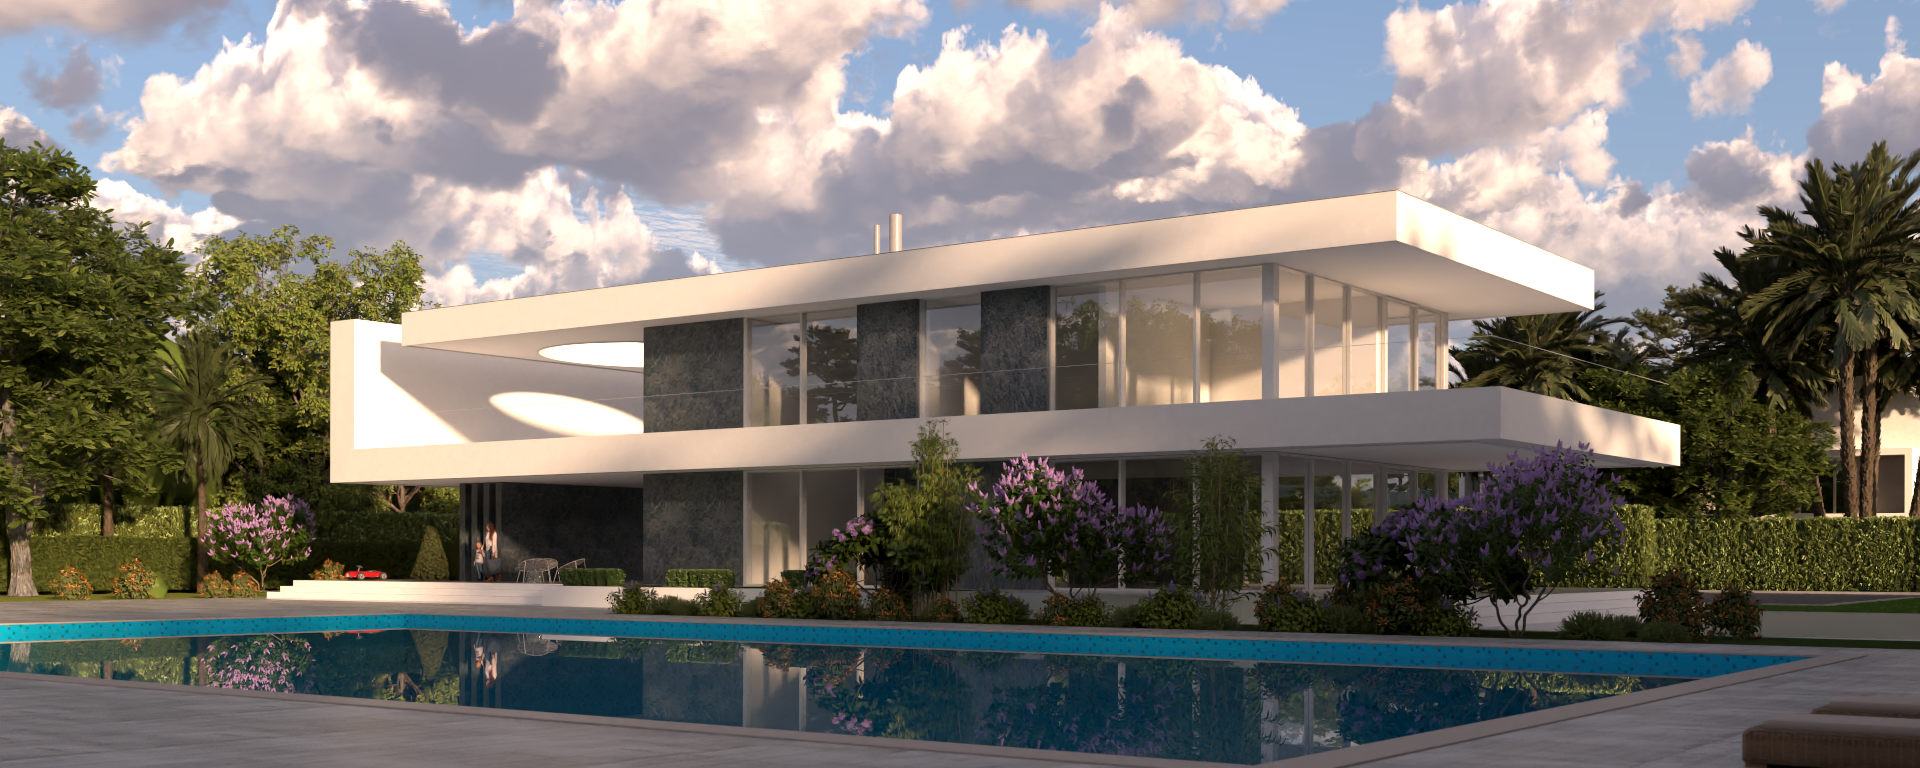
Thickness = 1000
Example: Wind Weather Effect
This example shows the effect of the Wind enhancement. Notice that when this enhancement is enabled, the vegetation becomes animated.
Example: Wind Intensity & Direction
This example shows the effect of the Wind Intensity and Direction parameters. The bigger the Intensity value, the more noticeable the movement becomes.
youtu.be
youtu.be
Example: Sunlight Intensity
This example shows the effect of Sunlight intensity parameter. Note that the Auto Exposure has been disabled for all three images.
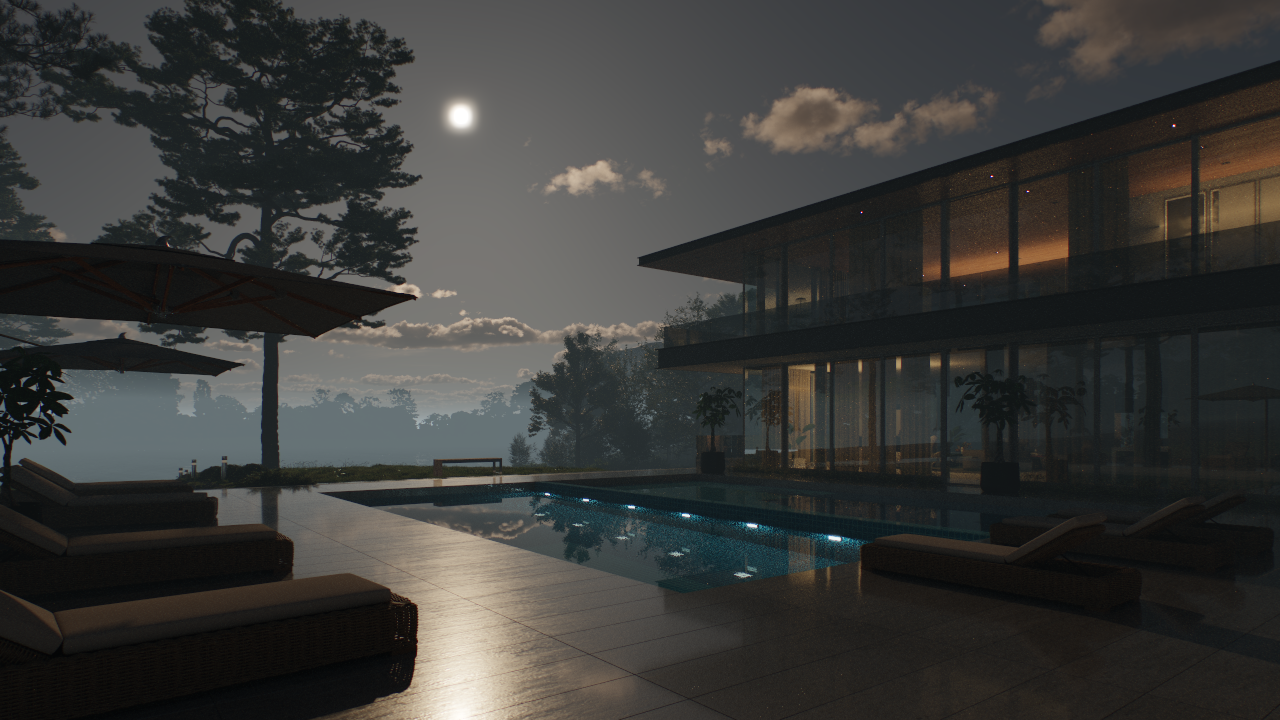
Sunlight intensity = 0.05
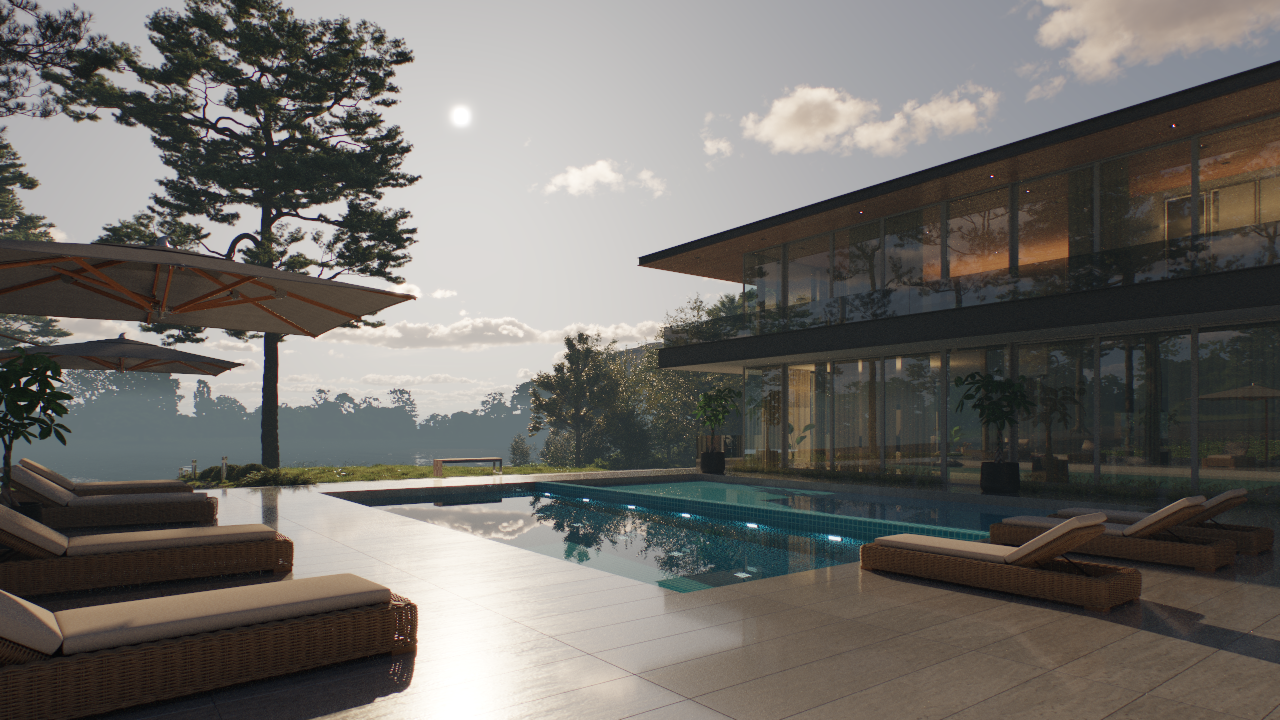
Sunlight intensity = 0.5
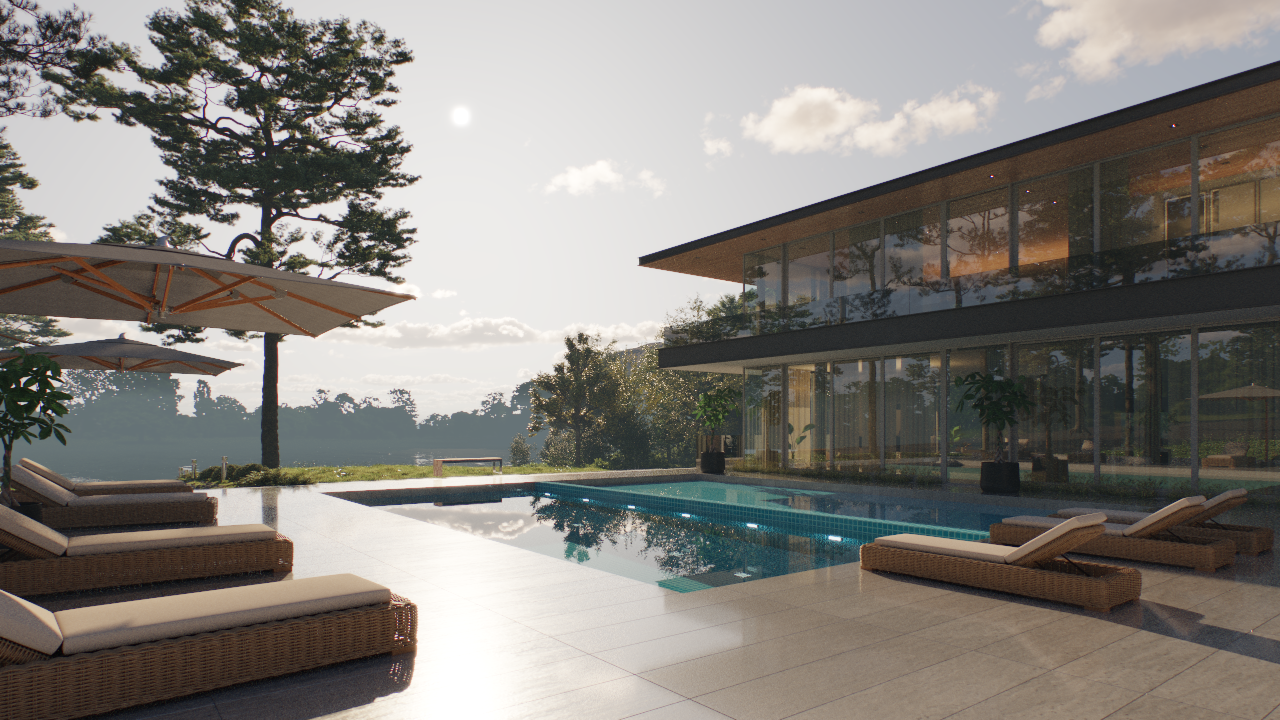
Sunlight intensity = 1
Example: Sun Disk Size
This example shows the effect of Sun disk size parameter.
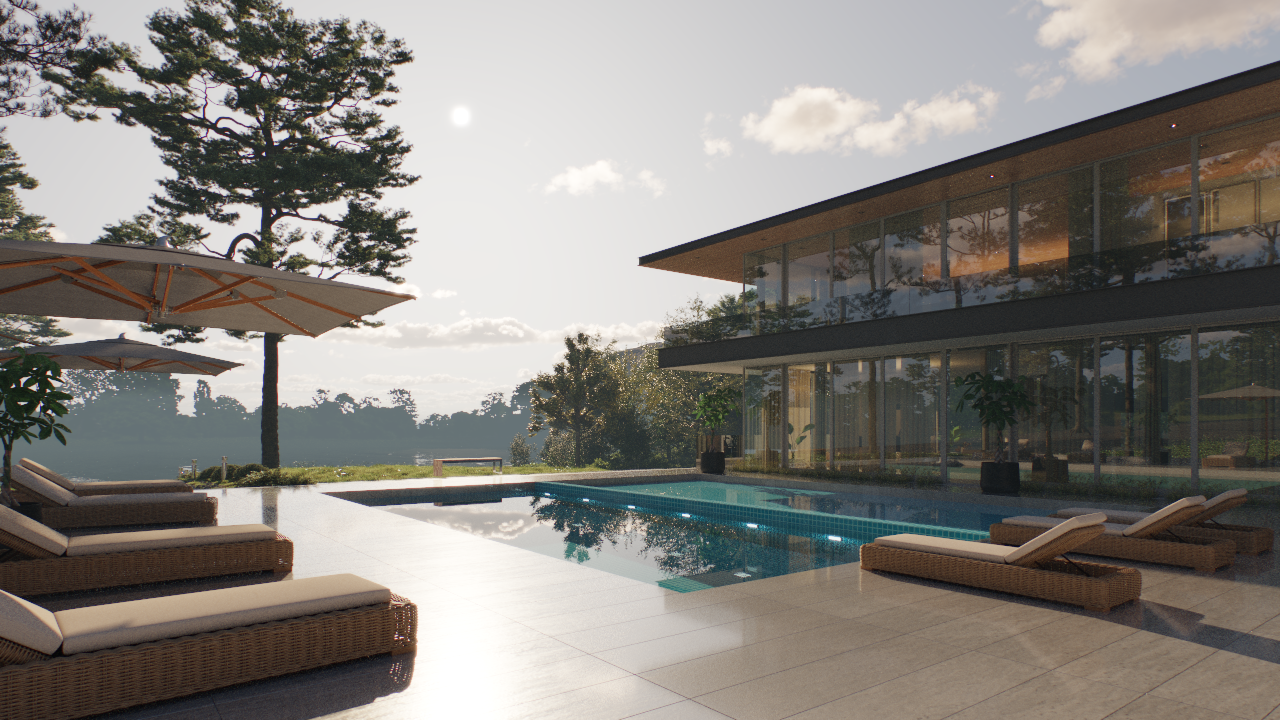
Sun disk size = 1
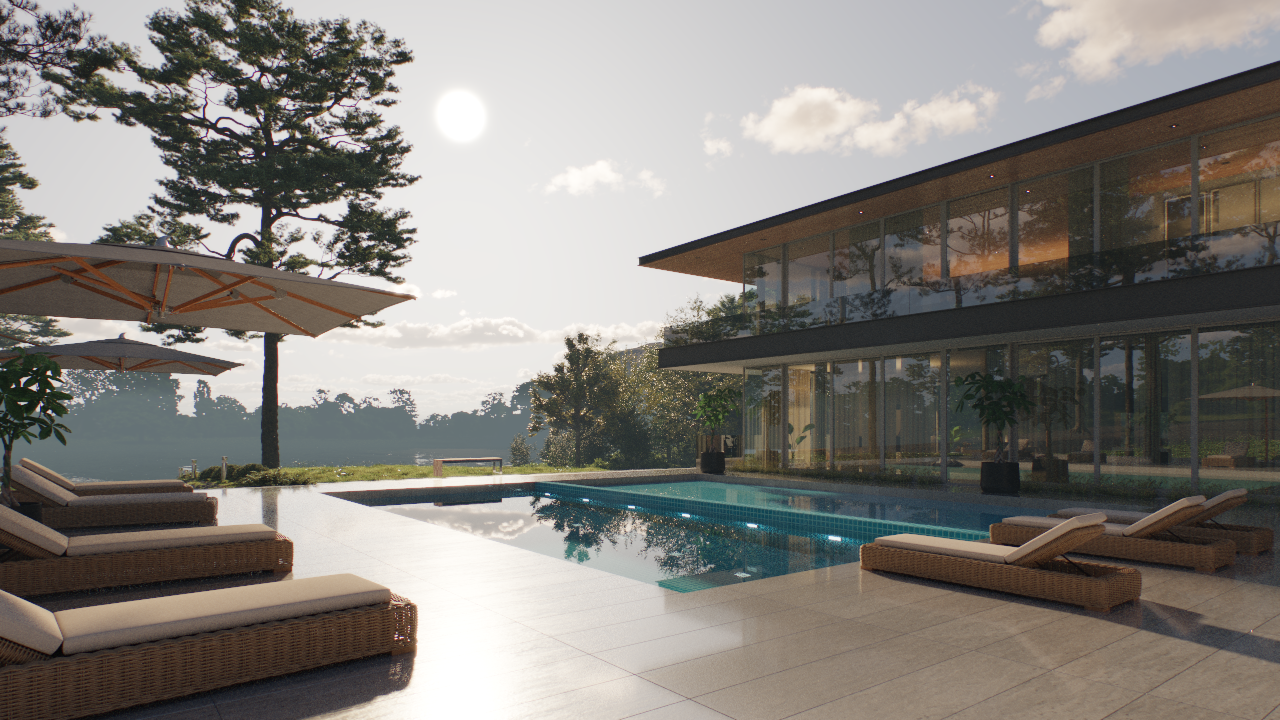
Sun disk size = 5
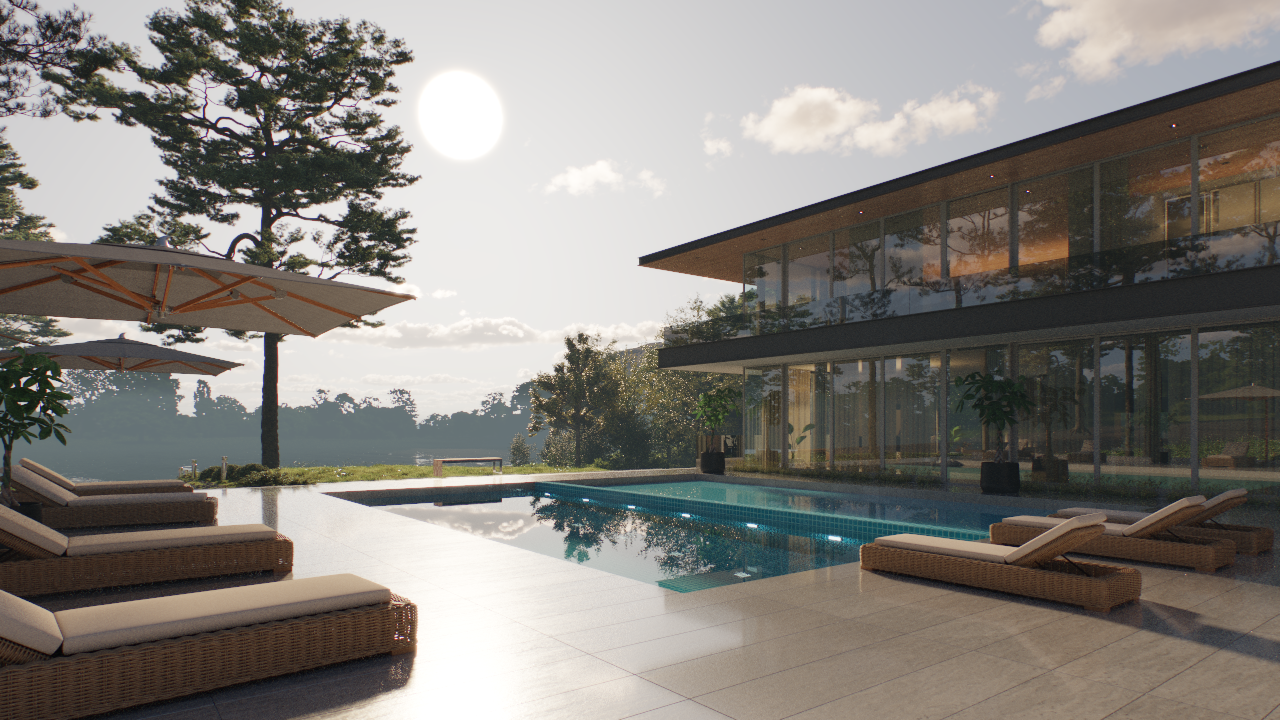
Sun disk size = 10
See also: