Create Section planes and Section boxes in Enscape Envision. This article explains how to edit them and adjust their settings.
Overview
A Section object clips away parts of your model. There are two types. A Section plane uses a plane to make the cut, while a Section box uses a box.
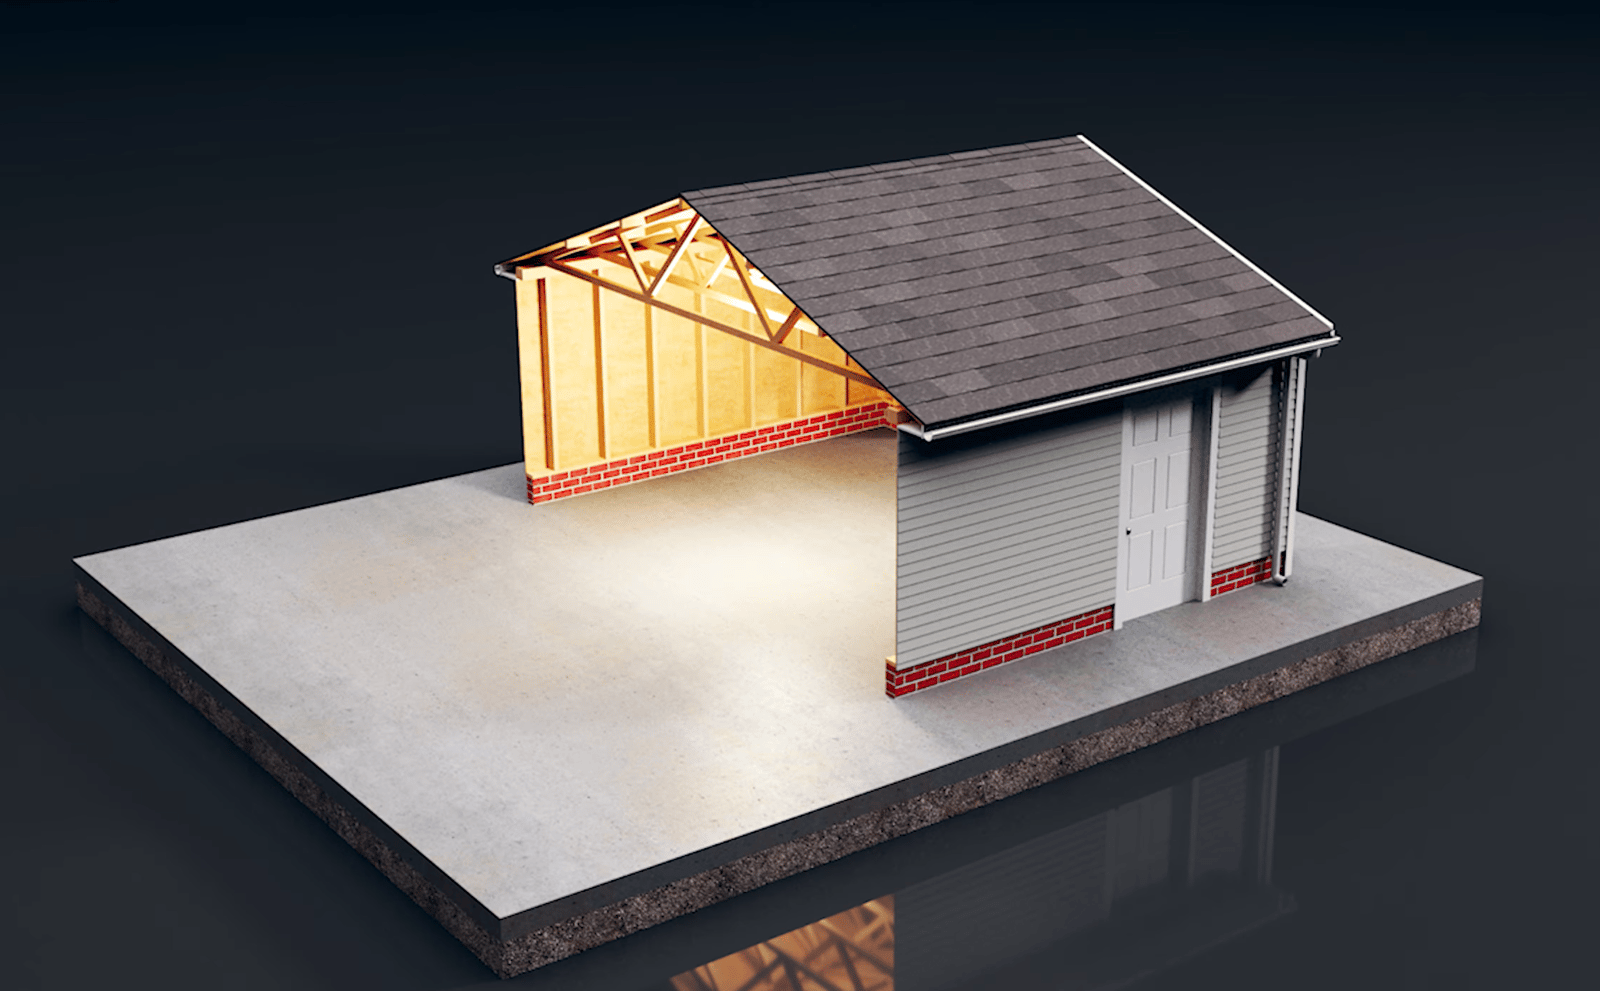
Create a Section object
Create a Section plane
- Use the Create section tool in the top toolbar.
- Choose Section plane from the dropdown.
- Click in the viewport to create the section plane.
- Set Cut direction in the Details panel.
Section plane video.
Create a Section box
- Use the Create section tool in the top toolbar.
- Choose Section box from the dropdown.
- Click and drag in the viewport to define the base of the box.
- Release the mouse button, move the cursor upward to set the height, then click to finish.
- Set Cut direction in the Details panel.
Section box video.
Find and edit existing Section objects
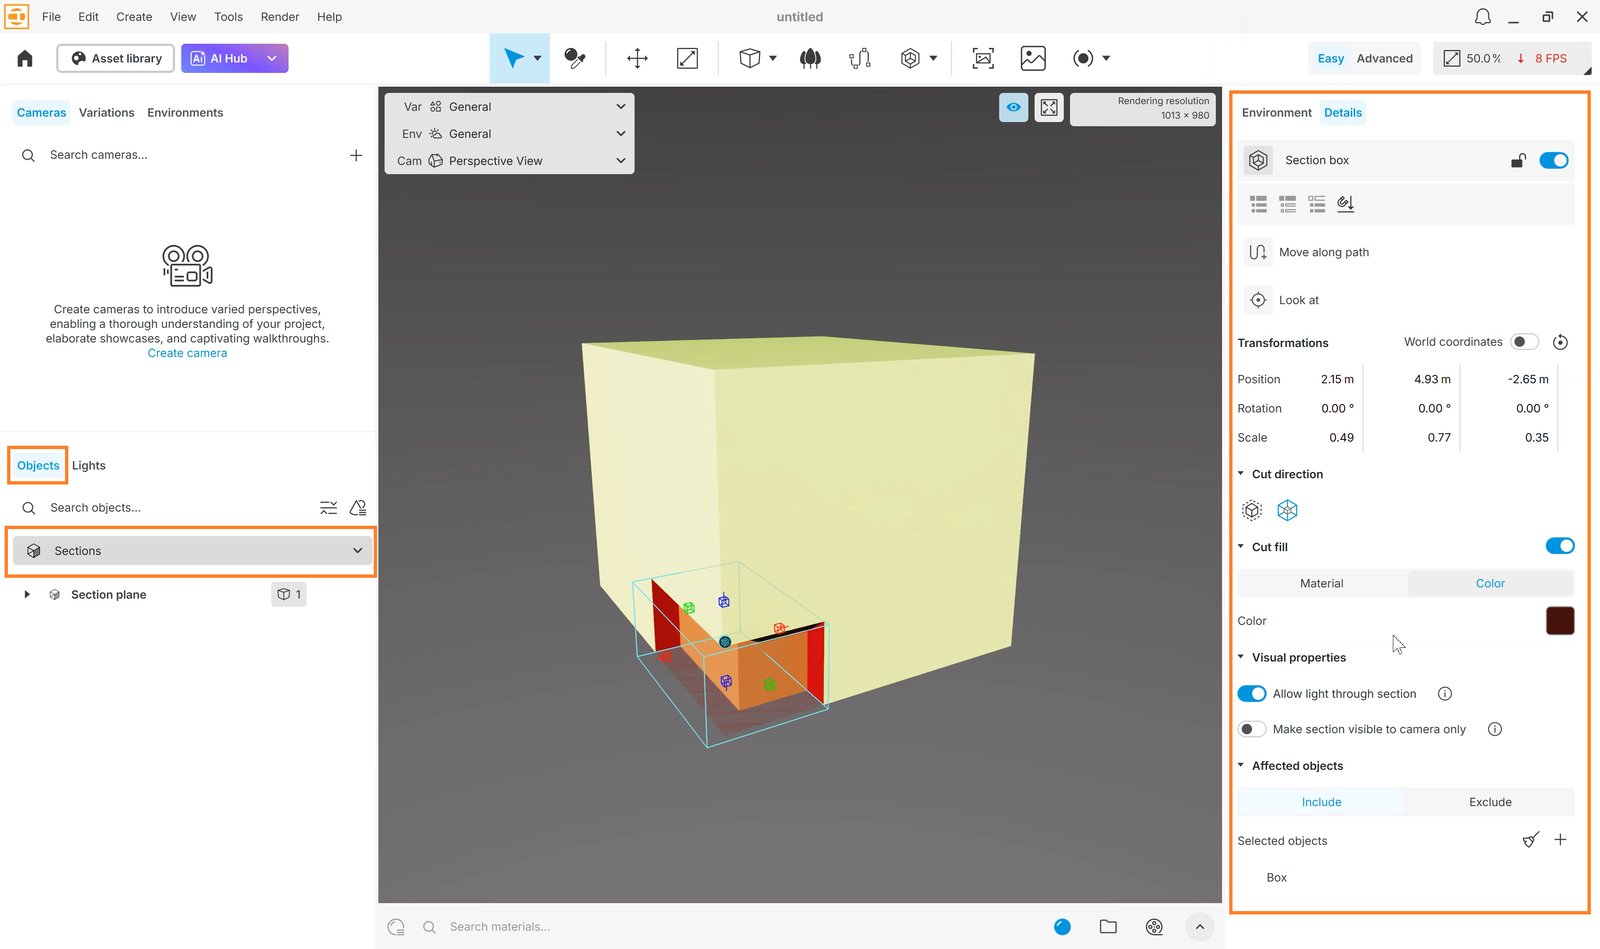
After you create a section object, it appears in the Objects tab when the Sections filter is enabled. Select it in the Objects tab to show its settings in the Details panel.
Actions for Section objects
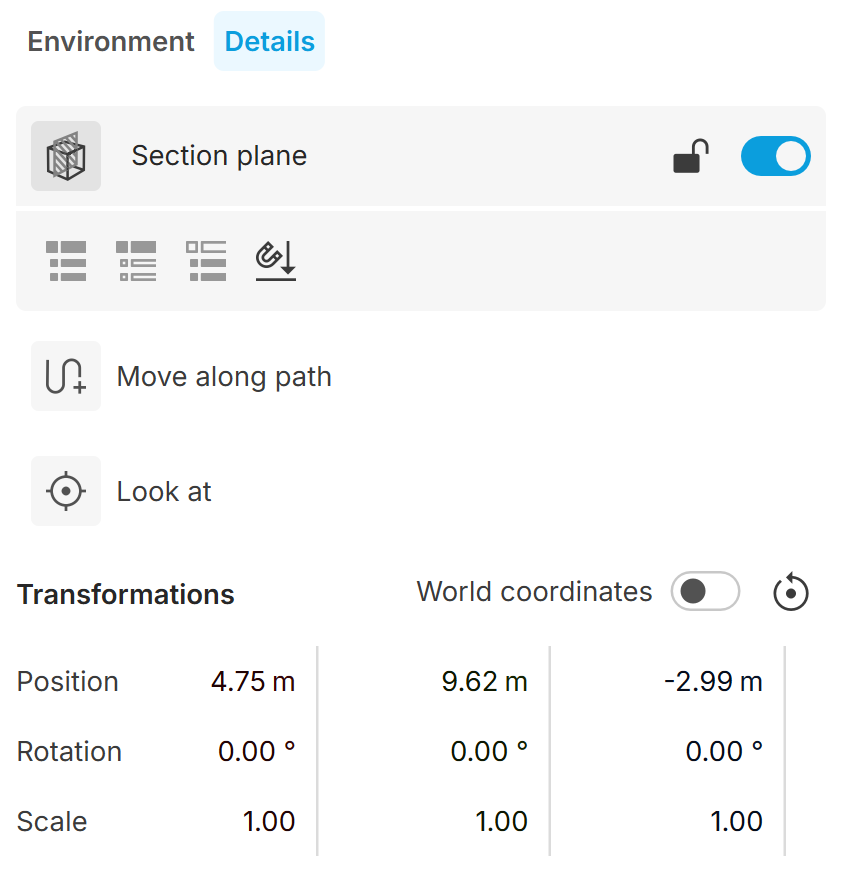
Name shows the selected section object's name and lets you rename it. The new name appears automatically in the Objects tab.


Lock disables position, rotation and scale changes for the selected section or sections. These options become greyed out. Click the control to enable transformations again.
Toggle shows or hides the selected section. Hidden sections are not rendered.

Select hierarchy All selects the parent and all children of the current selection in the project hierarchy.
Select hierarchy Parent only selects only the parent of the current selection in the project hierarchy.

Select hierarchy All children selects the other children in the current selection's project hierarchy group.

Land to surface moves the selected section down along the Z axis until its bounding box touches the first object below it.
Transformations
World coordinates uses the global scene axes for section transformations when enabled. When disabled, transformations use the section's own local axes.
Position moves the section along the X, Y and Z axes.
Rotation rotates the section along the X, Y and Z axes.
Scale sets the section's scale along the X, Y and Z axes.
Section properties
These properties apply to both Section planes and Section boxes. Cut direction has different options for each type.
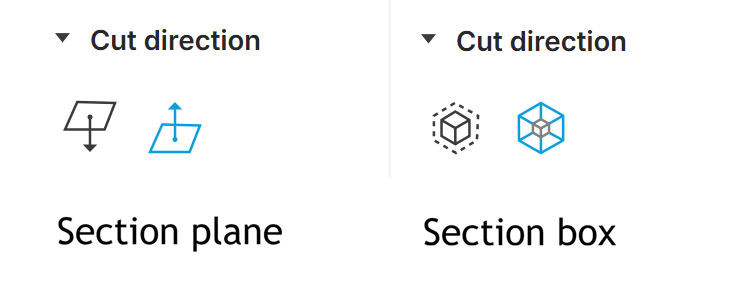
Cut direction
The Below icon cuts away everything below the plane. It is available for Section plane only.
The Above icon cuts away everything above the plane. It is available for Section plane only.
The Outside icon cuts away everything outside the box. It is available for Section box only.
The Inside icon cuts away everything inside the box. It is available for Section box only.
Cut fill
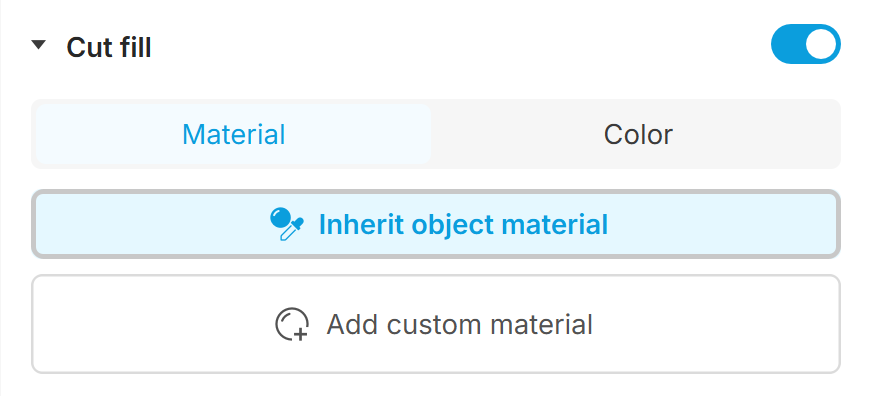
Cut fill applies a solid colour or custom material to the cut when enabled. Use the buttons below to choose a colour or material.
Material
Inherit object material uses the clipped geometry's material on the cut surface when enabled.
Add custom material adds a material from the Asset library.
The Remove icon removes the custom material and uses the object material instead.
Color
Colour adds a solid colour to the cut surface.
Visual properties
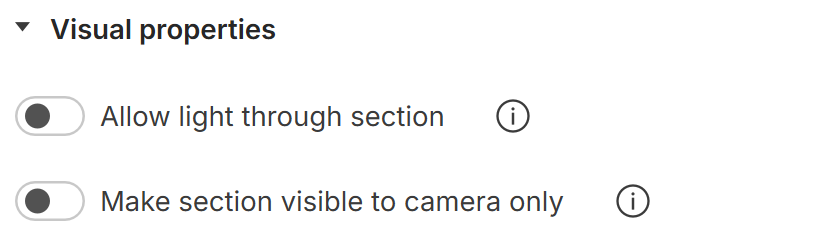
Allow light through section lets environment light pass through the section to light the inside of the cut. Use this when the cut section has no light sources.
Make section visible to camera only makes the section visible to the camera but invisible through reflective or transparent surfaces. Enable it so mirrors and glass show the original, uncut object for more realistic results.
Affected objects
Include adds objects to be included in the cut.
Exclude adds objects to be excluded from the cut.
The Remove icon removes all objects from the list.