Enscape Envision
User Interface
This page provides information about the user interface of Enscape Envision.
Last updated 27 May 2026
This page provides information about the user interface of Enscape Envision.
Overview
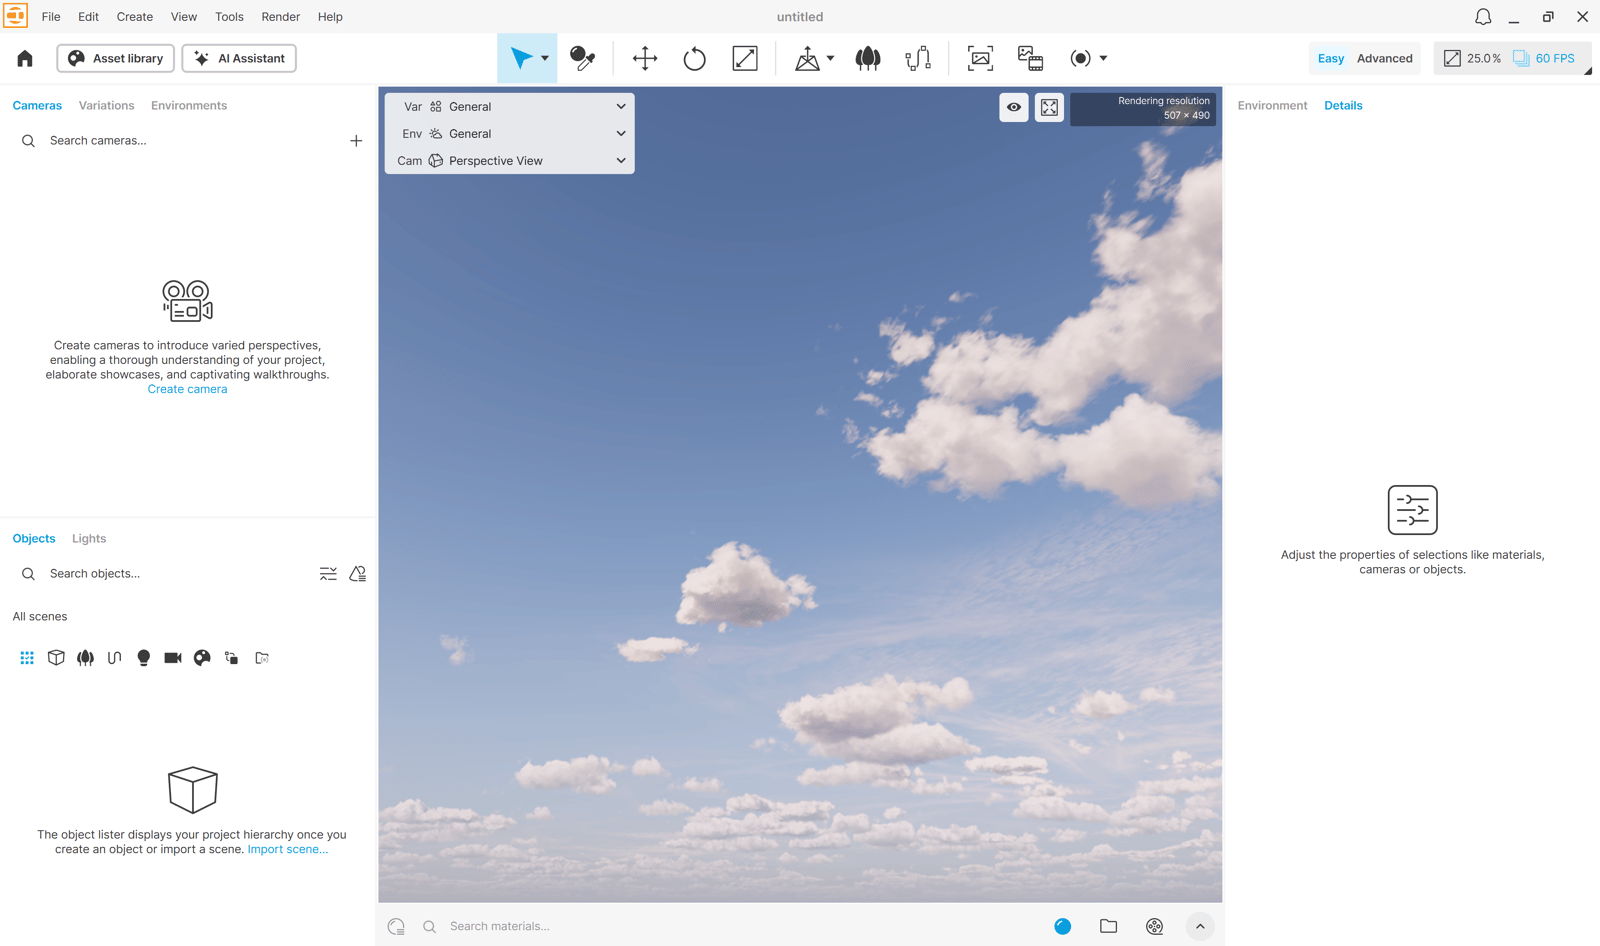
Envision interface has two modes: Easy and Advanced. Both modes share the same layout – a menu bar, a toolbar, a bottom dock panel, and left- and right-hand side panels with several tabs providing access to a range of features for managing your project.
Easy mode reduces the number of visible controls for a simplified, faster, and more intuitive workspace, but doesn't include advanced customization options. Advanced mode exposes the full set of tools, controls, and parameters for greater flexibility. Switching between modes preserves all project data.
For foundational training on the interface, see Chaos Academy.
Easy mode

Advanced mode
Interface Components
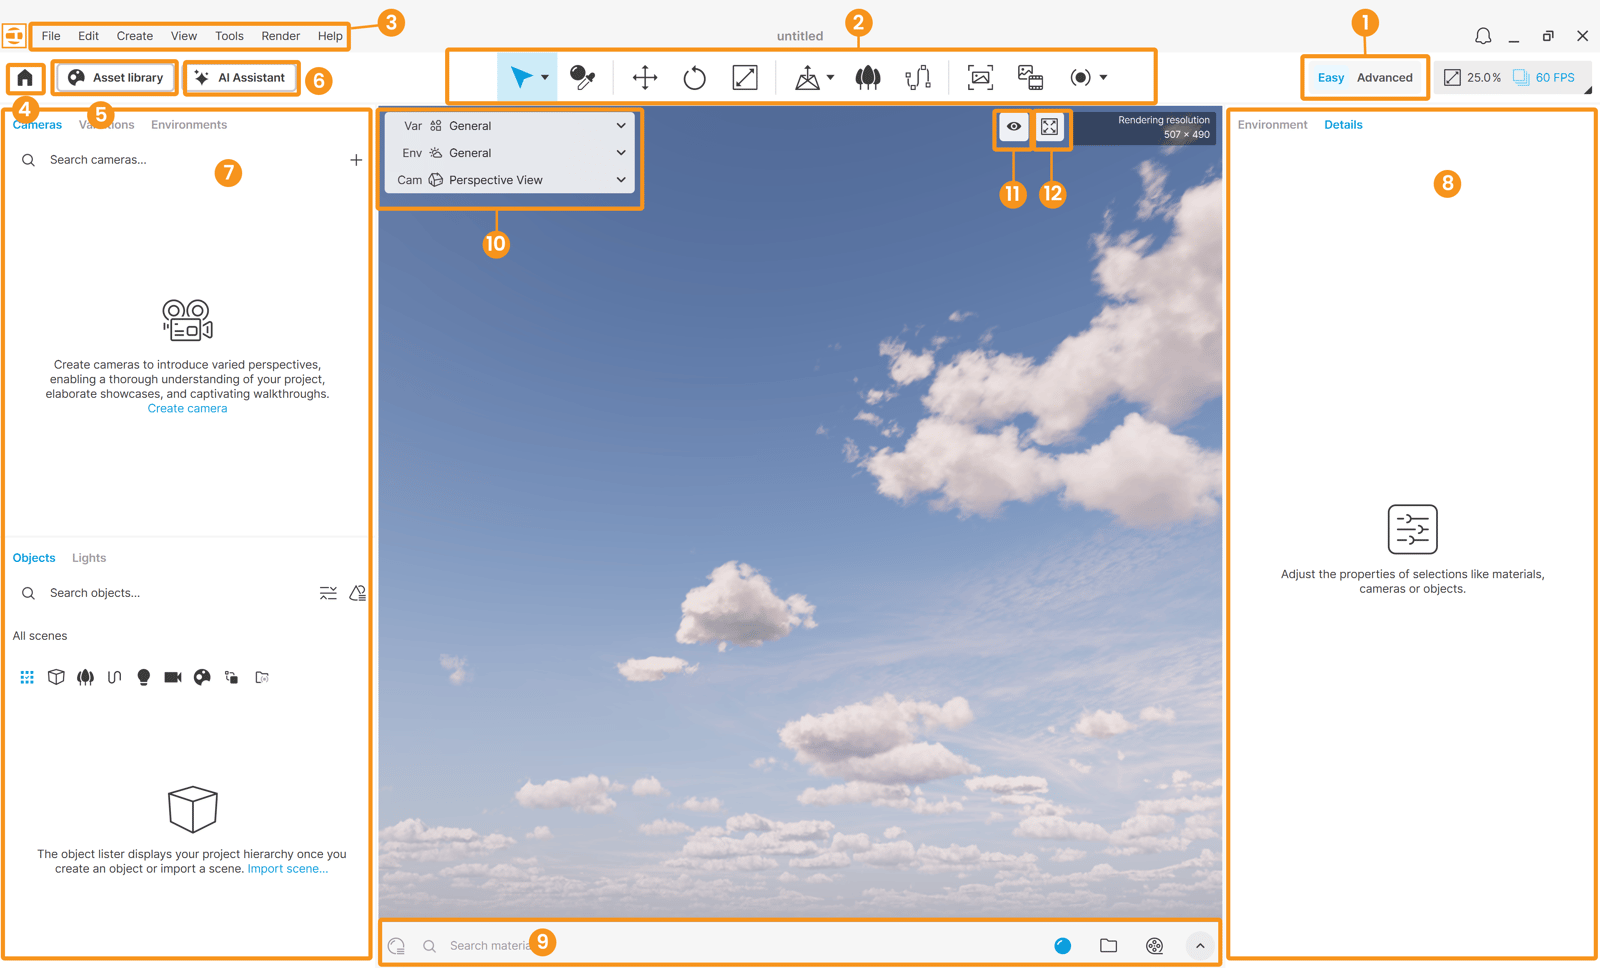
1. Modes – Toggles for switching between Easy and Advanced modes of the workspace.
2. Toolbar – The top toolbar contains commonly used tools for object manipulation, such as select, move, rotate, scale, as well as tools for creating objects, lights, paths, and crowd simulations. Read more.
3. Menu bar – A set of menus that give you quick access to common features, such as importing and managing projects, creating various objects, and many more. Read more.
4. Home Screen – A button that opens the Enscape Envision Home screen. The Home screen allows you to create new files or open existing ones; provides you with links to useful websites such as Envision Ideas Portal and Chaos Help Center, and gives you access to various sample projects. Read more.
5. Asset library – Opens the Cosmos Asset Library in the left panel, where you can browse for pre-made 3D assets and use them in your project. Read more.
6. AI Assistant – Opens the AI Assistant companion. It matches the light mood from a reference image, recommends assets and materials, and provides workflow and product guidance. Read more.
7. Left Side Panel – The left-hand side panel contains tabs for creating and managing scene and environment variations, cameras, objects, and lights. Read more.
8. Right Side Panel – The right-hand side panel contains tabs for controlling the environment as well as for adjusting the parameters of objects and materials. Read more.
9. Bottom Panel – The bottom dock panel contains buttons for Material Browser, Animation, and Local Library. Read more.
10. Current View Quick Settings – A set of dropdowns for selecting scene and environment variations as well as views. Read more.
11. Toggle Timeline Preview mode – Forces the viewport to either show the project state at the current playhead position in the timeline, or the currently selected variation/camera position. Read more.
12. Full Screen Mode – Opens the full screen mode, where you can select among three navigation modes: Standard, Walk, and Fly. Read more.