Use the Agent workflow in the Model tab of Veras to build a model from your source images.
Overview
Agent builds a 3D model from a rendering, photo or sketch. It models, reviews the result, compares it with your images and corrects what does not match. Describe what you want, then click Model this.
Session tab
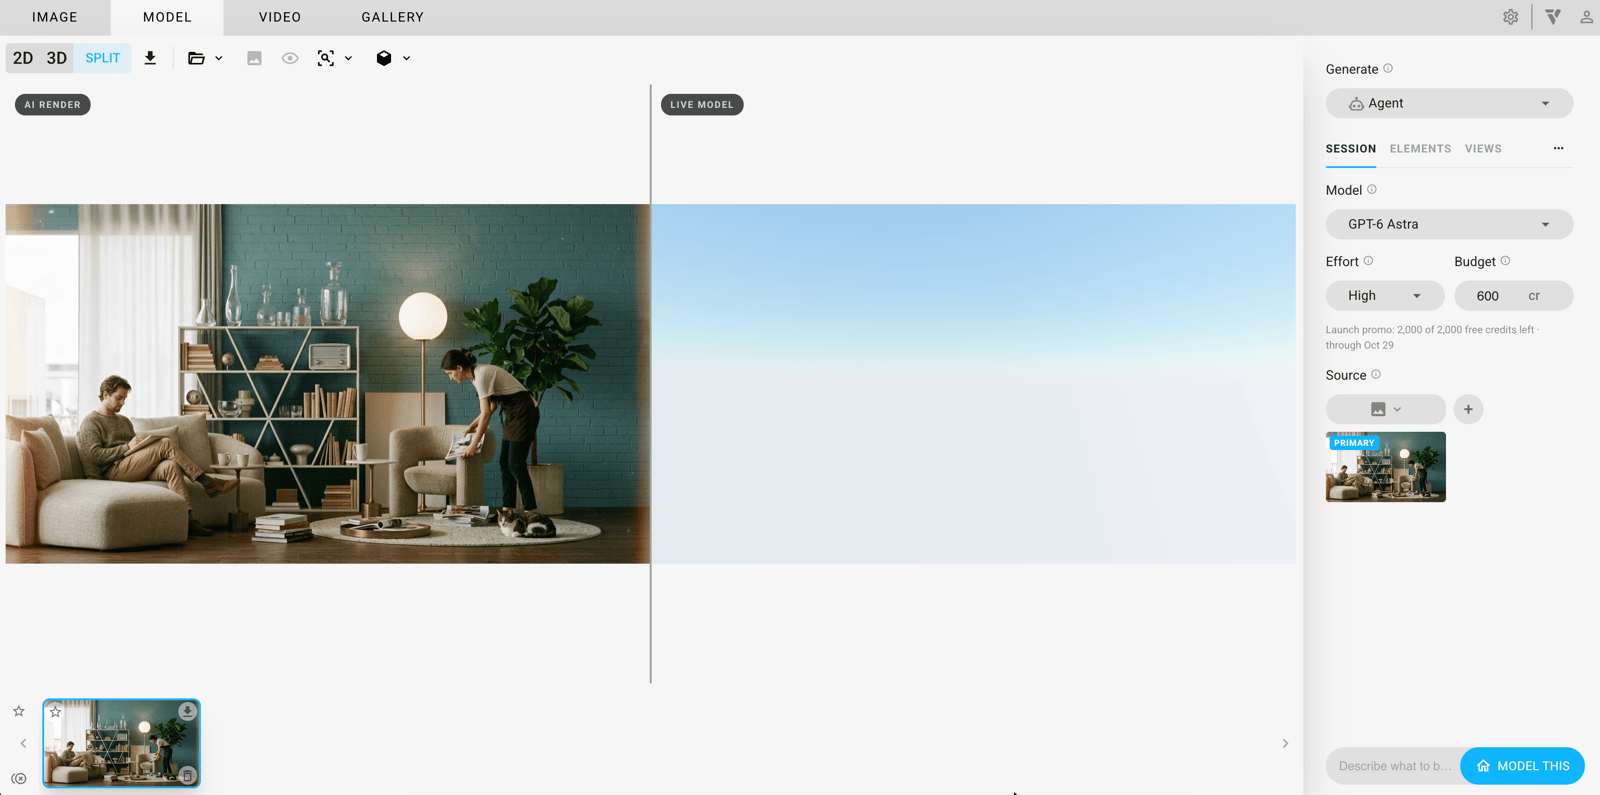
For Model, choose GPT-6 Astra (the default) or Claude Opus 5.5.
Effort controls the balance between speed and thoroughness. Choose High, Extra high, Medium or Low.
Budget sets the maximum credits the session can spend. Agent stops at this limit and waits for you.
Source sets what Agent models from. Click the plus icon to add more source data. Choose from:
- Manual Upload
- Host platform (if available)
- Rendered Image
- 3D Viewer
- Video
Elements tab
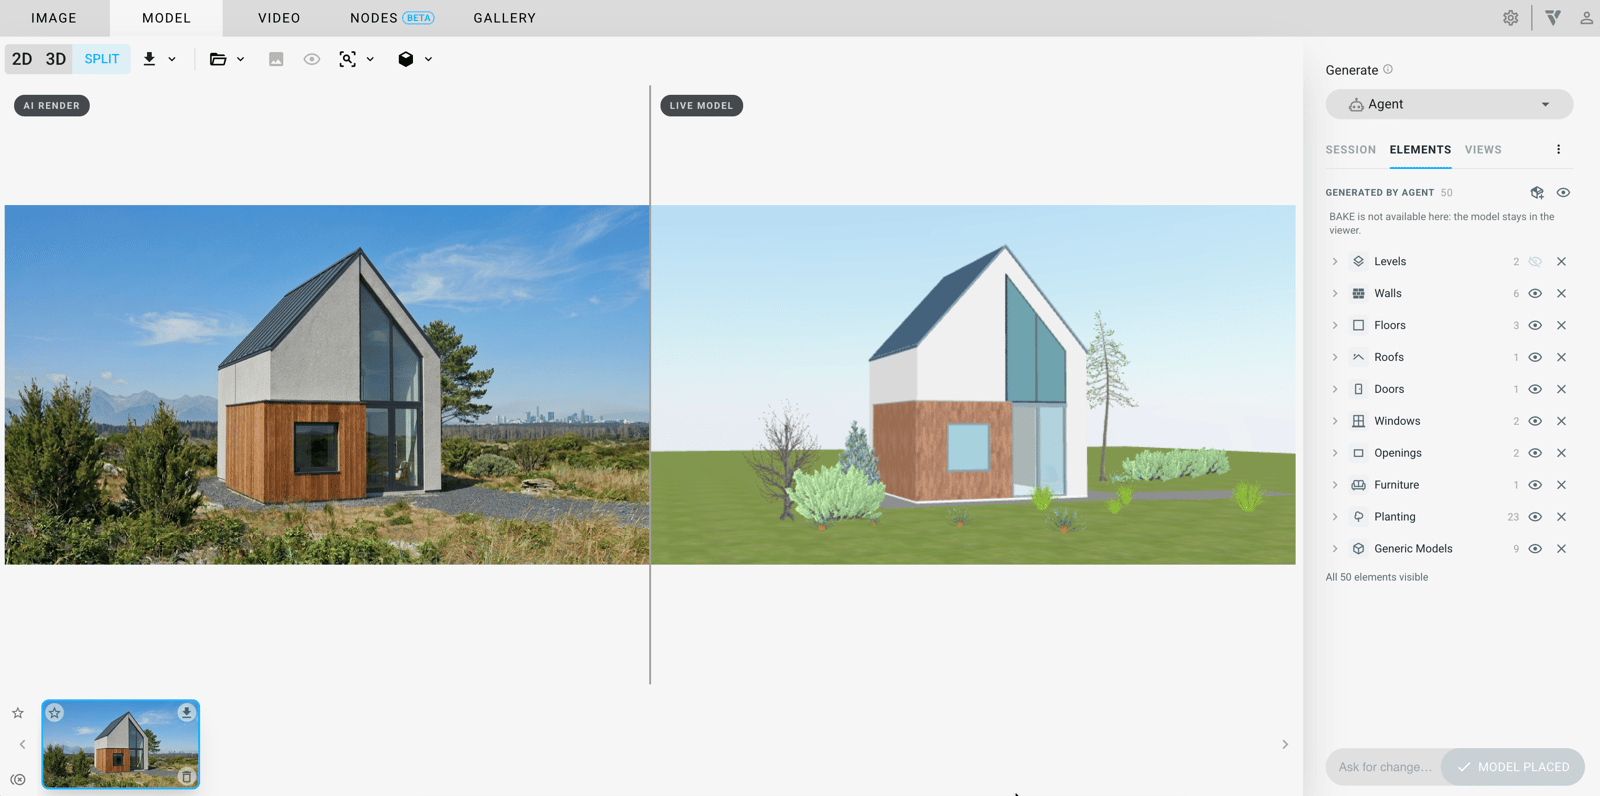
The Elements tab lists the elements Agent generates, grouped by type. Click to expand the list. Use the icons next to each definition to Hide/Unhide or delete the element.
Icon | Action |
|---|
Icon | Action |
|---|---|
Add a saved group or any 3D model from your Gallery. It is placed where you click. | |
Use Hide/Unhide to hide or show the elements in the Live Model view. |
Views tab
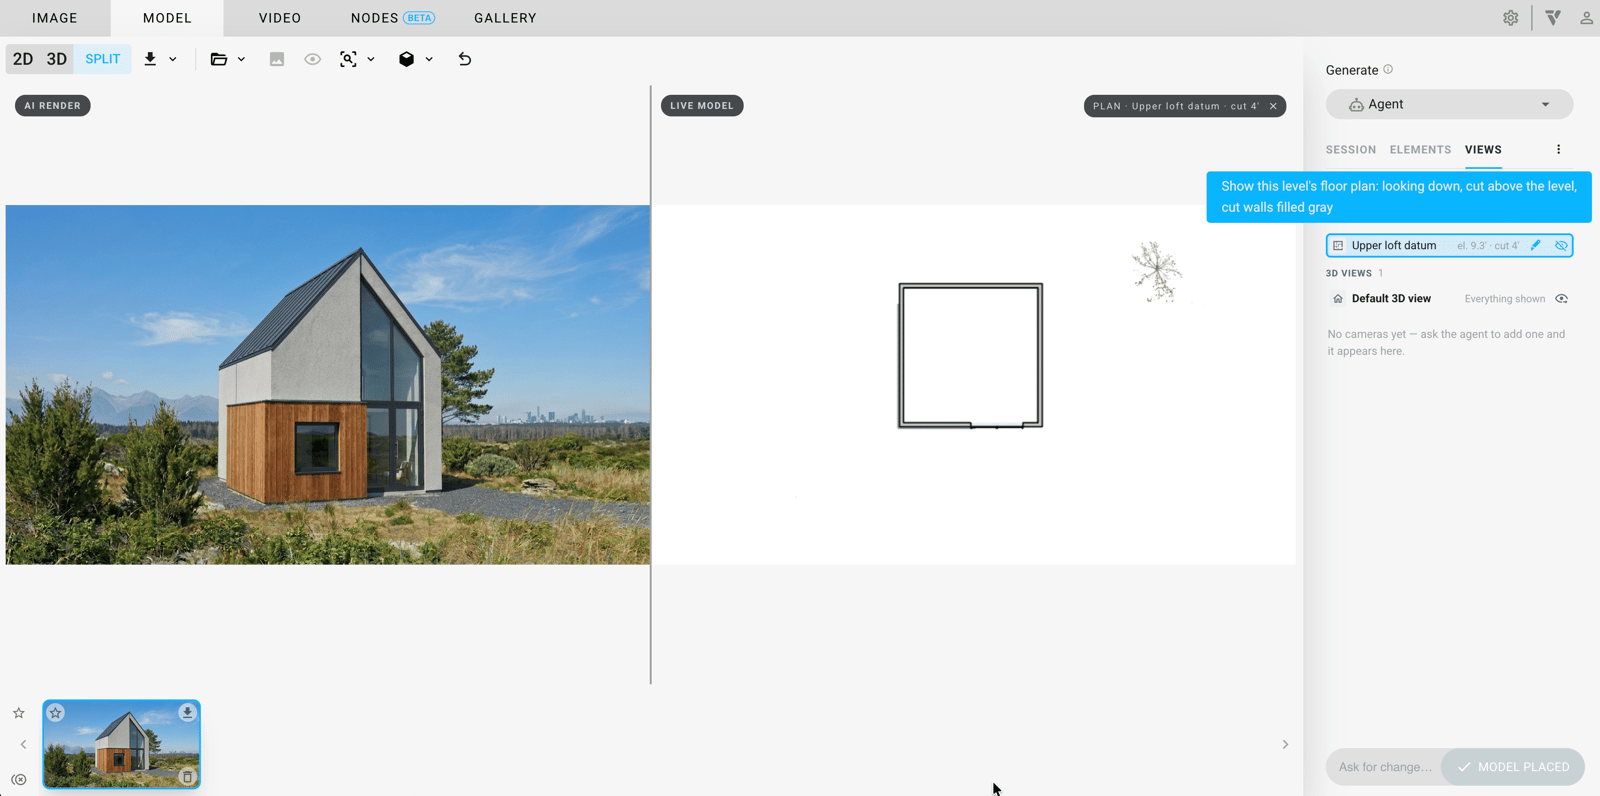
The Views tab lists detected Views or Cameras. Click one to examine it in the Live Model window.
You can ask Agent to create a Camera from a specific view. The Camera also appears in this menu.
Three-dots menu
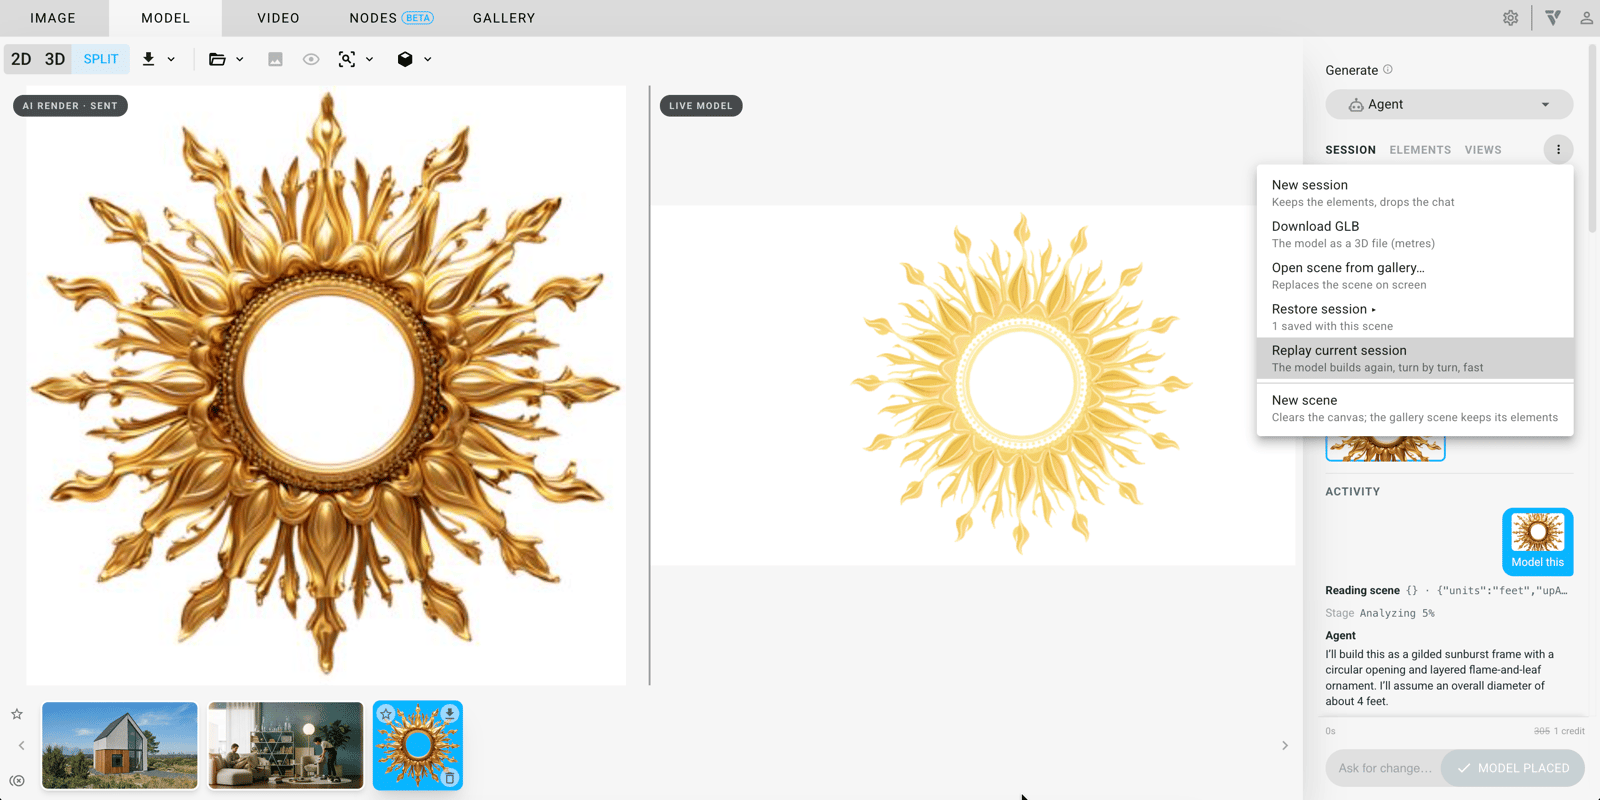
Click the three-dots menu for more options:
- New session
- Download GLB
- Open scene from gallery…
- Restore session
- New scene
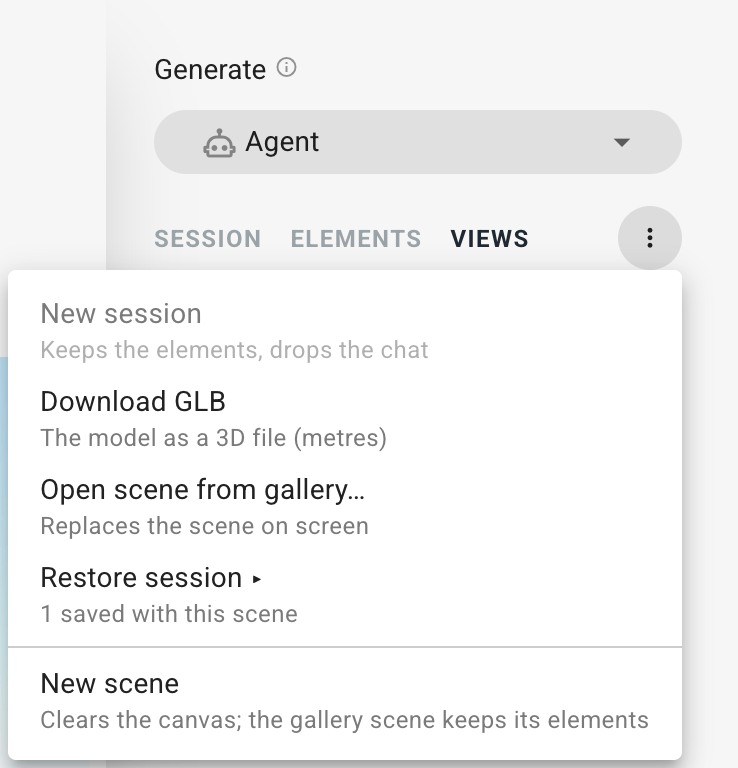
After you click Restore session, Replay current session becomes available. Use it for screen recordings or to show how a model came together. A replay sends nothing and costs no credits. Press Stop at any time to return to your model and chat exactly as they were.