Bake Veras assets into your Revit, Rhino or SketchUp model and choose how their geometry is stored.
Overview
Veras gives you baking options for Revit, Rhino and SketchUp.
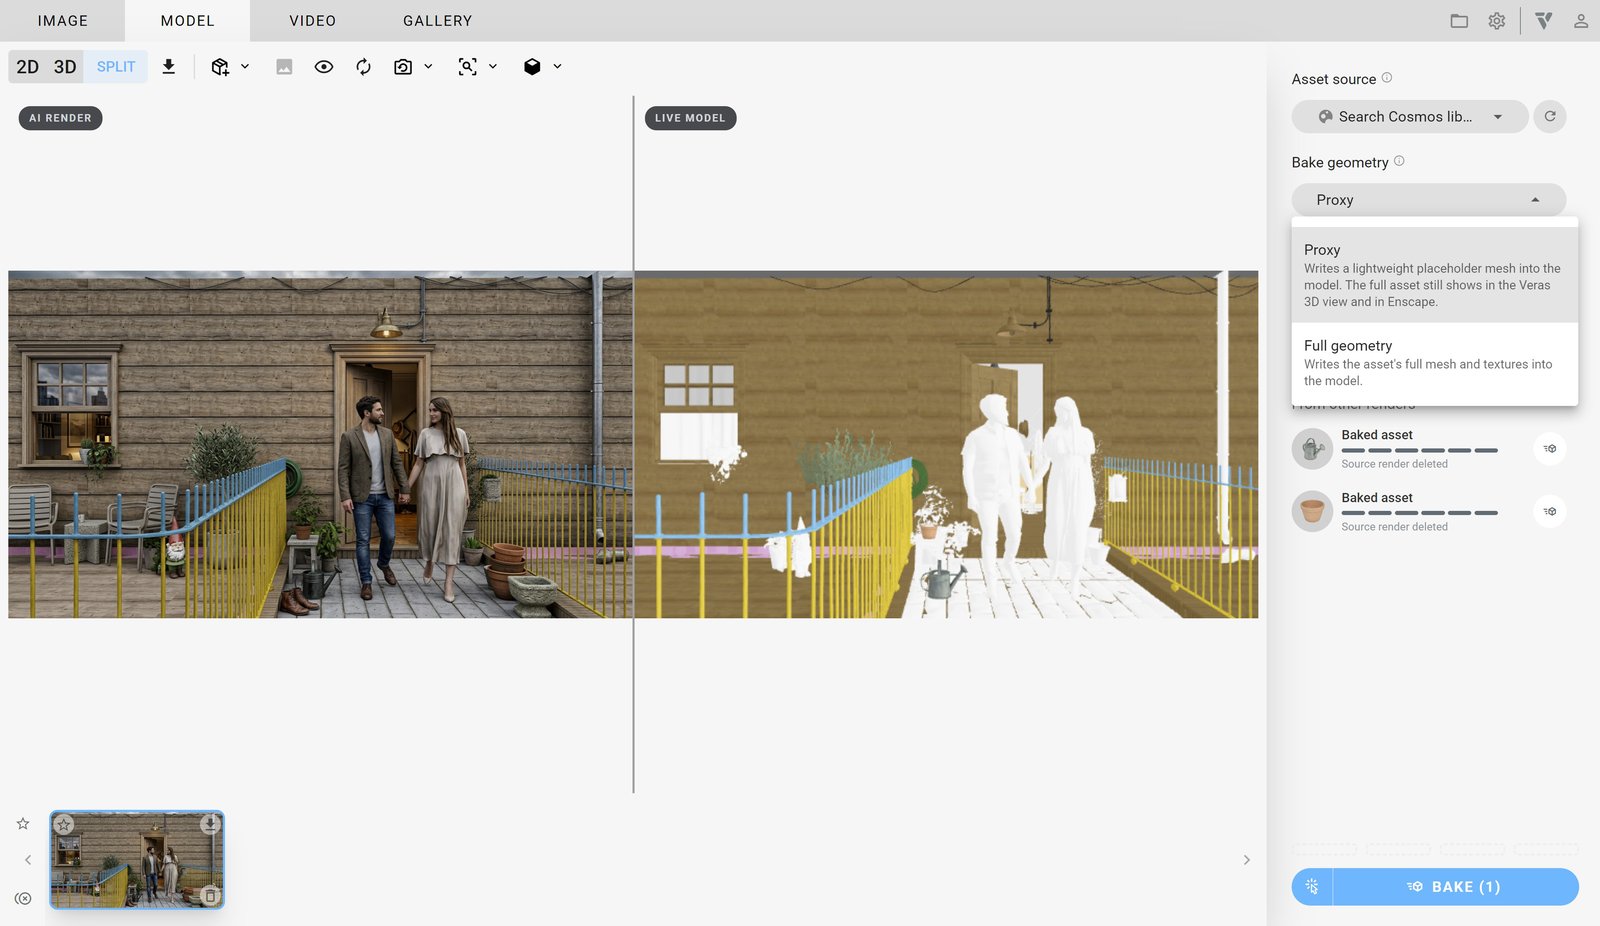
Bake geometry
The Bake geometry section controls how Veras writes the generated asset's geometry into your model. Your choice affects detail, file size and performance. Choose one of these options:
Proxy embeds a lightweight placeholder mesh into your model. This keeps the main model file small and maintains performance. The full, detailed asset stays visible in the Veras 3D view and in Enscape.
Full Geometry embeds the asset's complete mesh and textures directly into your model. You get the fully detailed asset in your native modelling environment. Expect a larger file because the model stores all the high-resolution data.
Baking works differently on each host platform:

Revit
Rhino

SketchUp
See the Visual Examples page for examples.
How to bake geometry
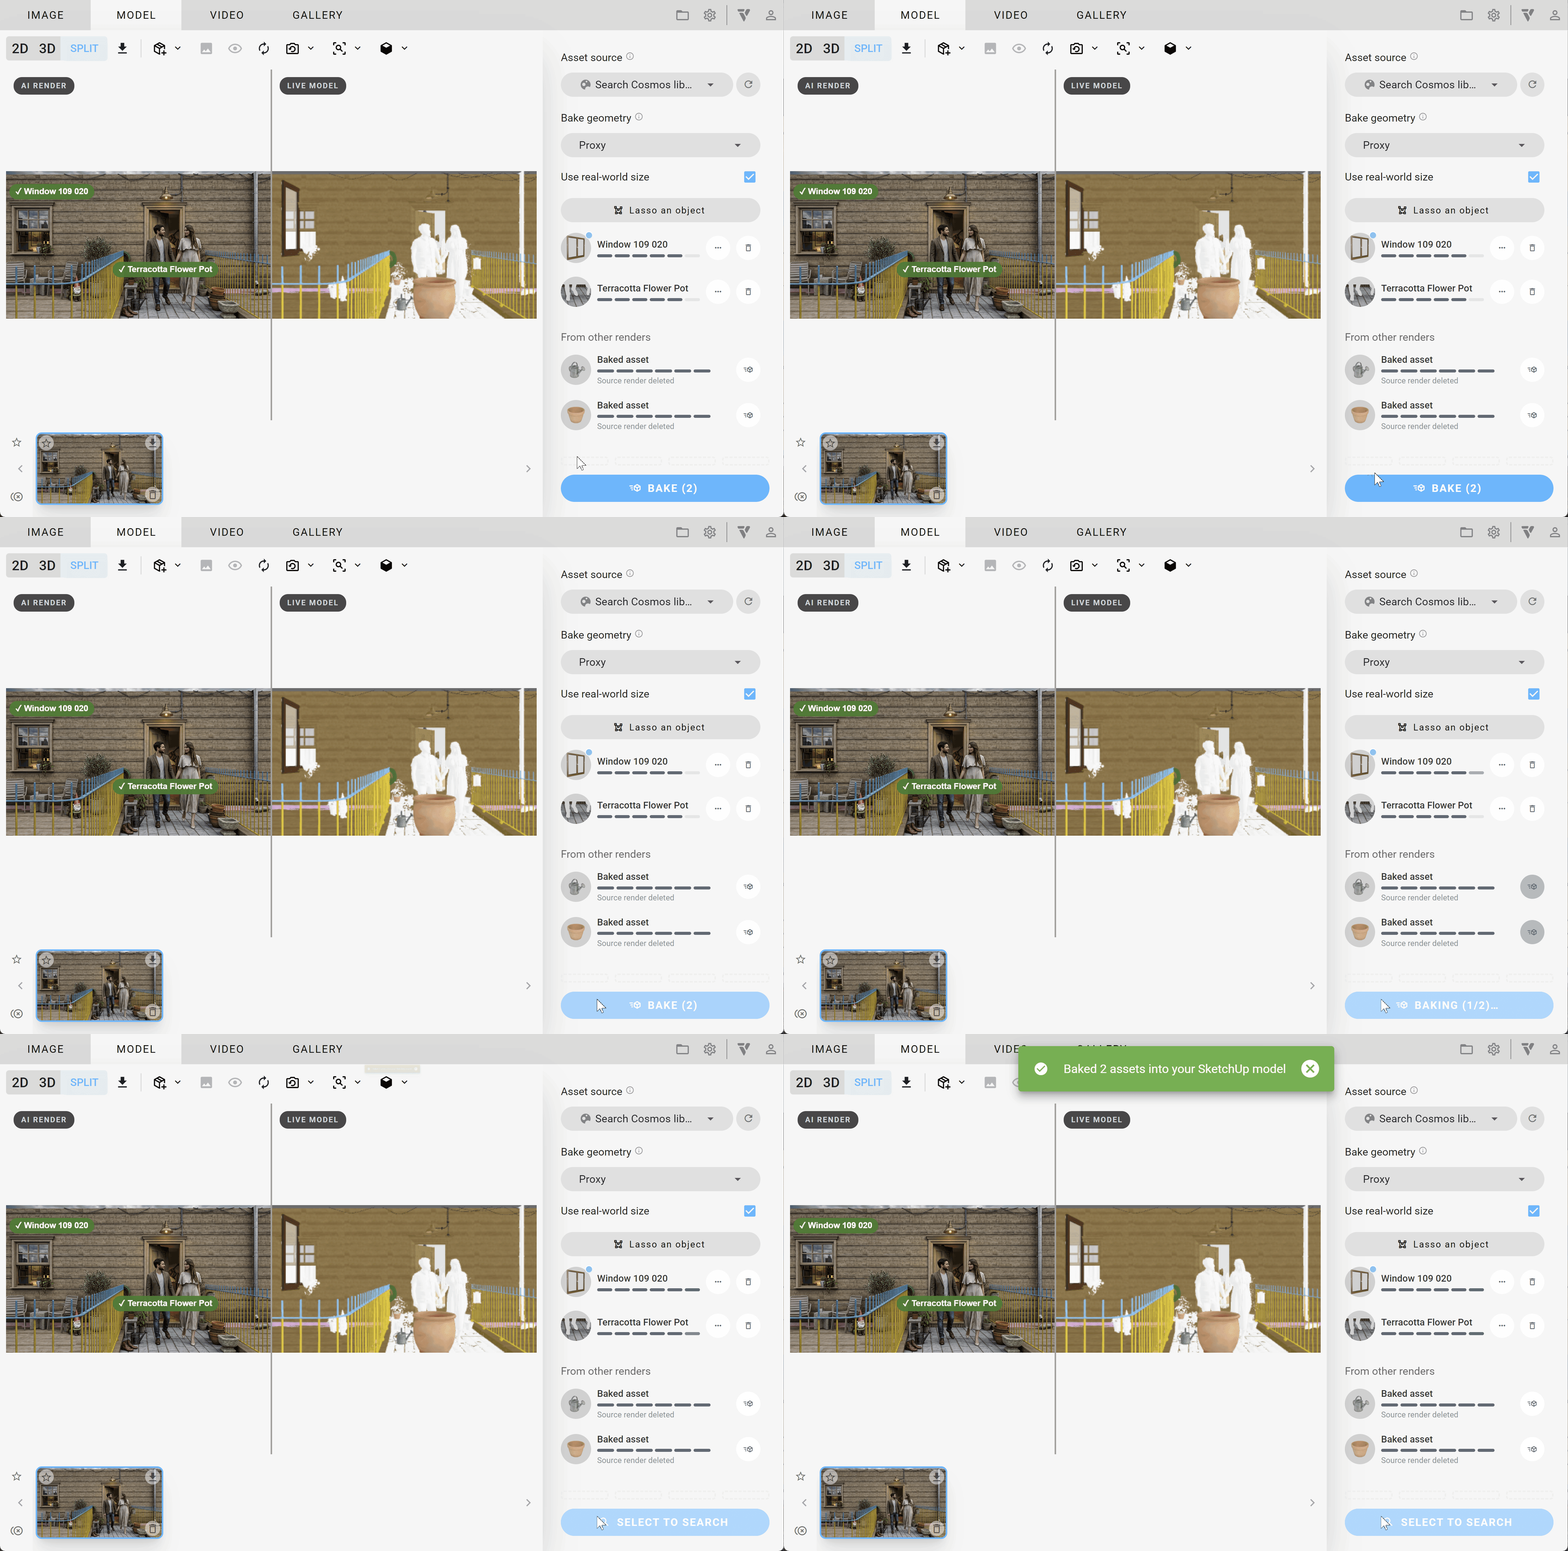
After you place and position assets in your scene using the Veras Model tab, you can bake them into your project. Baking permanently writes each asset's geometry into your model file.
Follow these steps to bake an asset:
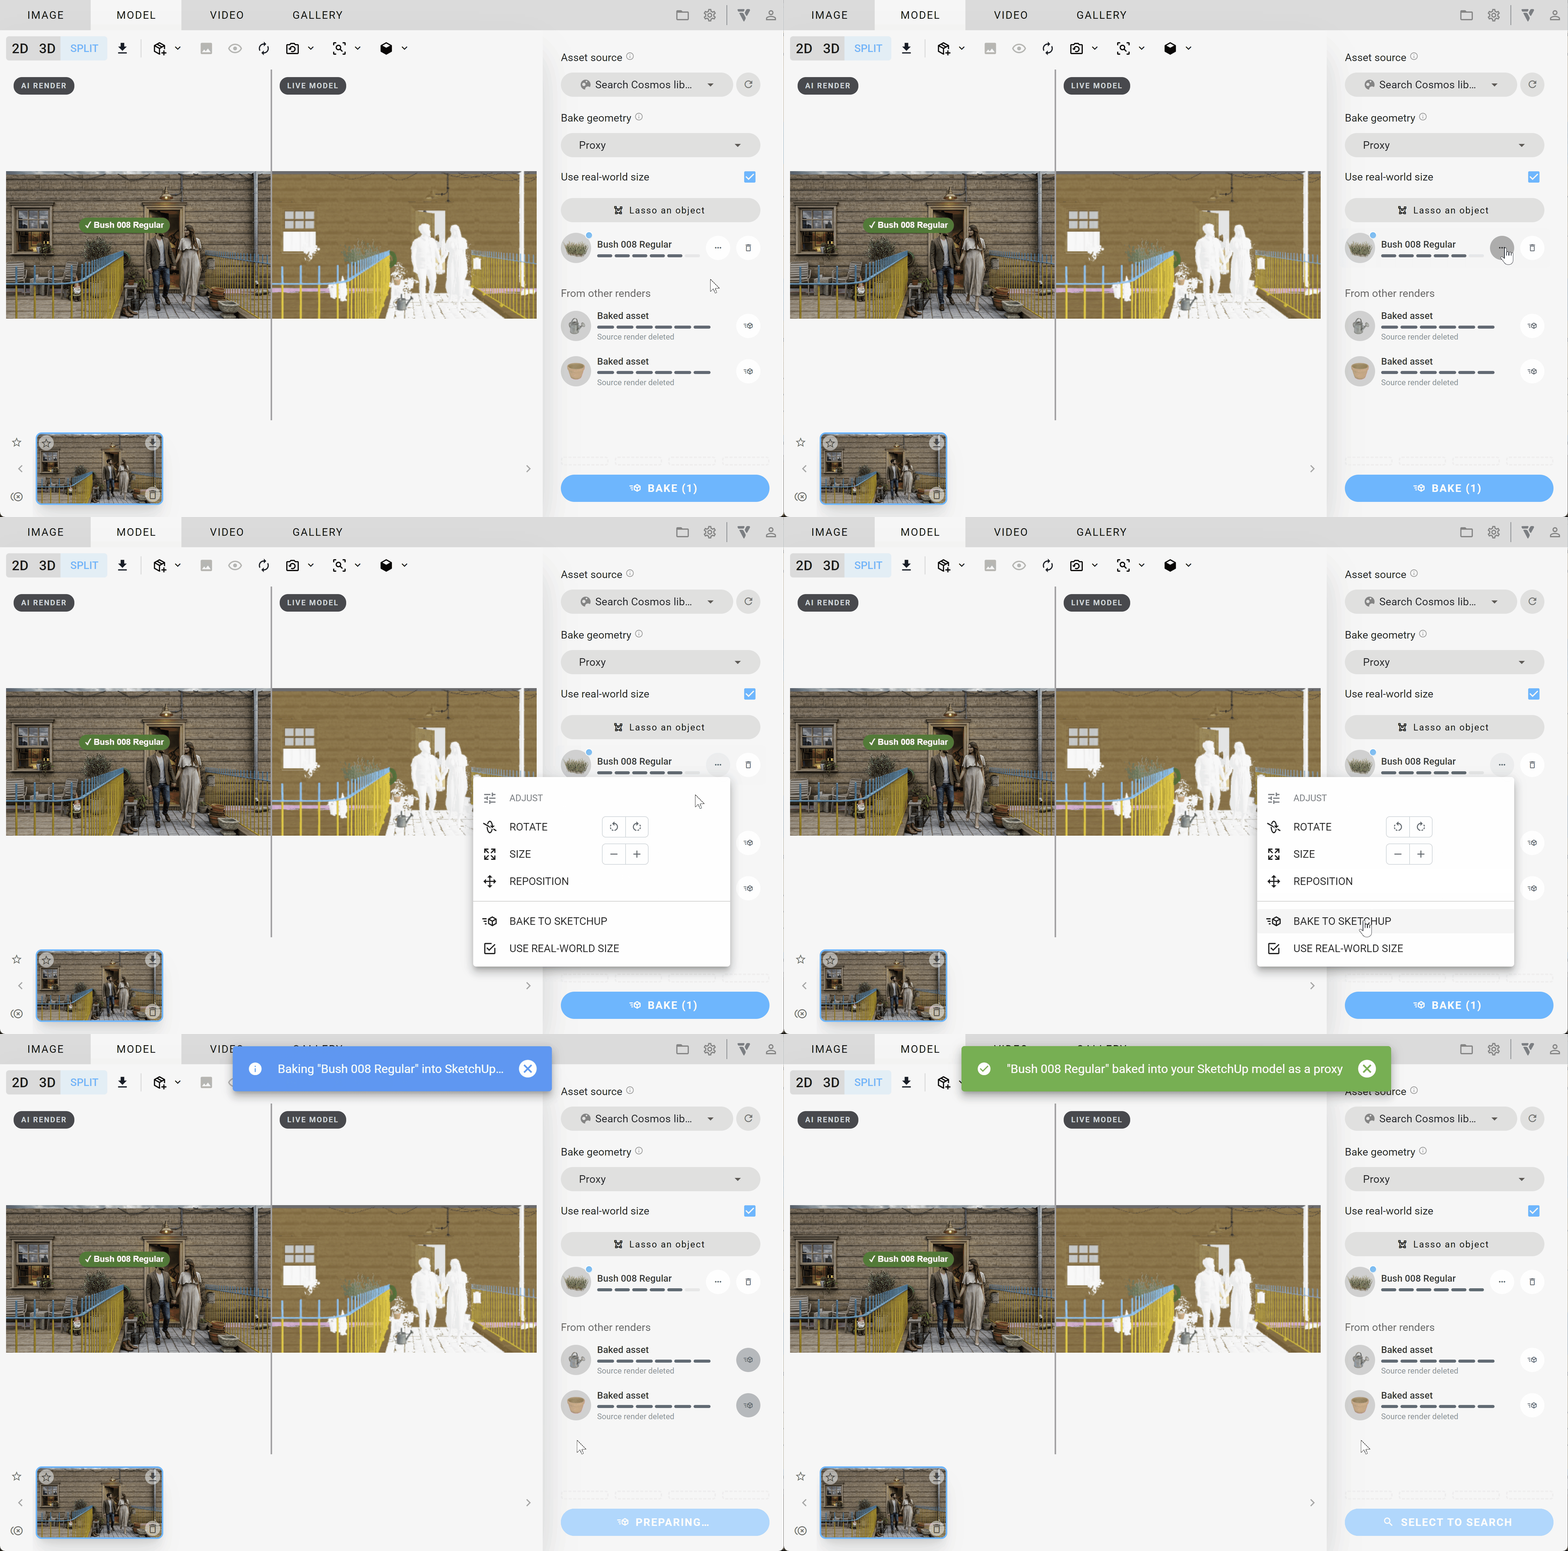
- Select the asset you want to bake from the list, such as "Bush 008 Regular".
- Set the Bake Geometry Type to Proxy or Full geometry.
- If needed, use the context menu options to Rotate, Size, or Reposition the asset until it is correctly placed in your scene.
Icon | Name | Description |
|---|
Icon | Name | Description |
|---|---|---|
Rotate | Rotates the asset in the 3D scene. | |
Resize | Resizes the asset in the 3D scene. | |
Zoom in | Zooms in on the selected asset. | |
Reposition | Lets you manually place the asset in the 3D scene. | |
Remove | Removes the asset from the 3D scene. | |
Done | Deselects the asset and closes the adjustments menu. |
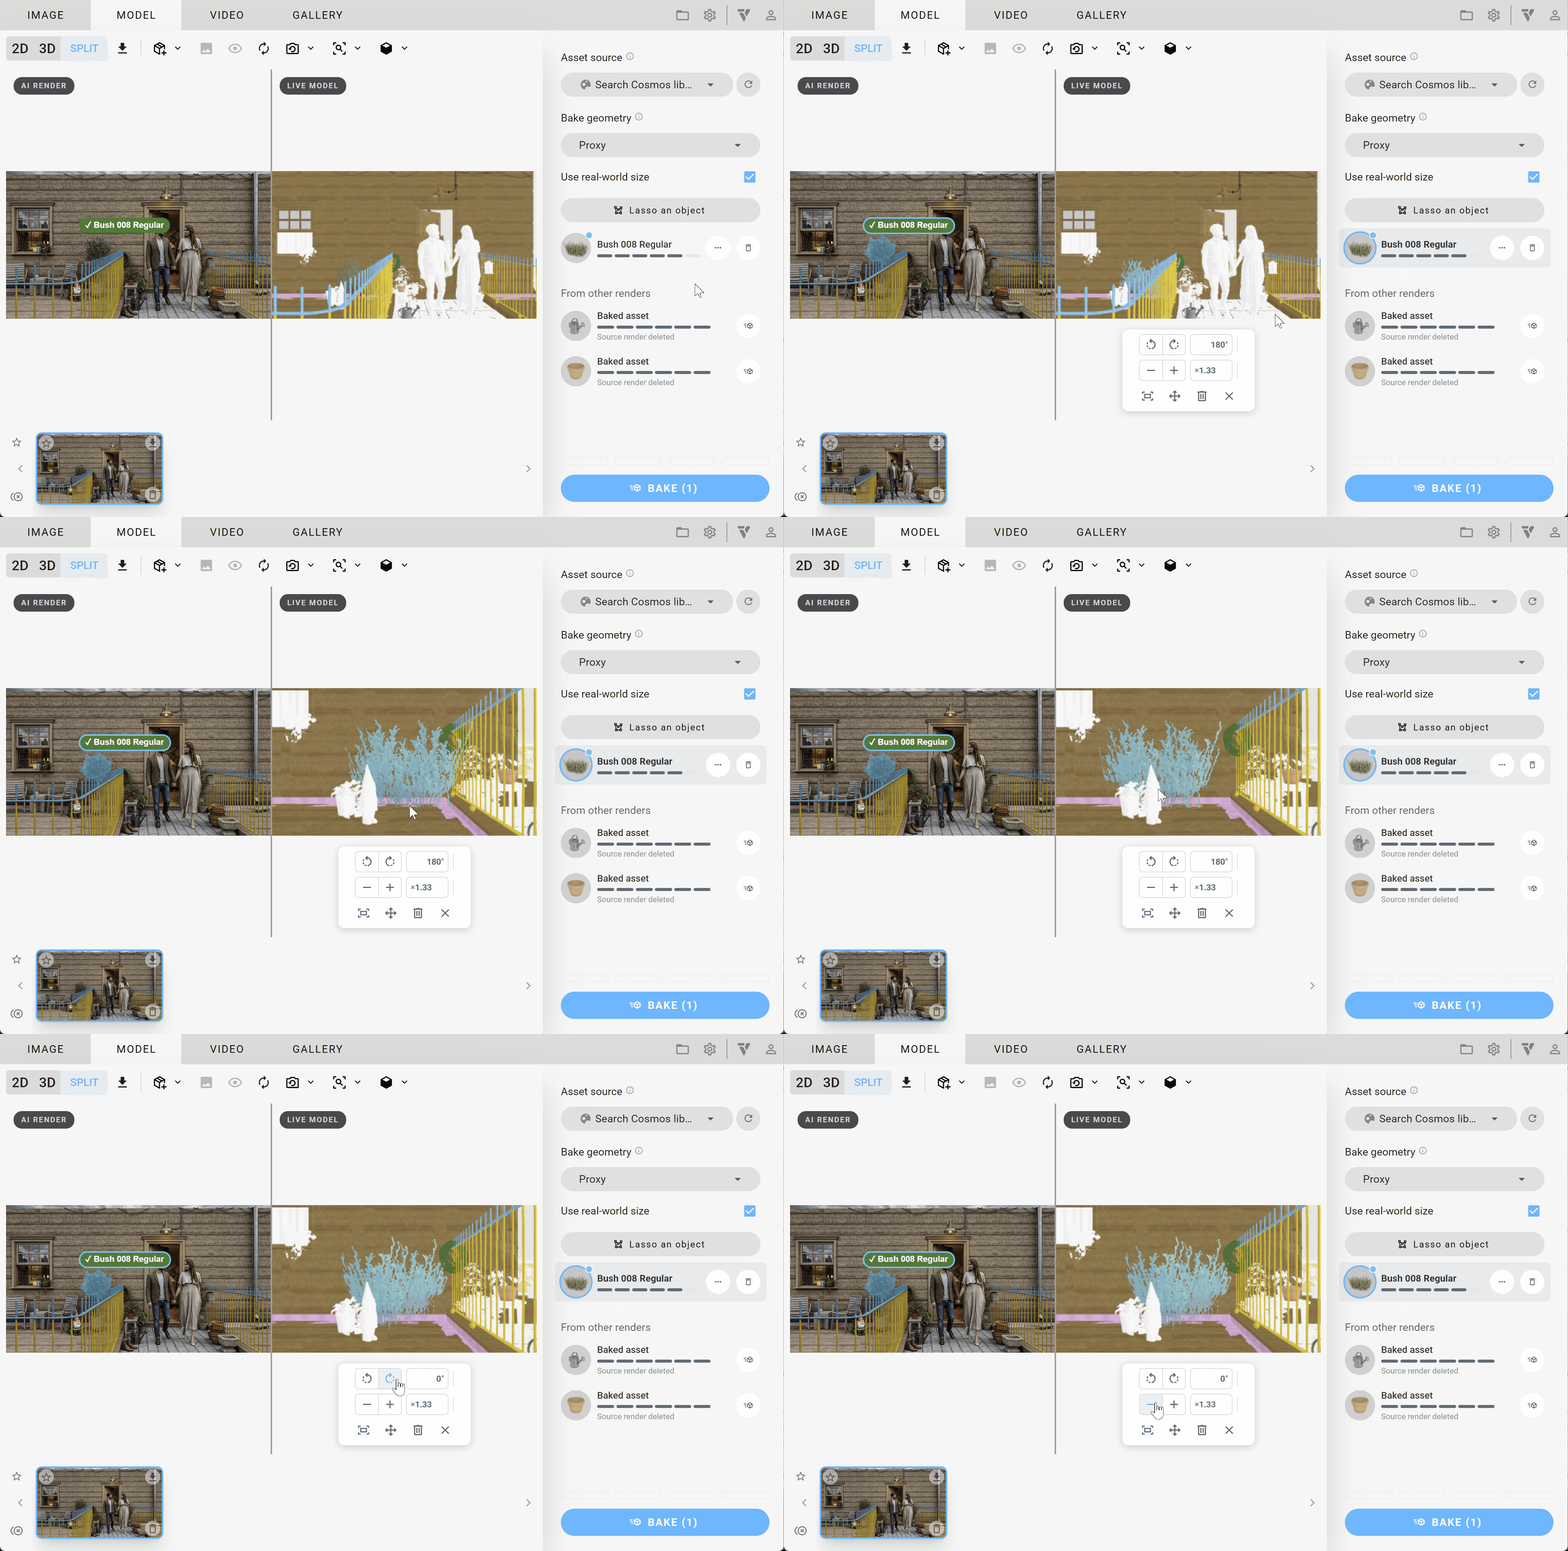
- Click the Bake button in the bottom-right corner to bake all assets at once. To bake a specific asset, click the three-dot menu (...) next to it in the list, then select Bake to SketchUp. Baking adds the asset to your model using the geometry setting you chose.