V-Ray for 3ds Max
How to Make Leaves
This tutorial shows two approaches to creating a leaf material: one using the VRay2SidedMtl and another using the VRayMtl with its Thin-Walled option enabled.
Last updated 4 April 2026
This tutorial shows two approaches to creating a leaf material: one using the VRay2SidedMtl and another using the VRayMtl with its Thin-Walled option enabled.
Overview
Leaves react in a particular way to light. When light is above or in front of them, the leaves are more reflective and smooth, like plastic. When lighted from behind, they disperse light like a stained glass window and have а more matte reflection.
In this tutorial, we try to mimic the leaves’ behavior in two ways:
- VRay2SidedMtl approach
- VRayMtl approach
The first approach uses VRay2SidedMtl to achieve the translucent effect of leaves as this material allows for seeing the light on the backside of objects. Two VRayMtls are linked to the VRay2SidedMtl - one for the front side of the leaves and the other for the backside. So far this has been the common approach to creating leaves.
The second approach uses the VRayMtl with its Thin-Walled option enabled as it makes the material suitable for portraying thin surfaces like leaves. The translucent effect is achieved by using the SSS translucency mode of the VRayMtl. This is a new and easy approach.
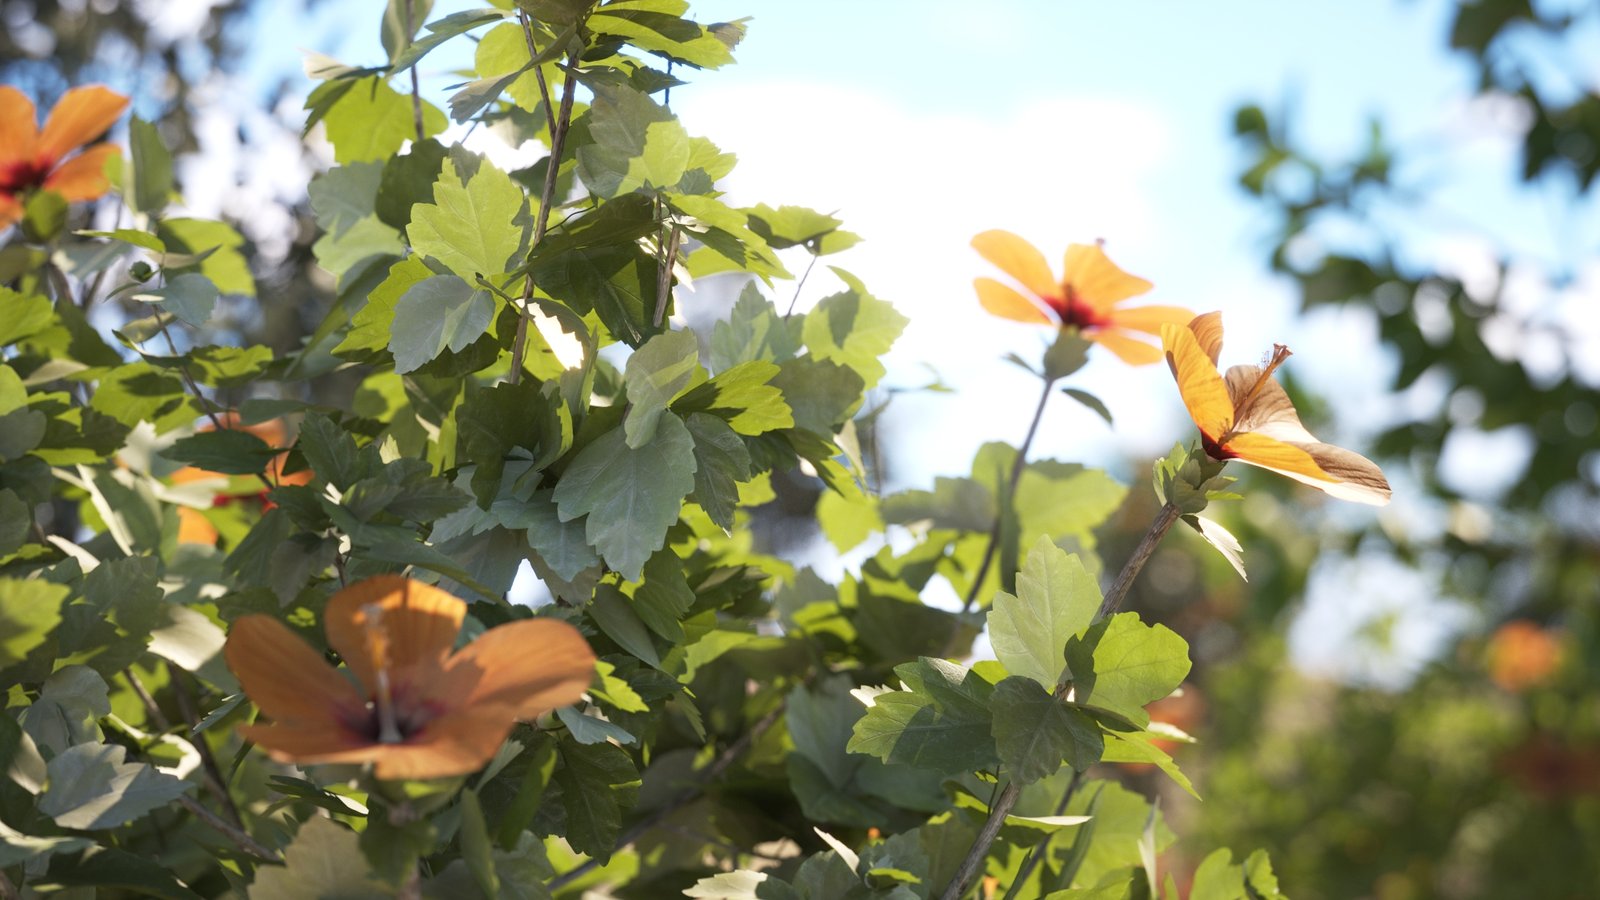
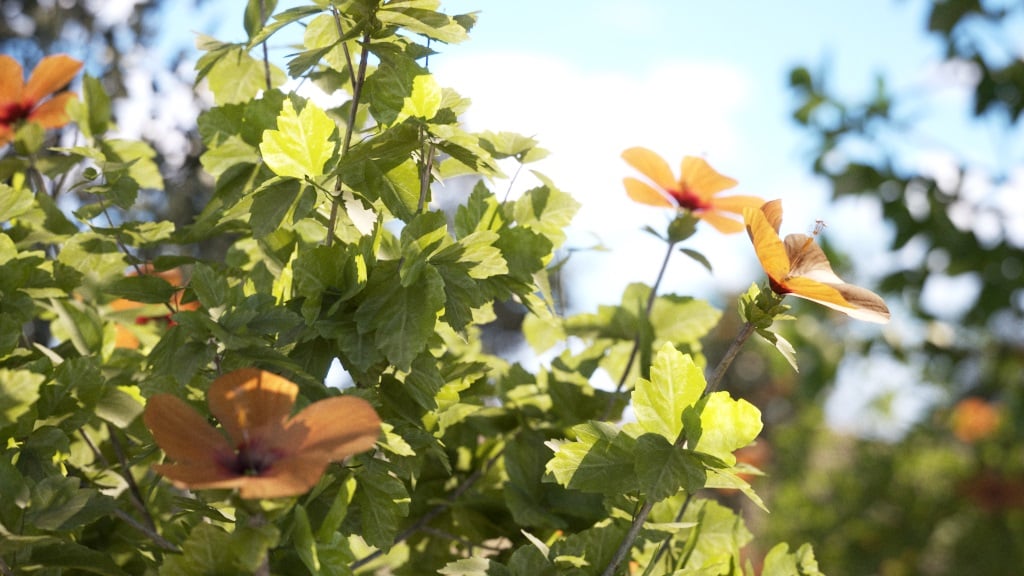
For the purposes of the tutorial we use a hibiscus tree geometry from Chaos Cosmos 3D content library. The hibiscus leaves are made of simple planes that we will shade. The tree is lit from behind by a VRaySun for best representation of the leaves translucent effect.
Want to follow along but don’t have a license?
VRay2SidedMtl Approach
Step 1: Create a VRay2SidedMtl and its front material
Let's create a VRay2SidedMtl in the Material Editor and assign it to the geometry.
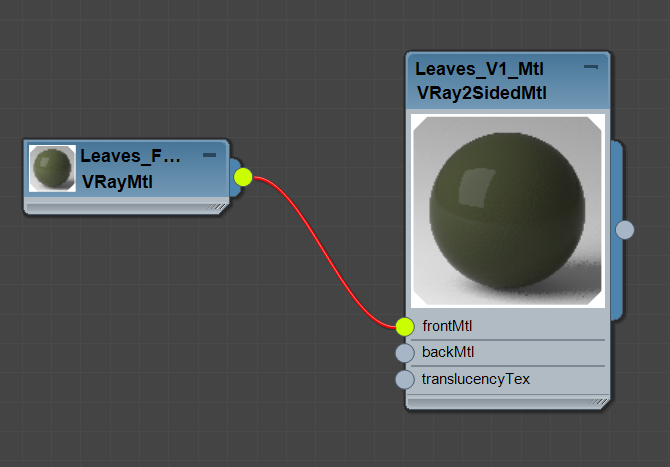
The VRay2SidedMtl consists of Front and Back materials. Both are applied to the shaded surface according to its polygon normals. If no Back material is used, then the Front one is applied on both sides.
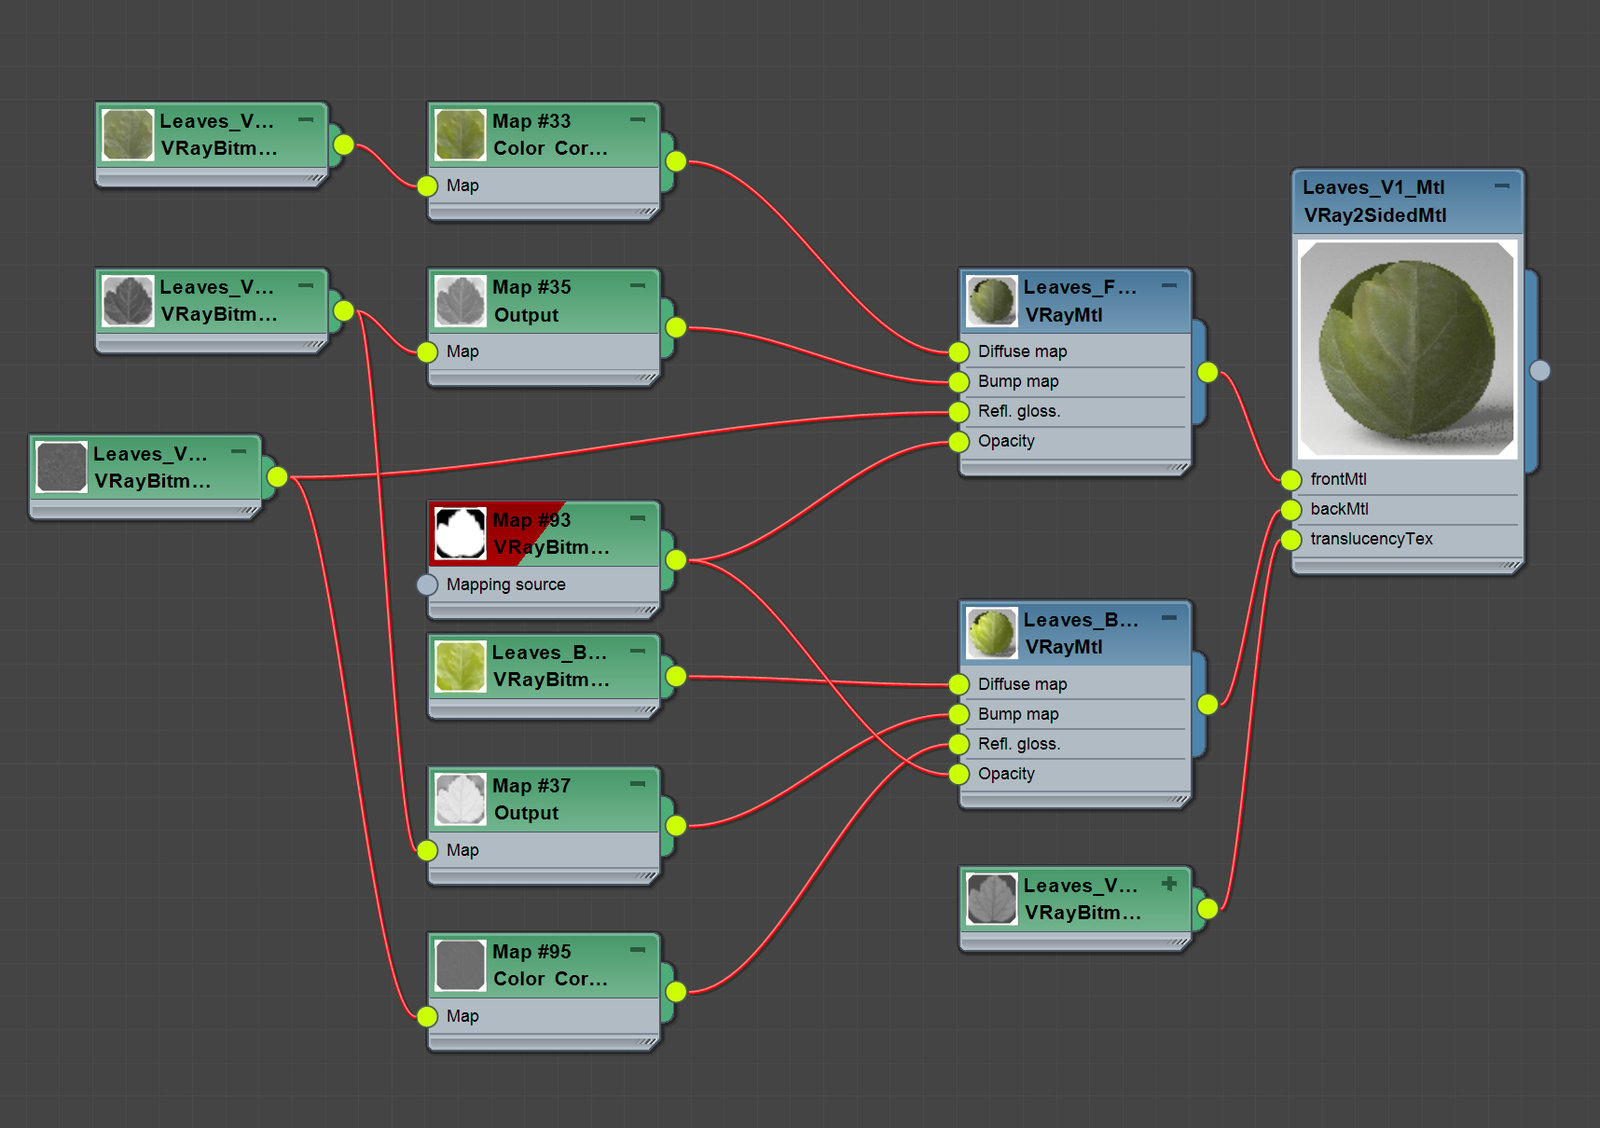
To set the Front material, connect a VRayMtl node to the frontMtl slot of the VRay2SidedMtl node in the Material Editor.
Configure the front material by adding textures to it.
Link a VRayBitmap map with a green leaf texture to the Diffuse map slot of the Front VRayMtl node.
Real-life leaves are not perfectly smooth - their lamina is actually relatively rough and covered with veins. To simulate this look, let's add a black and white VRayBitmap texture, where the veins are in white, to the Front material’s Bump map slot.
Increase the VRayMtl's Bump map to 100 to further refine the veins.
The upper side of the leaves is more reflective and shiny - almost like a plastic surface, so set the Reflect color closer to white to increase reflectivity.
Unlock Fresnel IOR and set it to 1.3 as this value is suitable for leaves.
Add a VRayBitmap texture to the Front material’s Reflection Glossiness map slot.
To shape the leaves, we need to plug another VRayBitmap to the VRayMtl’s Opacity map slot. It will give a leaf form to the planes.
To speed up rendering, set the Opacity mode to Clip.
If still not satisfied with how the front material looks, further enhance it with the help of color corrections. Here, we make the leaf veins more defined by adjusting the color of the maps. Using a Color Correction map we boost the Saturation of the Diffuse texture a little. We also adjust the Brightness and Contrast of the Bump map using an Output map.
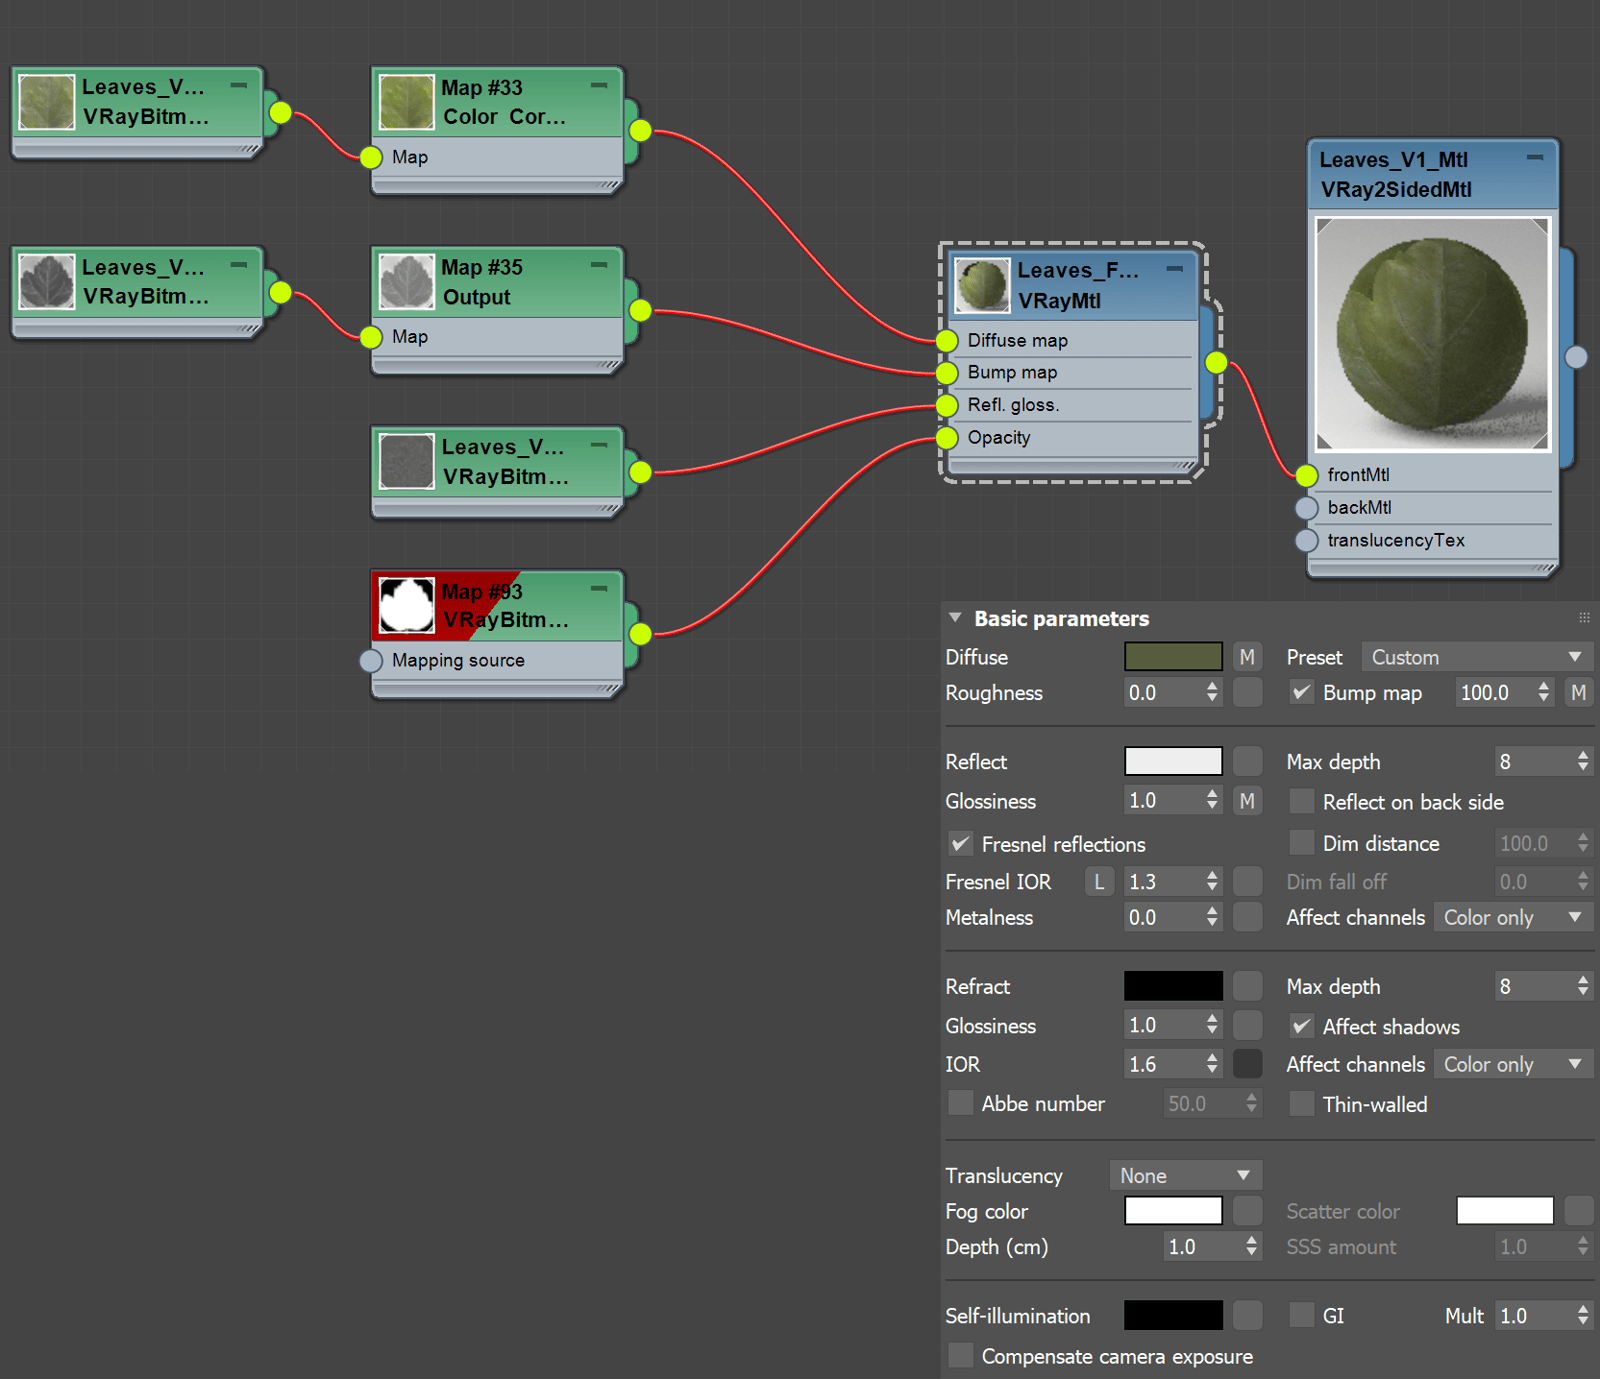
Here’s our front material.

Step 2: Set the back material
To set the Back material, first enable the Back material option in the VRay2SidedMtl's Parameters rollout.
Then, link a VRayMtl to the backMtl slot of the VRay2SidedMtl.
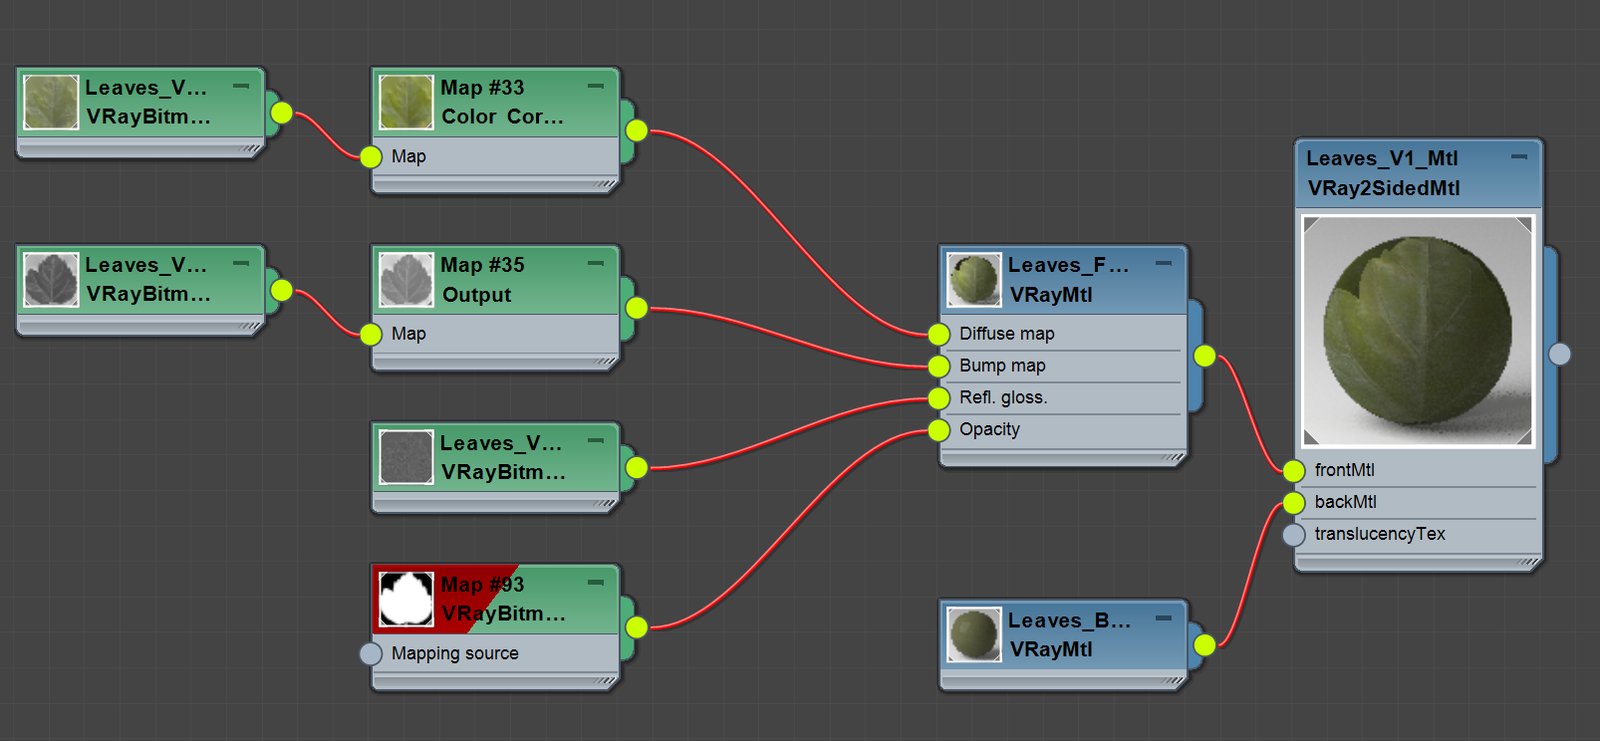
Add a VRayBitmap texture to the Back material’s Diffuse map slot. Here we load a slightly lighter leaf image than the one used for the Front side of the leaves.
Set the Reflection color to gray to lower the reflectivity of the leaves backside.
Set the Fresnel IOR to 1.3, too, just like we did for the Front material’s parameter.
Use the same VRayBitmaps as the Front material for the Bump, Reflection Glossiness, and Opacity map slots.
Use an Output map to invert the Bump texture colors so that the leaves are more physically accurate. Here, the Bump texture is used to produce the convex shape of the veins.
If necessary, adjust the brightness and contrast of the Reflection Glossiness texture with the help of a Color Correction map.

Here’s how the leaves look with the Back material added.
Step 3: Adjust Translucency
We control the Translucency by using a grayscale image map of the leaf where the veins are darker than the thin parts of the leaf itself. Thus, the leaves look more translucent in the thinner areas.
Load the image in a VRayBitmap texture and map it to the VRay2SidedMtl translucencyTex slot.
Here are our final leaves with VRay2SidedMtl.

VRayMtl Approach
This second approach simply uses a single VRayMtl with an enabled SSS translucency mode to achieve the desired effect.
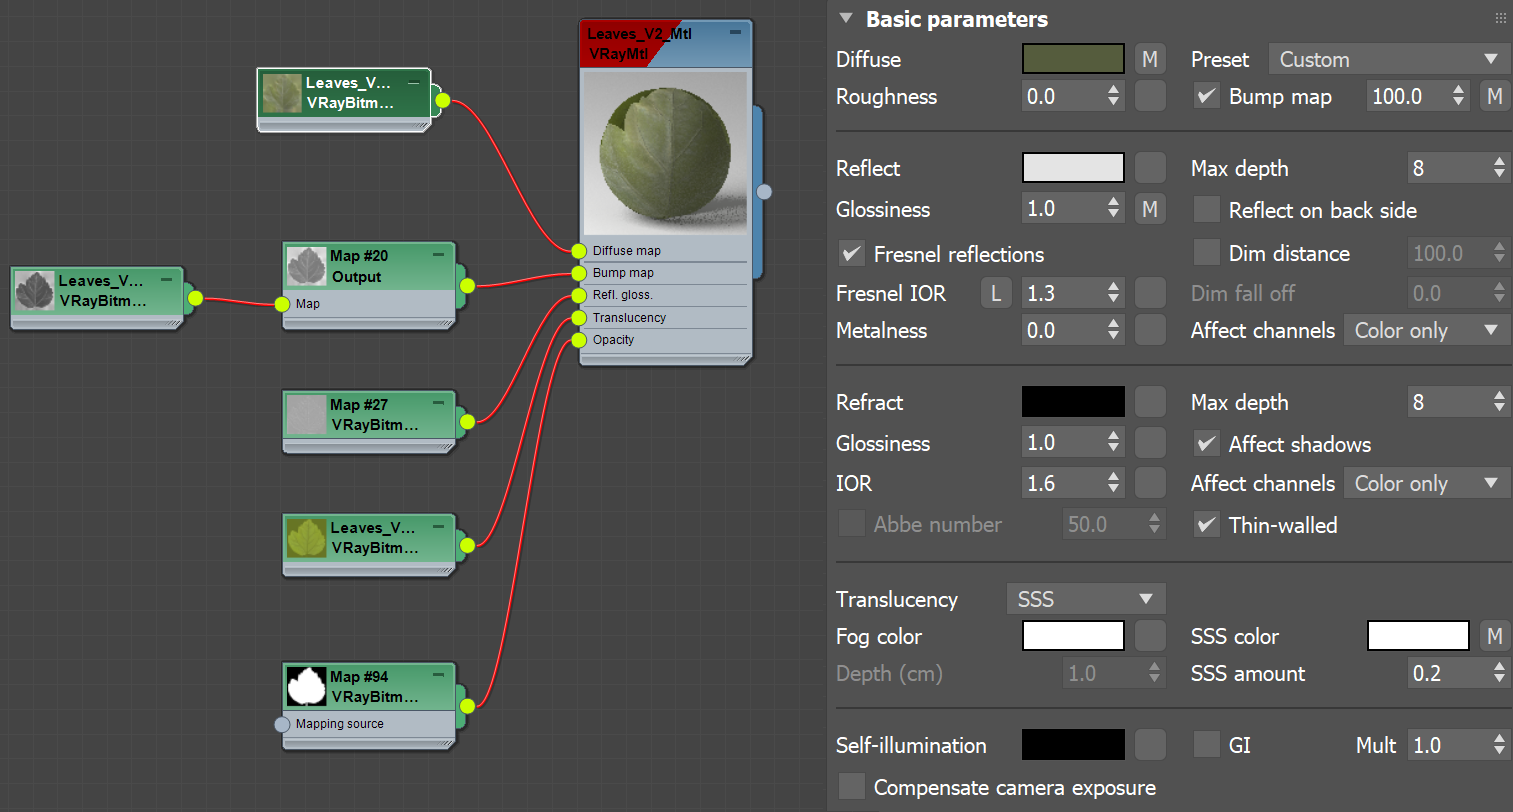
First, enable the Thin-Walled parameter to make the material suitable for portraying thin surfaces like leaves.
We link five VRayBitmaps driving the following parameters: Diffuse, Bump, Reflection Glossiness, Translucency, and Opacity. Their setup does not differ much from the one used in the VRay2SidedMtl approach, except for the Translucency. So, we focus mainly on this parameter.
Set the Translucency mode to SSS. This mode, together with the enabled Thin-Walled option, simulates thin translucent surfaces such as leaves. The SSS color defines the backside color, while the SSS amount controls the translucency effect.
In our case, let’s lower the SSS amount to 0.2. This makes the geometry partially translucent. As for the SSS color we have a VRayBitmap texture plugged in.
Don’t forget to unlock and then set the Fresnel IOR to 1.3.
If necessary, make further color corrections to the VRayBitmap textures for a more realistic representation of the leaves.
Here’s how the SSS translucency mode enhances the final image.

Front mtl

Front mtl and Back mtl
Randomizes Leaves
We can add some variation to the leaves with the help of VRayMultiSub textures.
Both approaches can benefit from this, it does not matter if the leaves are made with a VRay2SidedMtl or a VRayMtl.
Create a VRayMultiSub texture.
Link the Diffuse texture output to the VRayMultiSub texture and then link the VRayMultiSub texture to the Diffuse color of the VRayMtl.
Enable the By element option to make the texture randomize colors based on the leaves element IDs. In our case, we add 5 element IDs.
Specify the maximum random variations for the Hue, Saturation, and Gamma. Here, we use the values of 4, 3, 5 respectively.

Final Image
Here’s our final image of the randomized hibiscus leaves: