KeyShot Studio
Region Rendering
When working on scenes in KeyShot Studio with complex lighting or materials and you want to render specific areas faster, region rendering can help maintain an efficient workflow. There are two types of region rendering in KeyShot Studio:
Last updated 3 August 2026
When working on scenes in KeyShot Studio with complex lighting or materials and you want to render specific areas faster, region rendering can help maintain an efficient workflow. There are two types of region rendering in KeyShot Studio:
- Real-time Render Region
- Output Render Region
Both control the same region to be rendered. That is, the Real-time region will match the Output region and vice versa. You will see this best if the Real-time Resolution (set in the Project window, Image tab) is the same as the Output render Resolution (set in the Render window). If one is smaller or larger than the other, the region will adjust accordingly.
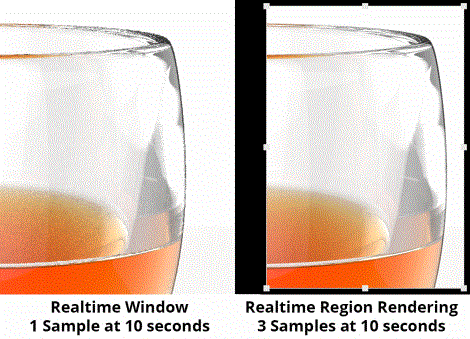
Real-Time Render Region
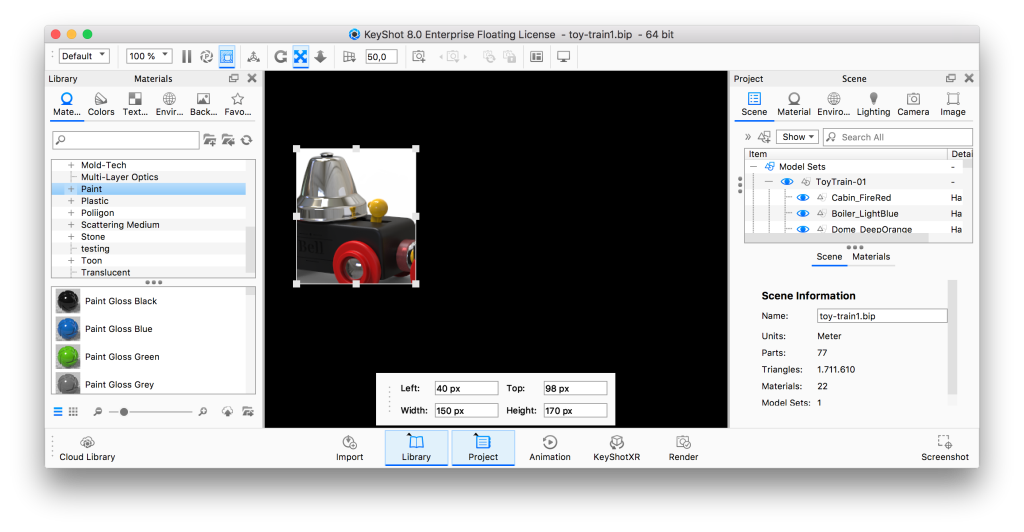
To activate real-time region rendering click the Render Region icon  on the Ribbon.
Select the Render Region icon on the Ribbon again to disable real-time region rendering.
Output Render Region
Region rendering is an output option on both the Still Image and Animation tabs.
To activate output region rendering check the Region checkbox in the Render window Output options.
Uncheck the Region checkbox in the Render window Output options again if you want to disable region rendering.
Render Region Setup
The smaller the region (and less complicated the materials and lighting), the faster the render will resolve. Both types of region rendering are set up in the same way. When region rendering is enabled you can control the region area size and position in two ways:
- Real-time View
Adjust region size: click and drag the corners or edge handles of the region area.
Move the region: click and drag inside the region to move the entire area. - Position Panel
Adjust region size: Enter the Height and/or Width or the render region.
Move the region: Enter Left and/or Top (distance from the top-left corner).
Move the panel: click and drag the left side of the panel to re-locate it anywhere in the Real-time View.
Both can be used together as well and the camera can continue to be adjusted by clicking and dragging in the black area surrounding the render region.