Use Studios in KeyShot Pro to save scene, model and material variations in one file for creating and presenting variations. Studios can include any combination of Camera, Environment, Image Styles, Models Sets or Multi-Materials.
The Studios window
You can dock the Studios window. Open it using any of these options:
- Select Window > Studios… from the main menu.
- Select the Studios icon
 in the Ribbon.
- Press U.
The list at the top of the Studios window shows all Studios in the scene. A blue background highlights the active Studio. Icons 


 beside each Studio name show which elements it includes.
Drag and drop Studios to reorder the list.
Beside the Studios list are  Add new Studio,
 Delete Studio and
 Thumbnail settings.
Below the Studios list, five drop-down menus show the active Camera, Environment, Image Style, Model Sets and Multi-Materials.
Set up a Studio
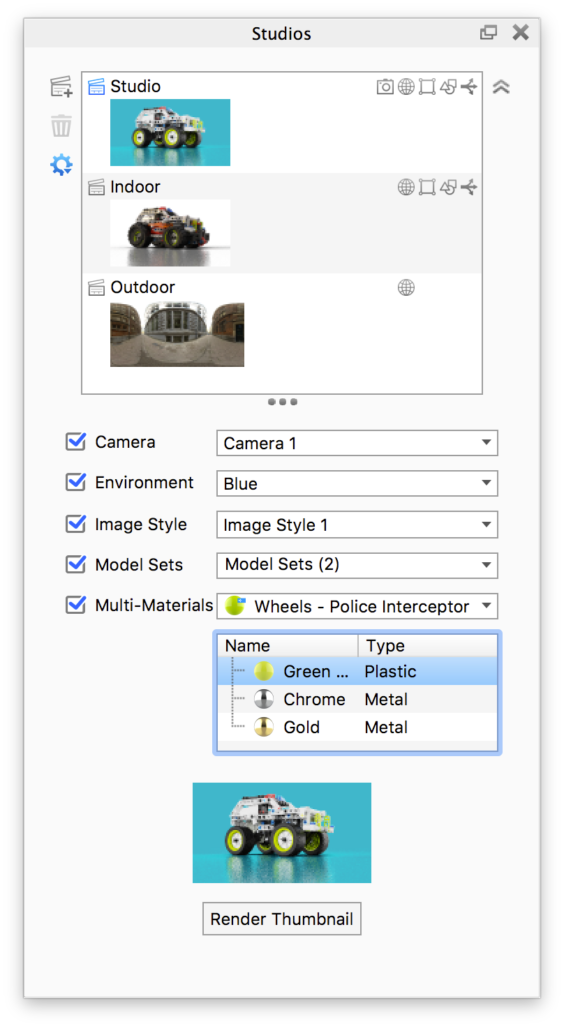
Click the Add Studio icon To change a Studio, select a different Camera, Environment, Model Set or Multi-Material from the drop-down menus. Camera Select the Camera to use in your Studio. If you leave this unset, the Studio uses the active Camera. Environment Select the Environment to use in your Studio. If you leave this unset, the Studio uses the active Environment. Image Style Add an Image Style to your Studio to include settings such as Frontplates. If you leave Image Style unset, the Studio uses the active Image Style. Colorways Select the Colorway to use in your Studio. If you leave this unset, the Studio uses the active Colorway. Model Sets To add multiple Model Sets to a Studio, select their checkboxes in the Model Sets drop-down menu. Multi-Materials When the Multi-Material checkbox is selected, you can choose which material from each Multi-Material in the scene appears in the Studio. Select a Multi-Material from the drop-down menu to see its materials listed below. |
Thumbnails
KeyShot generates a thumbnail when you create a Studio. If Camera is set to Free Camera, the thumbnail shows the environment. To generate a thumbnail for a Studio, click Render Thumbnail at the bottom of the window. The thumbnail uses the active elements in the Real-Time view.
Thumbnail settings
- Preview size: Set the thumbnail size in the list, or choose to hide thumbnails.
- Thumbnail Render Settings:
- Samples sets the number of samples used to render each thumbnail.
- Use environment thumbnail for Studios without thumbnails lets you choose the thumbnail source for a Studio without a camera. You can render it from the free camera or use the environment thumbnail.
- Use Render High Res when you need higher-resolution thumbnails, for example for the Configurator.
- Render Thumbnails renders all thumbnails. To render a thumbnail for one Studio, select the Studio and click the button below the preview.
- Reset all to Environment Thumbnails – discards all current thumbnails and replaces them with environment thumbnails. If a Studio has no environment included, it uses the current environment.
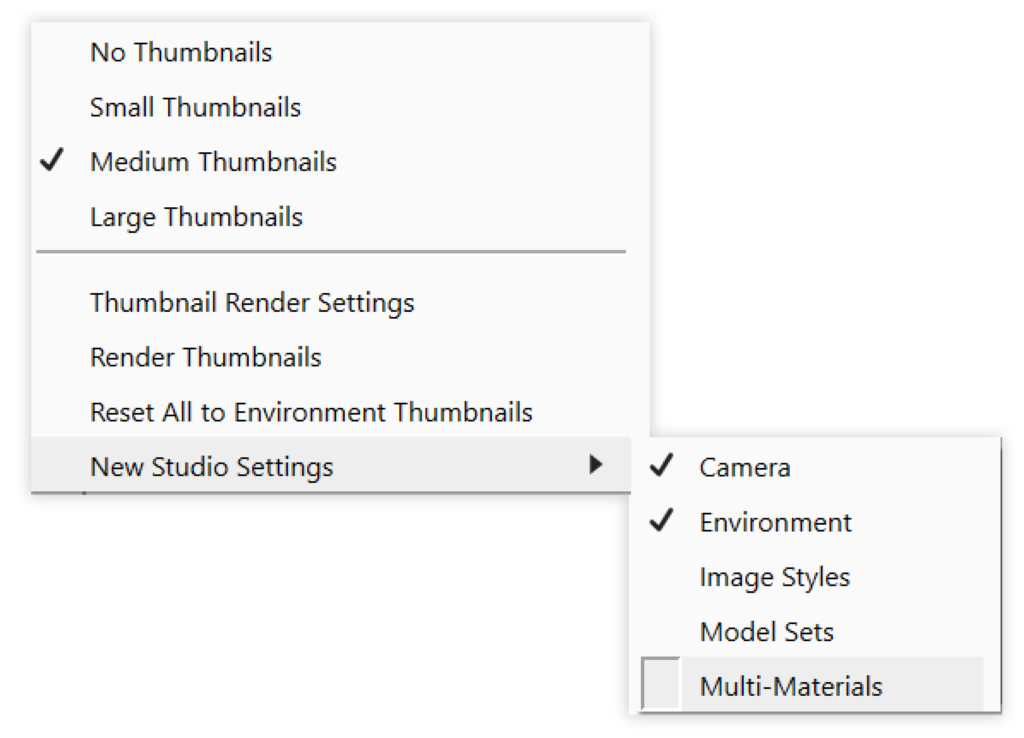
New Studio settings
New Studios include only Camera and Environment by default. Use the New Studio Settings flyout to choose which components to include each time you create a Studio: Camera, Environment, Image Style, Model Sets and Multi-Materials.
Studio switch events
Use Studio Switch Events to switch entire Studios during an animation. Right-click a Studio in the Studios list to add an event. Read about animation with Studios.