Use Hatch Patterns in SketchUp to add patterns to section fills, which show the inside of a solid object cut by a section plane. A Hatch Pattern combines adjustable vector lines with a background colour or tileable raster image. It can also be a solid colour without vector lines.
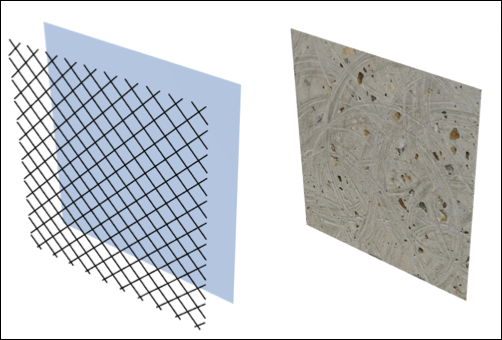
Use the Hatch Patterns panel to view, import, create and manage hatches in your model. Find it in the Default Tray, or enable it through Window > Default Tray > Hatch Patterns.
Using the Hatch Patterns panel
The Hatch Patterns panel includes a default library of standard Hatch Patterns in .skh format.
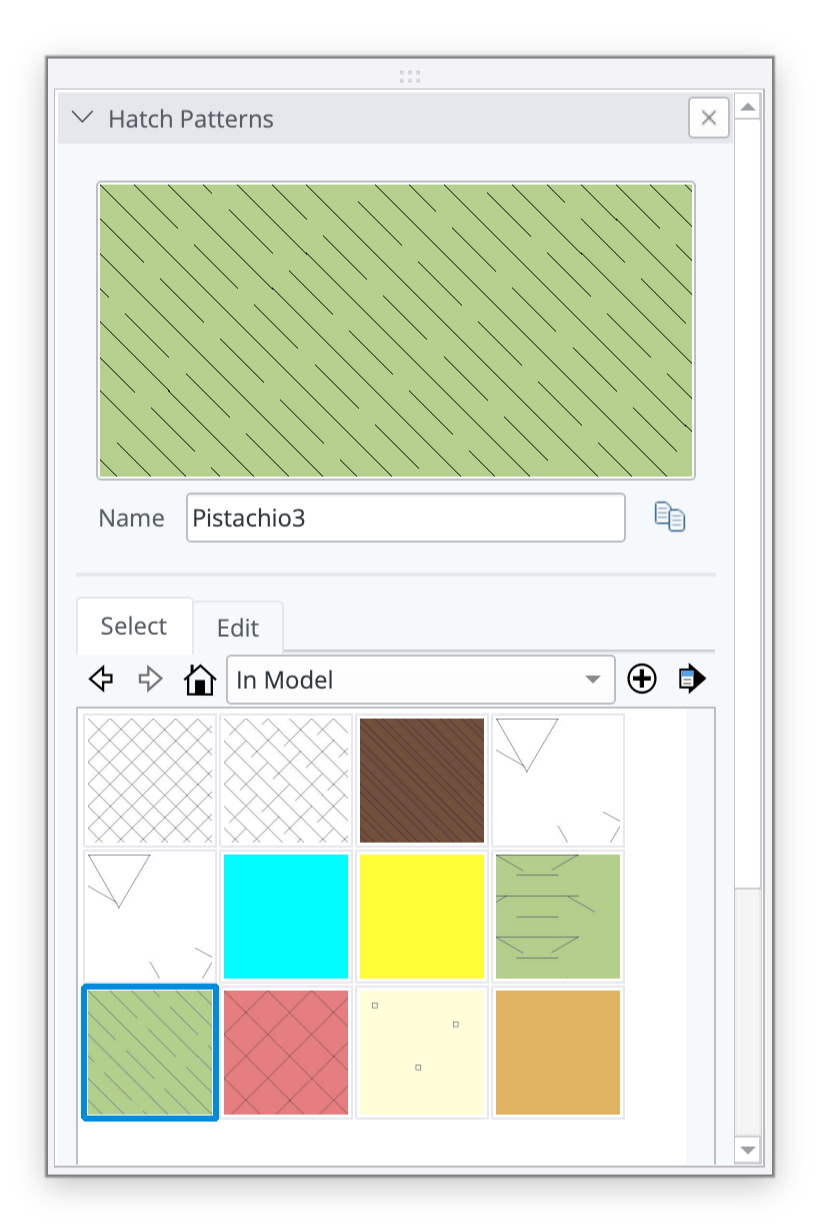
To import your own pattern, click the plus icon. You can import an .skh file, use an image or import a .PAT file. Importing a .PAT file creates a new .skh hatch pattern. SketchUp imports only one pattern per .PAT file. If a .PAT file contains multiple patterns, upload each pattern separately.
Use the Details icon to manage added patterns and sort them into collections.
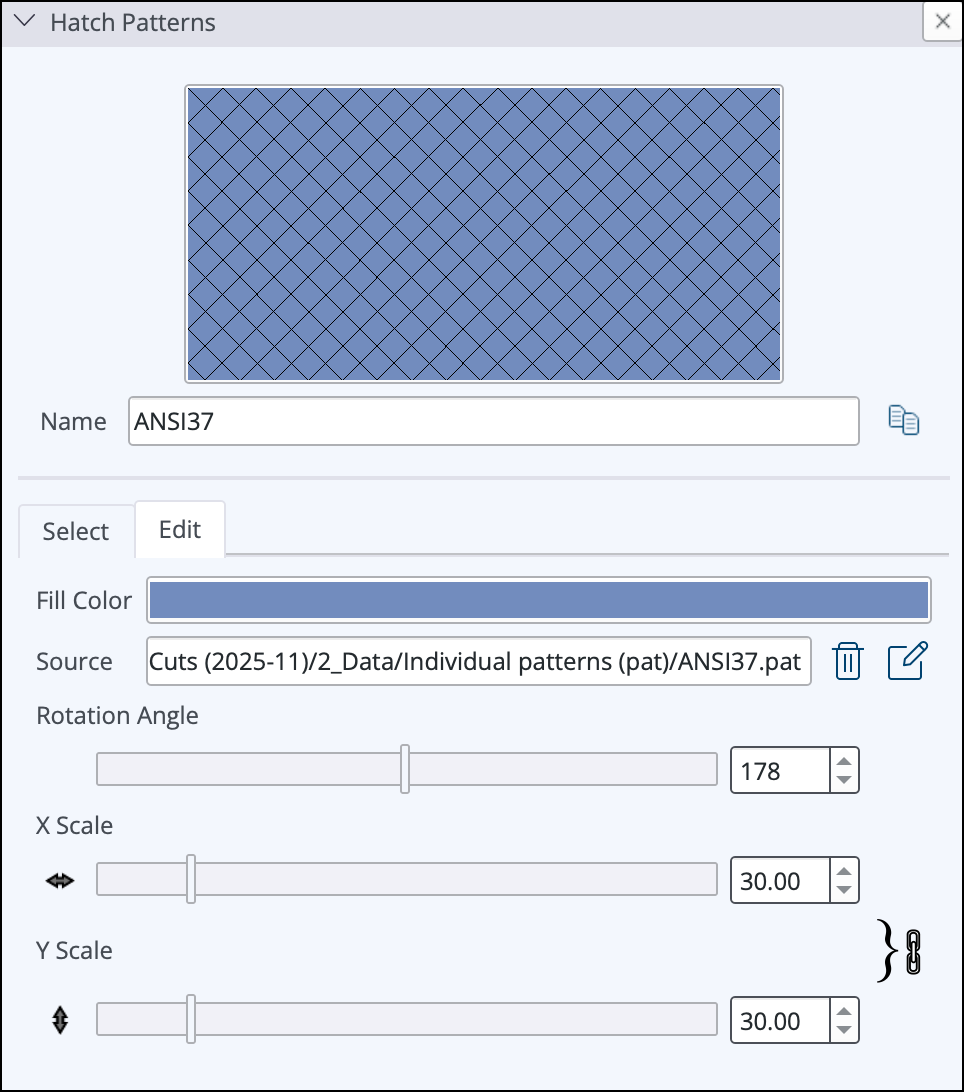
Use the dropdown to view patterns in your model, default patterns or other imported patterns. Click a pattern to display it at the top of the panel. With a pattern selected, click Edit to change it. You can:
- Rename the pattern.
- Review, edit or remove the pattern's source file.
- Set the pattern's rotation angle.
- Change the pattern's X- and Y-scale values.
Section Fill setup and visibility
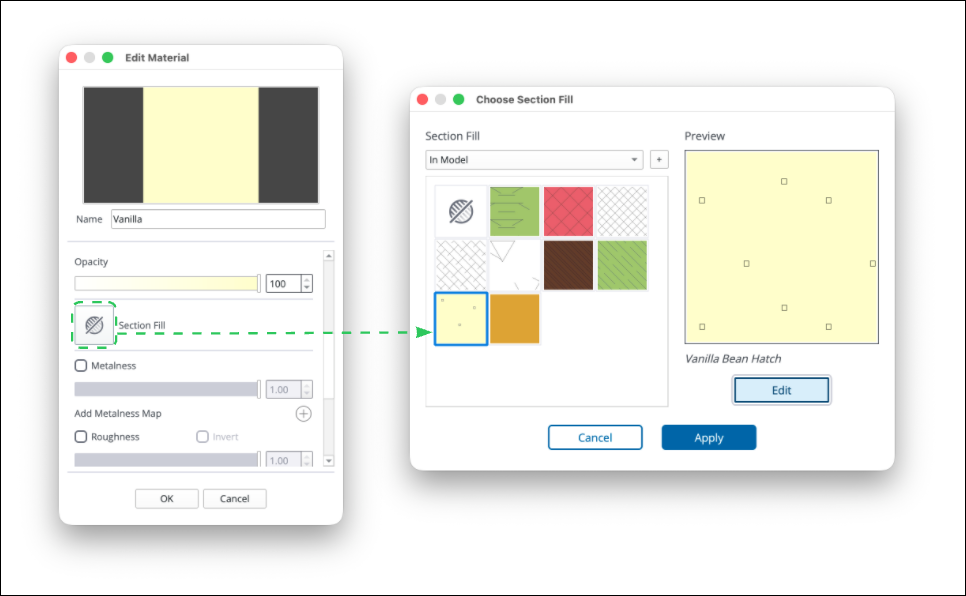
To assign Section Fill Hatch Patterns to individual materials, edit the material in the Materials panel. You can also use the Section Fill option in Entity Info.
Section fills in Materials
In Edit Material, click Section Fill to open the Choose Section Fill window and link a hatch pattern to the material. When a section plane cuts a solid group or component with that material, the section cut shows the linked Hatch Pattern. See Editing Materials for all material editing options.
Section fills in Entity Info
In Entity Info, click Section Fill to set a group or component's section fill independently of its material.
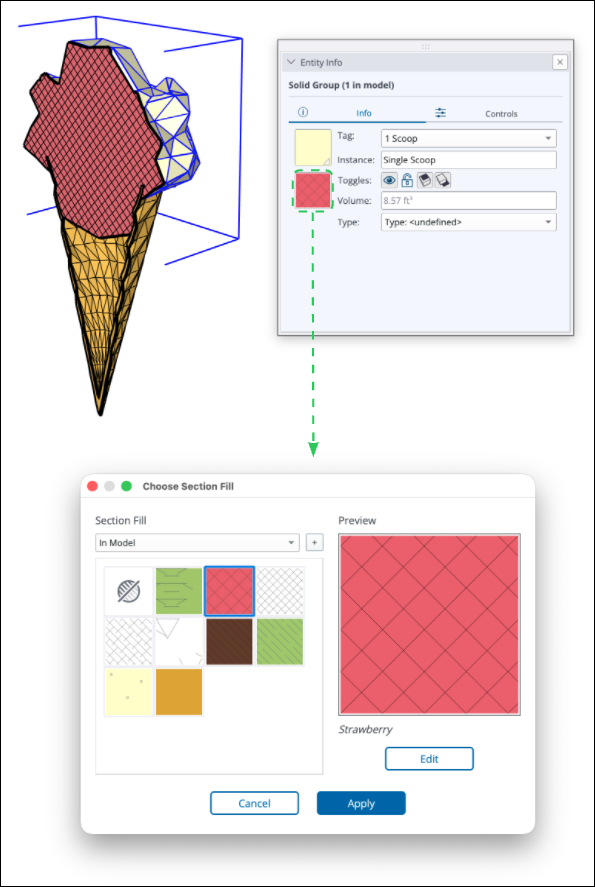
This overrides section fills linked to materials in that entity. See Inspecting an Entity for all Entity Info options.
Section fills in Styles
In the Styles panel, open the Edit tab and use Model Settings to set a section fill for the selected Style. Use Section Cuts, Section Fill and Override Section Fill by Style to change how section fills appear.
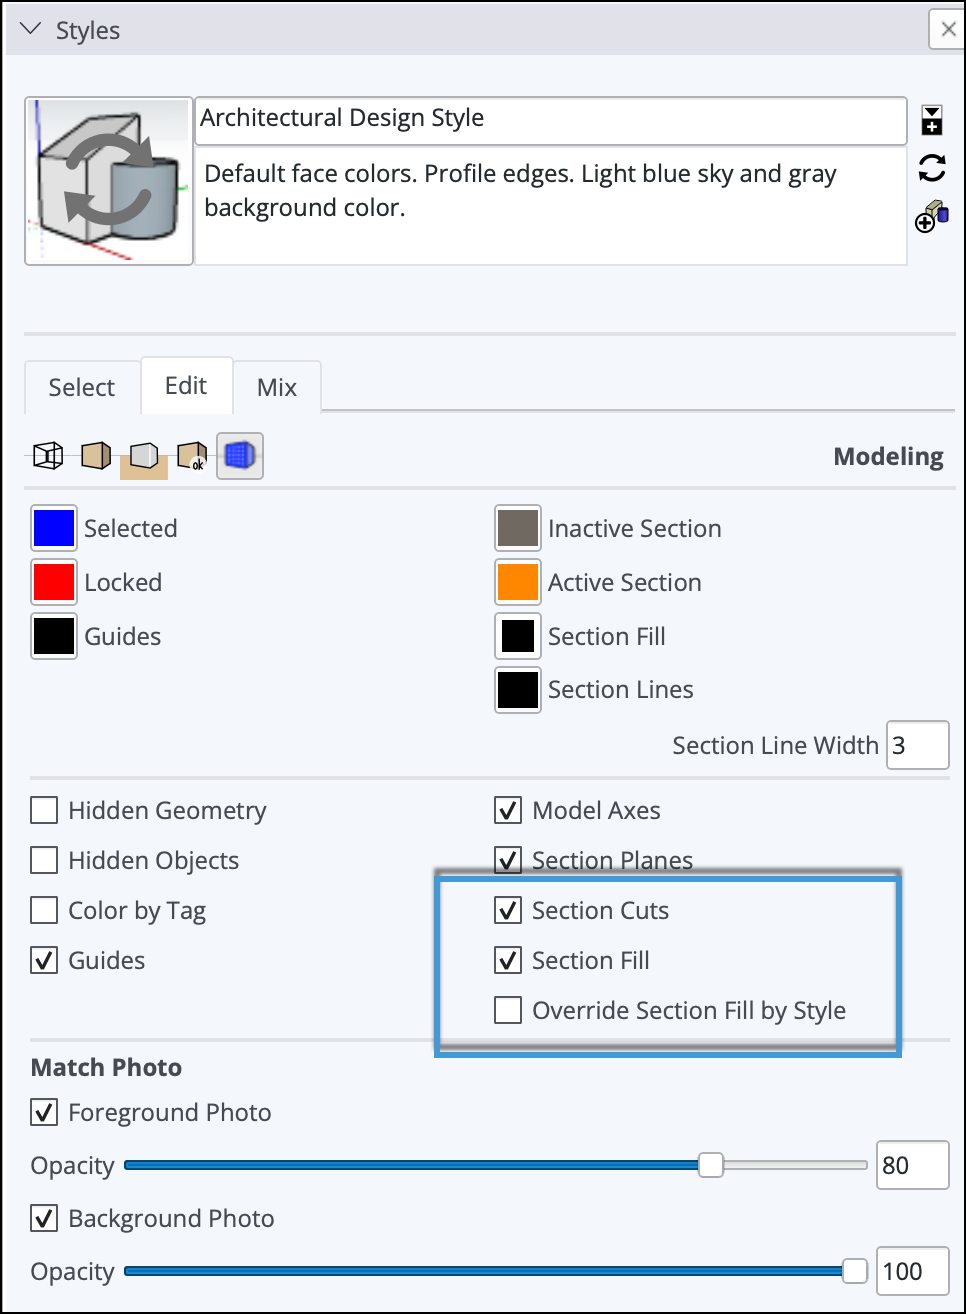
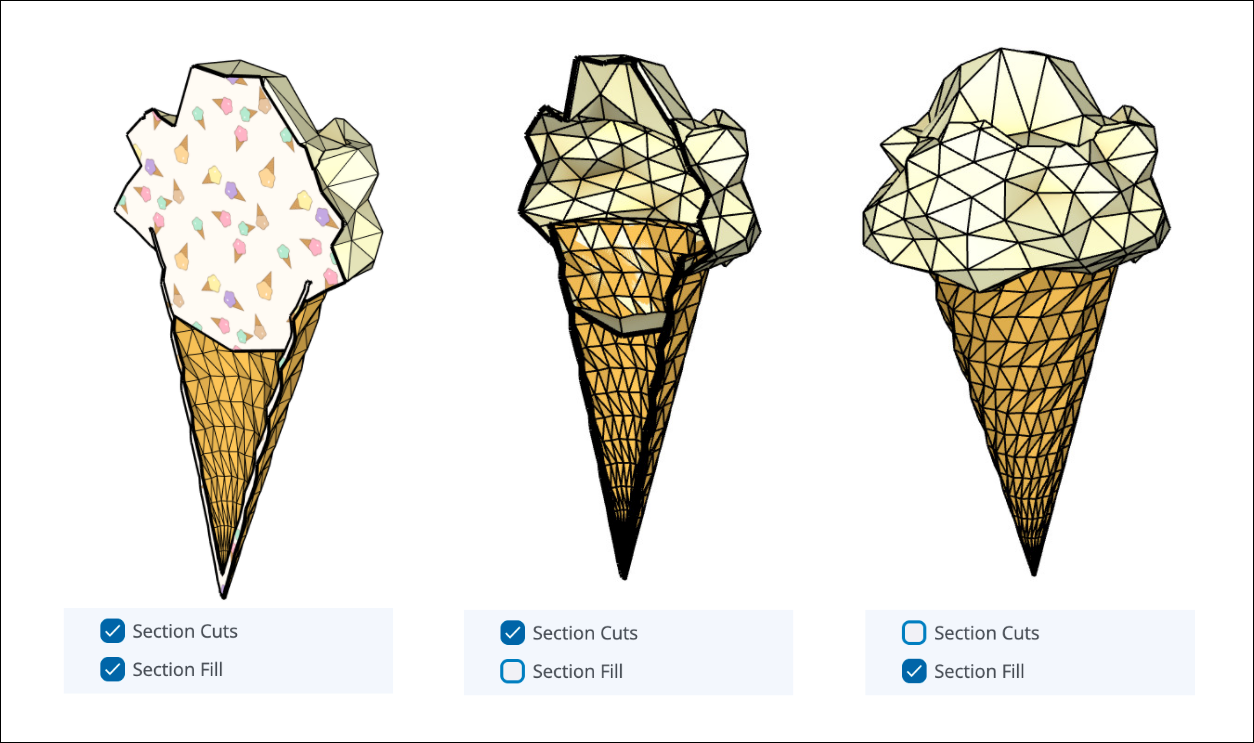
Turn on both Section Cuts and Section Fill to show the section cut with its pattern. Turning these options off changes how fills and cuts appear throughout your model.
The Override Section Fill option works as follows:
- When this option is on, SketchUp uses a single, uniform fill set in the Style panel. These are "classic section fills".
- When this option is off, SketchUp shows the section fill hatches assigned to individual objects and linked to materials.
See Creating and Editing a Style for all Styles panel options.