Learn how to create edges and faces, the basic parts of a SketchUp model, and use the inference engine to draw accurately. Drawing a model in 3D differs from drawing an image in 2D.
Drawing a line
Use the Line tool to draw edges, also called line entities. Edges form the structure of your model. To draw a line:
- Select the Line tool (
 ) on the toolbar or press L. The cursor changes to a pencil.
- Click to set the line's starting point. If you click in the wrong place, press Esc to start again. As you move the cursor around the drawing area:
- A line follows your cursor.
- The Measurements box shows the line length in the units set by your template.
- The line's colour shows which axis it aligns with.
- Click again to set the line's end point.
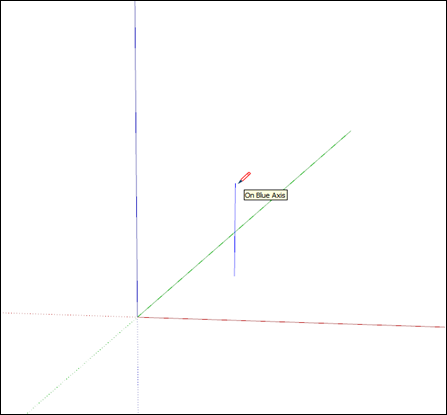
- Optionally, type an exact length and press Enter (Microsoft Windows) or Return (MacOS). You can change this value repeatedly until you draw a new line or select another tool.
You can change a line's length if it does not bound a face. To edit a line:
- Select the Move tool (
 ).
- Hover the Move tool cursor over an end point of the line.
- Click and drag the end point to change the line's length.
Creating a face
Join several lines into a closed shape to form a face.
By default, SketchUp shades some faces. These faces can represent walls, floors or other surfaces in your 3D model.
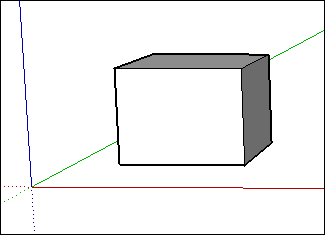
The Rectangle, Circle and Polygon tools also create faces. See Drawing Basic Shapes for details.
Dividing faces
Draw a line or curve on an existing face to split it.
After you split a face, use the Push/Pull tool to push or pull one part while the other stays in place. See Pushing and Pulling Shapes into 3D for details.
Opening 3D shapes by erasing edges and faces
Erase an edge or face to create an opening in a shape. Erasing an edge also erases any adjacent face. Select the Eraser tool ( ) or press E, then click an edge to erase it. To delete only a face, context-click the face and select Erase.
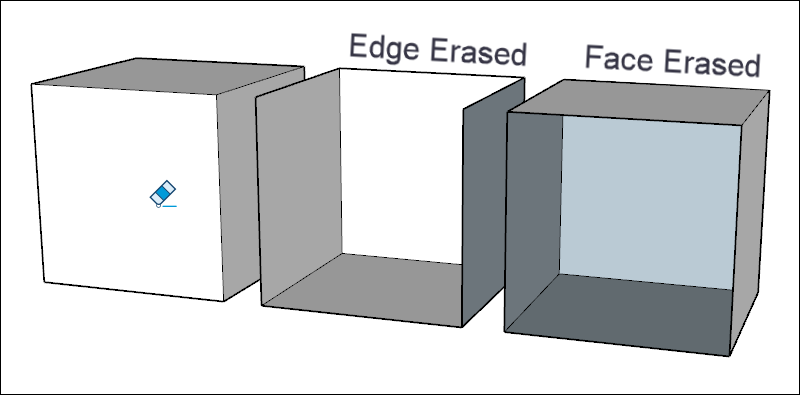
Restoring deleted faces
If you accidentally delete a face, use either of these methods to restore it:
- If you have made no further changes you want to keep, select Edit > Undo from the menu bar. You can also press Ctrl+Z (Microsoft Windows) or Command+Z (macOS).
- Redraw the line that caused the faces to disappear. SketchUp restores the faces.
Understanding inference types
SketchUp uses point, linear and shape inferences. It often combines these into a complex inference. Components and dynamic components also have their own inference types.
A point inference identifies the exact point under your cursor in the model:
Point inference type | What it looks like | What it means |
|---|---|---|
Origin point |
| The point where the three drawing axes meet. |
Component Origin Point |
| The axis origin inside a group or component. This is also its default insertion point. |
Endpoint |
| The end of a line, arc or arc segment. |
Midpoint |
| The middle point of a line, edge or arc segment. |
Arc Midpoint |
| The middle point of an arc. |
Intersection |
| The point where a line intersects another line or face. |
On Face |
| A point on a face. |
On Edge |
| A point on an edge. |
Center |
| The centre of a circle, arc or polygon. |
Guide Point |
| A guide point. |
On Line |
| A point along a guide line. |
On Section |
| The point where a drawing tool creates an edge on a section plane. |
Intersection with Hidden Section |
| The point where the drawing tool intersects an edge generated by a hidden section plane. |

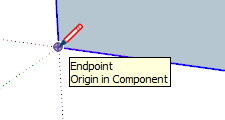


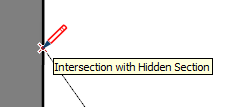
A linear inference snaps along a line or direction in space. It displays a ScreenTip and sometimes a temporary dotted line while you draw:
Linear inference type | What it looks like | What it means |
|---|---|---|
On Red Axis |
| Alignment with the red drawing axis. Click and drag as you draw to see the inference. |
On Green Axis |
| Alignment with the green drawing axis. Click and drag as you draw. |
On Blue Axis |
| Alignment with the blue drawing axis. Click and drag as you draw. |
From Point |
| Alignment from a point. The dotted line's colour shows the axis direction. |
Through Point |
| Start drawing from a point, then hover over another point. Hold Shift to lock the direction from the starting point through the second point. |
Parallel |
| Alignment parallel to an edge. |
Extend Edge |
| A continuation of an existing edge. |
Perpendicular |
| Alignment perpendicular to an edge. |
Perpendicular to Face |
| Alignment perpendicular to a face. |
Tangent at Vertex |
| An arc whose vertex is tangent to the vertex of a previously drawn arc. |


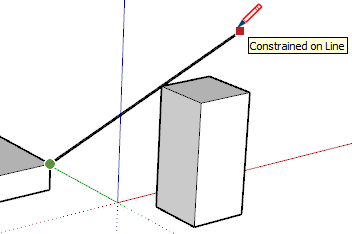


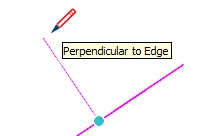
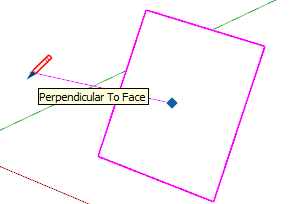
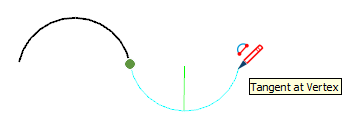
Shape inferences identify proportions as you draw, such as when a rectangle becomes a square.
Shape inference type | What it looks like | What it means |
|---|---|---|
Square |
| A rectangle with all sides the same length. |
Golden Section |
| A rectangle with proportions that match the Golden Ratio used in mathematics and the arts. |
Half Circle, Quarter Circle, or Three-Quarter Circle |
| An arc that forms exactly one half, one quarter or three-quarters of a circle, respectively. |
Arc Side and Center |
| Hover a drawing tool over an arc to show its edge and centre inferences. |
Circle/Polygon Center |
| Hover a drawing tool over a circle's edge to show its centre inference. |


Finding and locking an inference
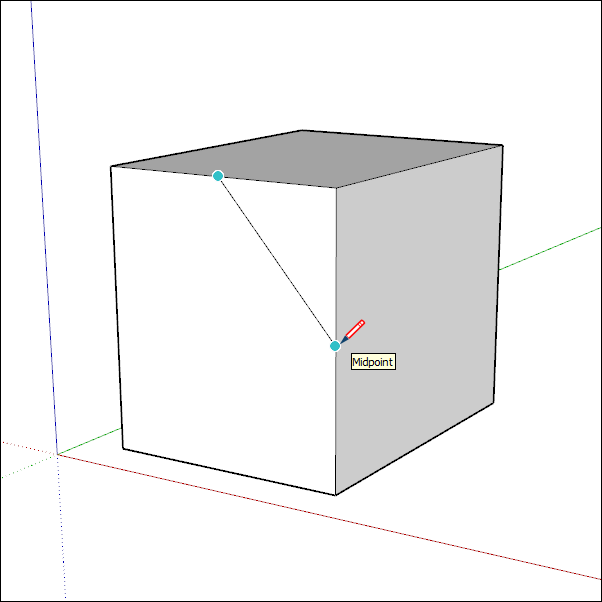
The SketchUp inference engine helps you draw accurately in 3D. Hover the Line tool over another line's midpoint to see a light blue dot and a ScreenTip that says "Midpoint". Each inference has its own colour and ScreenTip. See Understanding inference types for the full list.
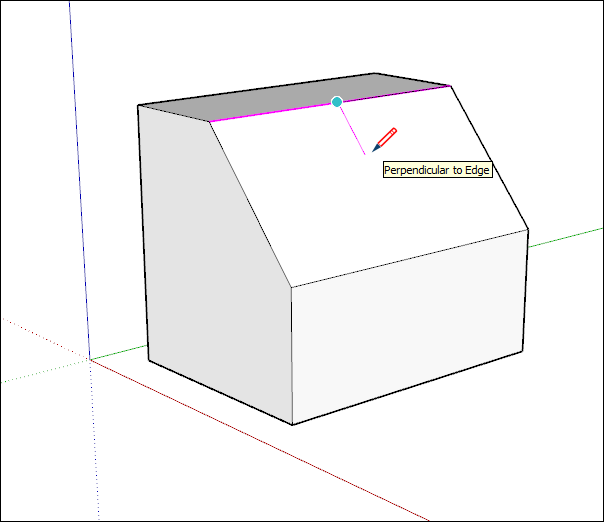
The inference engine also identifies geometric relationships between lines. For example, it shows when the line you are drawing is perpendicular to another line.
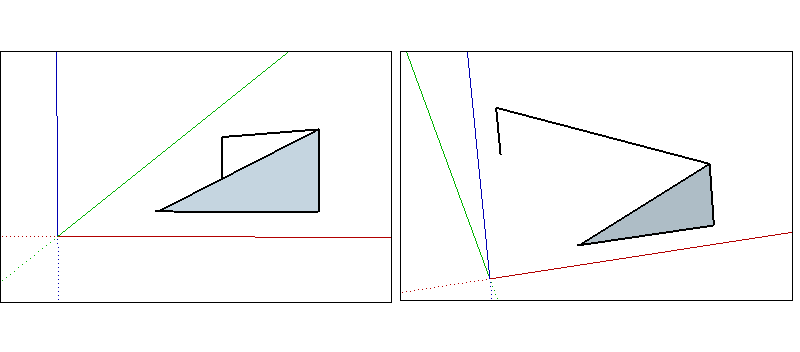
The inference you need may not appear immediately, or SketchUp may align with the wrong geometry. Pause the cursor over the point you want to use. SketchUp then prioritises alignment with that point as you draw.
Toggling linear inferencing
Most SketchUp tools use inferencing. In a busy area of your model, inferences can get in the way. The Line tool lets you turn linear inferencing off and back on.
With the Line tool, click to start a line. Before clicking to finish it, press COMMAND on Mac or ALT on Windows to cycle through these states:
- All Inferences On
- All Inferences Off
- Parallel and Perpendicular Only
All Inferences On
This is the default behaviour used since SketchUp Version 1. The Line tool snaps to the red, green and blue axes. It also snaps to the magenta axis, parallel or perpendicular to a specified edge.
All Inferences Off
The Line tool ignores all linear inferences, so the cursor moves more freely as you draw edge segments. Other inference types, including On face, Guide points and Midpoints, remain available. Use them to check that your lines lie on the intended planes.
Parallel and Perpendicular Only
The Line tool shows only parallel and perpendicular linear inferences. Use this state to align your line with other geometry without other linear inferences appearing.
Locking inferences with the keyboard
Lock an inference to keep your drawing direction fixed while you draw or reference geometry elsewhere in the model. Use the arrow keys to lock to the default axis directions.
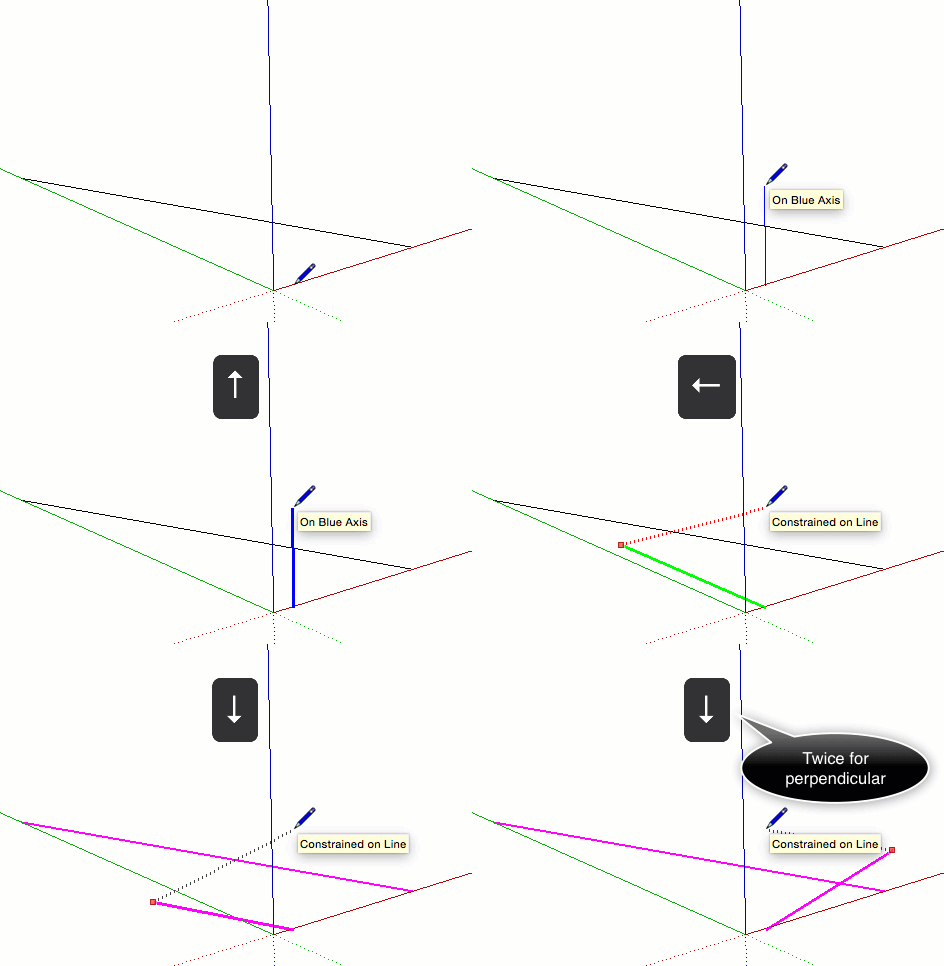
Key | What it looks like |
|---|---|
↑ | Locks the drawing direction or plane to the Blue axis. |
← | Locks the drawing direction or plane to the Green axis. |
→ | Locks the drawing direction or plane to the Red axis. Remember "Right locks Red". |
↓ | Toggles the lock for a drawing direction or plane parallel or perpendicular to an inferred edge or plane. These inferences appear magenta. The drawing direction and the edge of the inferred face also turn magenta. |
Shift | Locks the current drawing direction or plane. For example, hold Shift while drawing along the Blue axis to lock the Blue inference. |
Shift+Alt (Windows) or Shift + Command (MacOS) | Holding Shift locks the drawing plane and keeps the tool on the inferred face plane. With the Rotate and Protractor tools, press Alt (Microsoft Windows) or Command (MacOS) to move the centre elsewhere in the model while keeping the same drawing plane. |
Some tools, such as Circle and Rotate, can lock to a plane rather than a drawing direction. Choose the coloured direction for the tool's axis, or "normal", to lock its drawing plane.
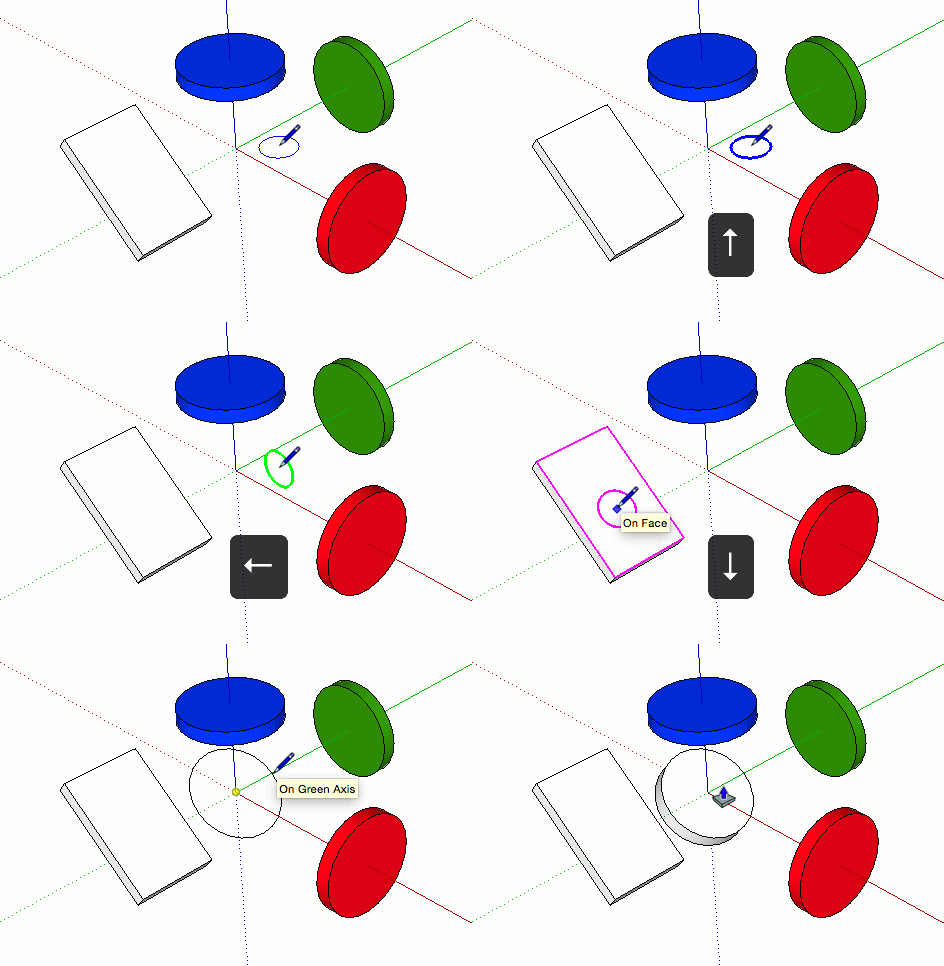
To check whether edges align with the axes, display axis colours on your cursor or model edges.
To display axis colours on your cursor:
- Select Window > Preferences (Microsoft Windows) or SketchUp > Preferences (macOS) to open the SketchUp Preferences dialog box.
- Select Drawing on the left.
- In the Drawing panel's Miscellaneous area, select the Display cross hairs checkbox.
- Click OK to close the SketchUp Preferences dialog box. The cursor shows cross hairs in the axis colours.
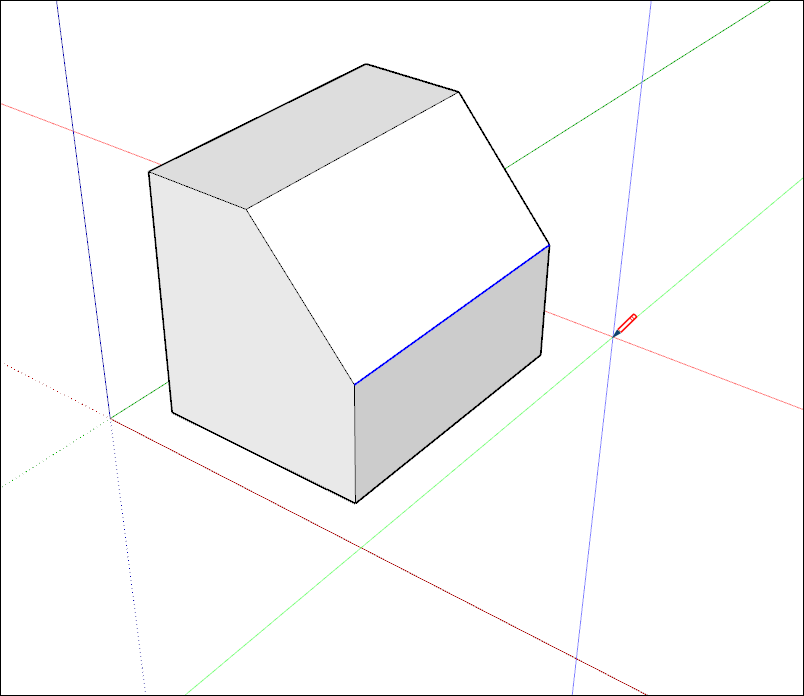
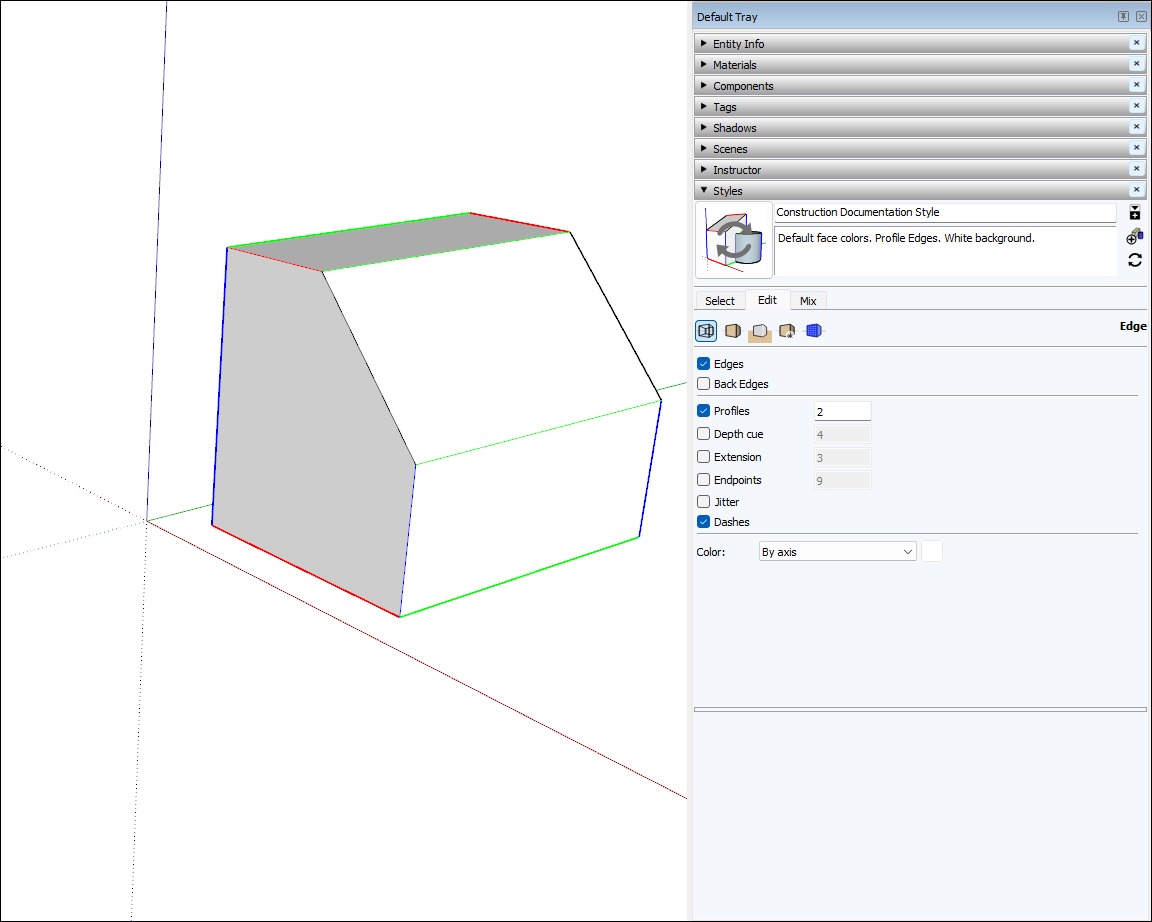
To colour model edges by the axis they align with:
- Select Window > Styles.
- In the Styles dialog box, select In Model from the styles library drop-down list.
- Click the Edit tab.
- Click the Edge Settings icon shown in the figure.
- Select By axis from the Color drop-down list. Edges aligned with an axis change to that axis colour. Edges that do not align with an axis keep their colour.