Enscape
Light Management
This page provides information about the Light Management in Enscape.
Last updated 3 June 2026
This page provides information about the Light Management in Enscape.
Overview
The Light Management provides complete, centralized control over all lighting in your Enscape scene - without switching back to your CAD tool.
With Light Management, you can:
- Quickly adjust and experiment with color, intensity, and beam qualities for one or many lights at once.
- Create reusable light presets for different moods, design phases, or presentation scenarios (e.g., warm & cozy, cool daylight, dramatic accents).
- Link lighting setups to specific Enscape views so each camera angle automatically shows the lighting you intended.
- Stay in your creative flow by making all adjustments directly in Enscape - no more jumping between applications.
The Light Management panel appears directly in the Enscape UI and acts as your lighting control center. It includes organized tabs for Light Presets and CAD Defaults, a searchable light list, clear viewport icons, and easy tools for creating, duplicating, and managing presets.
For the best results, ensure your lights are enabled in your CAD application so they appear correctly in the Enscape viewport.

Light Management Browser in Enscape Toolbar
Light Indicators
There are several ways light indicators are displayed in Enscape.
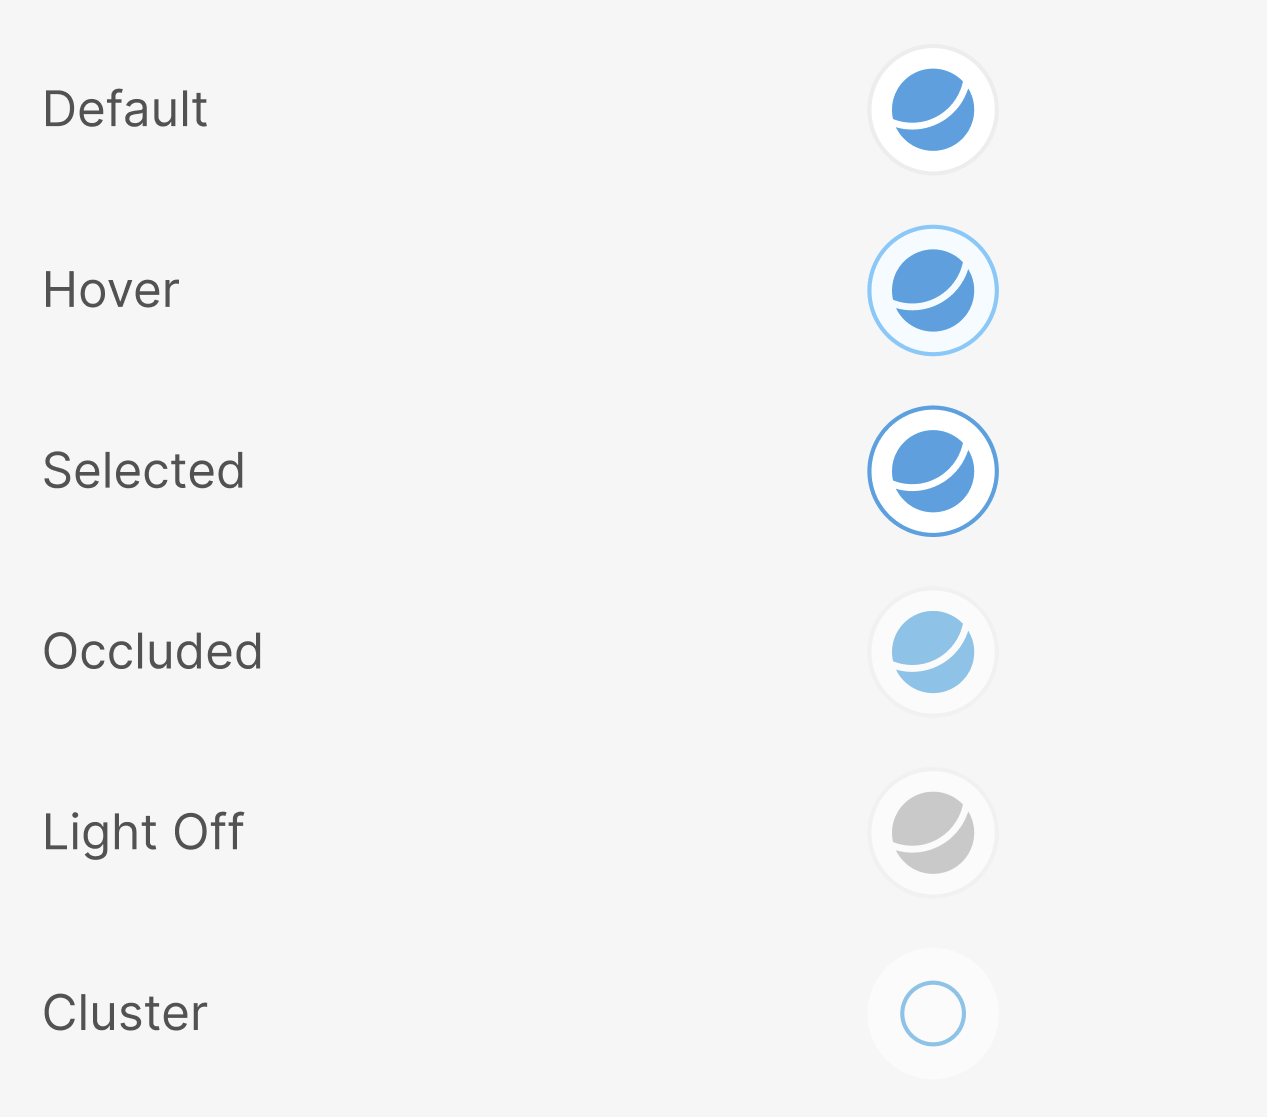
Light Management - Light Indicators Legend
Light Management Tabs
Light Presets tab
The Light Presets tab defines and manages reusable lighting scenarios. A preset stores the state of supported light parameters for the current project.
Examples:
- A cold, blue-toned preset for a cooler atmosphere
- A colorful preset for dynamic, vivid presentations
- A red preset for a dramatic or accent lighting scene
Presets can be switched instantly, making it easy to compare different lighting schemes.
youtu.be
Switching between Light Presets
CAD Defaults
The CAD Defaults tab shows the lighting values exactly as they are exported from your source CAD application.
- The values shown here reflect your Source CAD Defaults.
- This tab is read-only — you can’t edit lights from here.
- Use this tab as a baseline reference for how your lights are defined in CAD.
- To change these values, update the lights in your CAD application and re-sync/reload the scene.

CAD Defaults
Light list, search, and selection
The Light Management feature lists all lights detected in the scene, showing each light’s name together with the relevant type-specific properties supported by the renderer.
It also provides the following tools for working with lights:
- Search bar – Filter lights by name or partial string, which is particularly useful in large projects.
- Light Indicators – Controls which light icons appear in the 3D scene:
- Show Visible Only – Shows icons only for lights currently visible.
- Show All – Shows icons for all lights.
- Hide All – No icons shown.
- Multi-selection mode – When enabled, multiple lights can be selected in the scene. Clicking on a selected light deselects it.
youtu.be
youtu.be
Show and Hide Light Icons
youtu.be
Selecting Lights in Multi-Selection Mode
Working with light presets
Creating a new light preset
To create a new light preset:
- Click the Preset dropdown in Light Presets, then click the + button.
- Enter a name for the new preset and confirm by clicking the tick button.
- Select the light or lights you want to adjust, either from the light list or by clicking the light icon directly in the viewport. This highlights and selects the corresponding light in the list.
- Set the desired values for the selected lights as needed. Once these changes are saved, the preset is ready to use.
youtu.be
Editing Light properties
You can adjust light properties at two levels:
- Single light editing for a precise setup.
- Multi-light editing for broad, consistent changes across groups of lights.
Editing a single light
- In Light Management, locate the light in the list, or click the light icon directly in the viewport to highlight and select it.
- Double-click the light name to open its properties dialog.
- Set the desired values for the selected light by enabling or disabling it, adjusting its color, intensity, and size, and renaming it as needed.
- Click Save to apply the changes.
youtu.be
Editing multiple lights
Multi-editing is designed for efficient adjustments to groups of fixtures.
You can select multiple lights by:
- Enabling multi-selection in the panel and selecting lights in the list.
youtu.be
- Holding Shift and dragging a selection frame around lights directly in the renderer.
youtu.be
With multiple lights selected, you can apply a uniform color to all of them using the color picker and adjust their intensity in batch by using the intensity slider to increase or decrease brightness for all selected lights at once.
youtu.be
Multi-Selection Edit intensity behavior
The intensity slider for multiple lights uses a percentage relative to each light’s range:
- The change is based on the range between the current value and the maximum possible value, not a percentage of the current value.
- Because light intensity is handled on a logarithmic scale:
- Small slider changes on very bright lights can result in large, sudden changes in perceived brightness.
- Reducing intensity is not exactly the inverse of increasing it, so up/down adjustments can feel asymmetrical.
Linking Light Preset to Views
Light Management is integrated with View Management, allowing you to associate specific lighting with specific saved views.
Assign a preset to a view
- Open View Management in Enscape.
- Select the view you want to configure.
- In the view settings, choose a light preset to assign to that view.
When that view is activated, Enscape automatically applies the linked light preset.
youtu.be
Default behavior for views
- If a view has a linked preset, that preset is used for lighting when the view is active.
- If a view lacks a linked preset, lighting falls back to Source CAD Defaults.
Newly created views do not automatically get a preset. You must manually assign a preset if you want view-specific lighting behavior.
Editing the preset from View settings
View settings include a shortcut to the Light Management feature. To edit the light preset linked to a view:
- Select the view you want to modify and click the Pen icon to open the Edit View panel.
- Under Linked Light Preset, click Edit Light Preset. The Light Management feature opens with the corresponding preset, where you can:
- Enable or disable lights
- Adjust color, intensity, and size
- Rename lights as needed
- Save your changes and review the updated lighting for that view, refining camera composition and lighting together.
youtu.be
Behavior in exports
Starting from Enscape 4.15, Web Standalone and EXE exports use CAD Defaults for lighting. Views without a specific light preset assigned always render using the Source CAD Defaults. If you want a specific light preset applied to a view in the export, assign it explicitly to that view before exporting.