Enscape
Lighting for Revit
This page provides information about lighting in Enscape for Revit.
Last updated 28 May 2026
This page provides information about lighting in Enscape for Revit.
Overview
Lighting in Revit can derive from either the Sun, its geo-position, its brightness, and the time of day, and from artificial lighting. This article describes only artificial lighting in Revit.
The artificial lights in Revit are defined by a lighting fixture Family. Revit comes bundled with a number of pre-made artificial light families available for your projects.
Of course, it is also possible to design your own lights within Revit by the use of the Revit Family Editor, but this is outside the scope of this article. More detailed information regarding creating your own lights in Revit can be found on the Autodesk website.
General Lighting Settings
To distribute light evenly throughout the project, set the Enscape Rendering Quality to Draft.
To improve the image, go to the Enscape toolbar > Image > Visual Settings and enable Auto Contrast.

Auto Contrast option
Another option is to manually adjust the Exposure Brightness setting, also found in Enscape’s Visual Settings window.
Additionally, you can check the Auto Exposure option to control lighting in environments with no direct interior lighting.
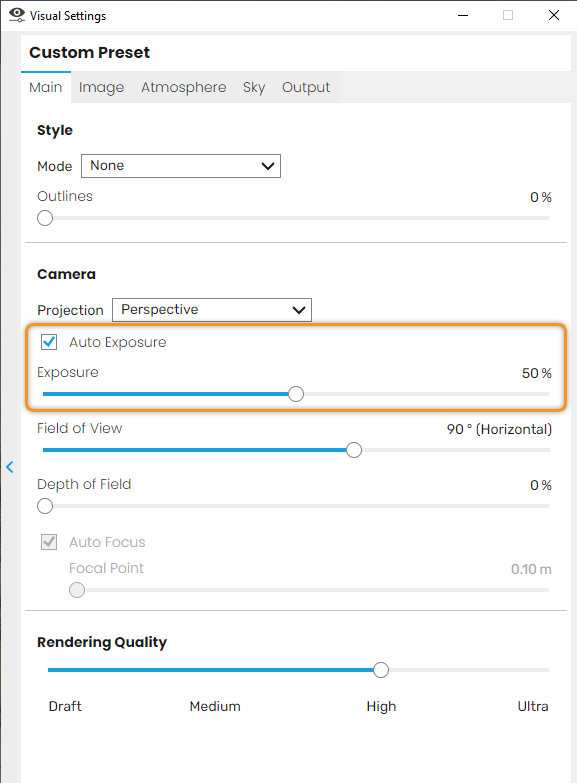
Auto Exposure and Exposure Brightness settings
Load Light Family into Project
To begin using a Light Family in Revit, load the family into the Revit project. Click on the Revit Insert option and then click Load Family from the Load from Library panel.

Load family into project
A dialogue window opens up. By default, it displays the Library specified in the Revit Options dialogue. In this case, it is set to US Imperial. Here, locate the Lighting folder.

Locating the Lighting folder
Then, go to either to the Architectural or MEP folder (MEP is mechanical, electrical, and plumbing).

Load the lighting type
Then, go to the Internal folder. Click on any of the lights in the list. This provides you with a Preview of the light in the Load Family dialogue window Preview area.

Select light and the associated preview of the light
Once you have decided which light you want to place into your Revit project, click Open in the Load Family window.
The Lighting Family loads into the project and is now available as a selection from Revit’s Project Browser Families section.
Now that you have loaded a Revit light Family into your project, you are ready to place the light in your scene.

Light component loaded into project, this is available in the Revit Project Browser
Overview of Light Placement
Lighting fixtures in Revit are hosted components - meaning they must be placed on a host component (wall, ceiling, table), either in an internal or external location within the project.
You can place lights in a Revit 3D view to plan the appropriate spacing, angle, and setback of lighting fixtures in the building model.
When placing interior light fixtures, it is easier to place them using a Floor or Ceiling Plan view. You can open either view from the Revit Project Browser.
Use the Shaded or Realistic modes in the Revit viewport to see how light falls on surfaces in Revit itself.
Placing standing lights, or upwards-facing recessed lights, is only done using the Floor Plan view. Placing hanging or downward-facing recessed lights, can only be done using a Ceiling Plan view.
With the relevant plan view open, you can then choose the Insert > Load Family option to initially load the light into the project.
Placing Light into the Scene
Select and place the light into your scene. Navigate to the Architecture tab in Revit and select Component > Place Component.
When you hover your mouse in an open Revit view, the selected component appears and it is attached to your mouse movement.
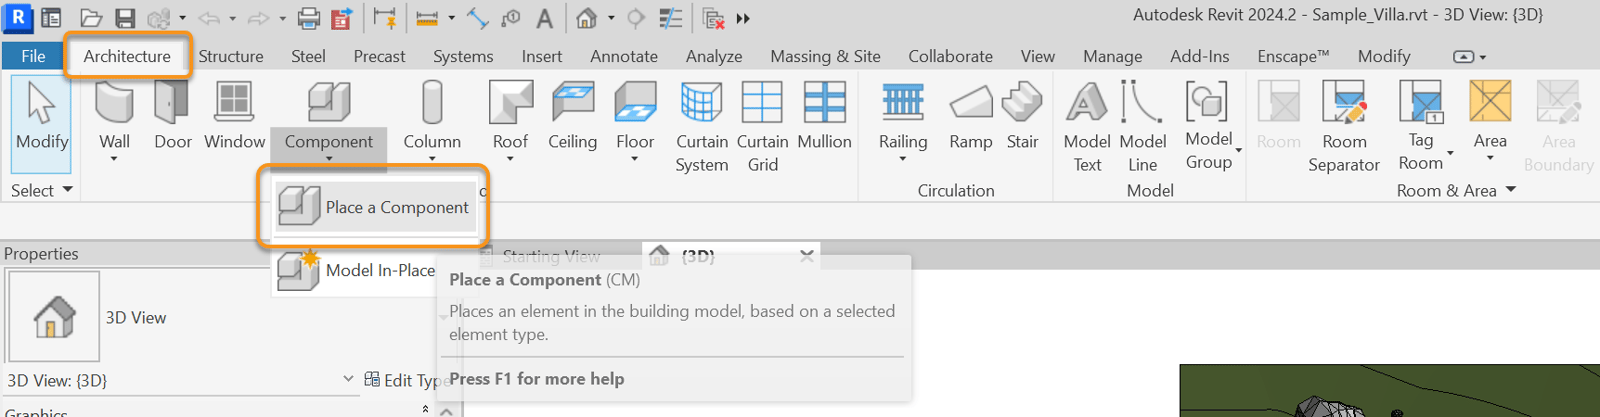
Revit's Load Component menu option
Place Light in Floor Plan View
Guide lines also appear to assist in placing the object precisely.

Placing a lighting component
In the Revit Default 3D view, the light is visible and therefore is also visible in the 3D view.

Lighting component is now placed and the light as it's displayed in a Revit 3D viewport
It is also instantly visible in the Enscape window.

The light is now placed and can instantly be seen in the Enscape Rendering window
Place Light in Ceiling Plan View
To place a wall light, go to the Ceiling Plan view. Wall Lights automatically snap to wall objects.
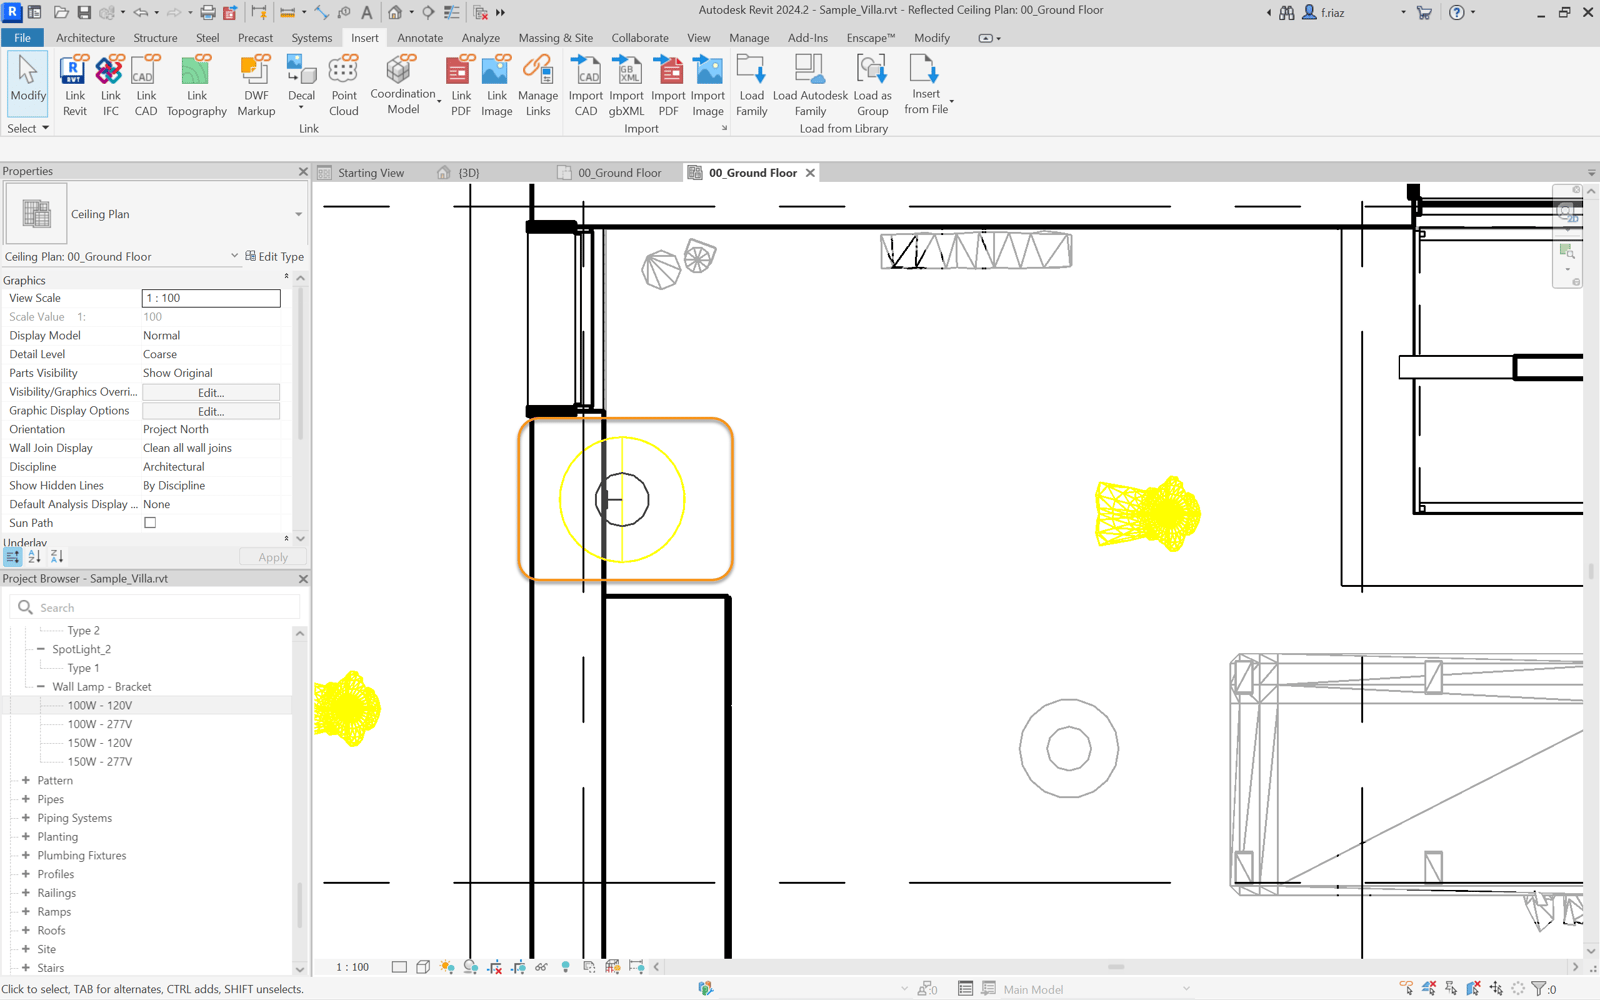
Placing a wall light
In the Revit 3D view.

Wall light placed and seen in Revit 3D view
Again, the light placement is instantly seen in the Enscape window.
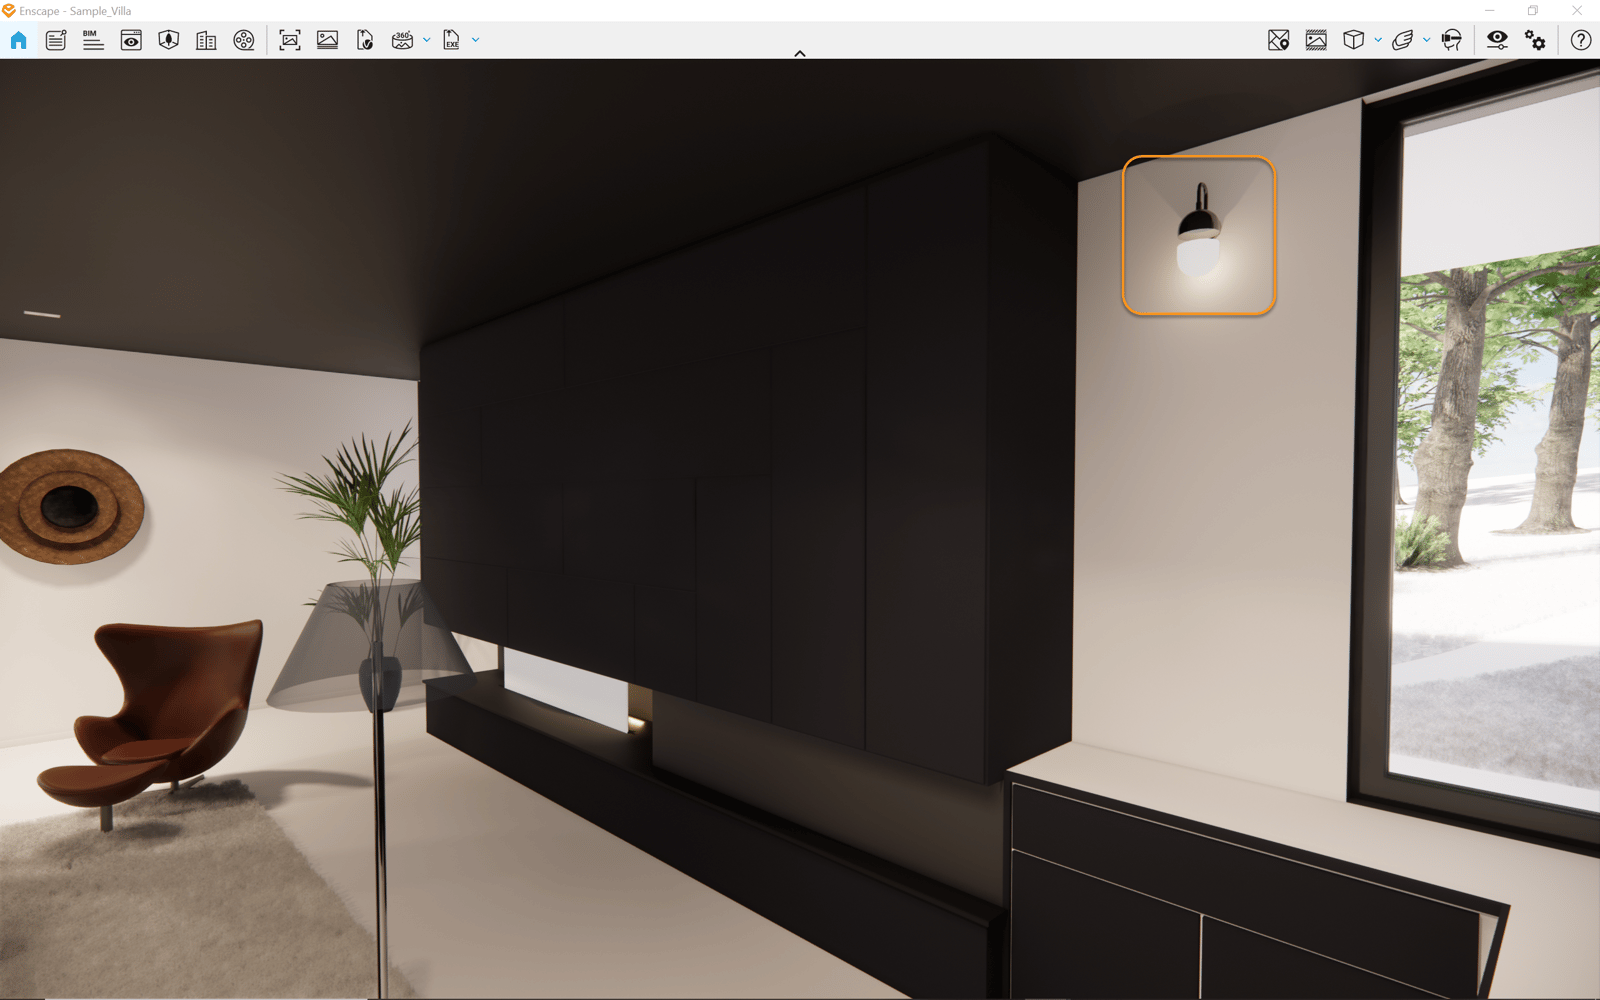
The wall light is now placed in the scene and can Instantly be seen in the Enscape Rendering window
Placing a ceiling light is a similar process, although it obviously does not snap to walls.
Here you can see the ceiling light before the actual placement, with the blue guidelines also being visible.

Placing a ceiling light in the Ceiling Plan view in Revit
Once you have finished placing the light, if the light is selected, then further information about the light is displayed.

Ceiling light placed showing further information about the light
Editing Lights
To edit a light, either select the light in any of the Revit Viewports, and then from the Modify | Lighting Fixtures menu in Revit, click on Edit Family.

Modify | Lighting Fixtures options in Revit
This opens the Family: Lighting Fixtures, whereby you can begin to edit the family.

Component now opened in Revit's Family Editor
Edit the electrical connections for the light. Now things such as the Light Source Definition become available. Each light source can be adjusted by its position and brightness to achieve the desired lighting effects.

Open the Light Source Definition window
Light Source Definition
Clicking on the Light Source Definition button opens the Light Source Definition window.
Choose the shape of the light emitter from the Emit from Shape area. Choose the light distribution shape from the Light distribution options. The preview window shows the result of these options.

The Light Source Definition window
These examples are all using a light that is set to 60Watt with 15lm/W intensity setting.
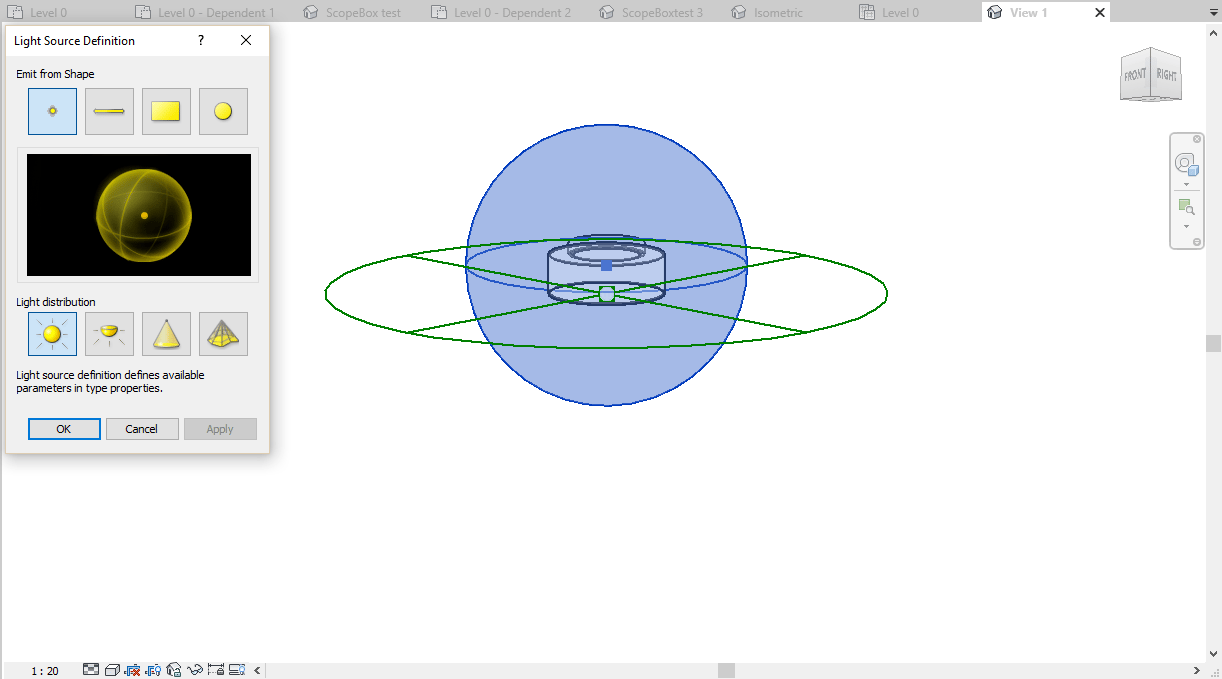
Point Light with Spherical distribution in the Revit editor

Point Light with Spherical distribution in the Enscape window

Point Light with Hemispherical distribution in the Revit editor

Point Light with Hemispherical distribution in the Enscape window

Point Light with Spot distribution in the Revit editor

Point Light with Spot distribution in the Enscape window

Point Light with IES distribution in the Revit editor

Point Light with IES distribution in the Enscape window
You can find the same options available for Line, Rectangle, and Circle lights allowing you a range of lighting options.
Furthermore, when placing a light source into a light Family, remember to check if the Light Source is enabled in the Family Category and Parameters window. This window is found under Revit’s Create menu option, available when you edit a family via the Edit Family button. Otherwise, the light source does not function.

Light Source enabled in Revit's Family Category and Parameters window
Further options that are available for a light can be found by selecting the light you want to adjust and then press the Edit Type button under its Properties.

Edit Type button
This brings up the Type Properties window. From here you can start adjusting the parameters.

Type Properties window
Changing a Lights Basic Parameters
The basic parameters for lights are located in the Photometrics section. Enscape does not take into consideration the Revit Light Loss Factor when rendering lights. Enscape has its own light calculation parameters.
To change the brightness of a light, you must adjust the Initial Intensity setting by clicking on its button, which opens the associated window.

Initial Intensity listing in a light’s parameters
In the Initial Intensity window, adjust the settings to suit your requirements.
For more details on these settings, see the Revit manual in the Autodesk Documentation.
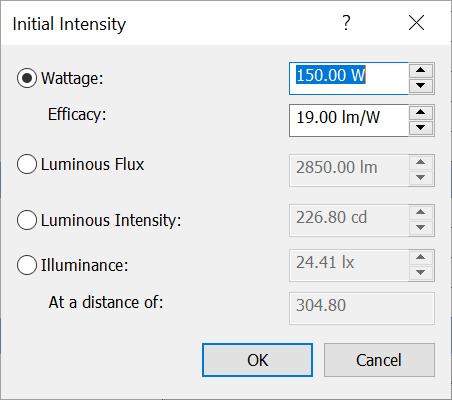
Initial Intensity window settings
The Ambient Brightness slider in the Enscape Visual Settings > Atmosphere tab can be adjusted to affect indoor lighting during daylight, but also compensates for multi-bounce lighting by adding atmospheric brightness instead.
The occluded regions remain darker to better emphasize the geometry and depth.
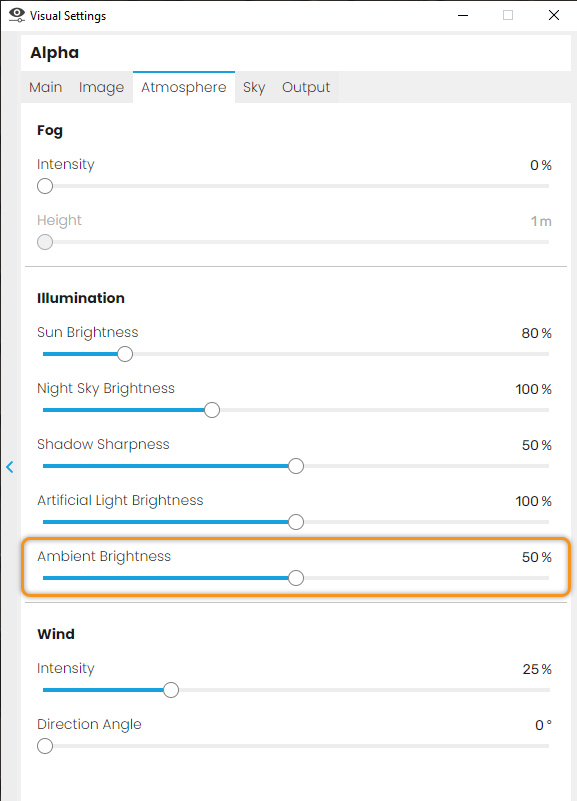
Ambient Brightness slider
You can change the initial color of a light by clicking on the button next to the Initial Color option.
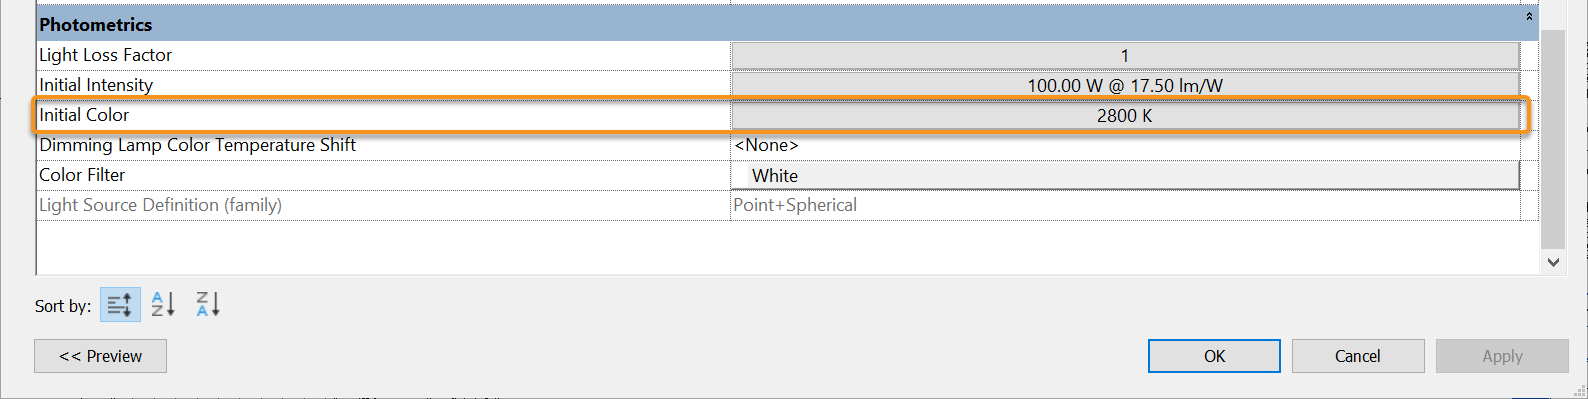
Changing the Initial Color property of a light
This opens the Initial Color window. There, you can either select one of the already existing options from the Color Preset dropdown or set the Color Preset to Custom. The Custom Preset allows you to manually set the color temperature on the Kelvin scale (K).

Initial Color option
To change the light tint, use the Color Filter option.

Change the Color Tint of a light
Using IES Lights (Photometrics)
If you have a light that has had its Light distribution set to Photometric Web, then you can select a Photometric Web (IES) file to use. Photometrics are a method of defining the visible light in a rendered image and an IES file that simulates detailed, real-life light bulb/fixture effects.
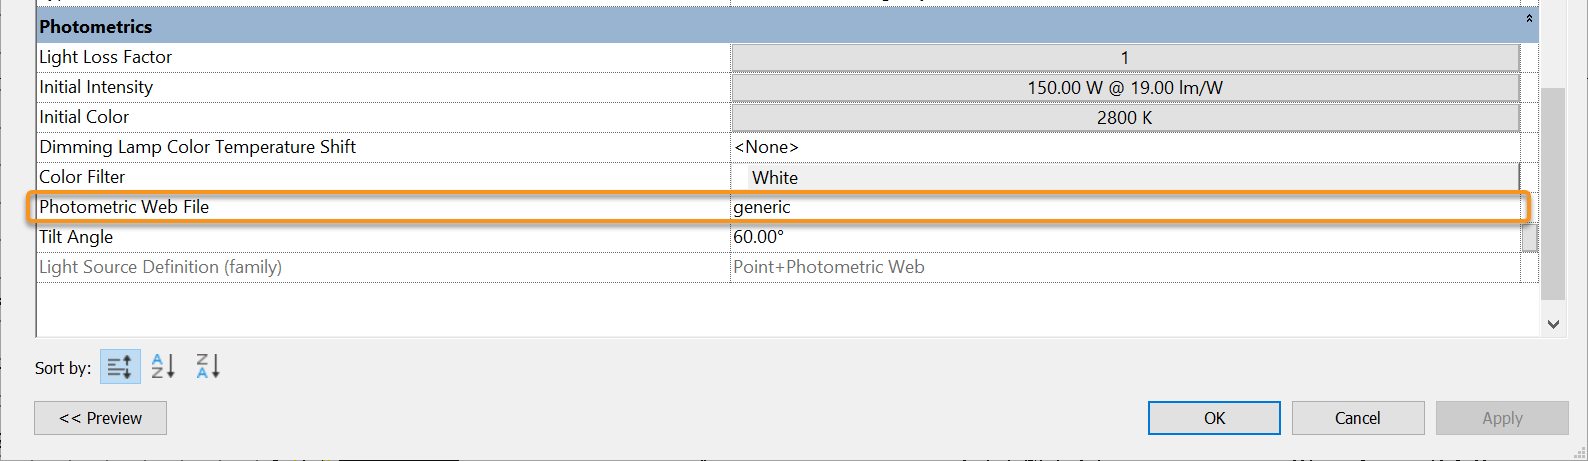
Photometrics Web File option is now available
One great resource for IES light profiles is the Renderman IES Profiles library.
Revit’s Reveal Hidden Elements button makes IES profiles visible as a web or mesh in the Revit viewport.

An IES Light's Photometrics Web revealed in the Revit viewport
Nested and Shared Lighting
When creating a light that requires multiple light sources, such as a chandelier, you need to use nested lighting. These light sources can then be shared so that a lighting fixture schedule can display information for individual lights within the nested object.