Use the Model tab in Veras to create and place assets and materials.
Overview
The Model tab in Veras 5 connects 2D AI renderings with 3D CAD/BIM design. It turns rendered concepts into usable 3D assets. Use Agent to describe what you want within the created 3D model. Detect objects in a 2D image, then find matching ready-made assets and materials in Chaos Cosmos. You can also create custom textured 3D meshes with AI engines such as Trellis and Tencent HY 3D. Place the assets on the appropriate surface in your scene. You can then fine-tune them or bake them directly into your host application, such as Revit, Rhino, or SketchUp.
The Model tab contains the following:
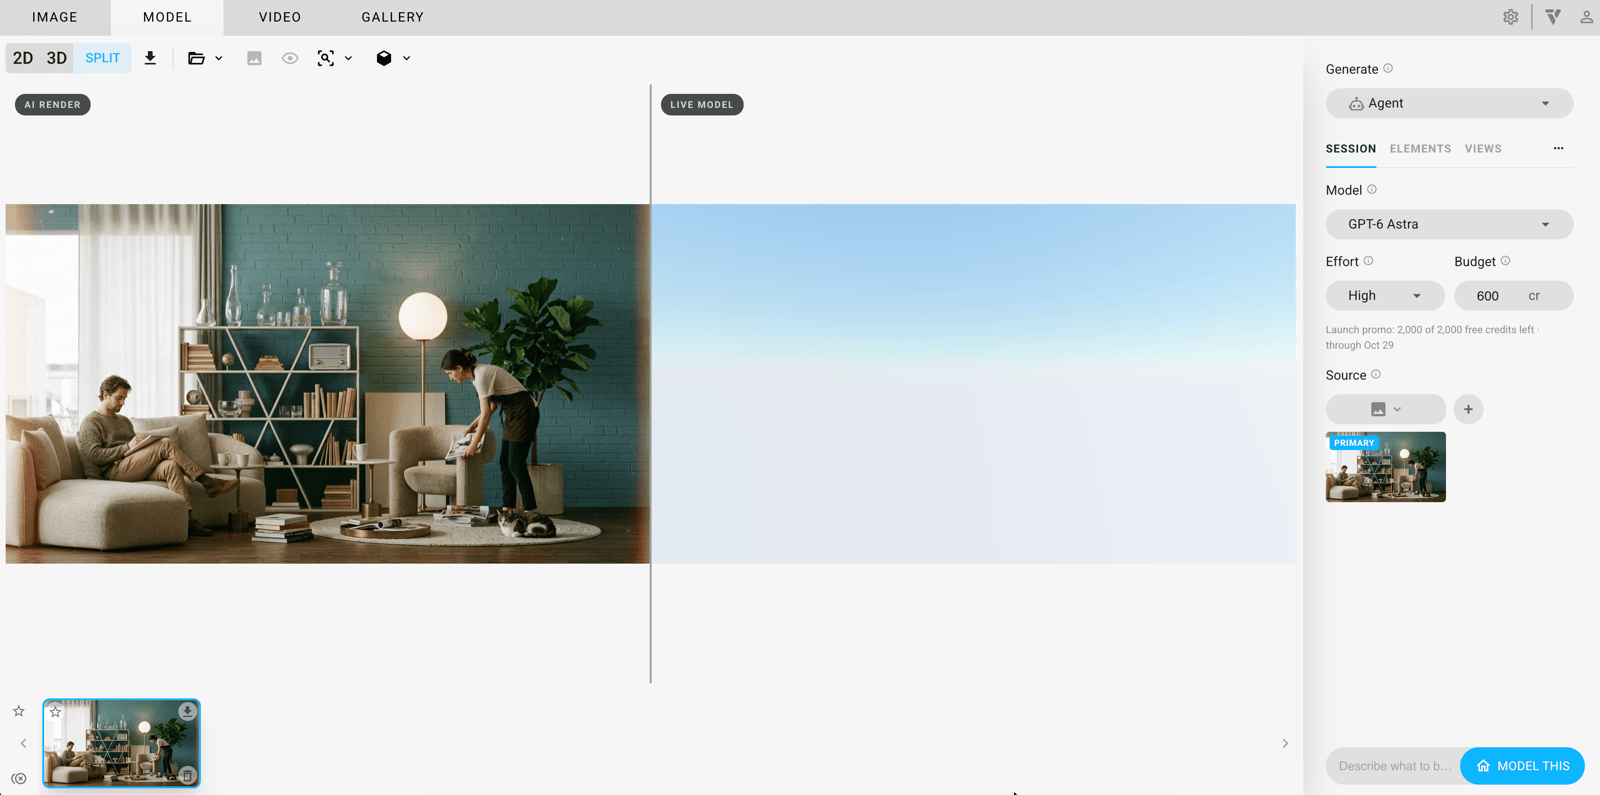
Toolbar

2D Mode

3D / Split Mode
Icon per mode | Action | Icon per mode | Action |
|---|
Icon per mode | Action | Icon per mode | Action |
|---|---|---|---|
2D Mode enabled | 3D / Split Mode enabled | ||
Download saves the render result to your computer. | |||
Image Upload | 3D Model Upload | ||
Show Preview | |||
Show/Hide Original Image | |||
Refresh Preview Image | Refresh Model | ||
Sync Camera Options | |||
Zoom camera to model extents. Open the dropdown menu for additional settings (FoV, Sun elevation, Sun position, Sun intensity). | |||
Display style. Choose Shaded, Arctic Clay, or Textures Clay. |